|
#1
 08-28-2017, 08:33 PM
|
|||
|
|||
|
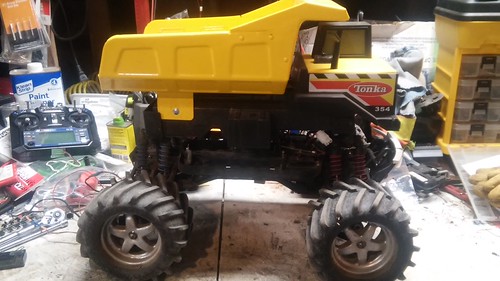
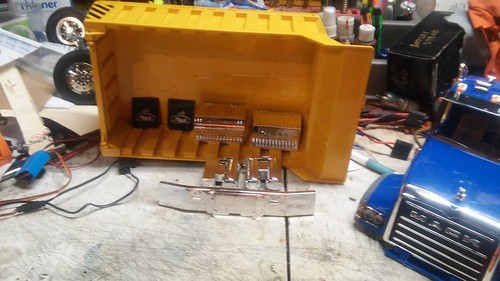
I rarely have JUST one project in the frying pan at a time. With a SUPER dump, & log truck in the construction phase, PLUS Bruder Cat D5, & Cat D11, as well a Mack conversion AND a Bruder Liebherr 574 in the conversion phase(s)......Oh, yeah, & the cheapo Chinese excavator (needs IMPROVED upon so it'll actually do something) ALL are in the process of being converted/built, I think it's time to open shop. Much easier to have ONE thread for all the pics, comments, question, concerns etc.
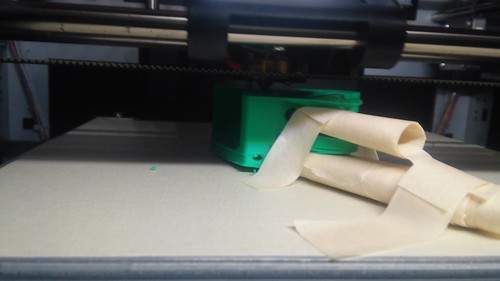
I'll post pics & build progress here from now on, perhaps even video or two along the way as well. This weekend, THANKS to Stein, user name SteinHDan, & the open source 3D STL print files he graciously posted, I began putting the new asset to work. 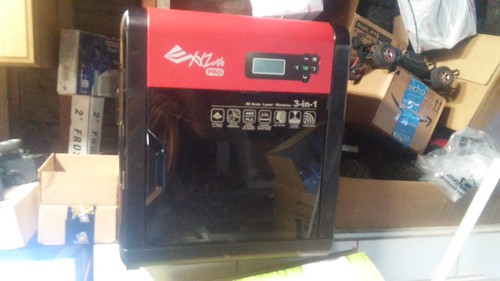 20170826_174837 by Anthony Kalnoski, on Flickr 20170826_174837 by Anthony Kalnoski, on FlickrThe 3D printer started to crank out the needed 3D parts for the front loader conversion. Being NEW to 3D printing, as well as CAD, I'd be several months before I could feel comfortable enough to produce ANYTHING that would be used for building. With that being said, I already ran into some problems with the newest asset. I printed parts, I've looked at pictures that show what's wrong & how to correct it, but they DON'T have this problem on there. One of the parts I printed is severely deformed. 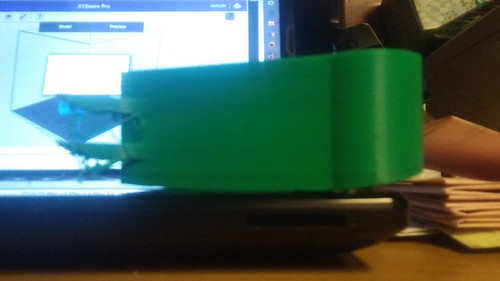 20170828_164523 by Anthony Kalnoski, on Flickr 20170828_164523 by Anthony Kalnoski, on Flickr 20170828_164548 by Anthony Kalnoski, on Flickr 20170828_164548 by Anthony Kalnoski, on Flickr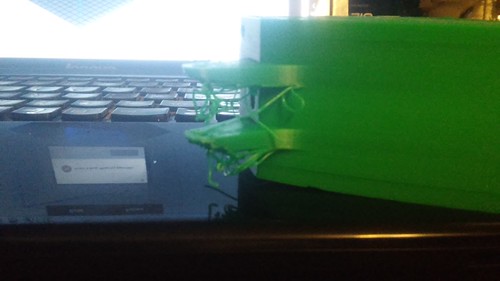 20170828_164534 by Anthony Kalnoski, on Flickr 20170828_164534 by Anthony Kalnoski, on FlickrAny thoughts, ideas, opinions how to fix? Last edited by skeeter; 11-09-2017 at 12:08 AM. 
|
|
#2
08-28-2017, 08:48 PM
|
|||
|
|||
|
Here's the other parts that came out of it so far.
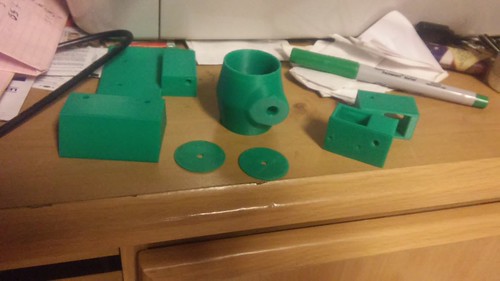 20170828_173625 by Anthony Kalnoski, on Flickr 20170828_173625 by Anthony Kalnoski, on FlickrI'm pleased with how they came out.
|
|
#3
08-28-2017, 09:23 PM
|
||||
|
||||
|
Looks like it's just on parts with overhangs. The plastic is not allowed time to cool properly before gravity makes it sag.
Couple ways to go: Slow your extruder, and thus print speeds, also weaker layer bonds. - Meh Rotate parts for no overhangs before slicing, printing. - Not always an option Add a fan at the hot end to help set plastic faster so it can't sag. - May void warranty, have to run aftermarket software. Edit parts to ramp overhang supports that are ground off during clean up. - learn cad Dual print heads with filiment and a disolvable support matrix. - $$$
__________________
What do ya mean "Cars are neither Trucks or Construction"? It's still scale, and i play fairly well with others, most of the time... Last edited by frizzen; 08-28-2017 at 09:26 PM. Reason: Spelling
|
|
#4
08-28-2017, 11:15 PM
|
|||
|
|||
|
Even with things slowed down, it still drooped.
 CAD, Yes, I'm learning it, slowly.   I've never been good with computers, so it's a challenge for me to learn it. Here's my Polish Hillybilly Redneck solution, since I DON'T yet know enough about CAD.  Making the "RAMP"   20170828_193913 by Anthony Kalnoski, on Flickr 20170828_193913 by Anthony Kalnoski, on FlickrIt's been RAMPED   20170828_193205 by Anthony Kalnoski, on Flickr 20170828_193205 by Anthony Kalnoski, on Flickr 
|
|
#5
08-28-2017, 11:39 PM
|
||||
|
||||
|
Heh, nice.
"If it's stupid, but it works, it's not stupid." How do the parts look?
__________________
What do ya mean "Cars are neither Trucks or Construction"? It's still scale, and i play fairly well with others, most of the time...
|
|
#6
08-28-2017, 11:45 PM
|
|||
|
|||
|
|
|
#7
08-28-2017, 11:49 PM
|
|||
|
|||
|
Quote:
I'll know in a couple more hours. So far, it looks a LOT better than it's predecessor! I think I'll be able to clean it up, & work with it when it's done.
|
|
#8
08-28-2017, 11:51 PM
|
|||
|
|||
|
I just hope I DIDN'T slow it down too much & make a weak part! Well..............IF that happened, I know what to do for a Polish Hillybilly Redneck fix to make a 3rd attempt at it.

|
|
#9
08-28-2017, 11:54 PM
|
|||
|
|||
|
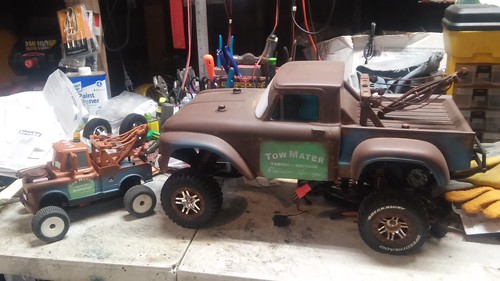
Gotta run, just got a call, some Ftard just went into the ditch....................it Towmater time. LOL
 20170808_002335 by Anthony Kalnoski, on Flickr 20170808_002335 by Anthony Kalnoski, on Flickr
|
|
#10
08-29-2017, 12:12 AM
|
|||
|
|||
|
All warmed up, & ready to leave the garage.
https://www.youtube.com/watch?v=ULW8AM72PJU
|
|
#11
08-29-2017, 01:25 AM
|
|||
|
|||
|
Turned out to be these two fools in the ditch.
https://www.google.com/search?q=coy+...KJyxvF4LbjXpM: Said something about being in town for the big race at the track this coming weekend. Something about not being able to get any track practice time in right now, so they were out on the streets a tearing it up. After seeing them drive, it's now wonder they stacked 'er up. This video was captured by an innocent by standard. https://www.youtube.com/watch?v=KPOg1IGQjZM
|
|
#12
08-29-2017, 01:58 AM
|
|||
|
|||
|
It's kind of crappy cell phone video. Here's a slightly better picture of the truck they were driving.
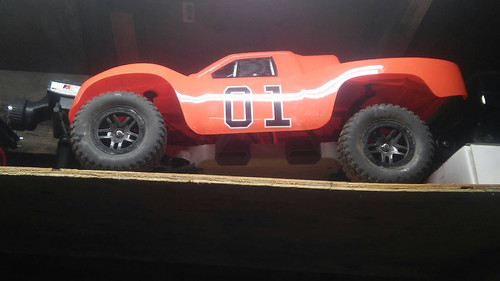 Traxxas Slash 4WD General Lee by Anthony Kalnoski, on Flickr Traxxas Slash 4WD General Lee by Anthony Kalnoski, on Flickr
|
|
#13
08-29-2017, 04:34 AM
|
|||
|
|||
|
Hi Skeeter!
Your two printing problems are very common problems, but they can be fixed. One is actually very easy to fix :-) Overhangs drooping: - The 3D-printer cannot put molten plastic in thin air. It will need some support to build on. But you don't need to add it yourself. Your 3D-printing software can do this for you. It will create a scaffolding that can easily be broken away when the part has finished. I guess you have a "Add supports", "Automatic supports" or an option like that in the software. That takes care of that problem. Part pulls up in the corners: - This is the most common problem of this generation of 3D printers IMHO. Getting the first layer of plastic to stick to the build plate is crucial. If it lifts in the corners, that's only going to worsen as you go up (as you can see from your part). There are many ways to fix this, or combinations of ways: - A surefire solution is to print with a raft. Again, this is most likely an option in your 3D-printing software. When building the raft, the 3D-printer will use a lot of plastic to get a good grip on the platform. The only downside with a raft is that it takes longer to print, but it will most likely stick fine. - Instead of the full raft, you could just print anchor pads in the corners. This is what I do most of the time. Something like a square or circle 20mm diameter, 1mm height pad and put it on the bed under the corner of the part so that it gives more surface that touches the bed in that corner. - Moving the nozzle closer to the build plate: I would try this first. Calibrate with a thinner piece of cardboard / paper than you did before. That will make the nozzle closer to the bed. This will make the plastic stick better to the bed. You can move the nozzle closer until the part is very difficult to remove from the build plate. Then you are too close. - Increasing the temperature (maybe even just on the first layer). Sometimes the hotter plastic sticks better to the bed. - Slowing the speed (maybe even just on the first layer) - If you have a heated build plate, try increasing the temperature. - Adding hairspray, etc (many people do this, but I've never done that) - Add a high-tack build plate sticker sheet, like BuildTak (you can buy it at Amazon for example). .. and probably a lot of other ways. In you case, it looks like your problem could be solved by moving the nozzle closer to the bed or just enabling a raft. Best regards, Stein :-) Last edited by SteinHDan; 08-29-2017 at 04:48 AM.
|
|
#15
08-29-2017, 09:38 PM
|
|||
|
|||
|
Follwing a quick nap after getting home from work, I'm ready to RE-print the FRONT structure. This time with rafting, & some structural supports. 3Rd times a charm......HOPEFULLY
|
|
#16
08-30-2017, 12:06 AM
|
|||
|
|||
|
While awaiting the 3D printer to re-make the front support for the loader
 I tinkered in the garage a bit tonight. Made some cab mount brackets (NOT my idea, I borrowed it from someone else's build) for the Bruder Mack conversion. I made 4 of them, I think I ONLY need 2, but while I had the saw, miter box & file out (No fancy tools here, just basic hand tools I tinkered in the garage a bit tonight. Made some cab mount brackets (NOT my idea, I borrowed it from someone else's build) for the Bruder Mack conversion. I made 4 of them, I think I ONLY need 2, but while I had the saw, miter box & file out (No fancy tools here, just basic hand tools  ) I may as well make 4 of them.............just in case I find I need to use more. ) I may as well make 4 of them.............just in case I find I need to use more. 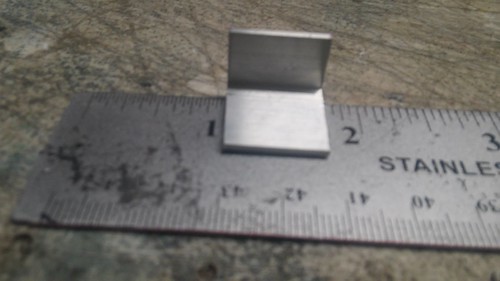 20170829_202052 by Anthony Kalnoski, on Flickr 20170829_202052 by Anthony Kalnoski, on Flickr 20170829_201904 by Anthony Kalnoski, on Flickr 20170829_201904 by Anthony Kalnoski, on FlickrI also did the blade locks on the D5. I saw this idea in a SmallHaul  youtube video. I WISH I could take credit for it. I liked the idea, so I borrowed it to incorporate into my build. youtube video. I WISH I could take credit for it. I liked the idea, so I borrowed it to incorporate into my build.  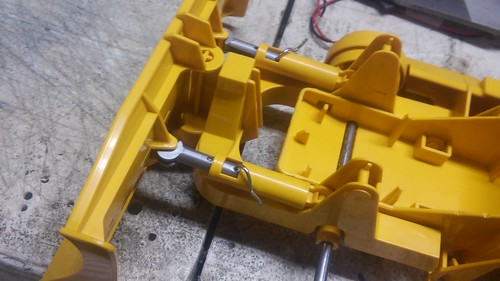 20170829_202140 by Anthony Kalnoski, on Flickr 20170829_202140 by Anthony Kalnoski, on Flickrthis makes the blade be able to swivel side to side, UNLIKE my original attempt, that was heavily glued 
|
|
#17
08-30-2017, 12:43 AM
|
|||
|
|||
The Right Hand Side blade sway MOCK cylinder I kind of messed up on it. The drill bit walked off of center as I was drilling it. Since I have a FAILED earlier attempt, I have extra of those. sometime in the future, I'll RE-do it with one of the left overs from that project. LUCKILY, I'm a hoarder, & NEVER throw away ANYTHING, until I'm absolutely positive that I won't have a future use for it! Heck, I've still got parts laying around for nitro powered vehicles, & I HAVEN'T had those around in years! 
|
|
#18
08-30-2017, 12:53 AM
|
|||
|
|||
|
our previous Co accusation, a haul truck. It's nothing fancy, & won't pull a full load, but it'd be what we got. Body is mounted on an old 3406 E=Traxxas Emaxx chassis.
 20170724_000054 by Anthony Kalnoski, on Flickr 20170724_000054 by Anthony Kalnoski, on Flickrsome pics of the build process  20170724_000106 by Anthony Kalnoski, on Flickr 20170724_000106 by Anthony Kalnoski, on Flickr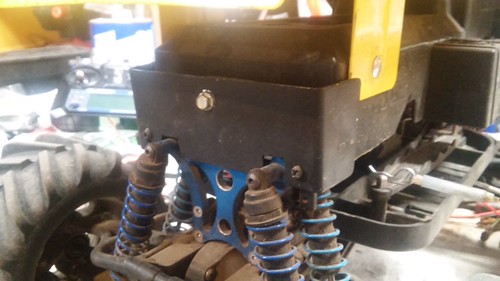 20170724_000124 by Anthony Kalnoski, on Flickr 20170724_000124 by Anthony Kalnoski, on Flickr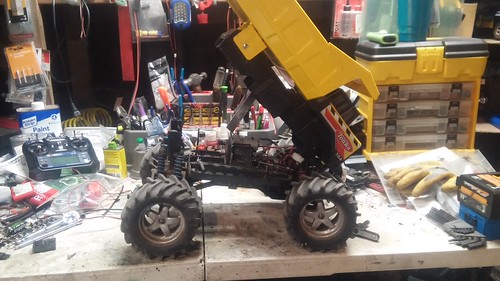 20170724_000252 by Anthony Kalnoski, on Flickr 20170724_000252 by Anthony Kalnoski, on Flickr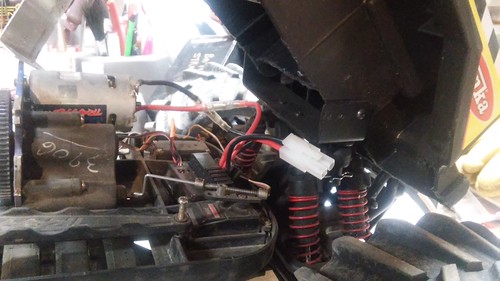 20170724_000311 by Anthony Kalnoski, on FlickrBody is mounted to CUSTOM fabricated mounts, & bolted with 3mm screws & nylock nuts. 20170724_000311 by Anthony Kalnoski, on FlickrBody is mounted to CUSTOM fabricated mounts, & bolted with 3mm screws & nylock nuts.
|
|
#19
08-30-2017, 01:00 AM
|
|||
|
|||
|
The black semi will be getting the sleeper cut off, converting it to a day cab, SOMETIME this winter when work slows a bit. It will be built as a SUPER DUMP, dump truck. If you don't know what that is, here's a video of it. It even feature a company truck that is local to my area.
https://www.youtube.com/watch?v=T-7mm9btEXE 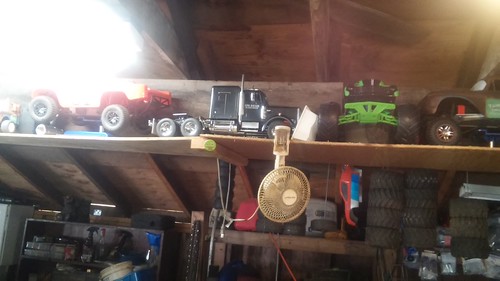 20170726_162200 by Anthony Kalnoski, on Flickr 20170726_162200 by Anthony Kalnoski, on FlickrThis yellow King Hauler, acquired from Corbetttrailers will be converted to a logging truck...........also this winter when work slows. It as well will be converted to a day cab 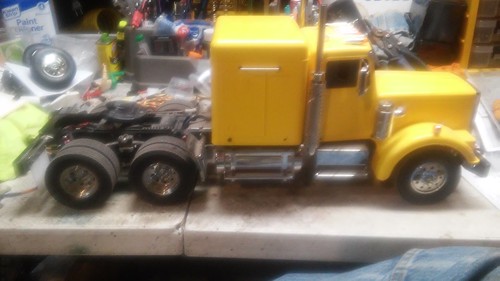 20170814_034507 by Anthony Kalnoski, on Flickr 20170814_034507 by Anthony Kalnoski, on FlickrThe 1:1  images by Anthony Kalnoski, on Flickr images by Anthony Kalnoski, on FlickrThe Ertl 1:24 scale version 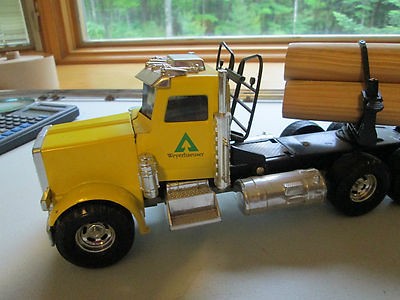 ertl-weyerhaeuser-logging-truck-3006_1_627c7bca27114eca35d82c9a3b95641d by Anthony Kalnoski, on Flickr ertl-weyerhaeuser-logging-truck-3006_1_627c7bca27114eca35d82c9a3b95641d by Anthony Kalnoski, on Flickr
Last edited by skeeter; 08-30-2017 at 01:15 AM. Reason: forgotten links/pics, & commentary
|
|
#20
08-30-2017, 01:06 AM
|
|||
|
|||
|
The fore mentioned Bruder Mack conversion
 20170810_024851 by Anthony Kalnoski, on Flickr 20170810_024851 by Anthony Kalnoski, on Flickr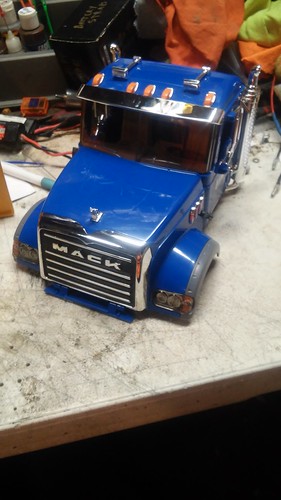 20170810_024900 by Anthony Kalnoski, on Flickr 20170810_024900 by Anthony Kalnoski, on FlickrThe cab trimmed to fit the motor & 2 speed WTBCarr planetary transmission 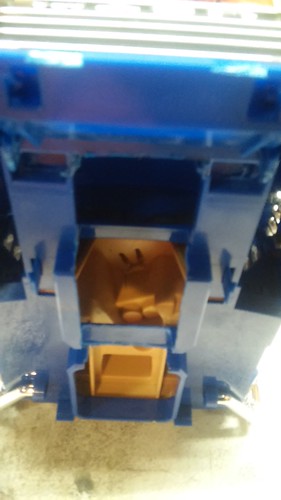 20170810_024943 by Anthony Kalnoski, on Flickr 20170810_024943 by Anthony Kalnoski, on FlickrPERHAPS some parking lot snow removal work may be in order this winter 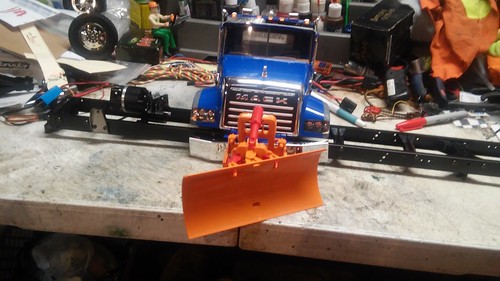 20170810_025235 by Anthony Kalnoski, on Flickr 20170810_025235 by Anthony Kalnoski, on Flickr 20170810_025116 by Anthony Kalnoski, on Flickr 20170810_025116 by Anthony Kalnoski, on Flickr
|
 |
| Currently Active Users Viewing This Thread: 12 (0 members and 12 guests) | |
| Thread Tools | |
| Display Modes | |
|
|


 Linear Mode

