
 |
|
|||||||
| Euro Style Trucks and Trailers A place for the Euro style trucks single and twin axle trucks and trailers... |
 |
|
|
Thread Tools | Display Modes |
|
#81
|
||||
|
||||
|
Looking great. Glad my little trick could help.
|
|
#82
|
||||
|
||||
|
Yup Propshaft, one of those things I would never have thought about.
 Started on the driver's cabine. Part 1 of this group. Before screwing things together "dry fitted" some parts and noticed that the white from the cabin shows through the "teeth" at the front. 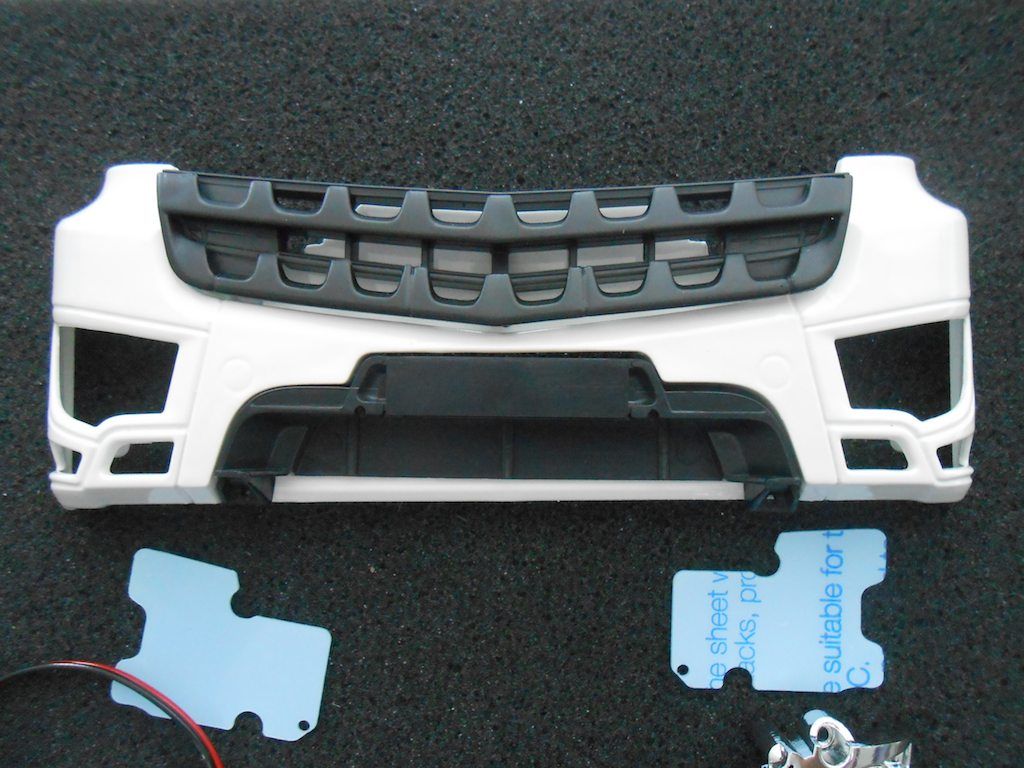 So decided to do something about that and paint that bit black (I could have used tape like Christian - aka Newcomer_2 but not to be found here on this island). Here I had another senior moments and first time around I painted the bottom part which doesn't need it. Good thing one can's see that bit once everything that needs bolting on is bolted on. 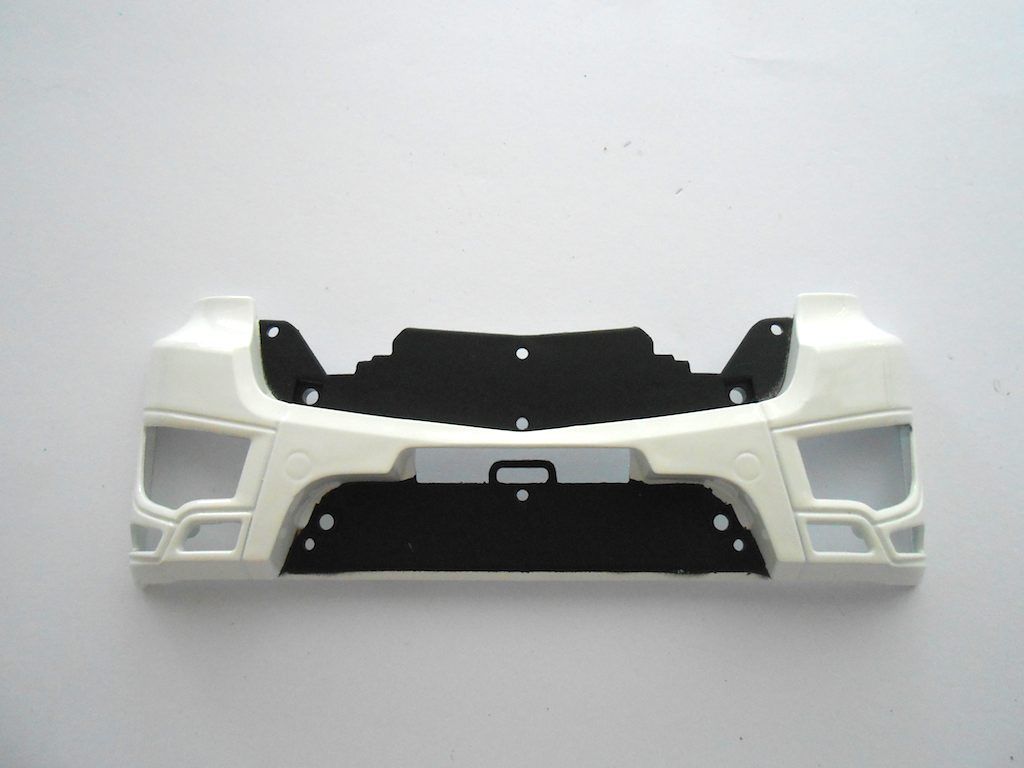 Here the first step of this group. (getting that blue plastic film of the plastic was about the most difficult and tedious thing of this part of the build) I got a bit of black speckles from the spray paint on the back. No biggie as the back of this part will not be visible. 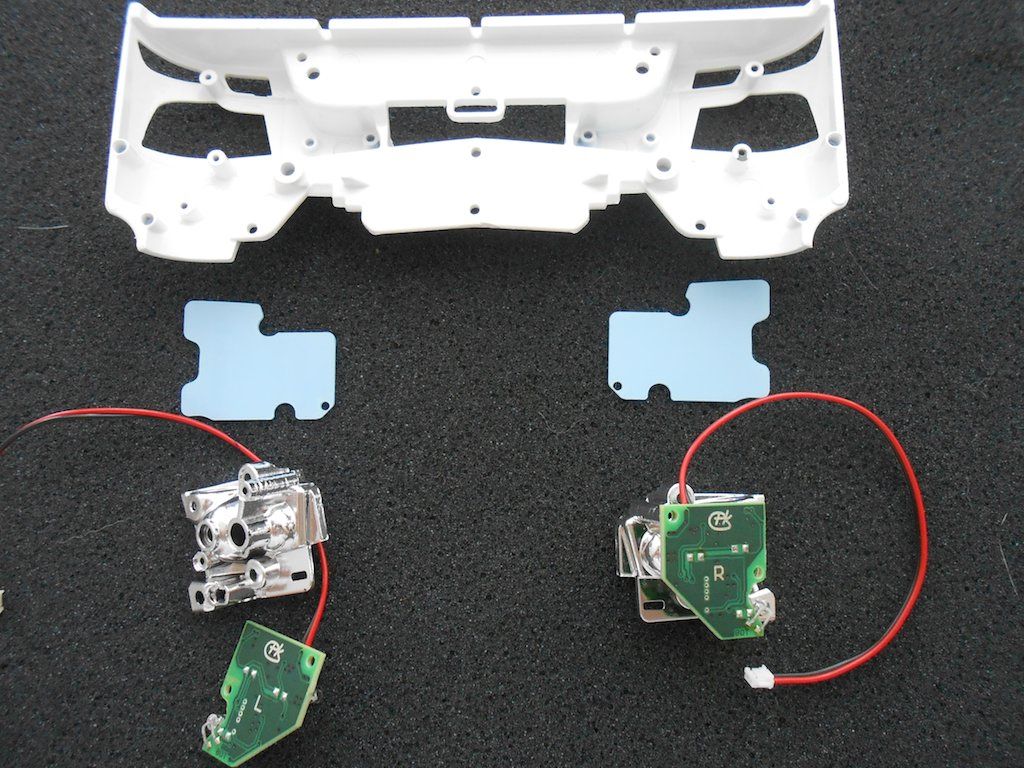 The plastic and the little black cover are put in place. The headlight will bend the plastic in place. A bit tricky to do. The little hole in the plastic is in case one wants to install the headlight protection grid. The bolt for that needs to go in that place. 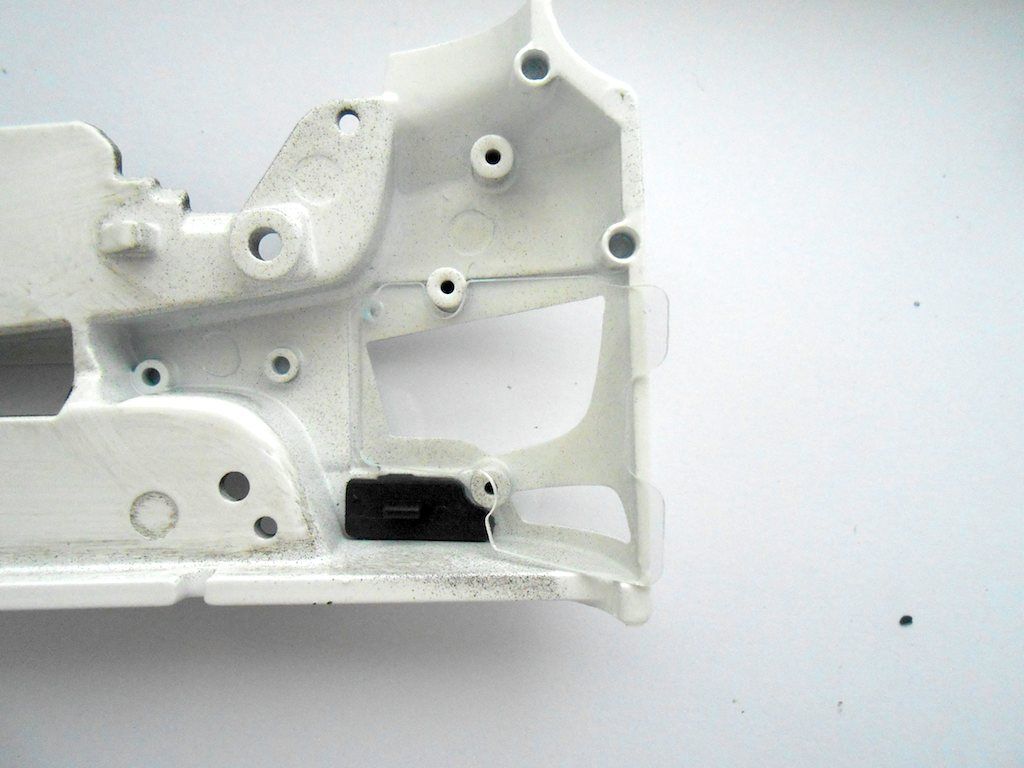 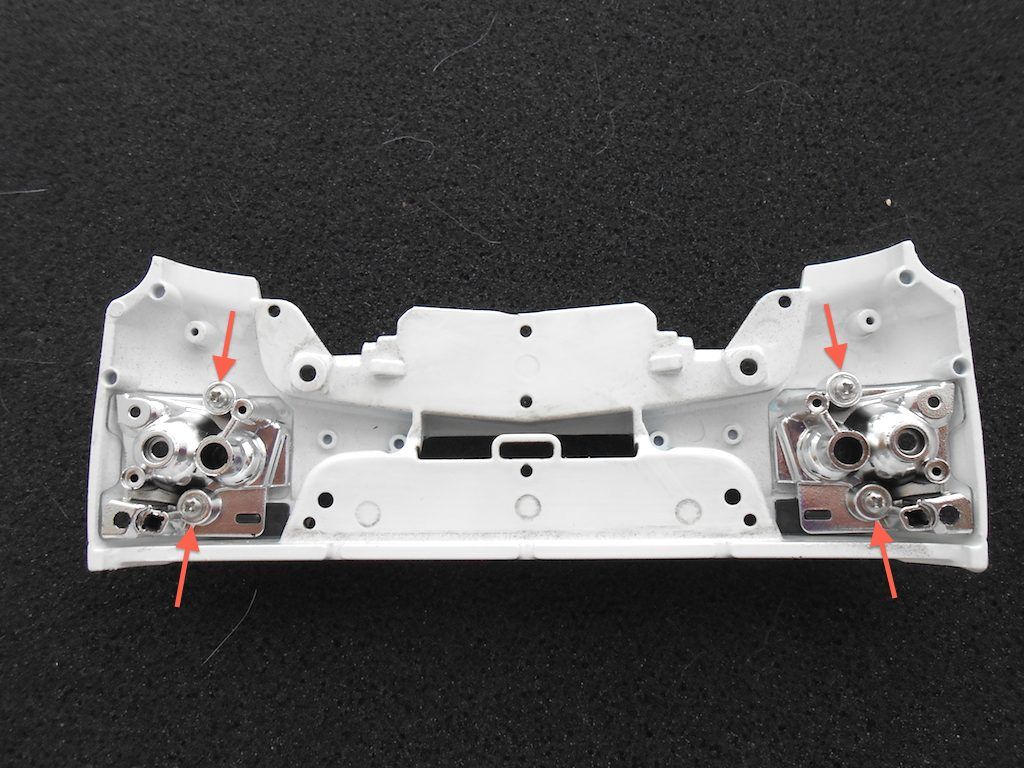 Next up the LED boards which are held in place by the steps. (in photo supposed to be 3 self tapping screws instead of 2) 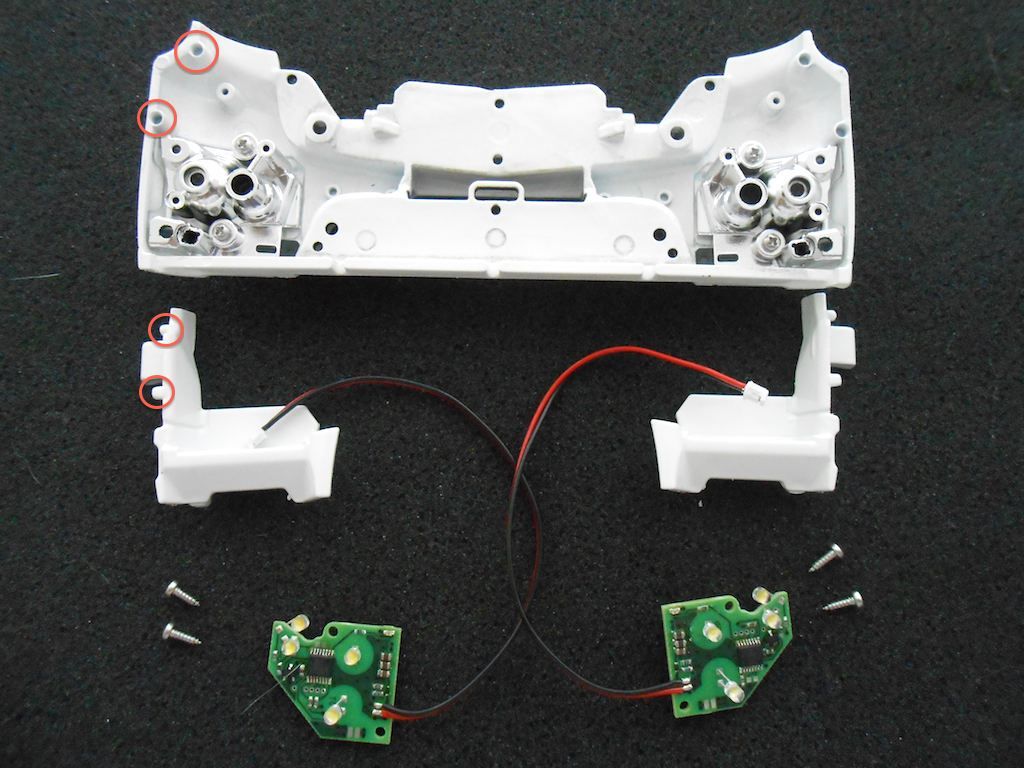 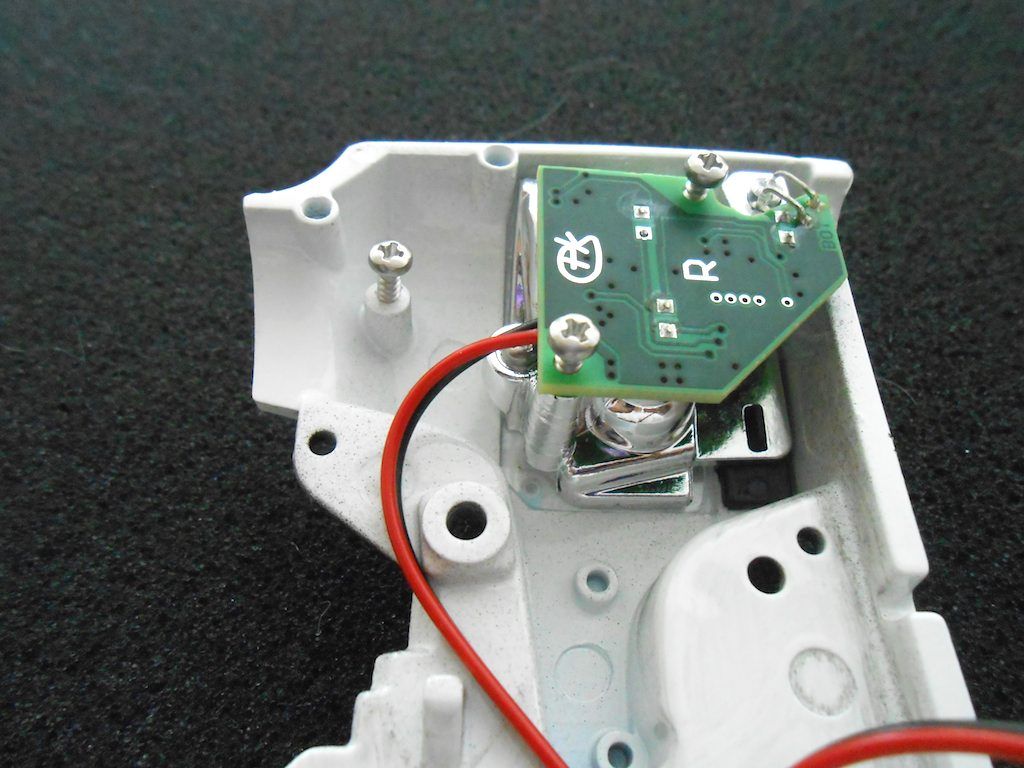 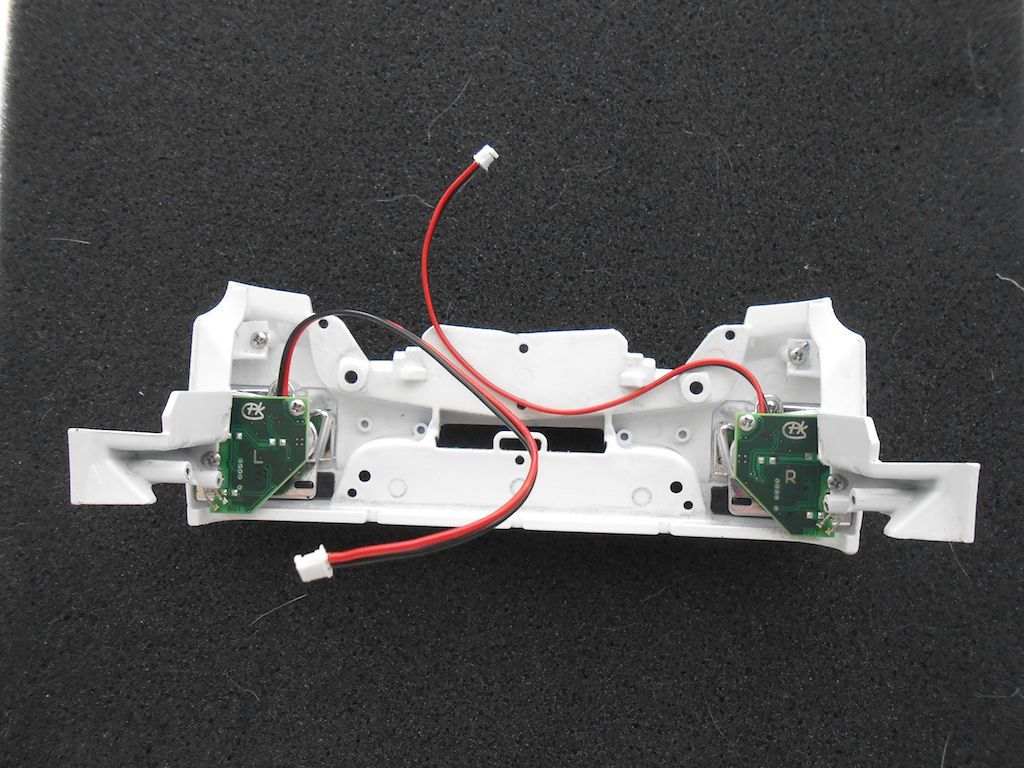 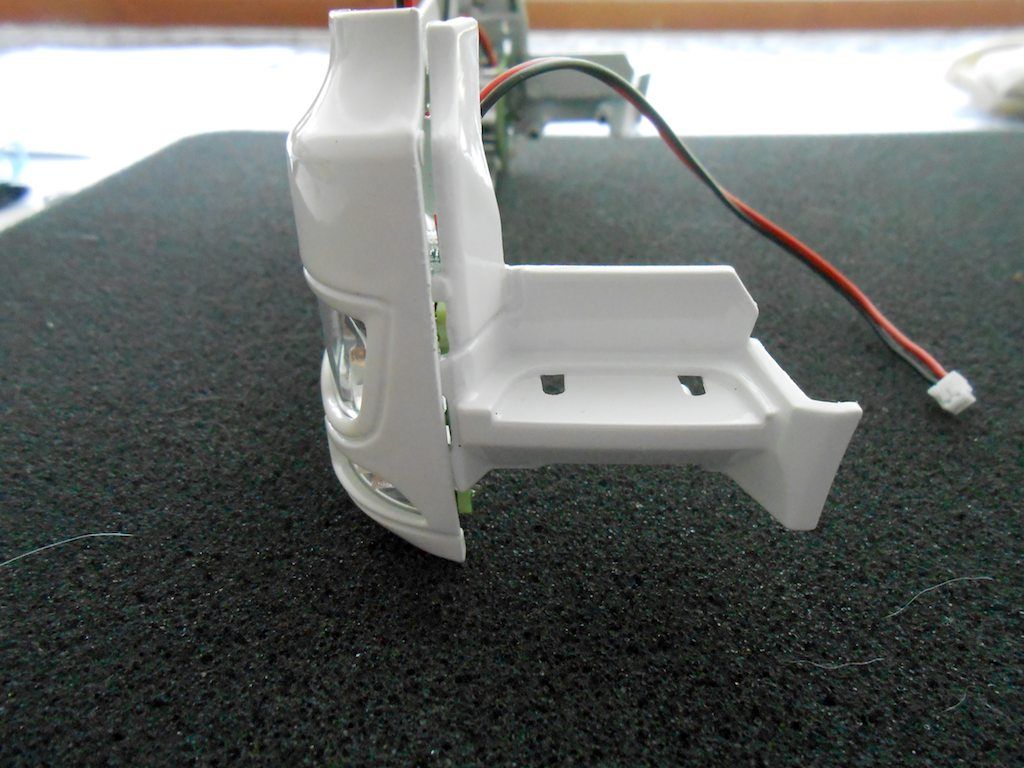 Tread "rubber" glued in place. Manual says to use 2 component stuff, but used crazy glue. 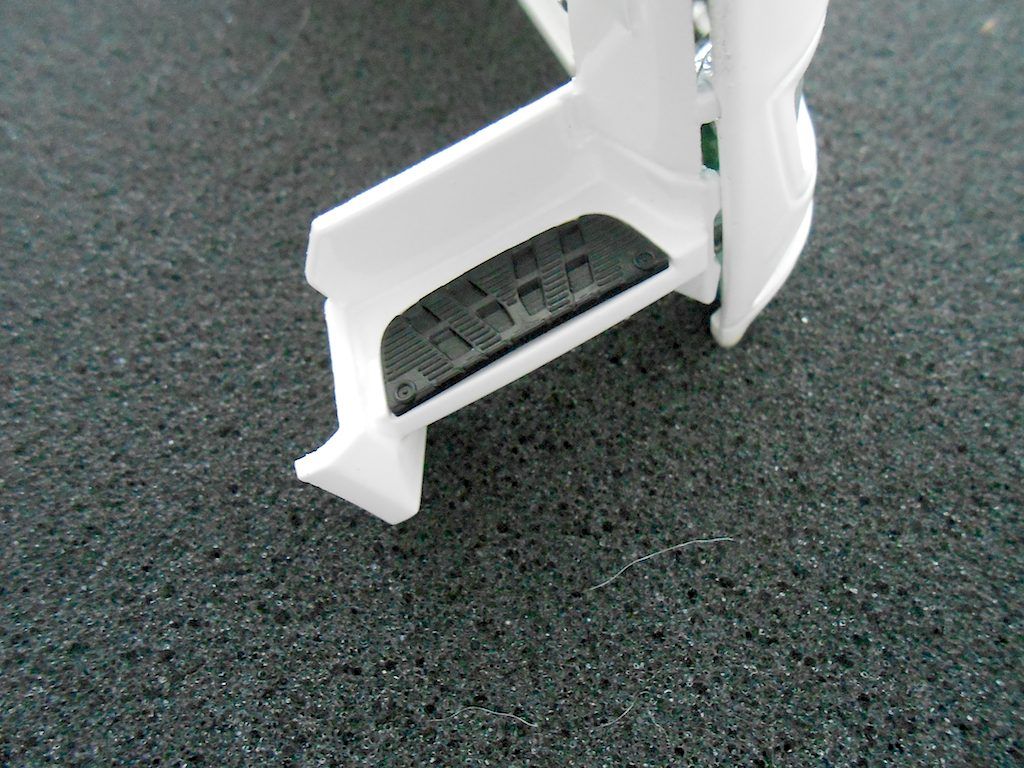 Now the lower step and the metal bits that are part of the upgrade for the AROCS Cab. Needed because otherwise too easy to bend/loose the lower step if one goes off-road with the truck. 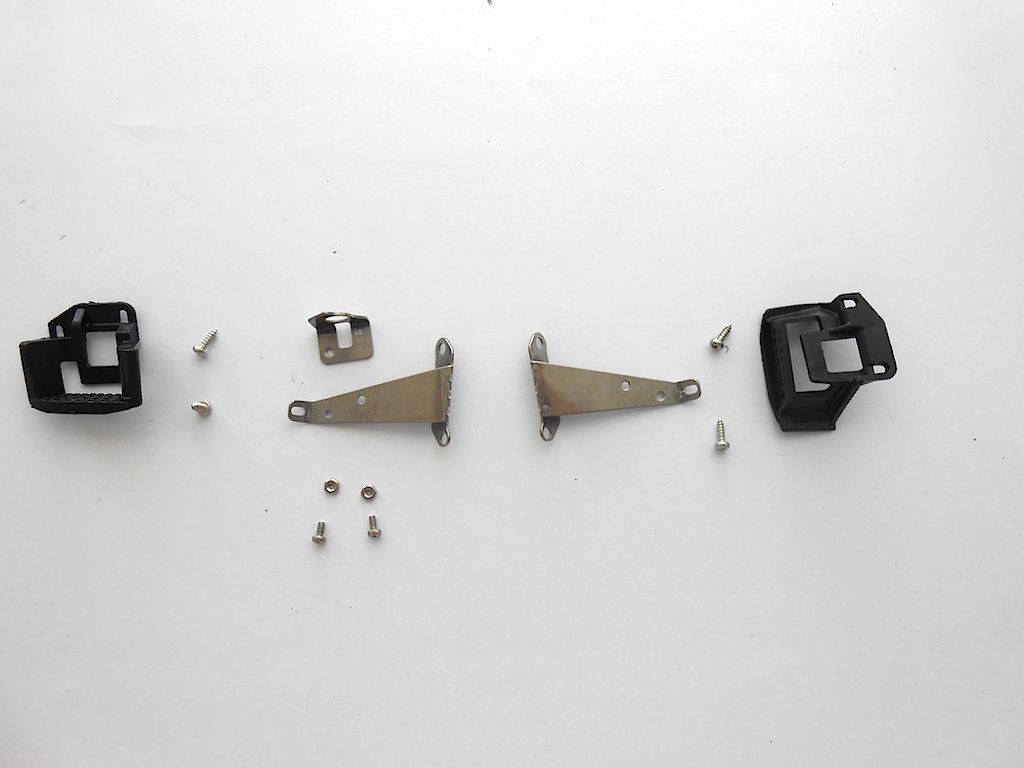 Here one can attach the on/off switch. the 2 openings are to line up with the bigger holes and is where this assembly bolts to the chassis. 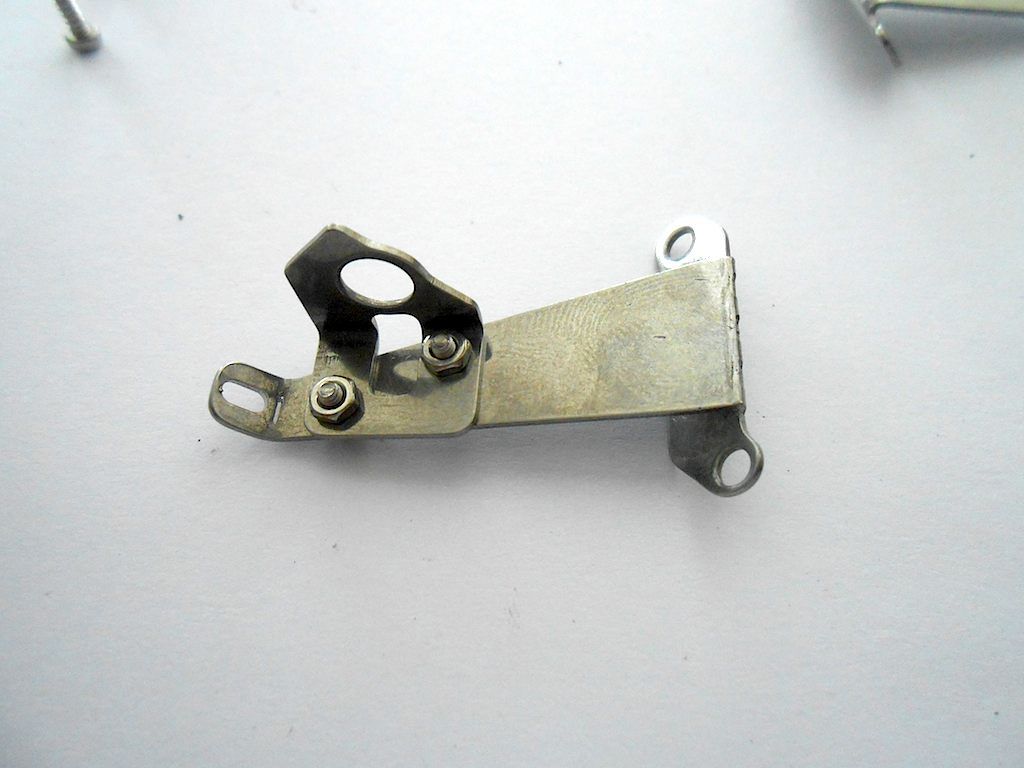 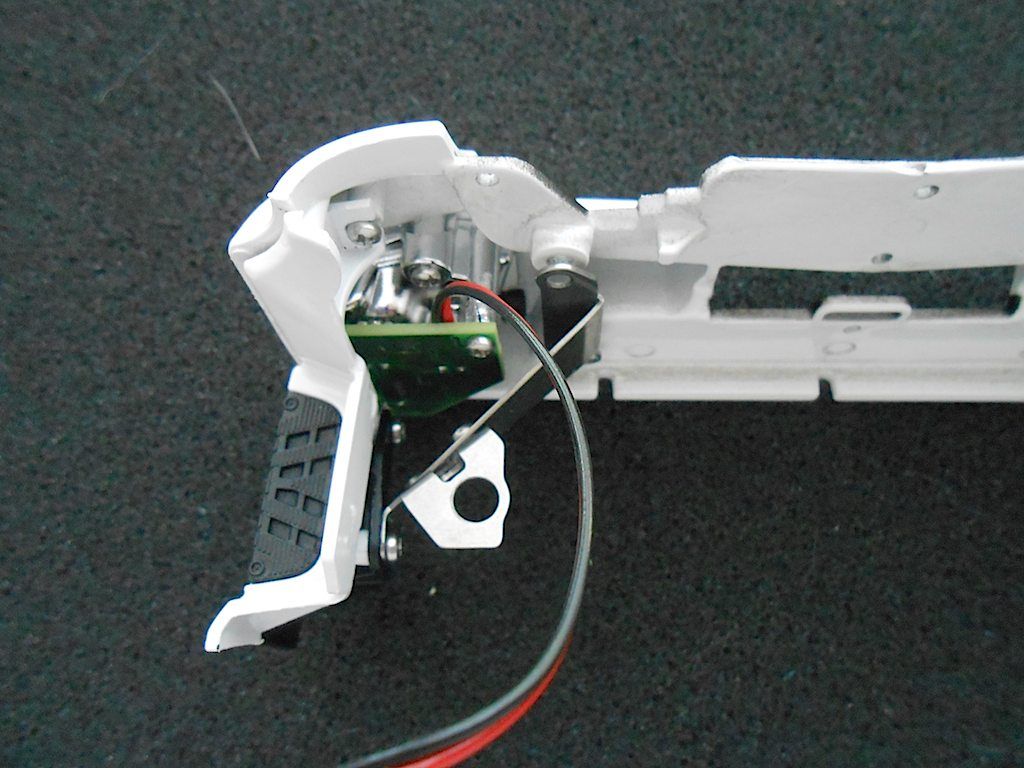 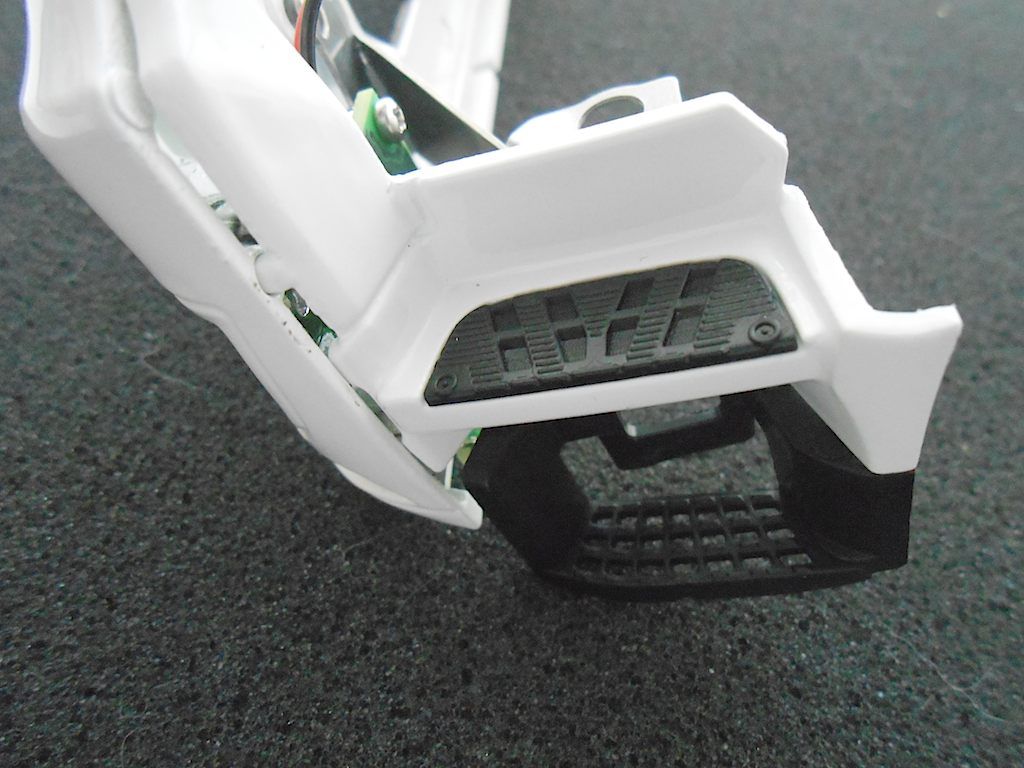
__________________
Cheers, Stephan (Rakthi is the one in the avatar) |
|
#83
|
||||
|
||||
|
Part 2
Finishing off the front of the bumper. The square nuts are where the bolts go that attach this part to the chassis. There is an indent in which they fit very tightly. 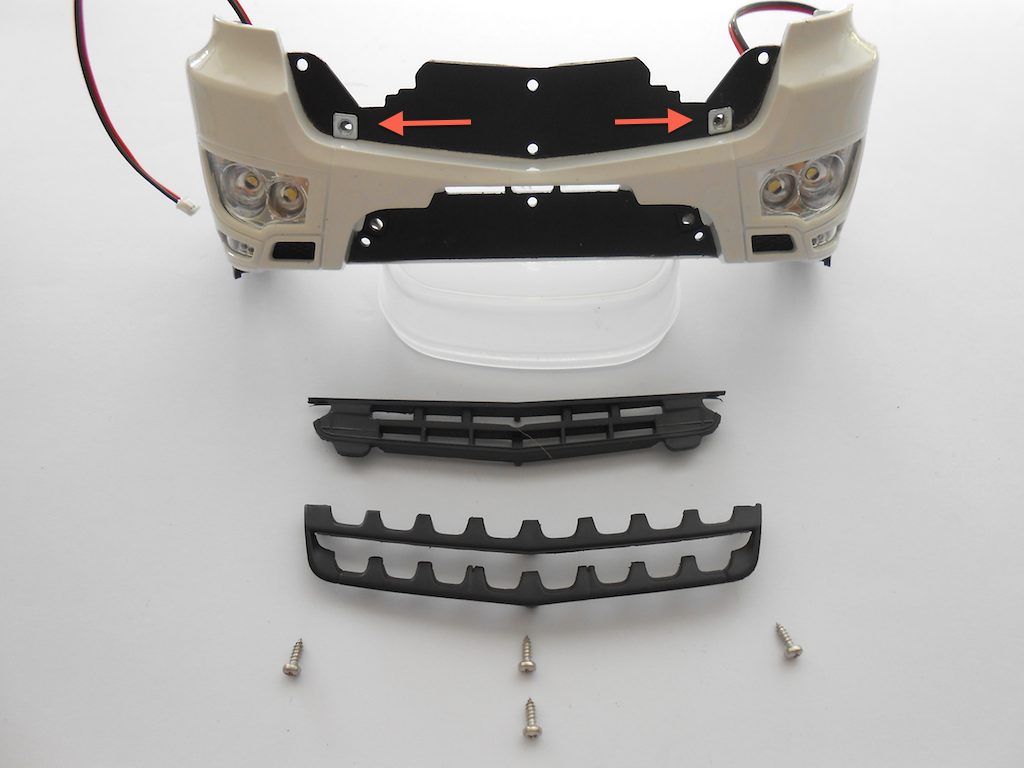 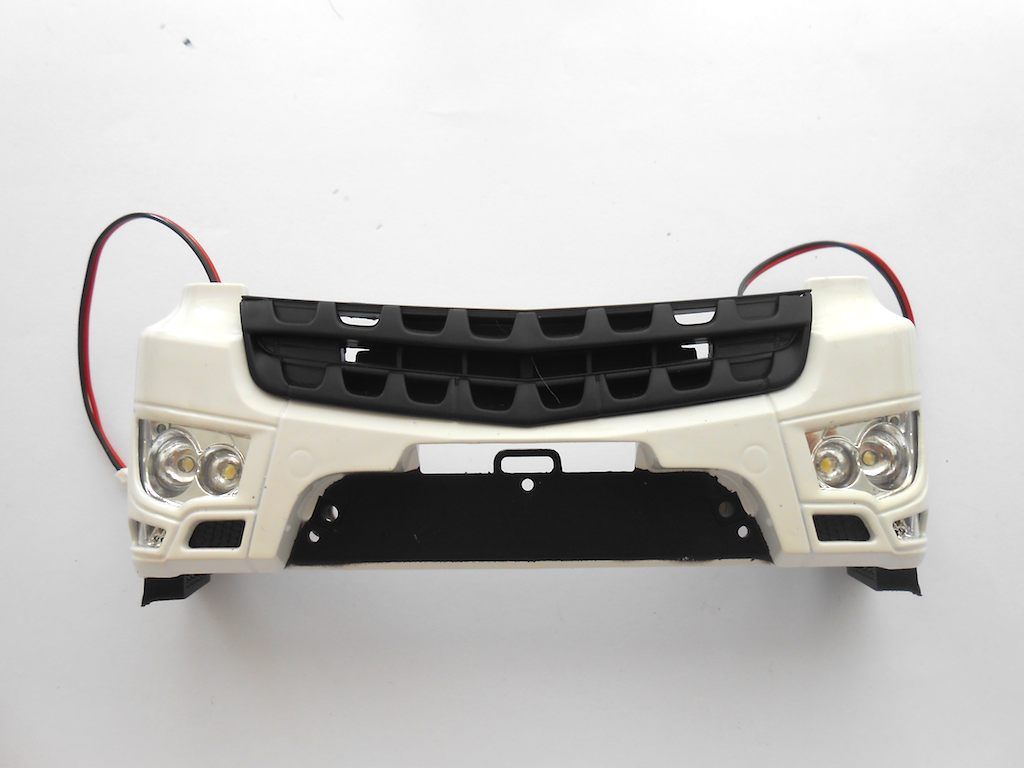 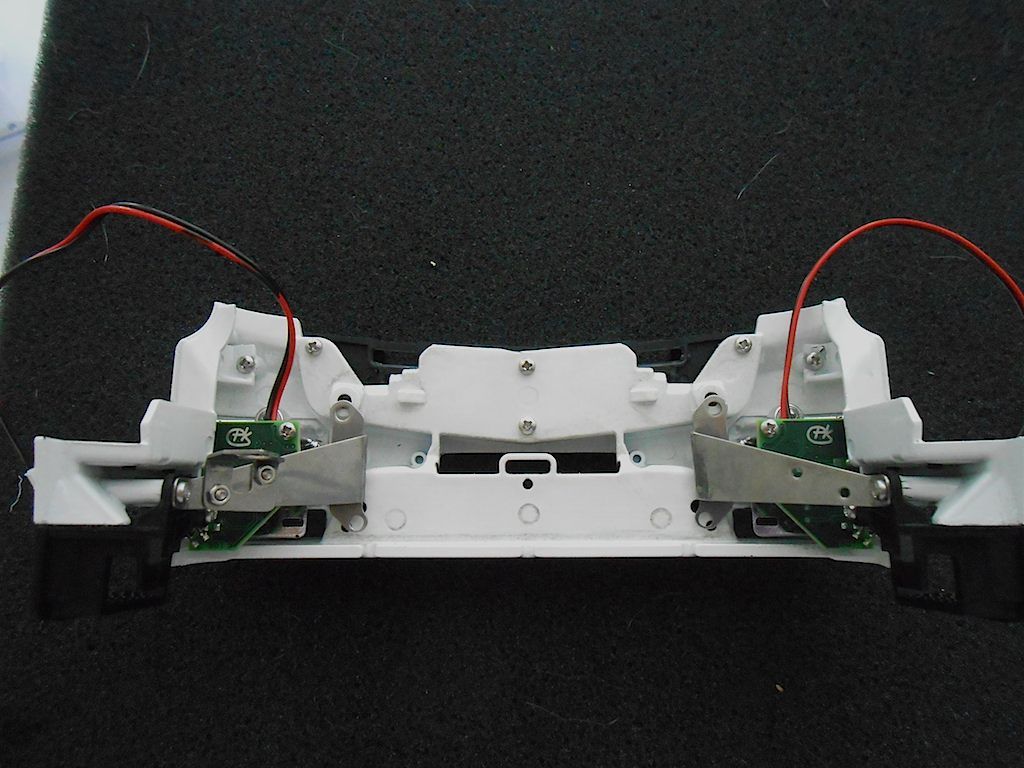 Bottom part of the bumper. Same as above. The square nuts from the bolts holding this assembly to the chassis fit in an indent. 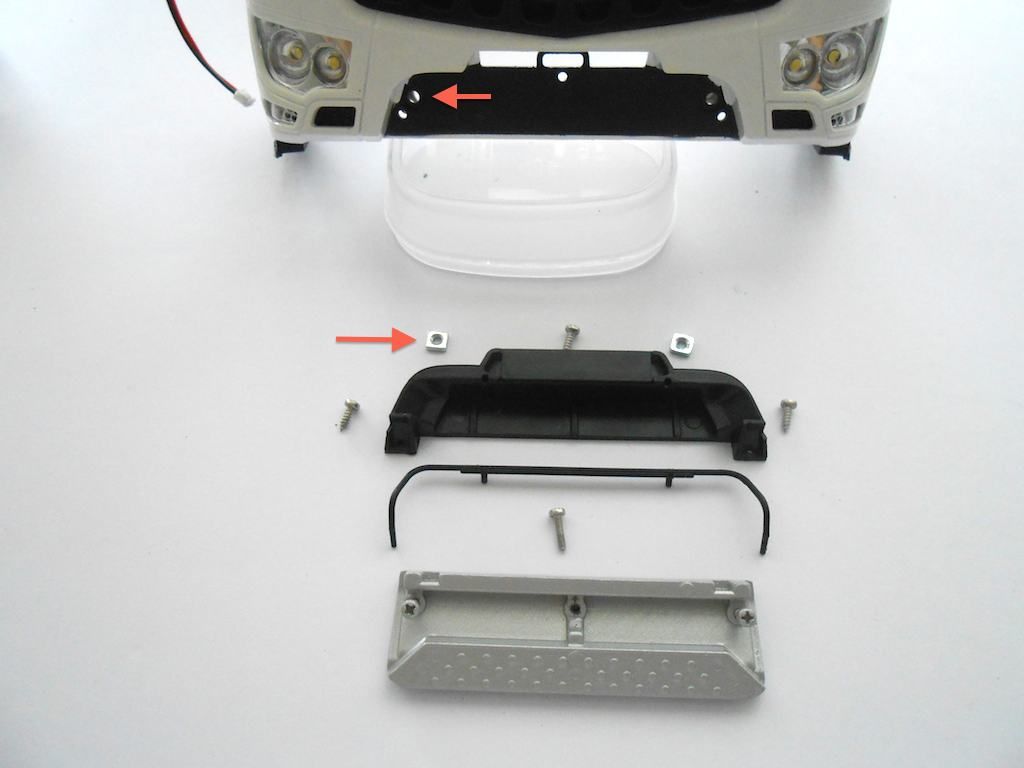 The thin bar gets glued with four drops of glue in the small openings provided. 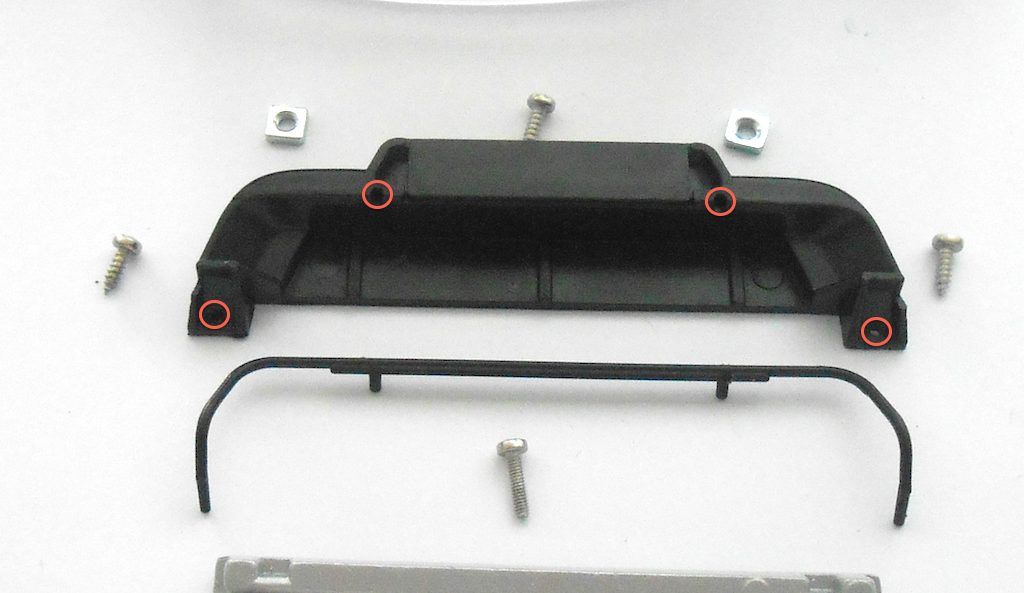 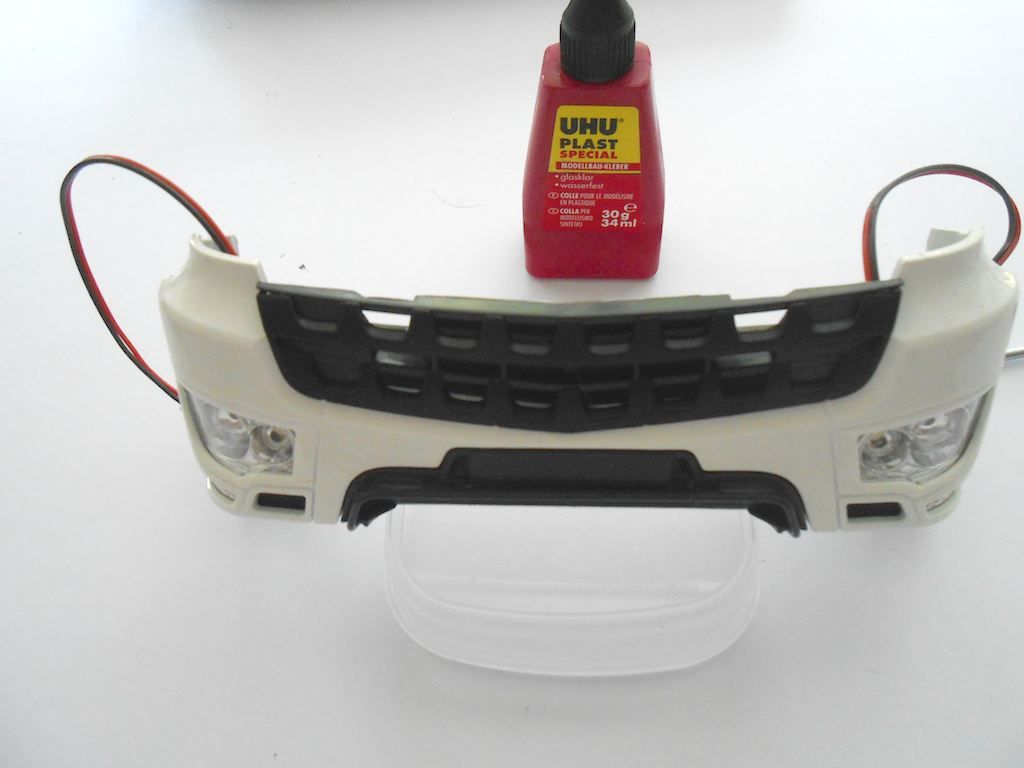 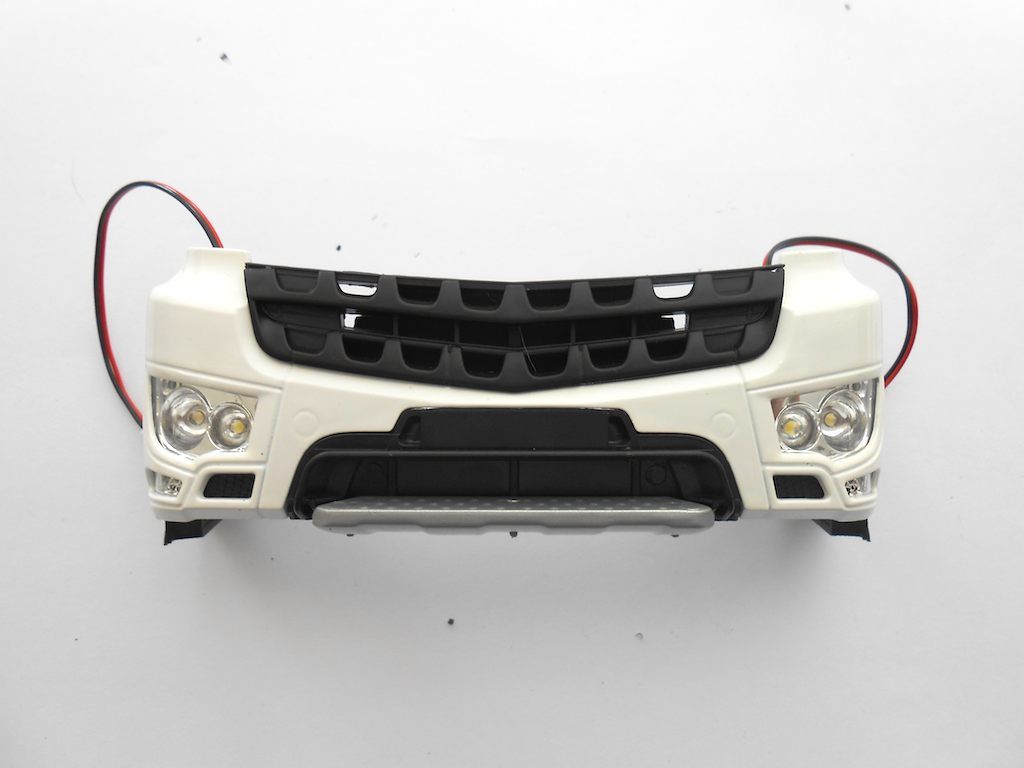 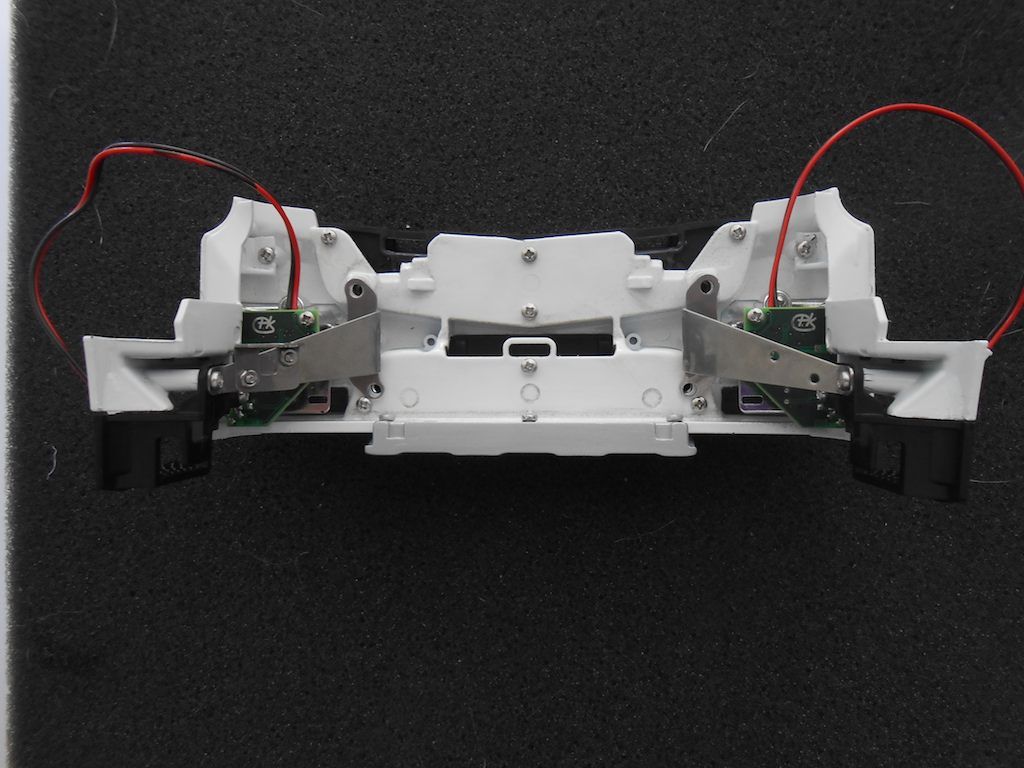 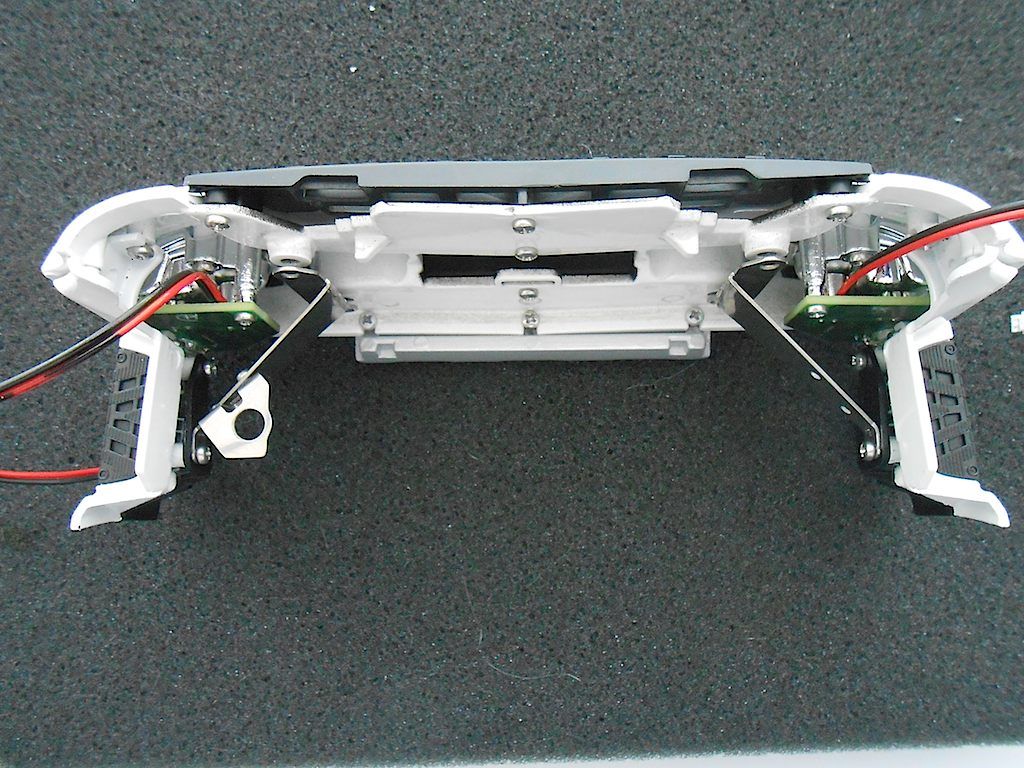 Next part should be the doors if I follow the manual.
__________________
Cheers, Stephan (Rakthi is the one in the avatar) |
|
#84
|
||||
|
||||
|
Did not get around to the doors. Decided to install the fender parts first. Seemed like a simple job. Remove wheel and bolt on.
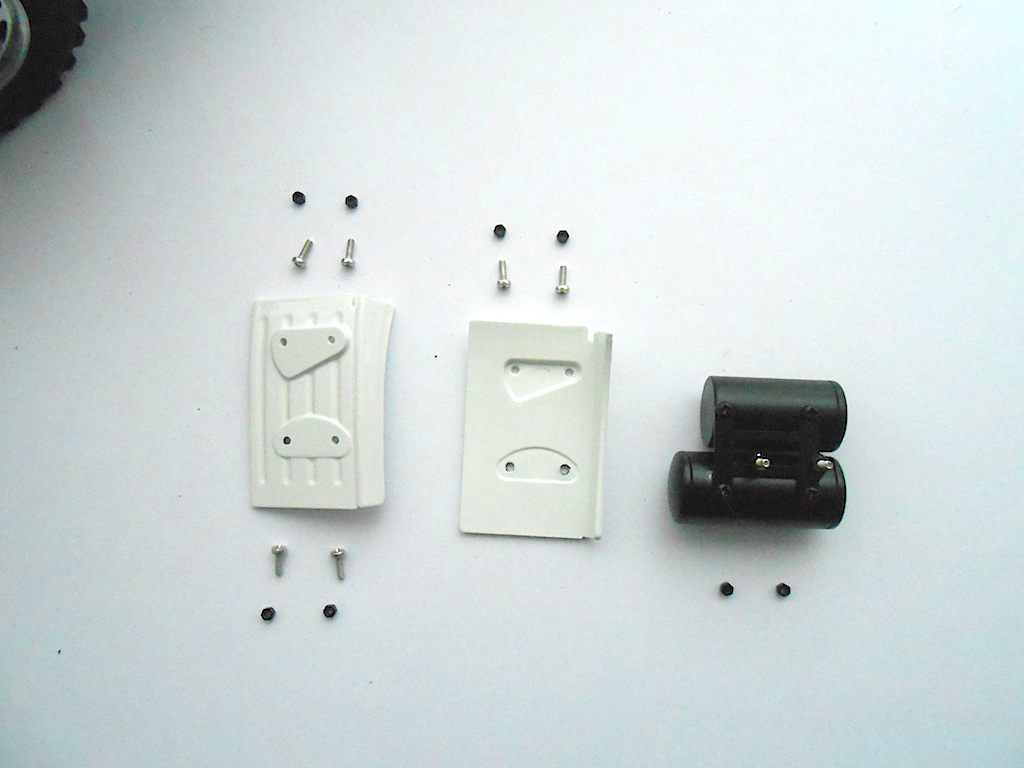 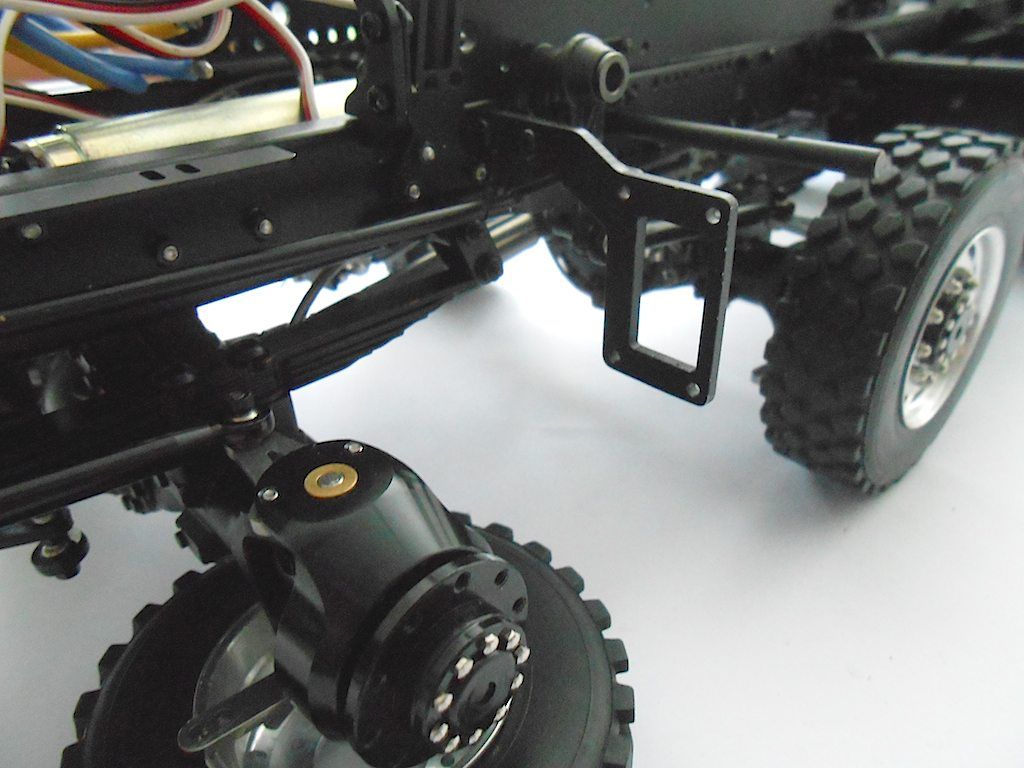 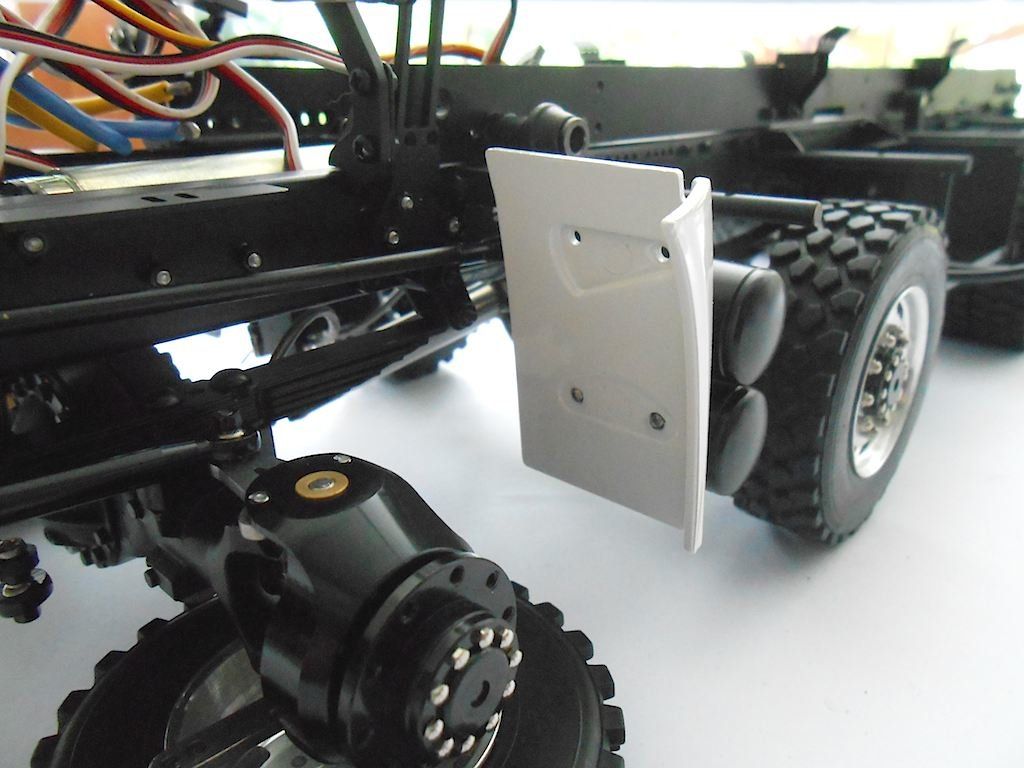 Didn't like the inside to be so white, so painted it black. 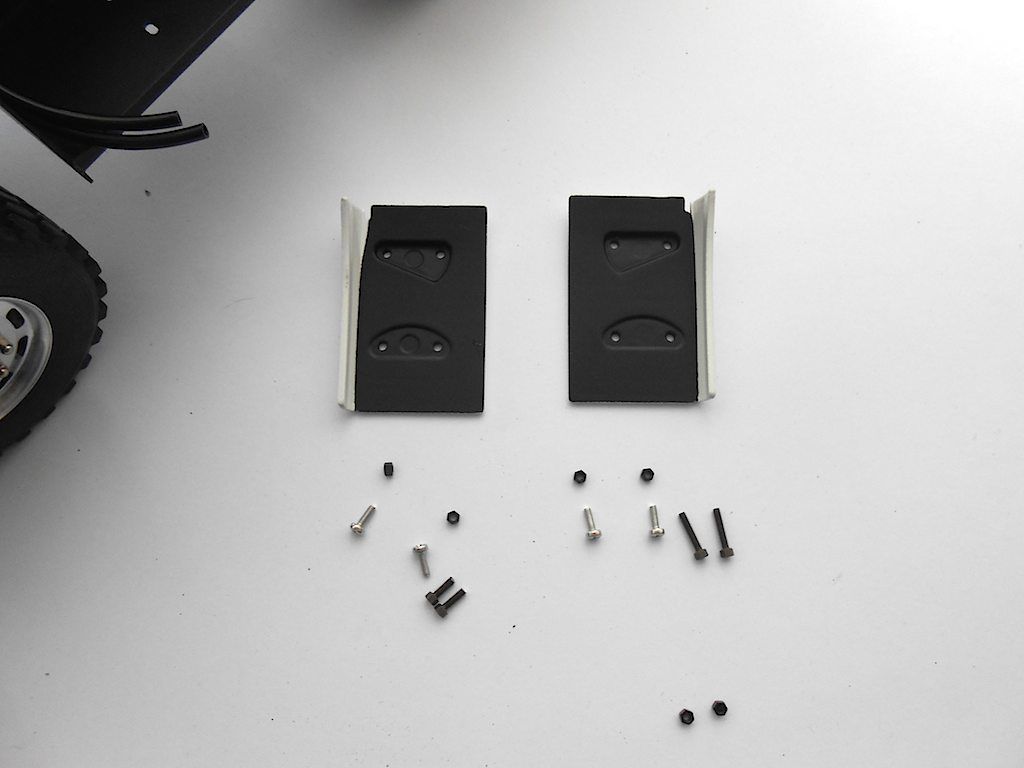 So I needed to use black bolts instead of the stainless screws. I only have those in M2x10, so cut 6 of them down to size and filed the cut mark 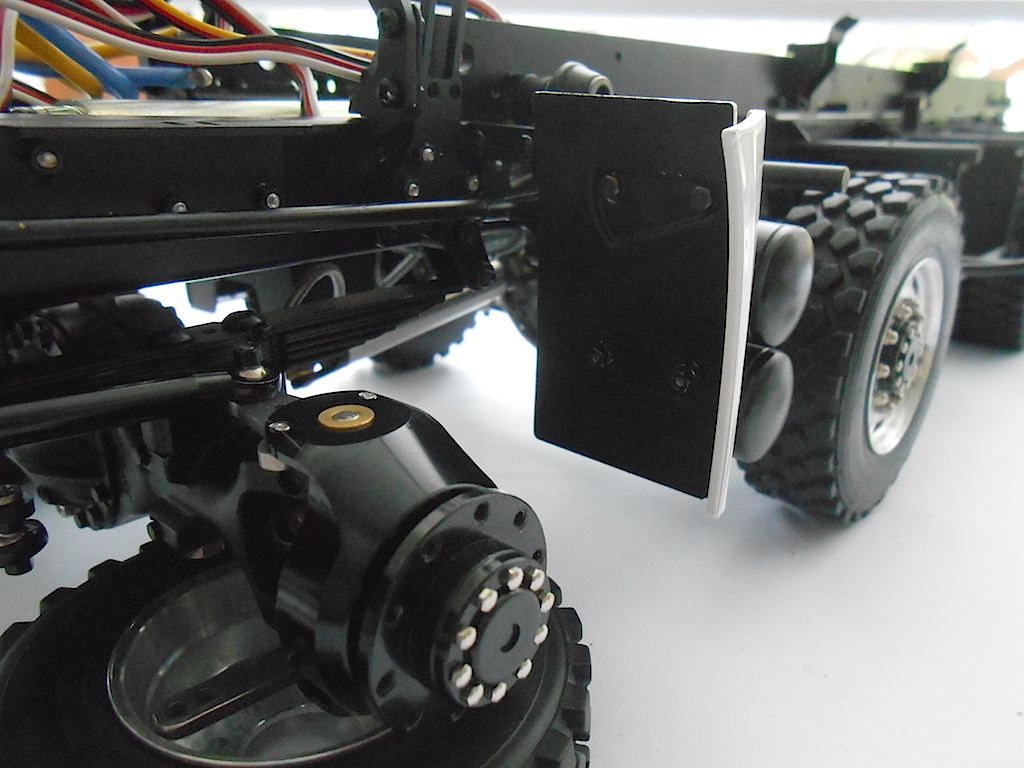 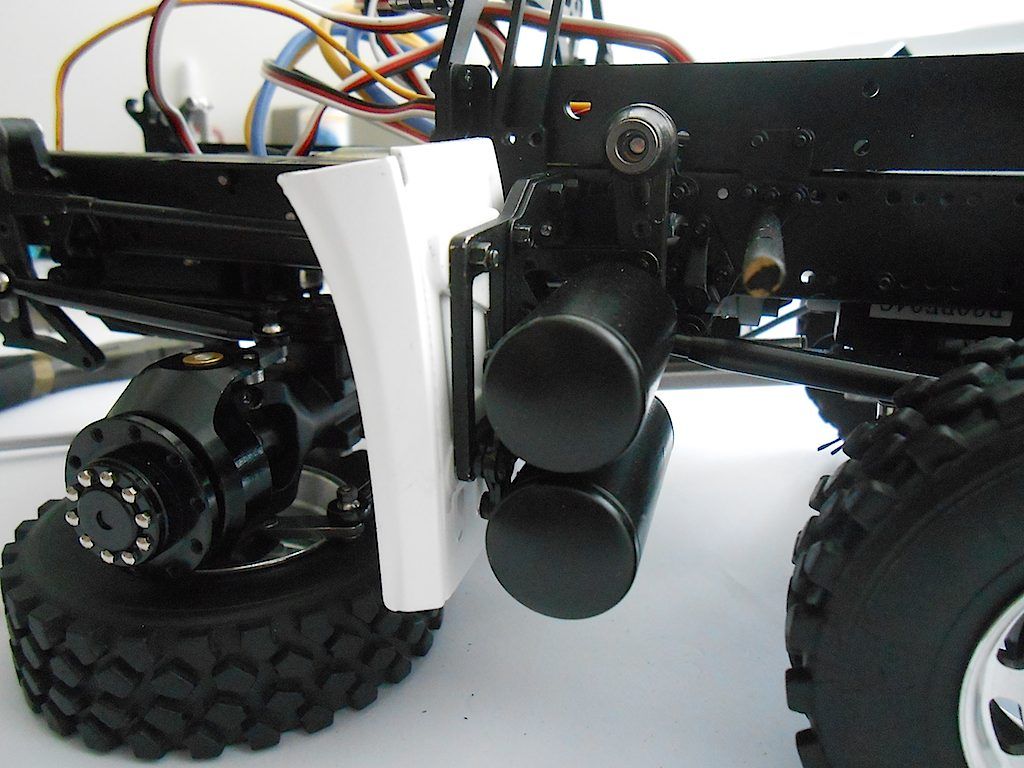 Easier to write about than to do it. Mighty tight in there and the axle is in the way for access to the bottom 2 nuts on this left side. Well, if the left side was mildly enervating, the right side was close to frustrating. Barely room to fit the nut. So only picture of the thing installed. 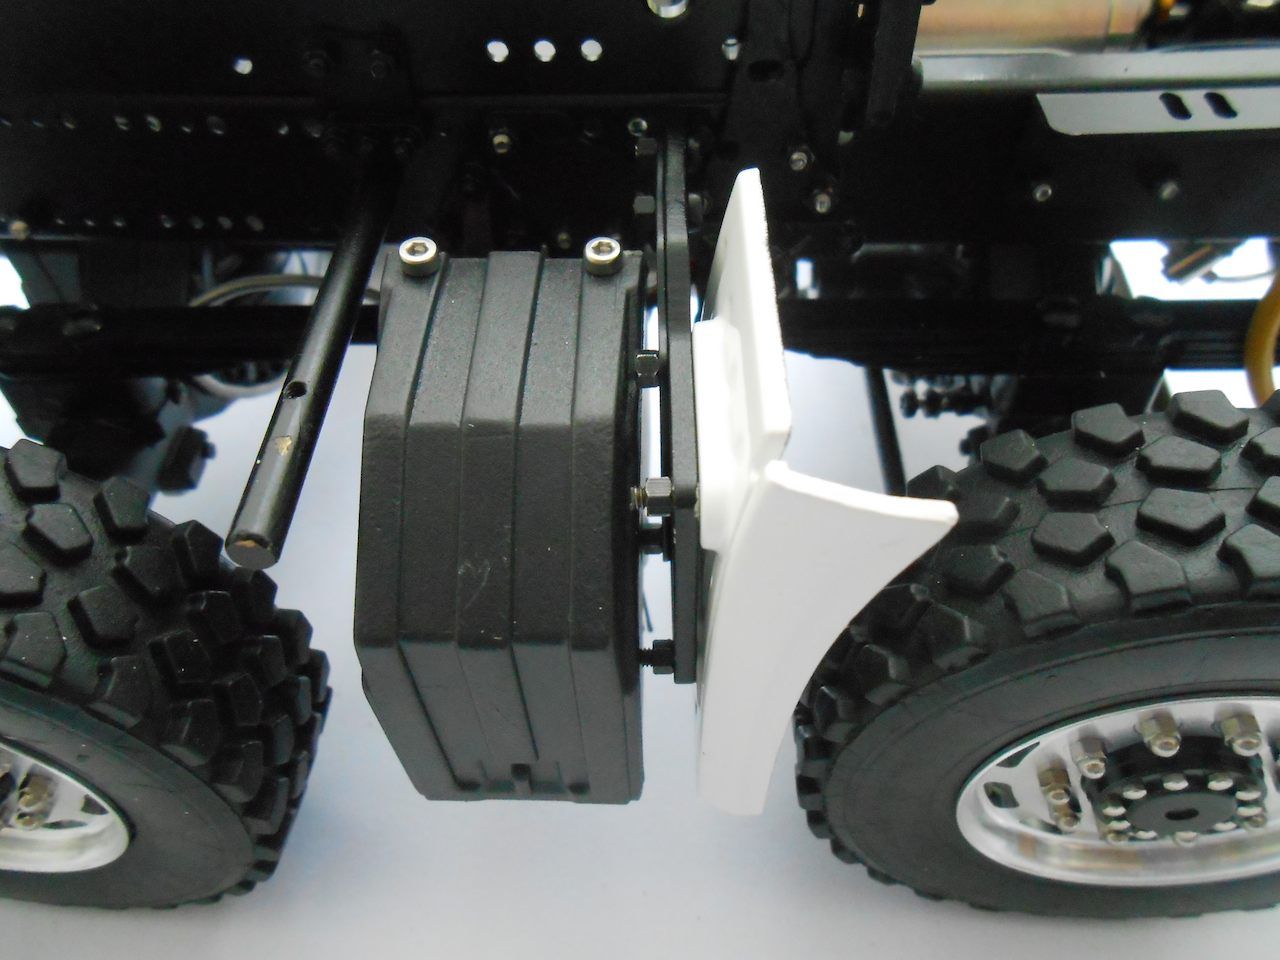 If I ever get around to building another one of these, I will install these two bits before I even touch the axles. Then "just" attach the bumper to the frame. 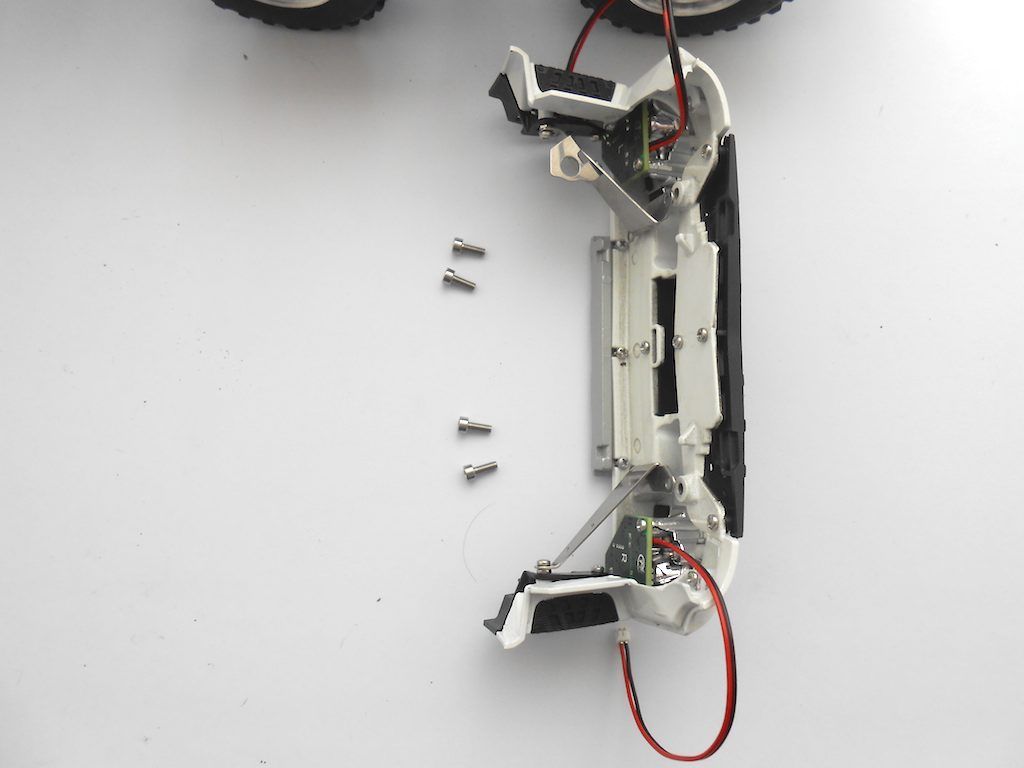 Tight ... but it fitted. One just has to fiddle to line all the parts up. There's not a mm to spare - especially on the bottom. One has to admire ScaleART for the tightness of their designs and the close tolerances of the parts. 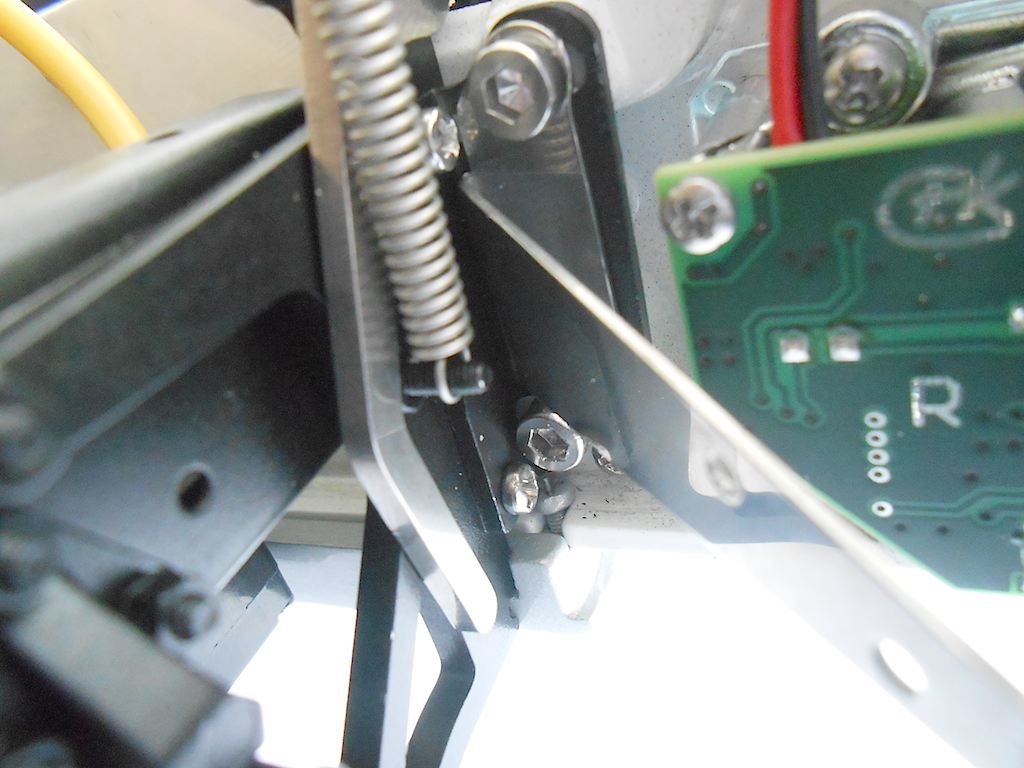 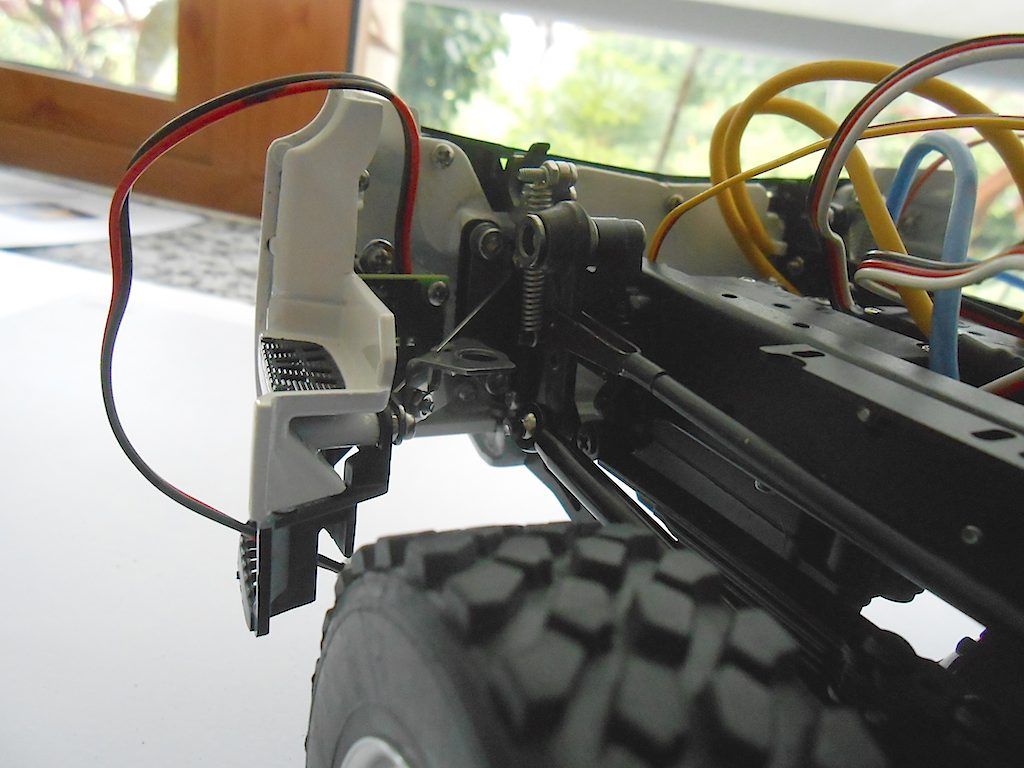 A channel to run the wires is foreseen in the bumper. 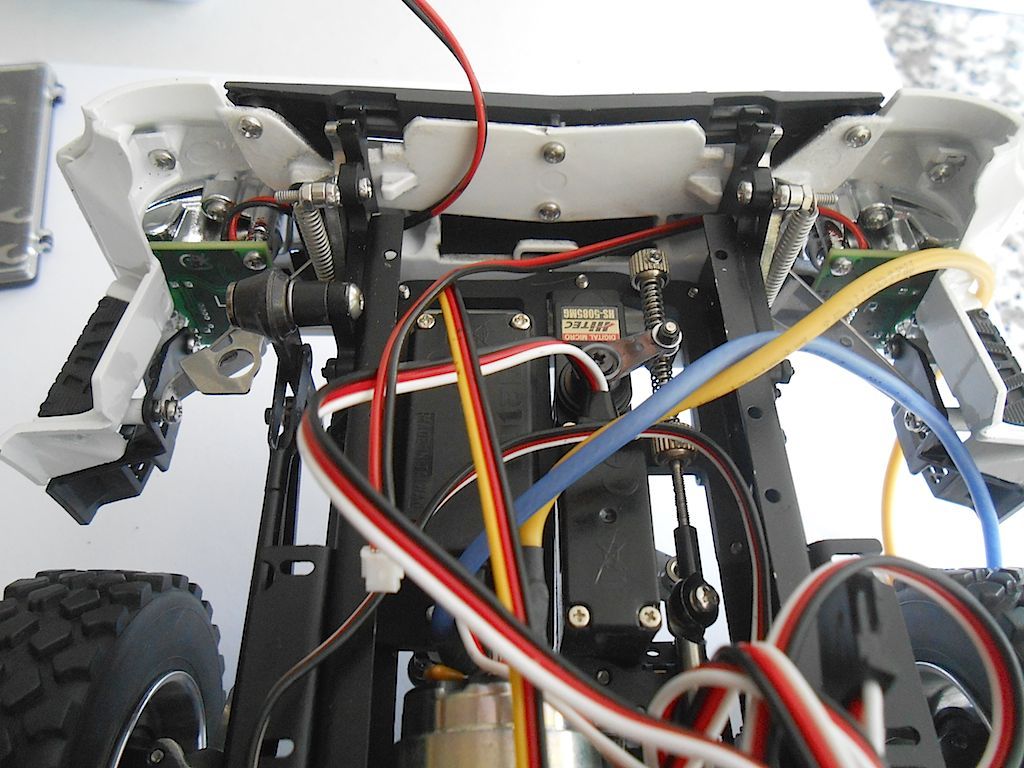 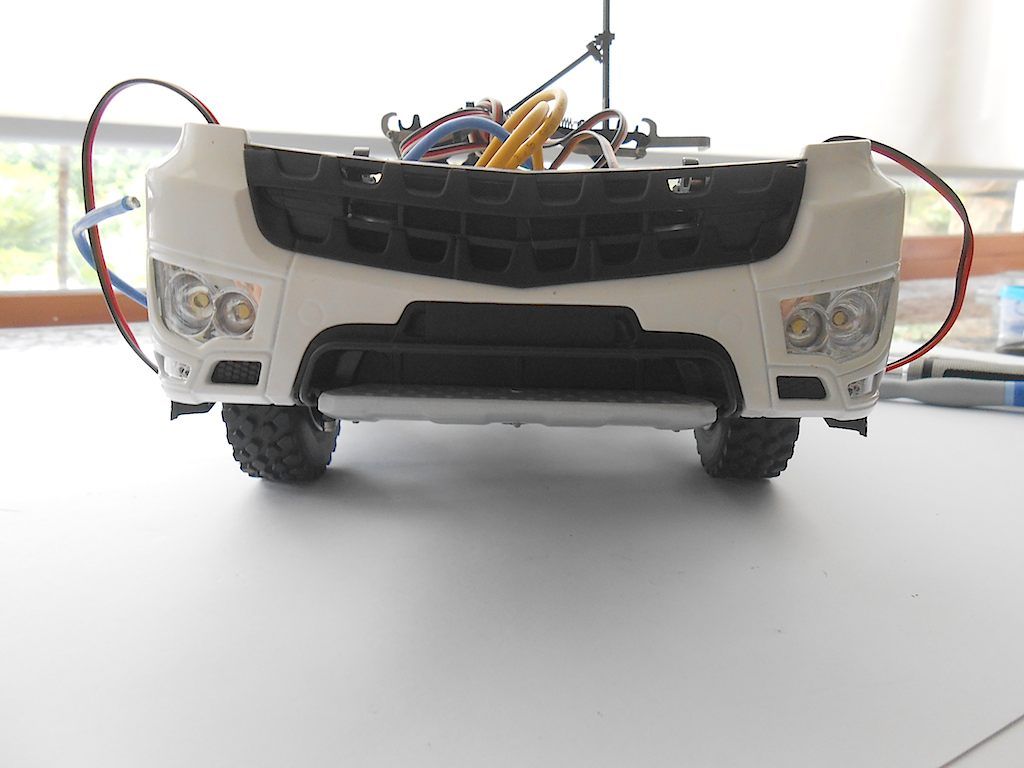
__________________
Cheers, Stephan (Rakthi is the one in the avatar) |
|
#85
|
|||
|
|||
|
Love the progress and the project regards Jake
__________________
Jake |
|
#86
|
||||
|
||||
|
My oh my and I thought a Tamiya truck had too many nuts and bolts but these Scale art trucks win the nuts and bolt gold medal every time, Nice work on the build so far. can't wait to see it built and painted
|
|
#87
|
||||
|
||||
|
Hi Jake, Thank you! Glad you like it.
 Hi Brel, one of the reasons I ended up buying this kit was the amount of bits and pieces. For me the more the merrier. As for color ... I couldn't make up my mind when I placed the order, ScaleART emailed a bunch of photos of the cabin in different colours. I thought white suited best. The container will be in bleu though. ++++++++++++++++++++++++++++++ Doors ... Part 1 ScaleArt give the option to go for the extended door or the short one. I decided for the short one. 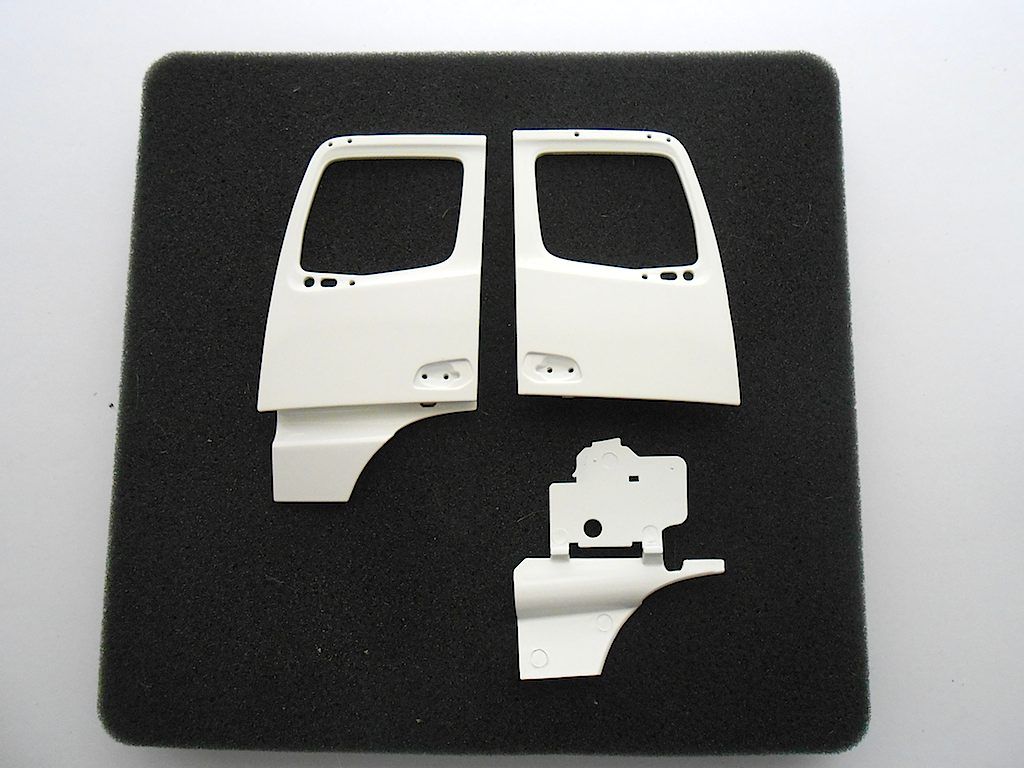 What you get (the screws put in by ScaleART to prevent paint clogging up the threads are still in place) 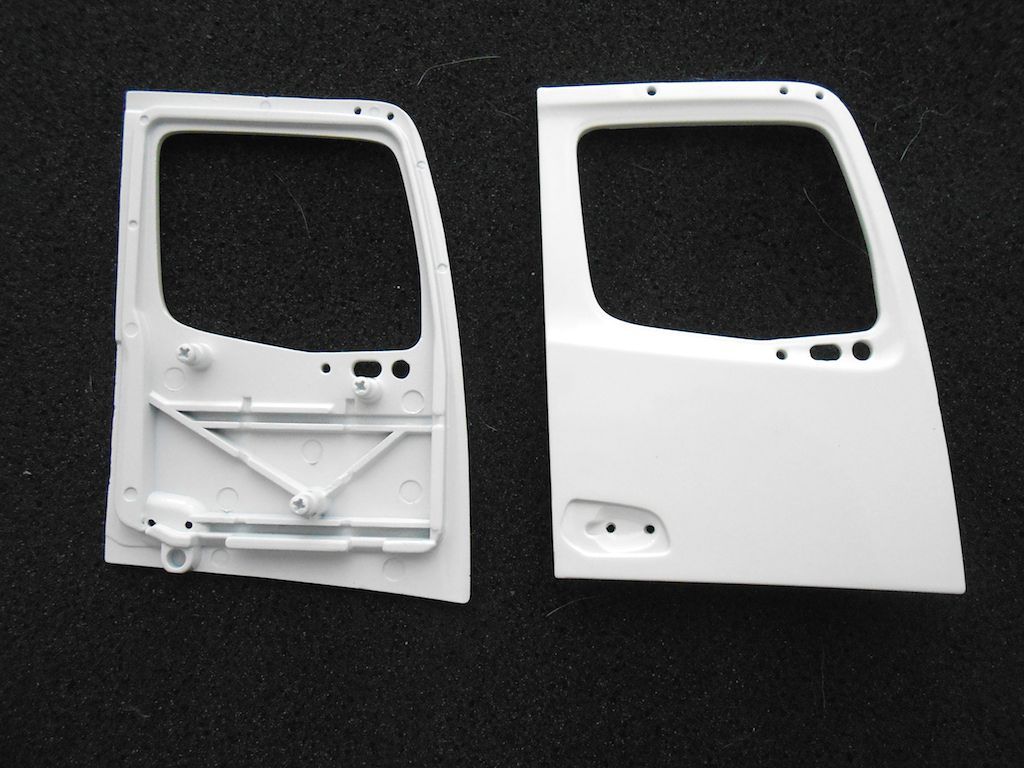 Before I continued I made an indication of the window rubber with a black felt tip stift. This breaks up the "whiteness" a bit. 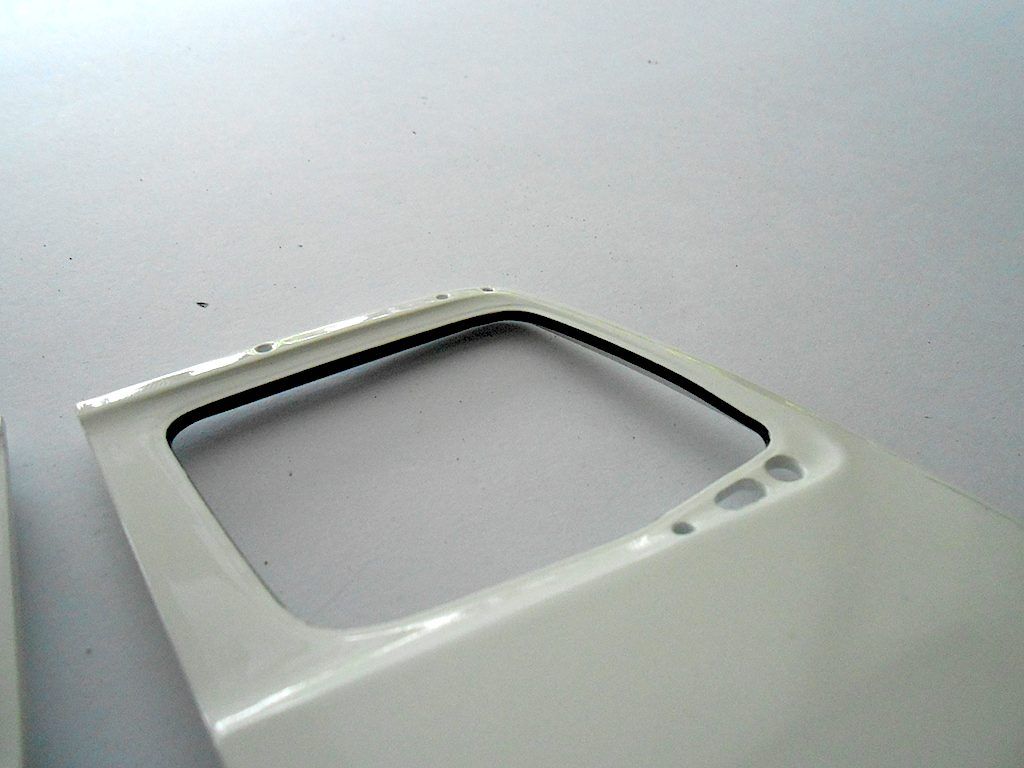 All the parts. (forgot one self tapping screw in the picture) 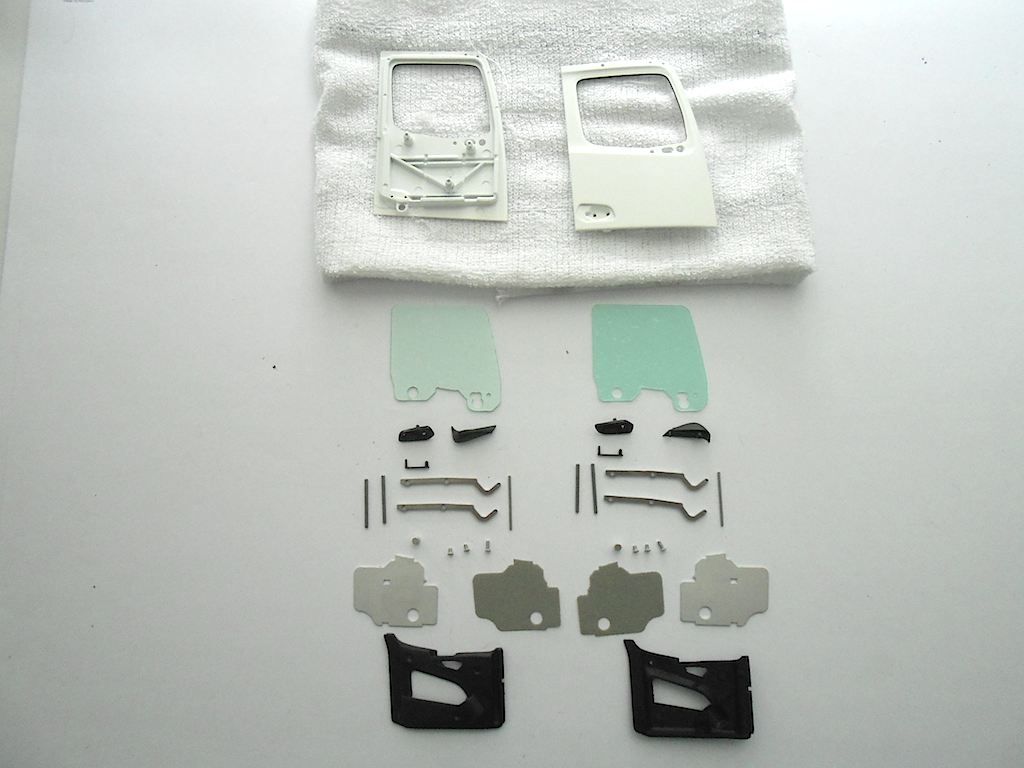 Here how it is supposed to fit together. First the metal parts that will be the door hinges/support. In the package there are 4 thick rods and 2 thin ones. Of the 4 thick ones 2 are a bit shorter than the other. Those go toward the front of the door. They are shorter to clear the plastic of the window. 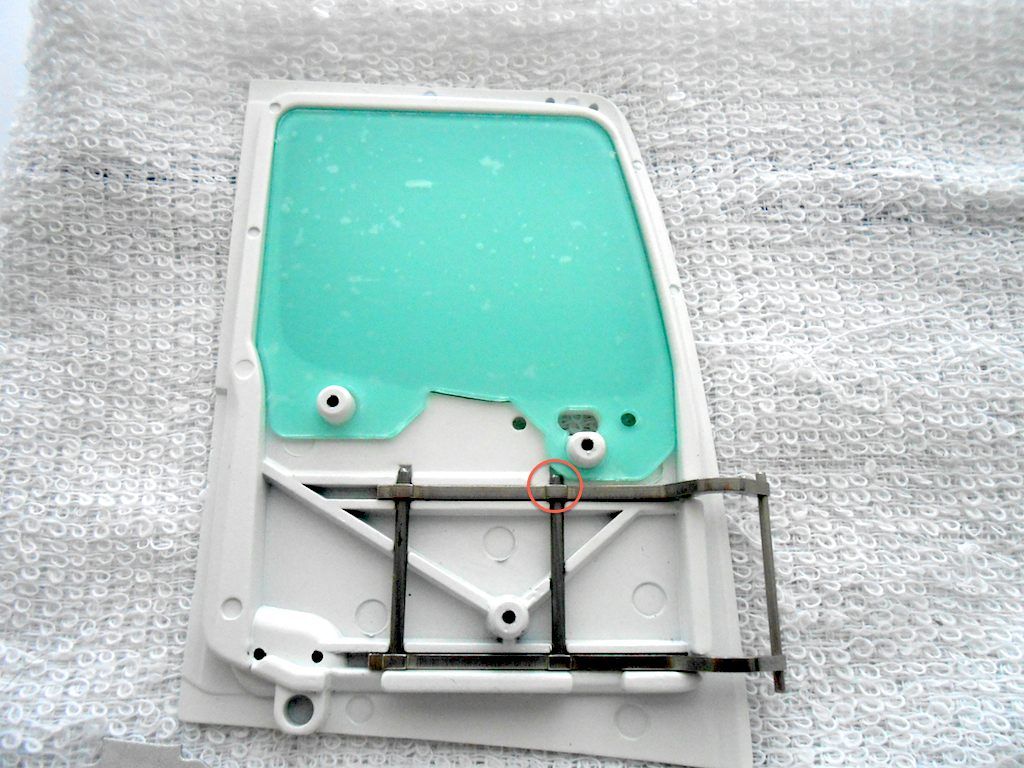 Metal plate to hold hinge/support to the door. 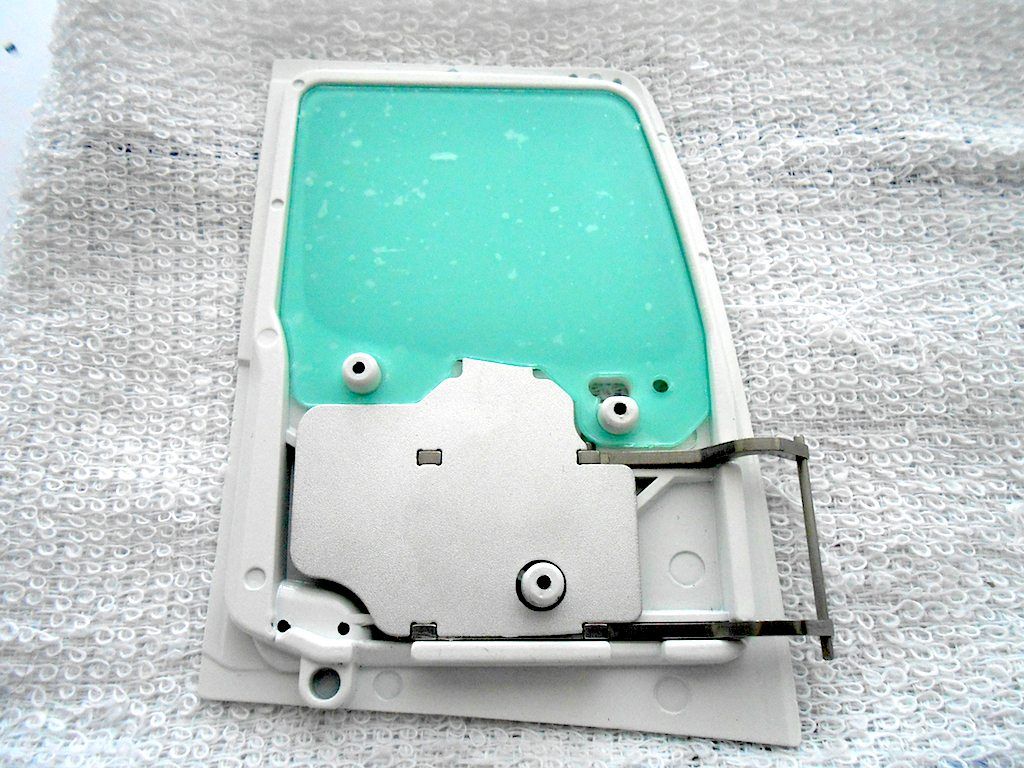 Optional carpet 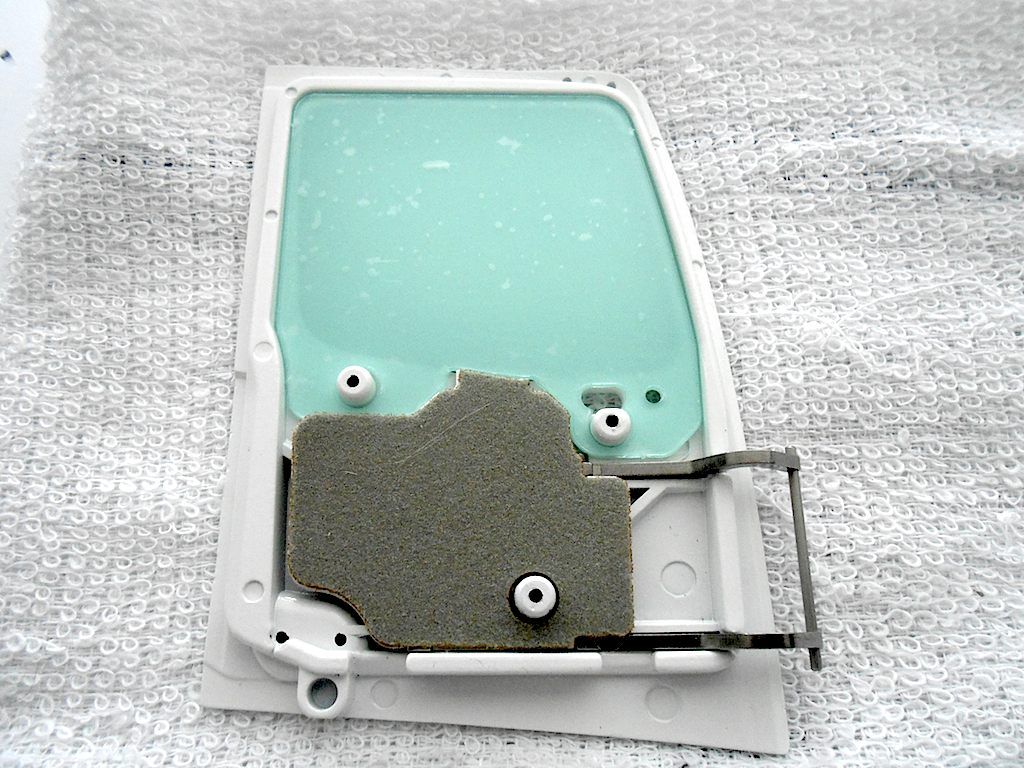 Door panel (will be screwed down with 2 short and one longer screw) 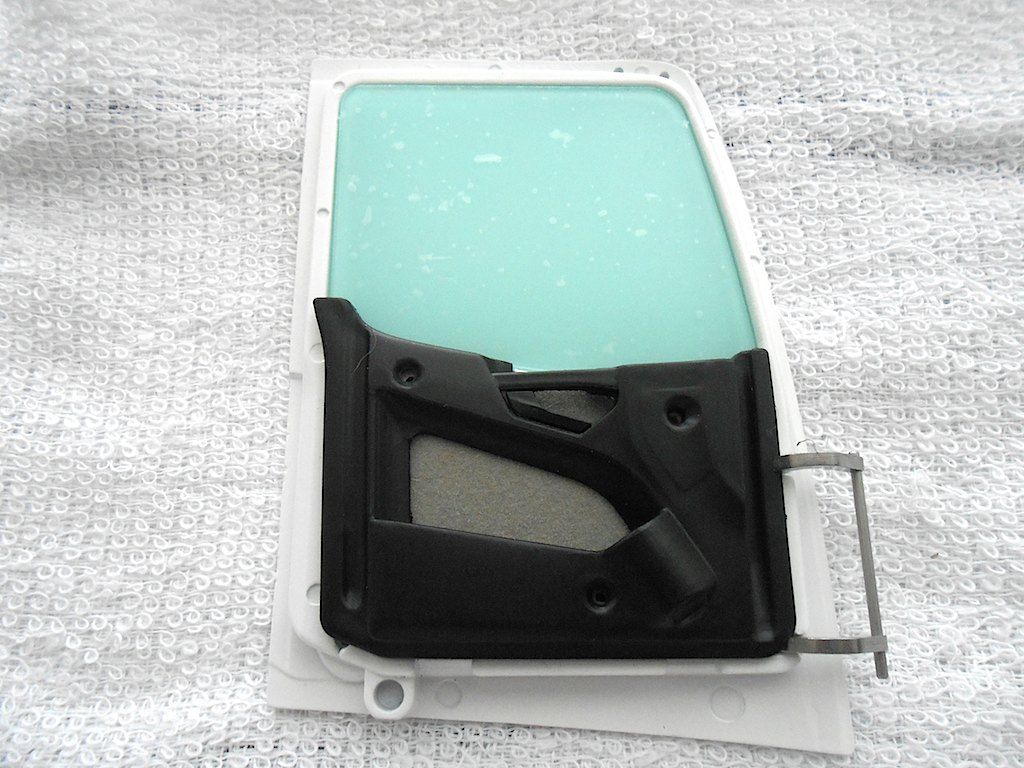 Before we screw all this together, after peeling the film of the plastic of the window, we have to attach the mirror support with a self tapping screw. This holds the window in place at the same time. 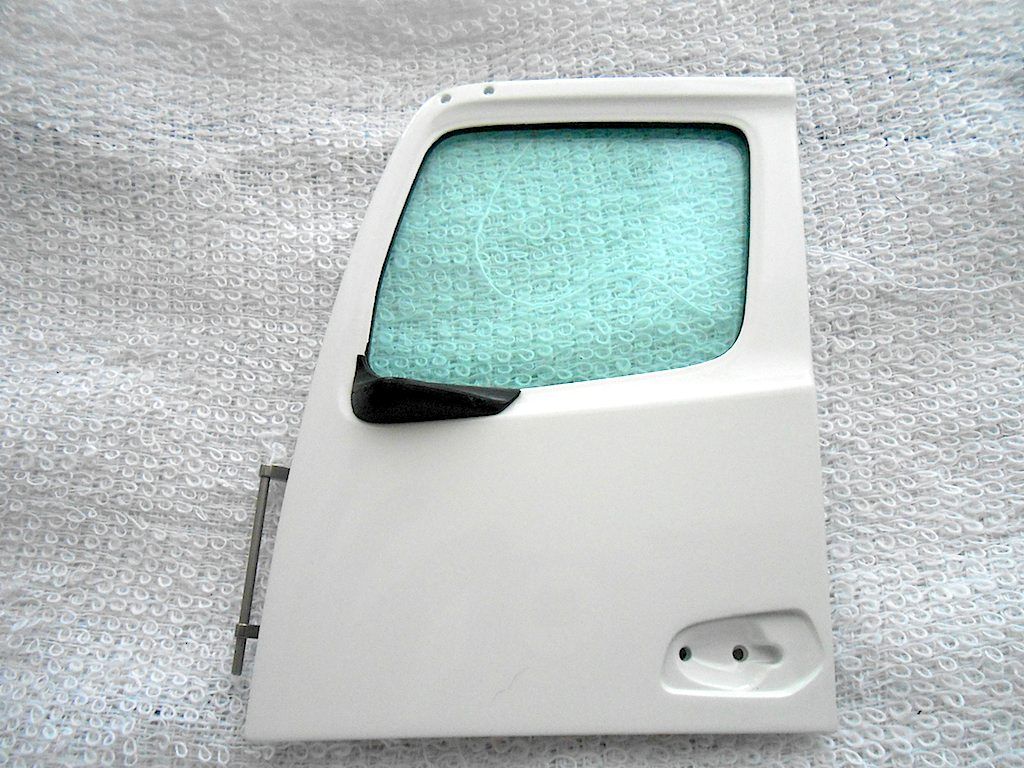 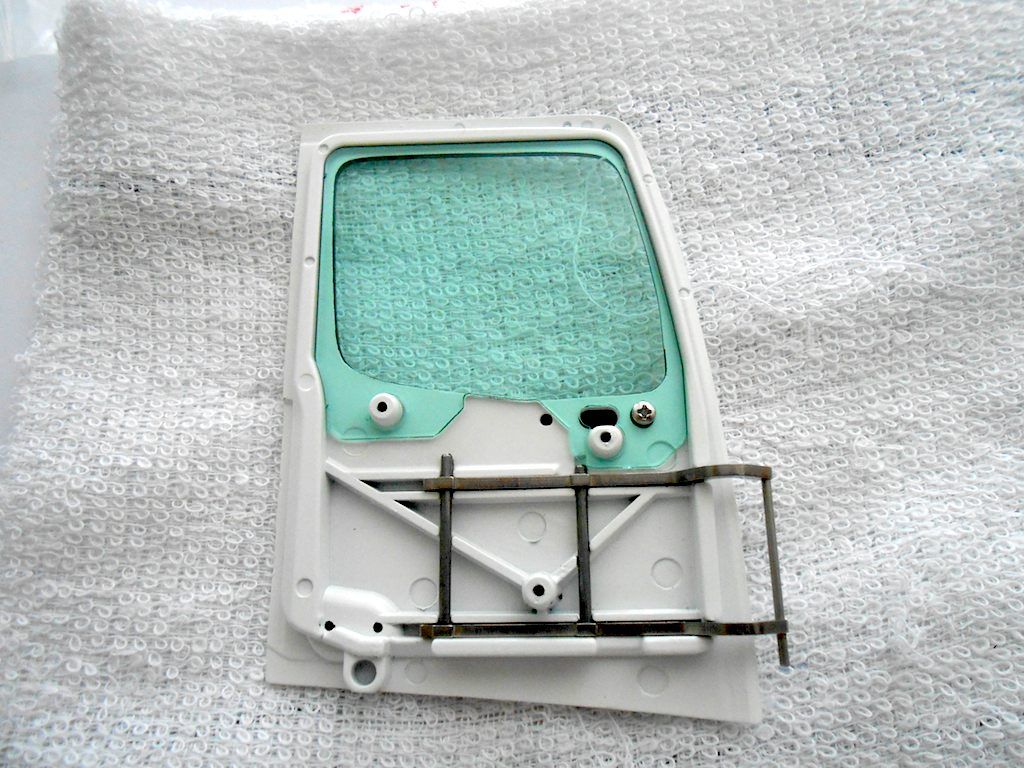 Finished and screws blackened with a Sharpie (door handle outside is glued in place) - The Magnet at the bottom of the door is supposed to glue into place, but I had to firsts clear the paint out of the provided spot with a 4mm drill, tried a dry fit, it clipped place and couldn't get it out again. So not glued. The other door same story. 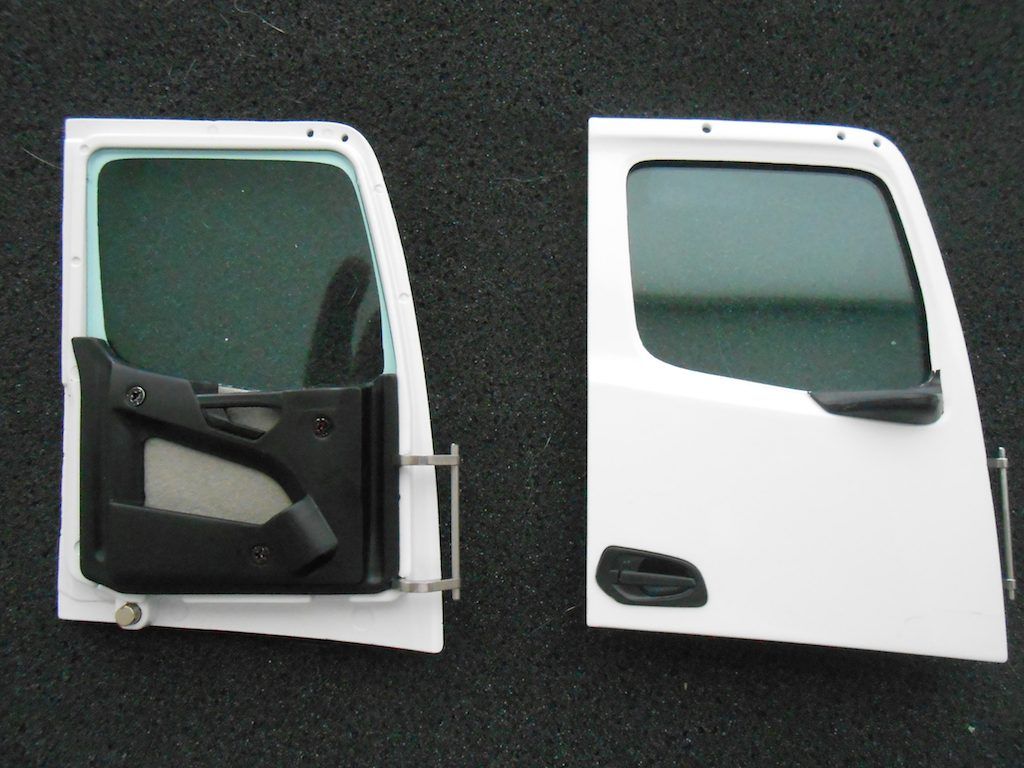
__________________
Cheers, Stephan (Rakthi is the one in the avatar) |
|
#88
|
||||
|
||||
|
Doors - Part 2
Not really the doors, more the sides of the cab. 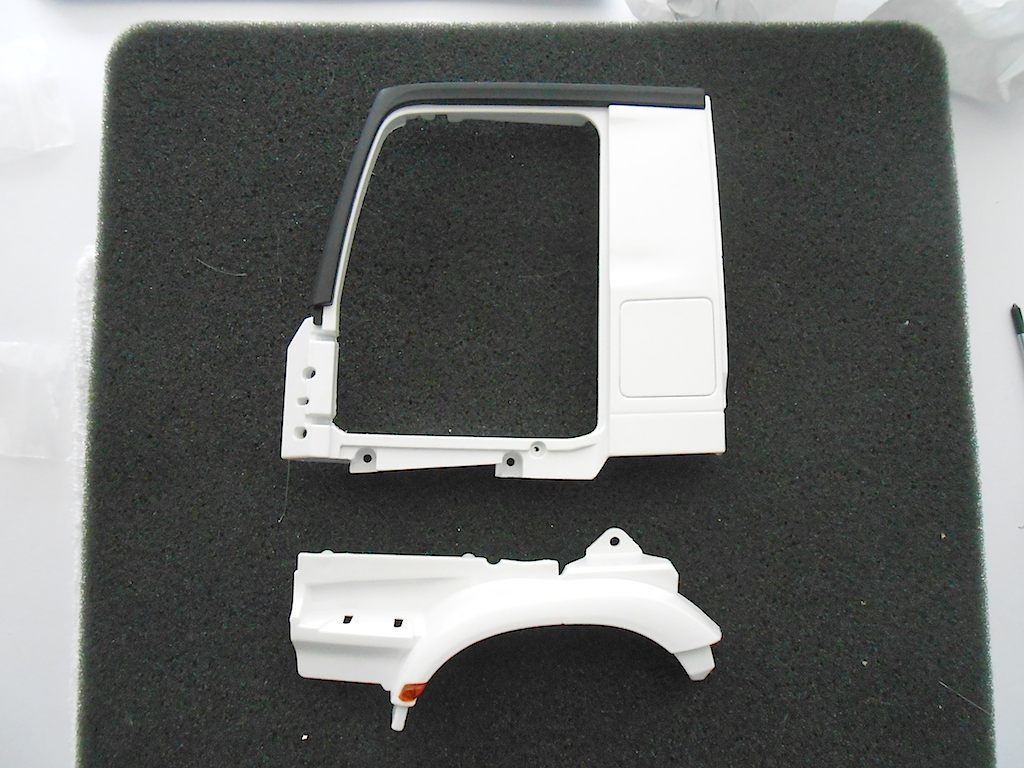 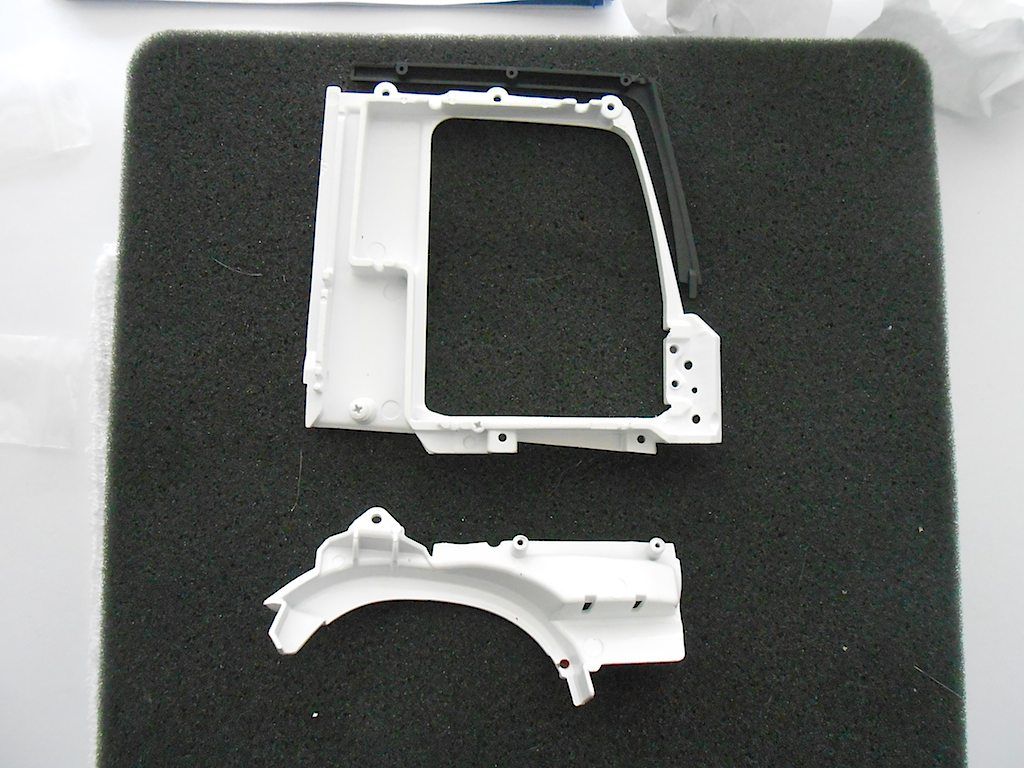 The black plastic strip is fastened with 3 self tapping screws 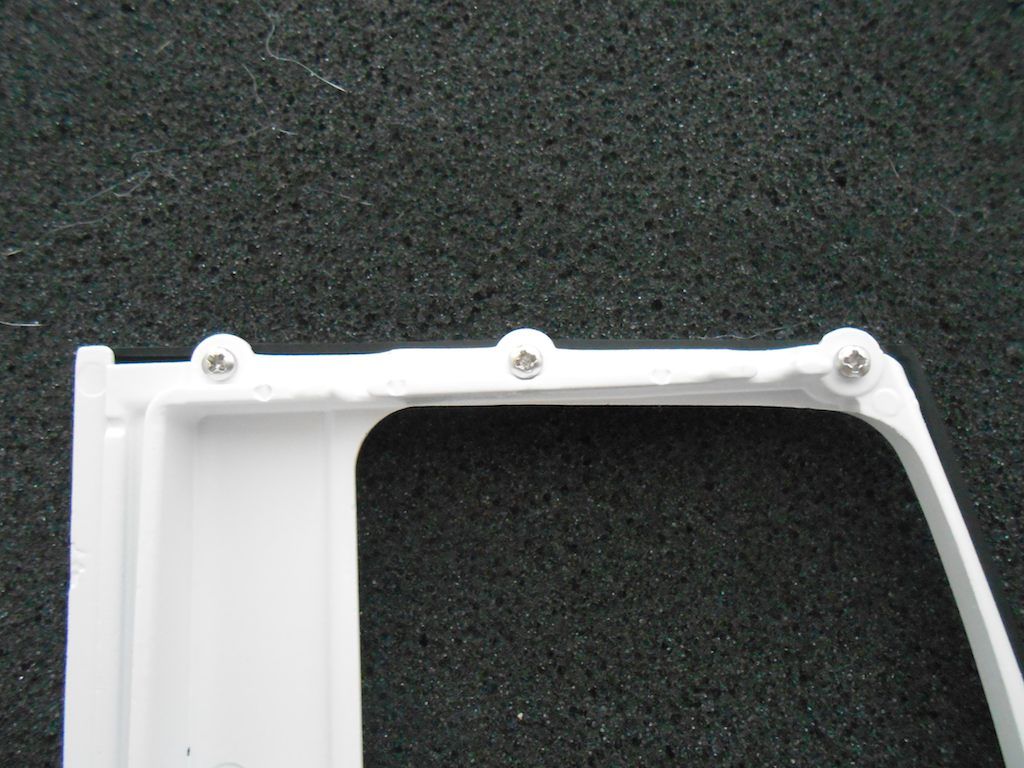 Next we screw in the galvanised iron screw that the magnet will stick too. (I cut that one in half, half way thru screwing it in it became pretty hard to do, and worried my screwdriver might slip out of the slit resulting in a big scratch ... 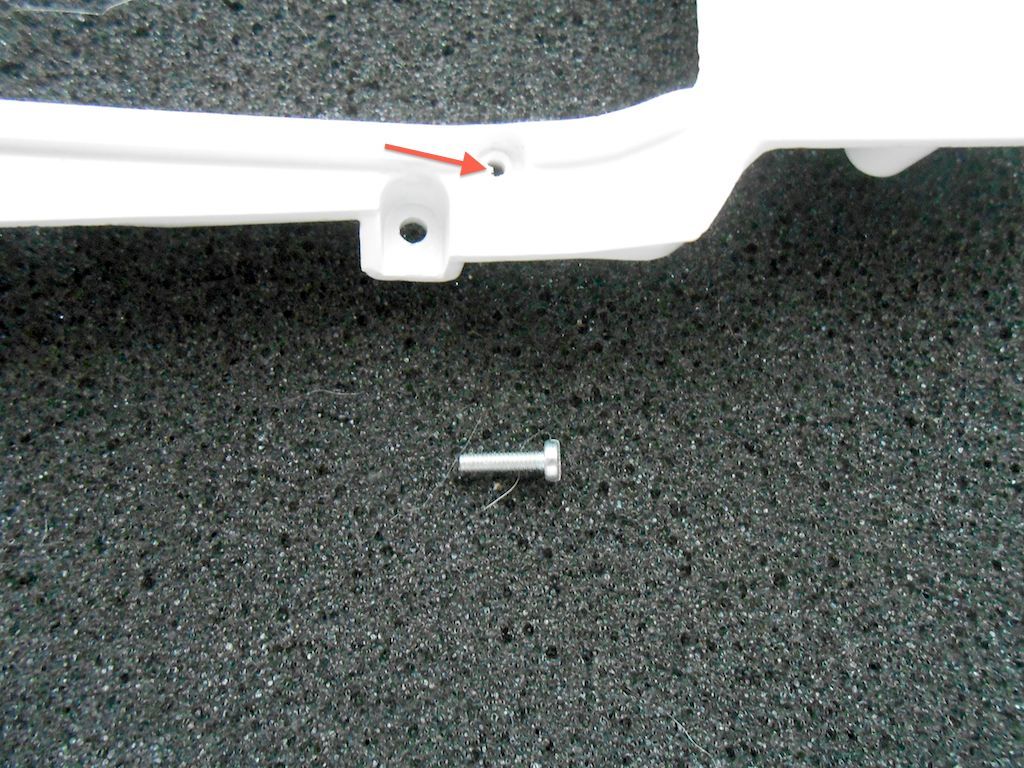 Next the fender/step part of the cabin. Held in place with one regular M3 screw and 2 self tapping ones. The indicator lights i painted orange yesterday and trimmed and fitted them already. 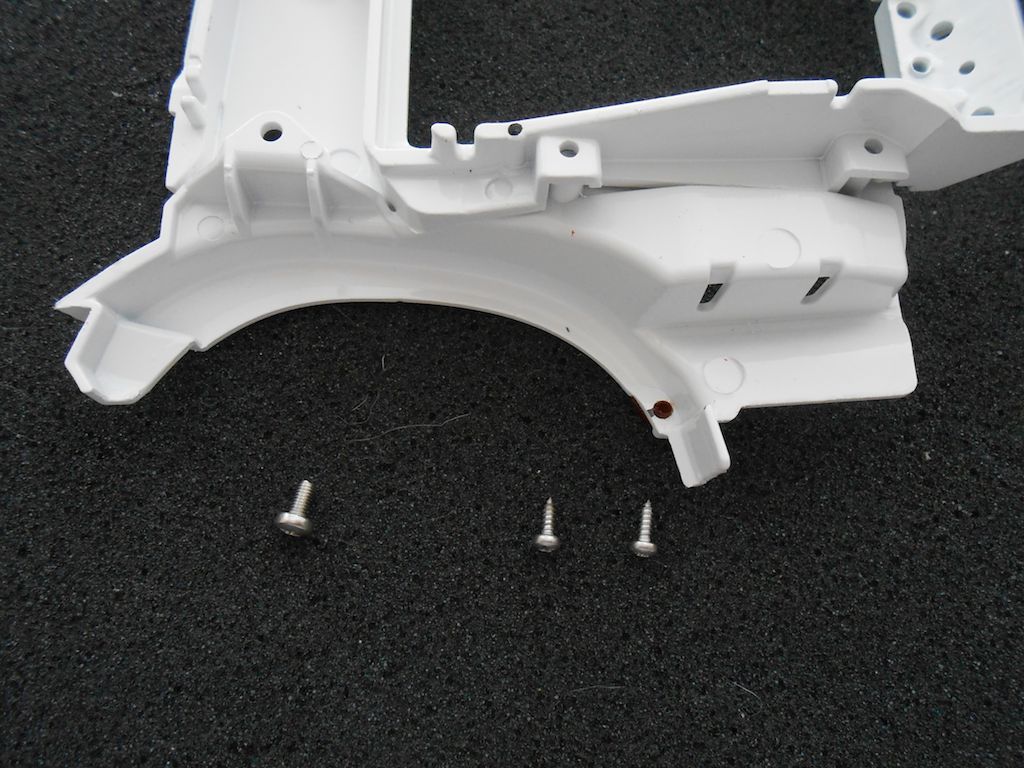 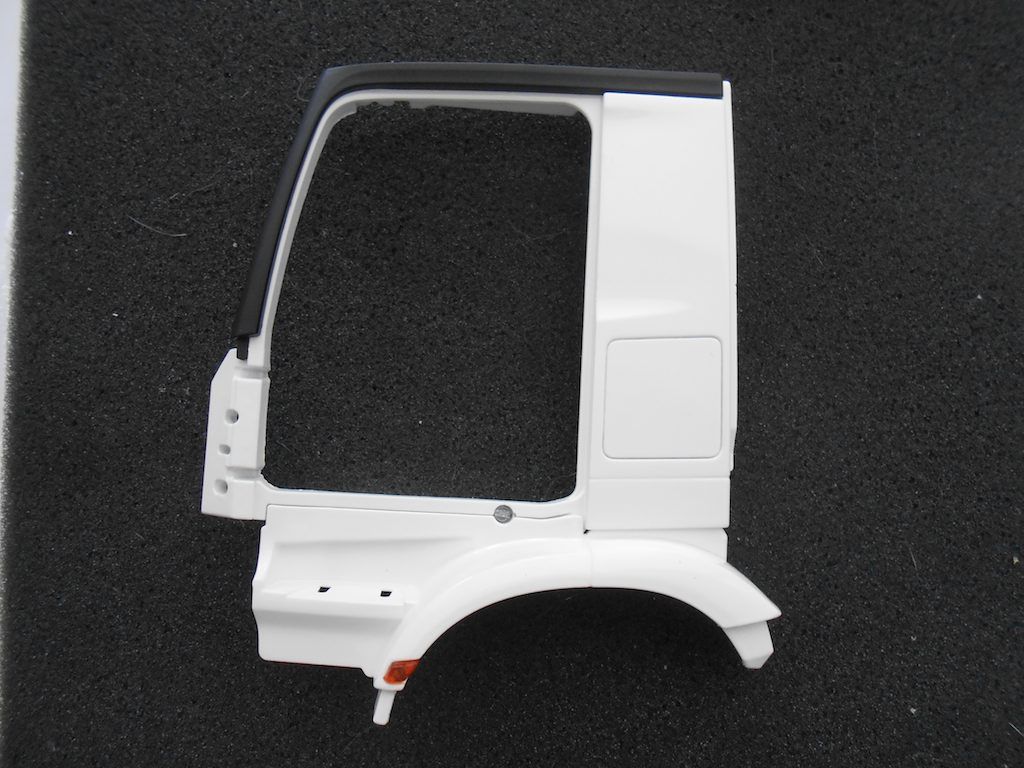 Both sides finished, the right side has the extension on the black plastic for the dead angle mirror. 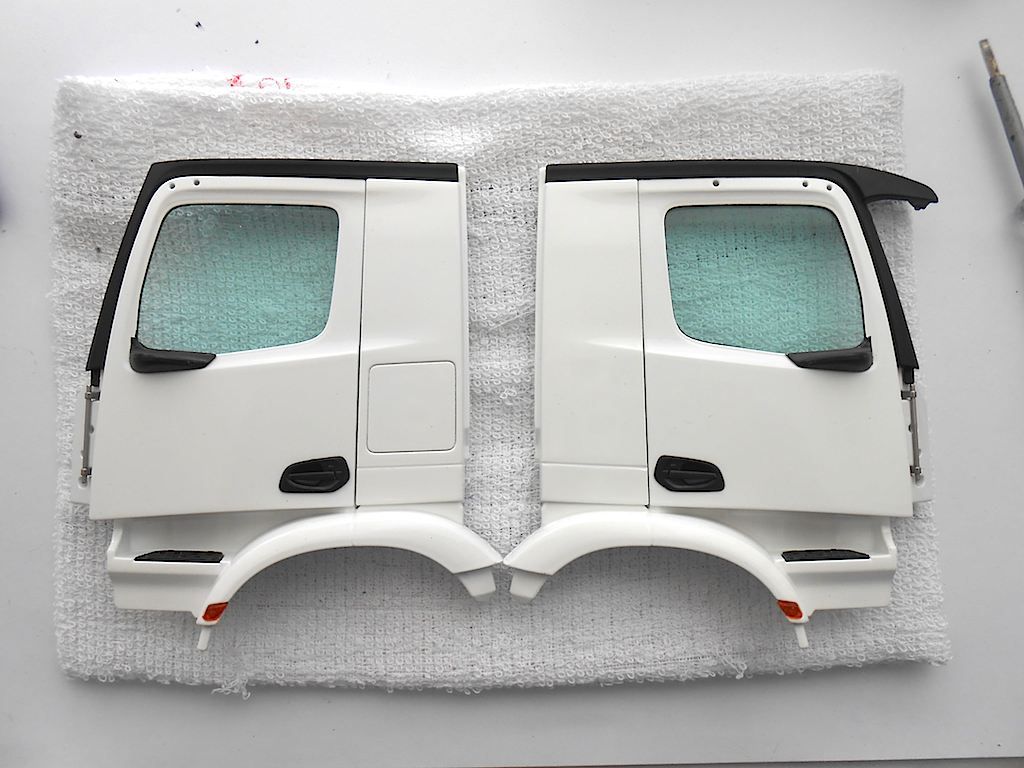 Next step will be the front of the cabin that will hold these two bits together.
__________________
Cheers, Stephan (Rakthi is the one in the avatar) |
|
#89
|
||||
|
||||
|
Oh dear, today was the "comedy of errors"
No clue what happened. Must be getting old. Next step, as said, the front of the cab. All the parts needed. 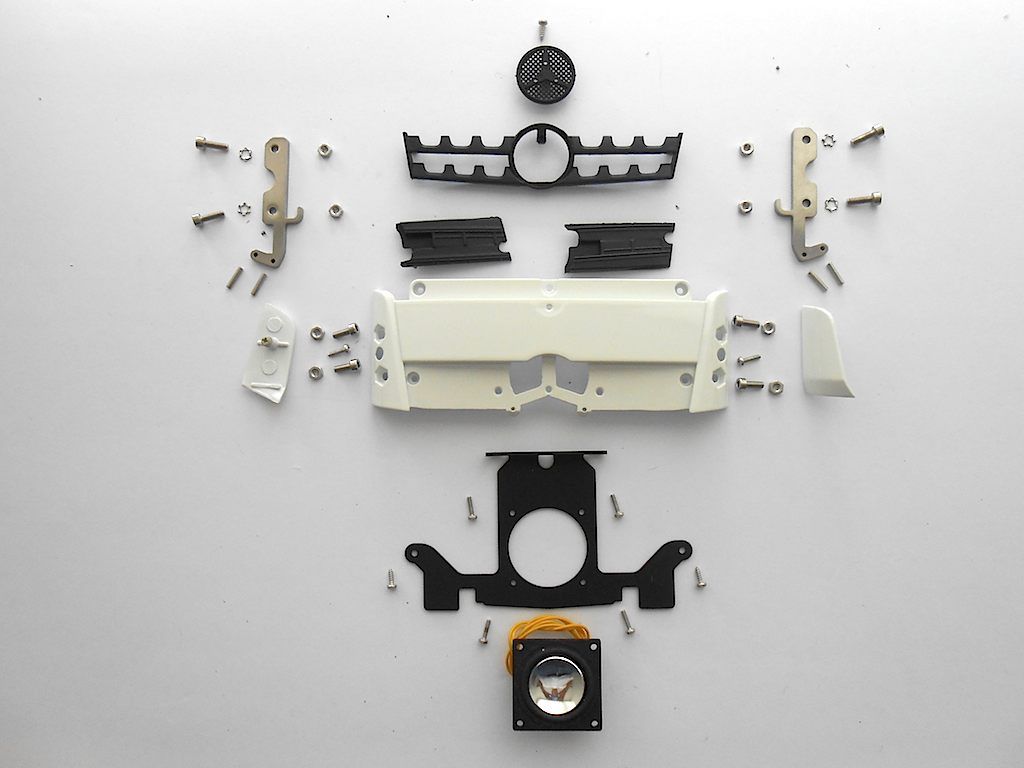 Reverse of main pieces 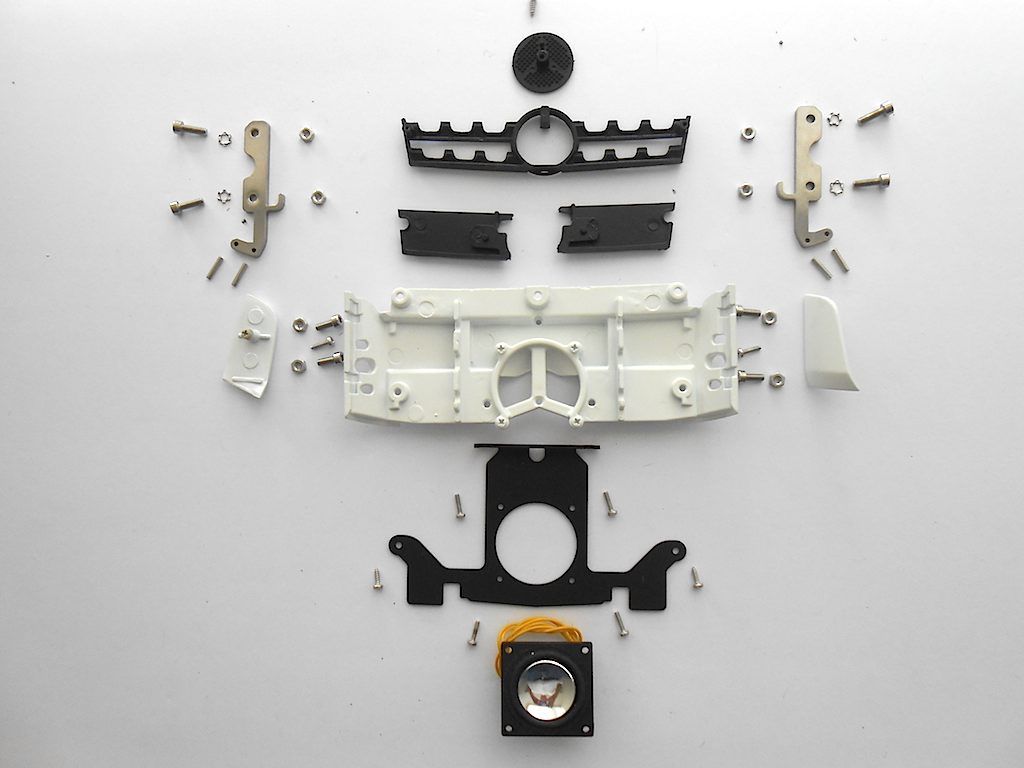 First I started with inserting the pins into the holders. These are the pins that go into the front locking mechanisme on the frame. (you can see the grooves at the top where they flare out a bit) 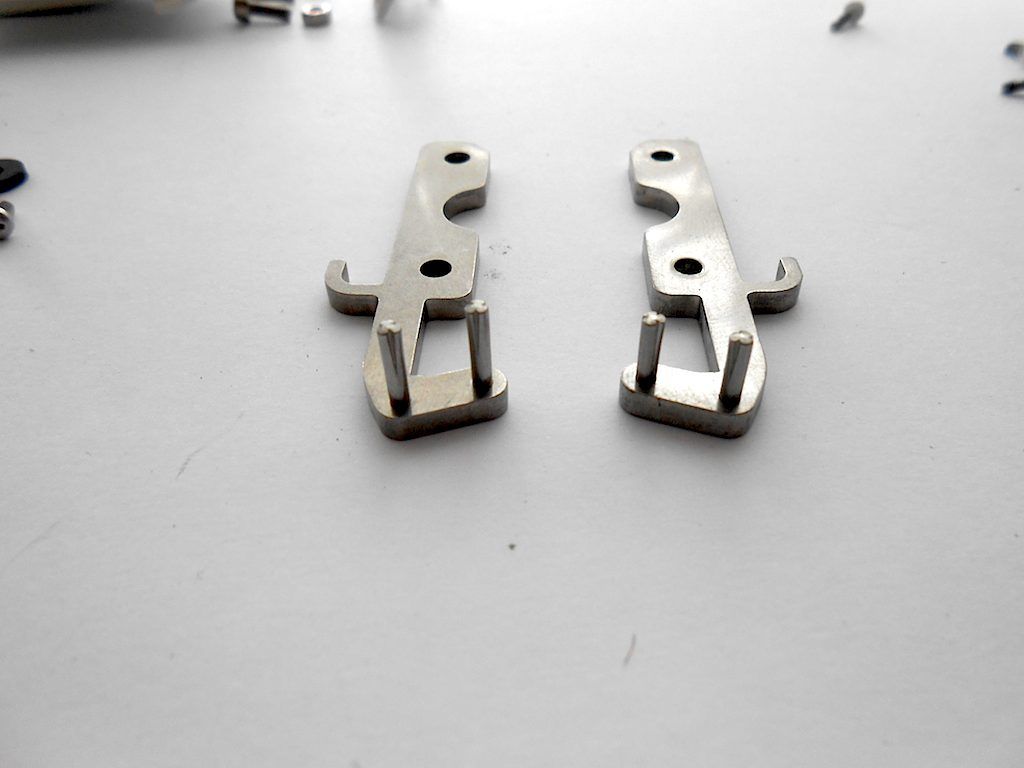 I could barely push them in the holes, so had to run a 2mm drill through them. Then needed a rather heavy hammer to drive them home. Next i installed the black metal piece and the speaker. So far so good. 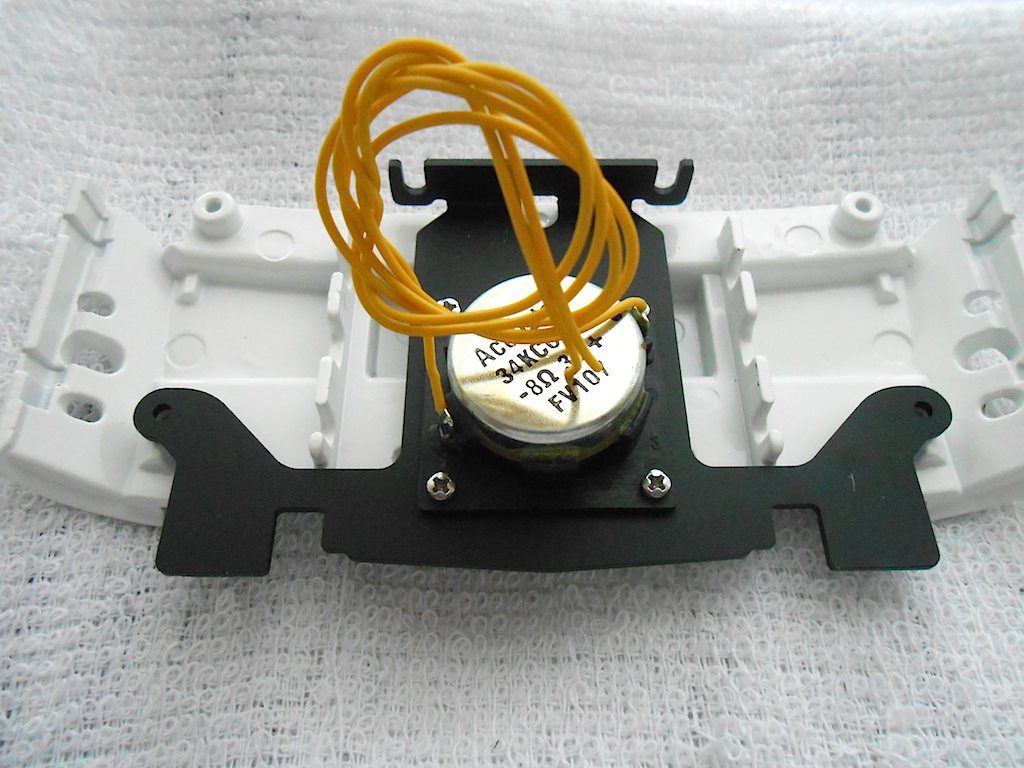 Prepped the 2 stainless steel parts for installation and installed it. (forgot to take picture) 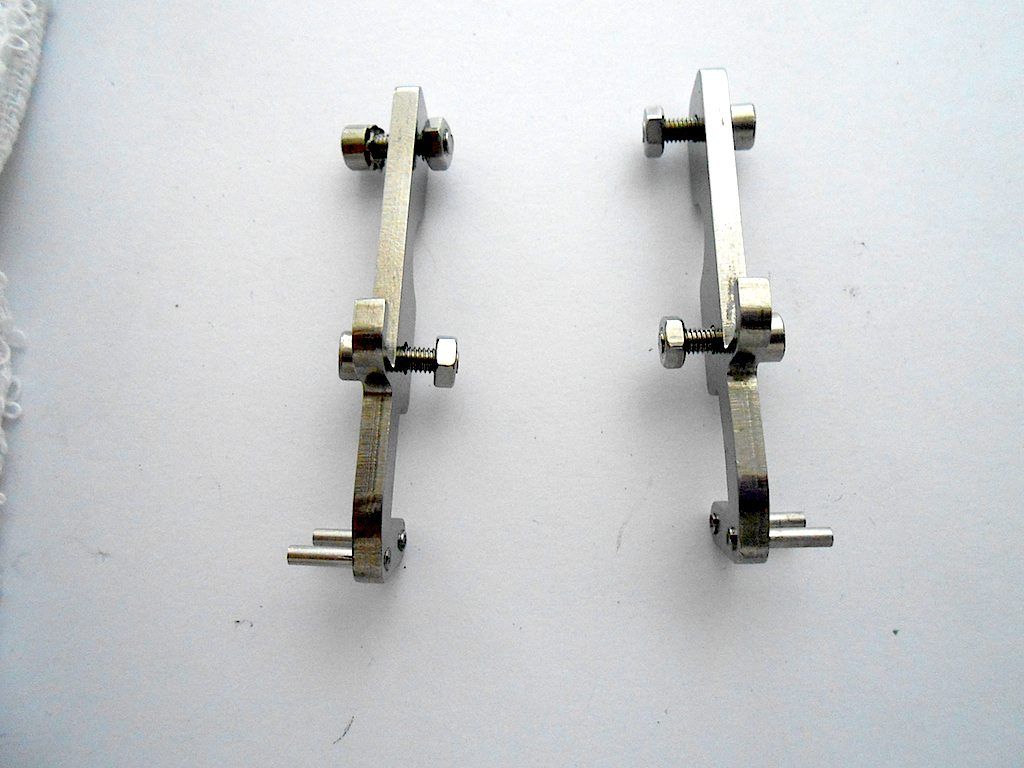 Turned over the part and put the 2 separate black plastic grill bits in place. They will be held down with the next part. 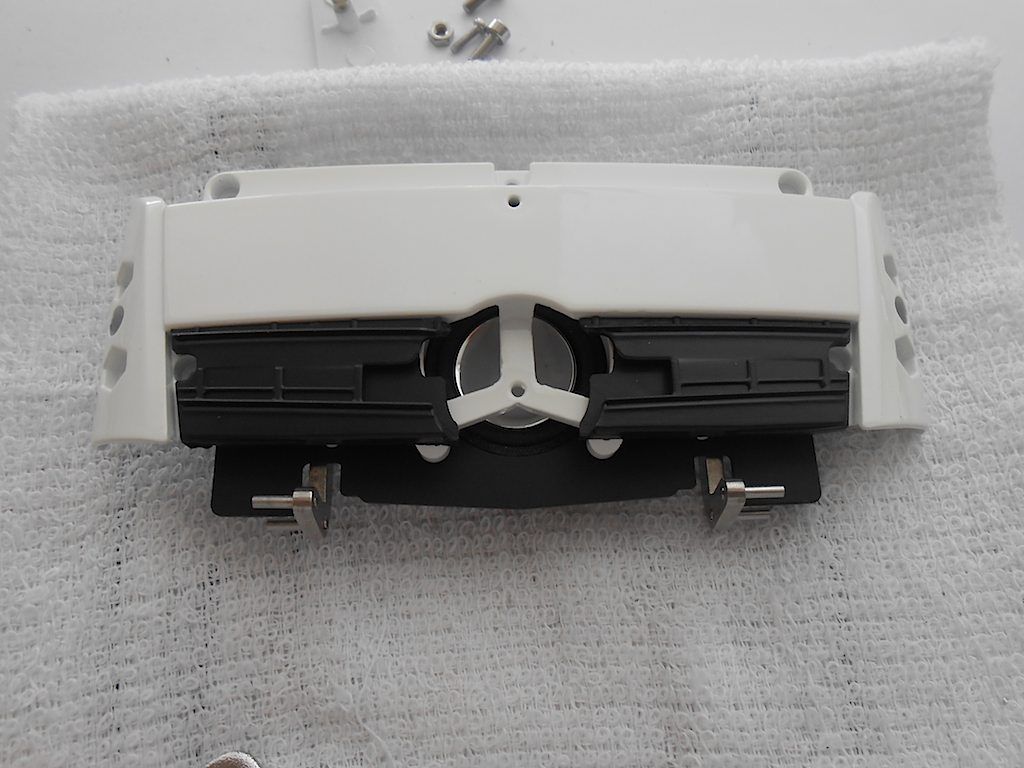 The outside part of the grill goes on top. 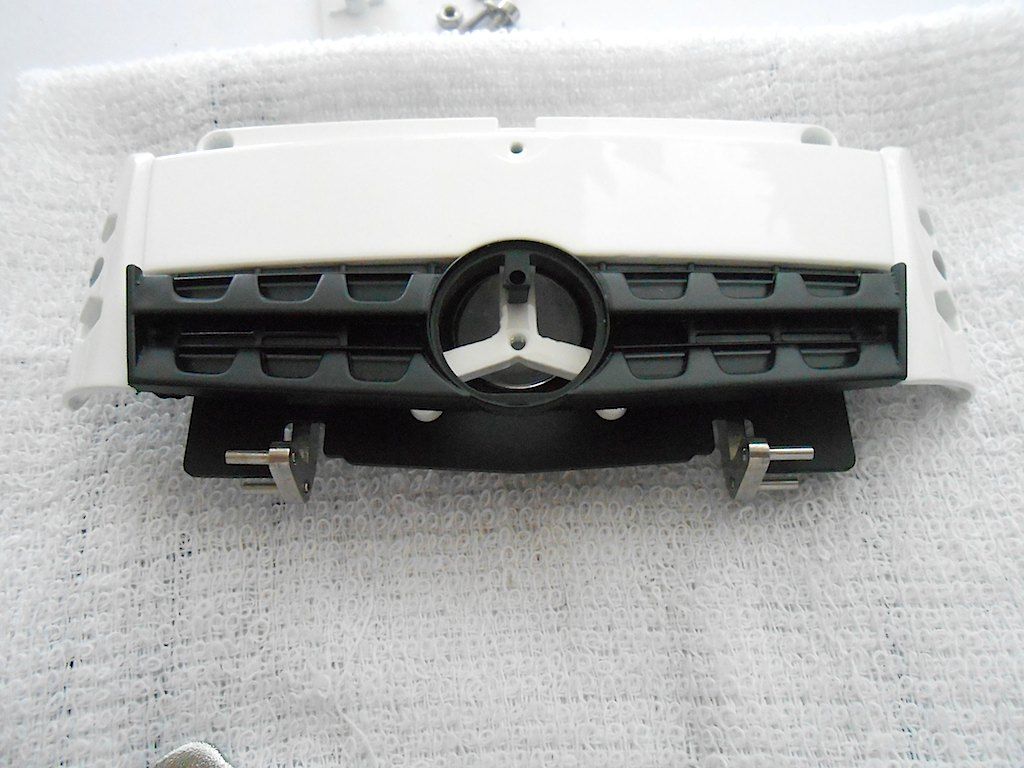 And gets screwed in with 2 self tapping screws from the back on the far left/right side of the black plate holding the speaker. The 2 previously installed stainless parts I had put on the wrong side of ledge they screw on too - and to think I checked a couple of times to make sure  :roll eyes: I only noticed this when I tried to fit it to the locking mechanism. :roll eyes: I only noticed this when I tried to fit it to the locking mechanism.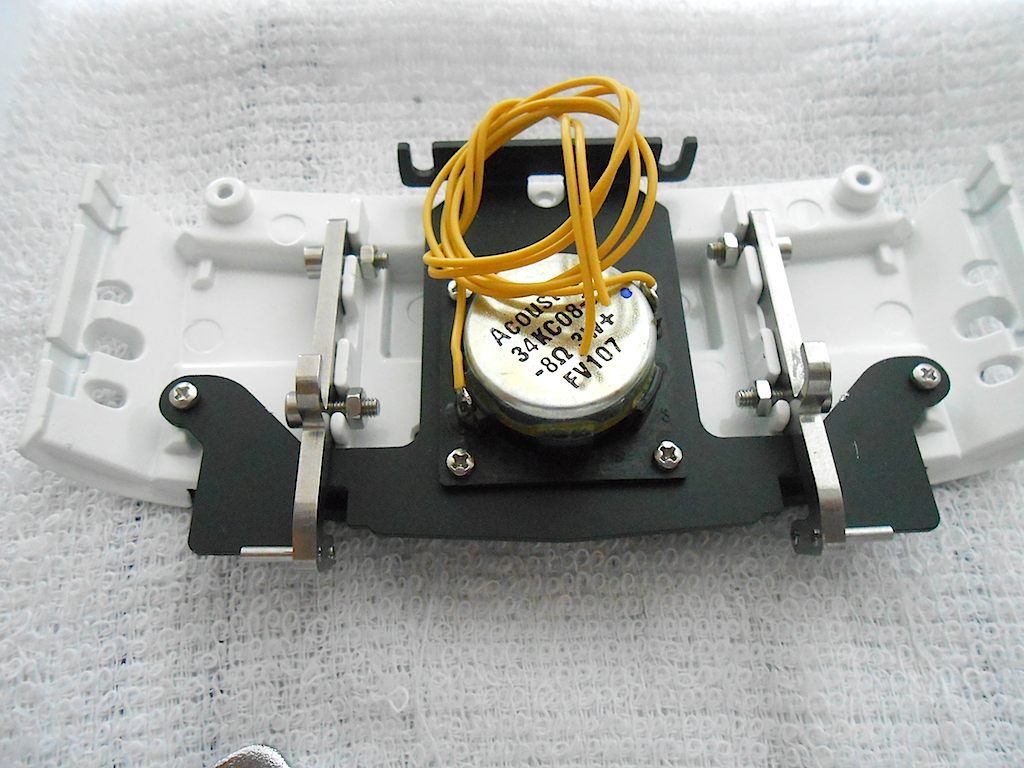 Supposed to look like this ... 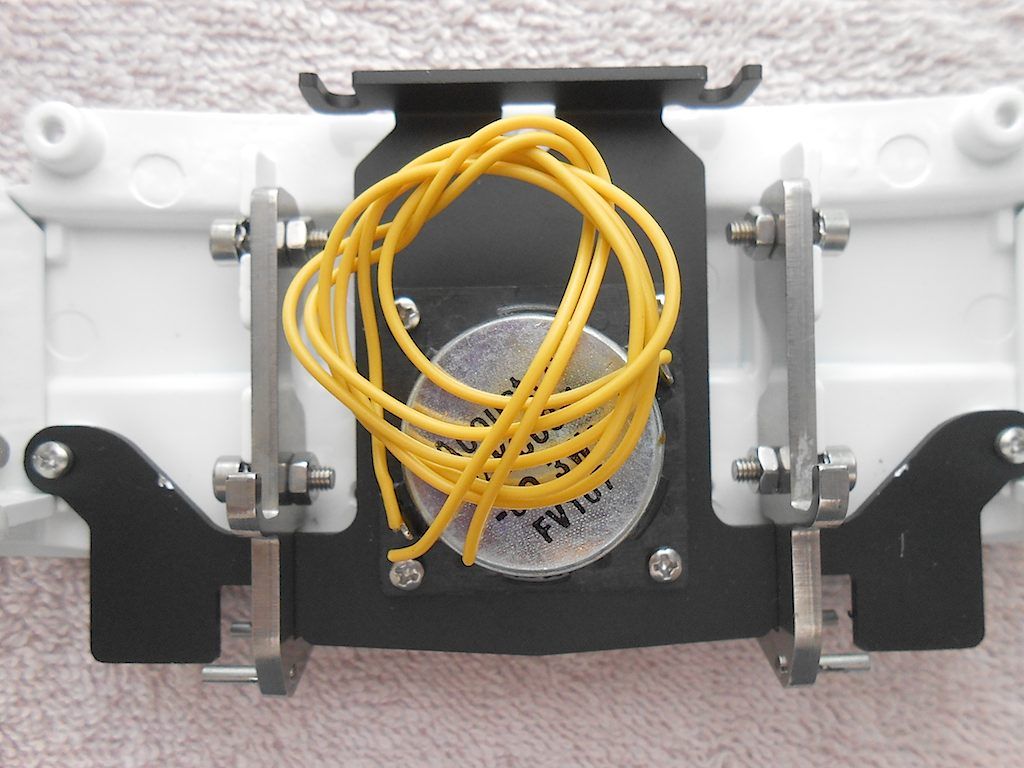 Next I wanted to attach the back of the Mercedes Star ... it screws in from the back ... so had to remove the speaker for access 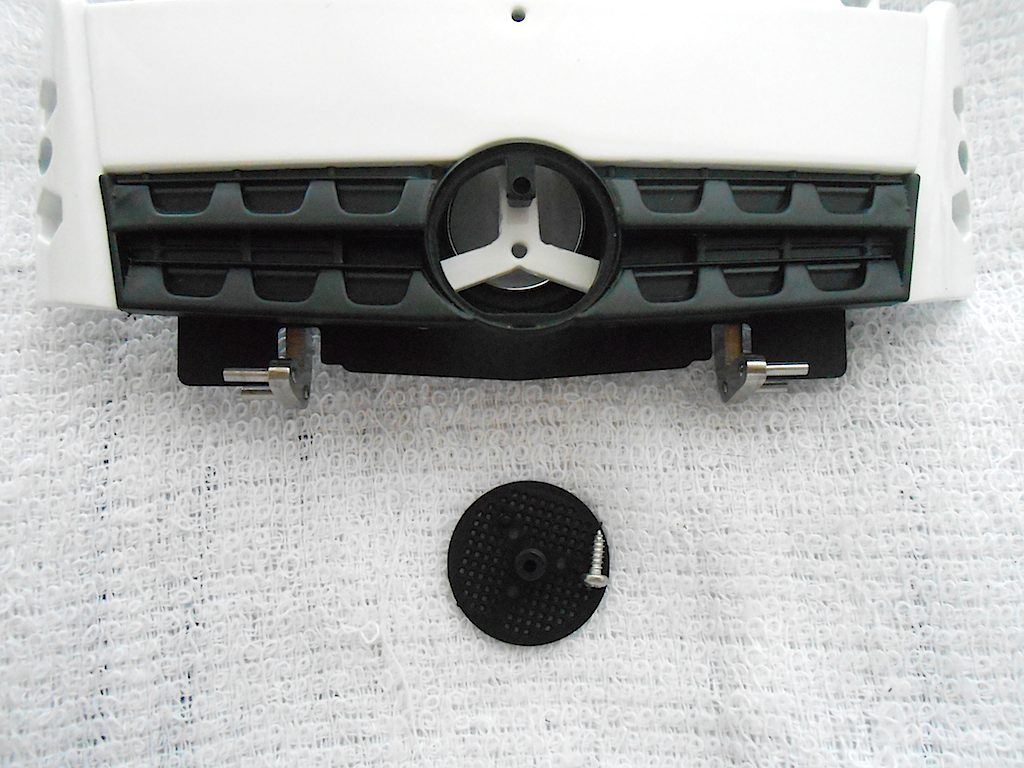 Also almost used the wrong kind of screw ... Needs to be a regular countersunk one. 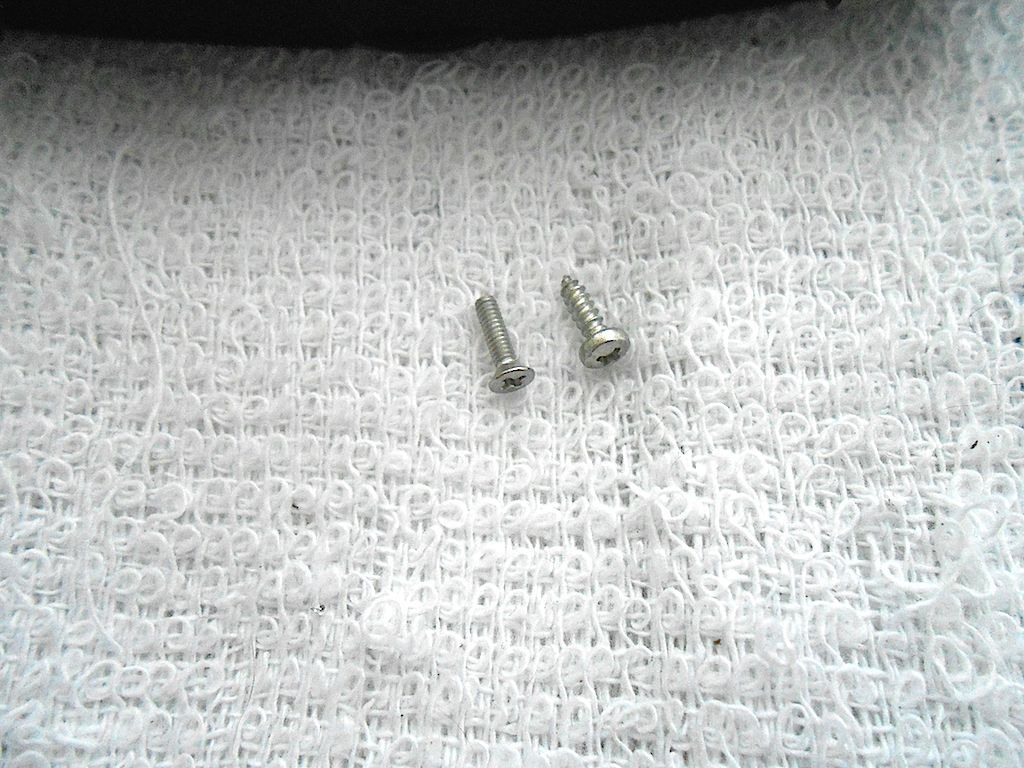 Installed 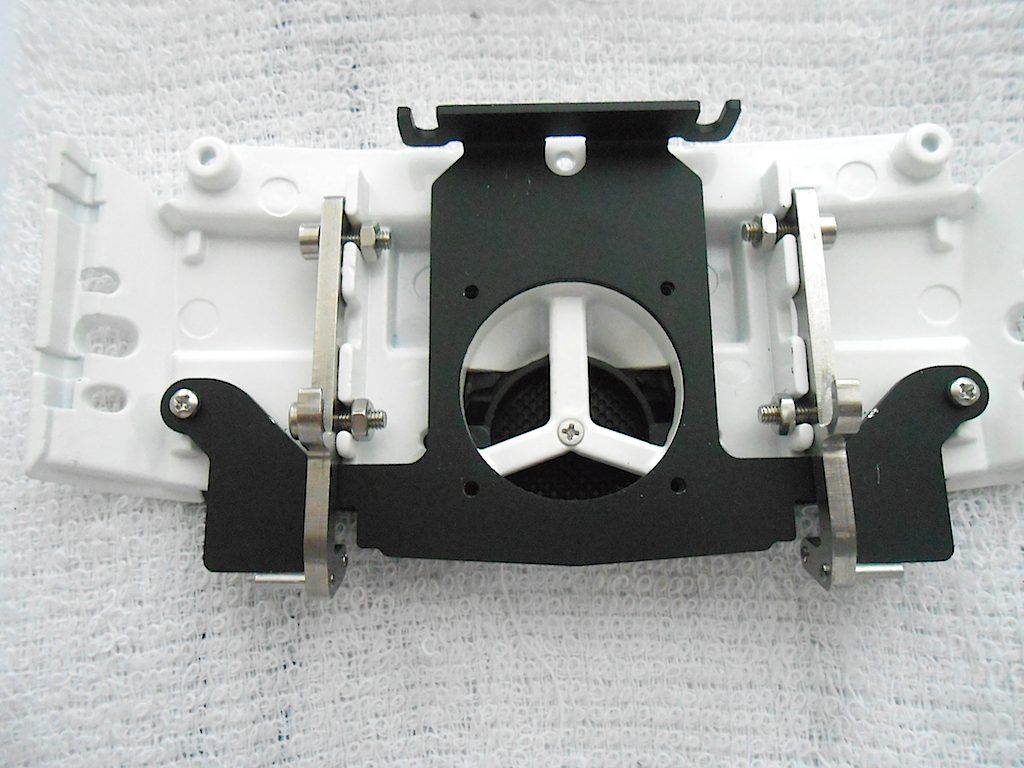 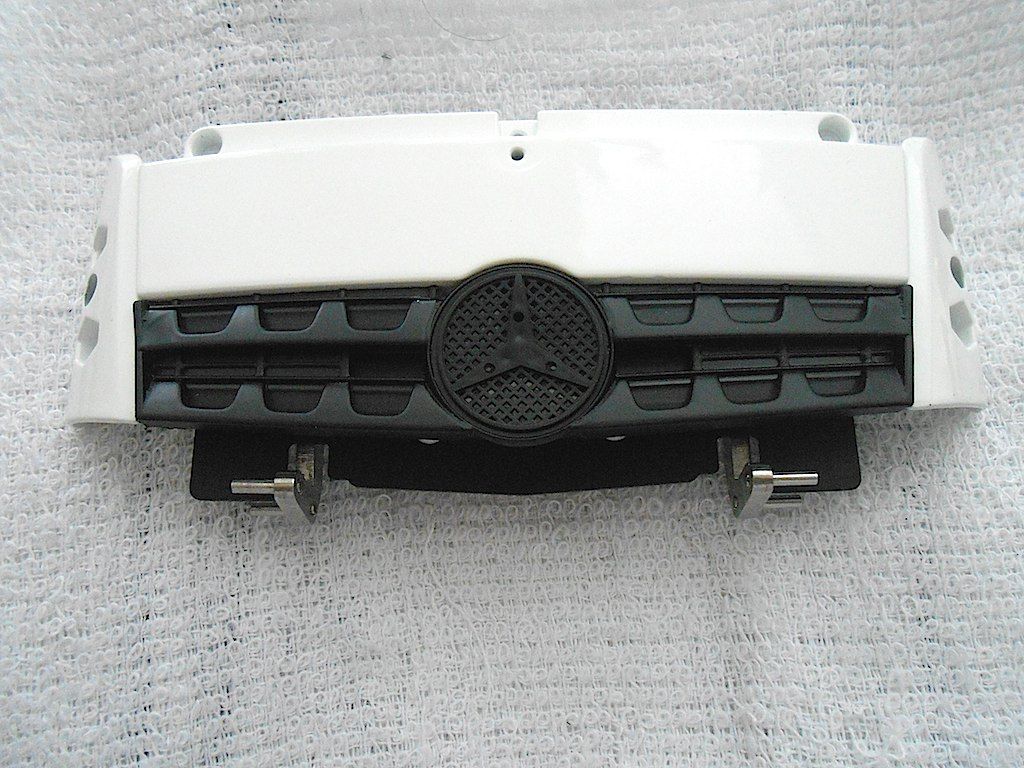 After sorting the stainless supports, test fitted on the front lock 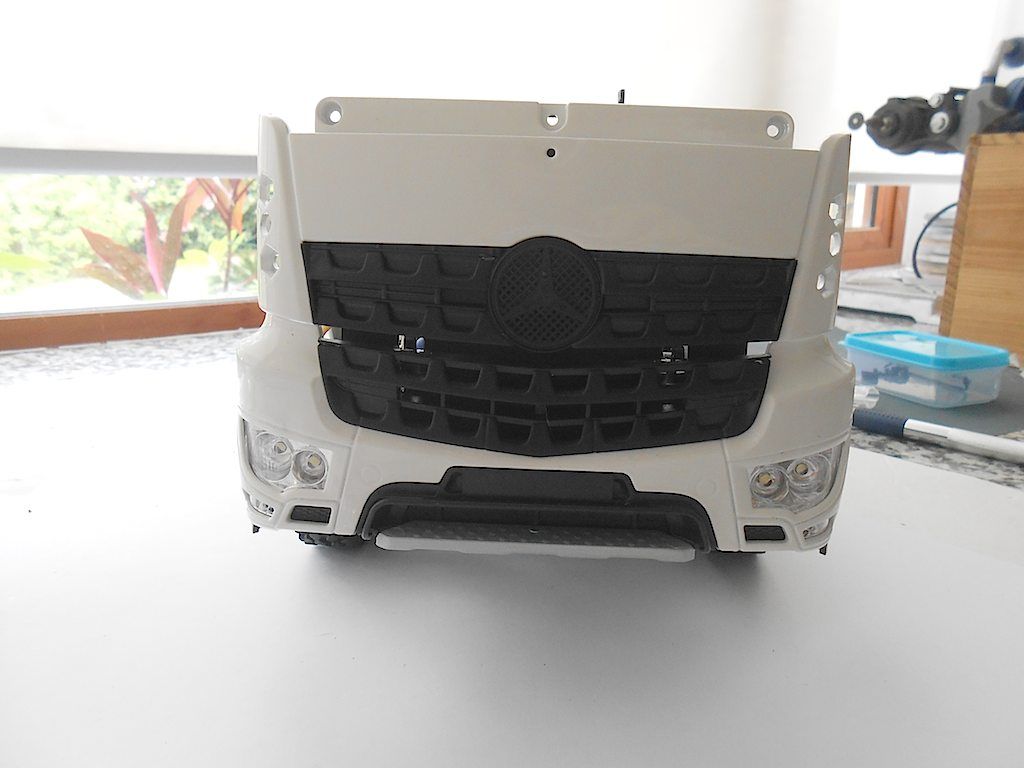 And tilt works fine too 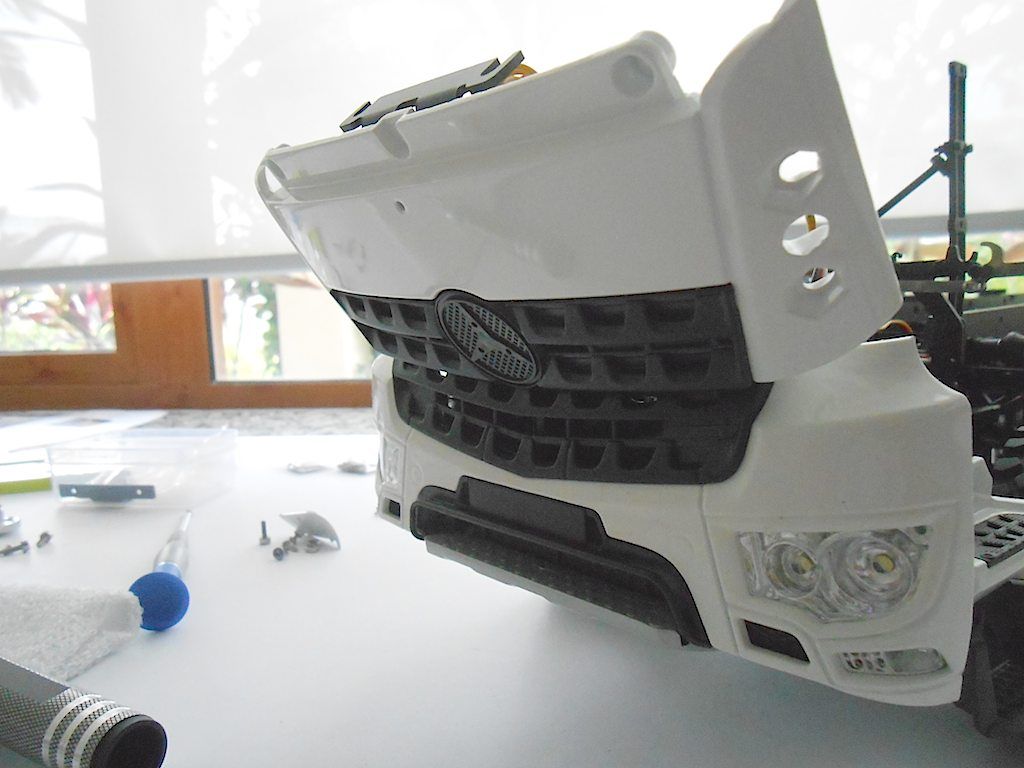 In the above picture you can see the holes that will be used to attach the sides of the cabs. The hexagonal shaped ones will hold the nuts and the middle one is for the little wind guide on the side.
__________________
Cheers, Stephan (Rakthi is the one in the avatar) |
|
#90
|
||||
|
||||
|
Now bolting the sides to the front
The two M3 Allen bolts go through from the inside to the nut on the outside. The whole thing is neatly designed. However ... 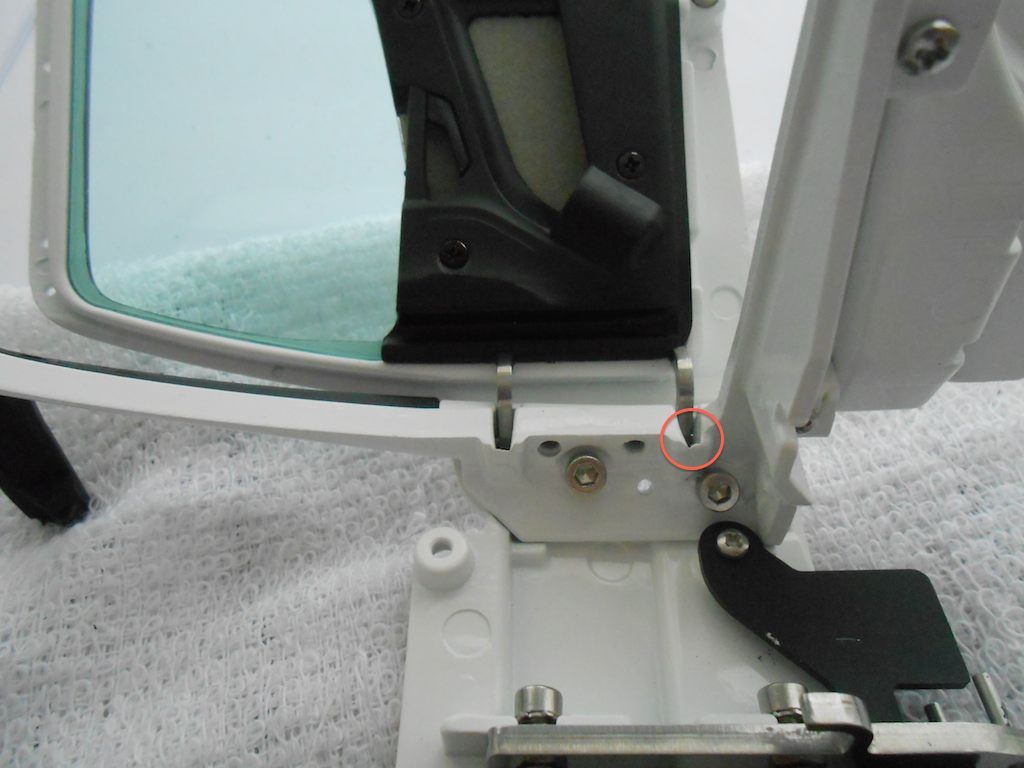 The door has a rather big gap ... Reason is why I have the red circle above. The casting is too rough at the hinges. Will need to be filed down. Apparently this is because this is one of the first batch of Arocs made. The later ones do not have this problem. 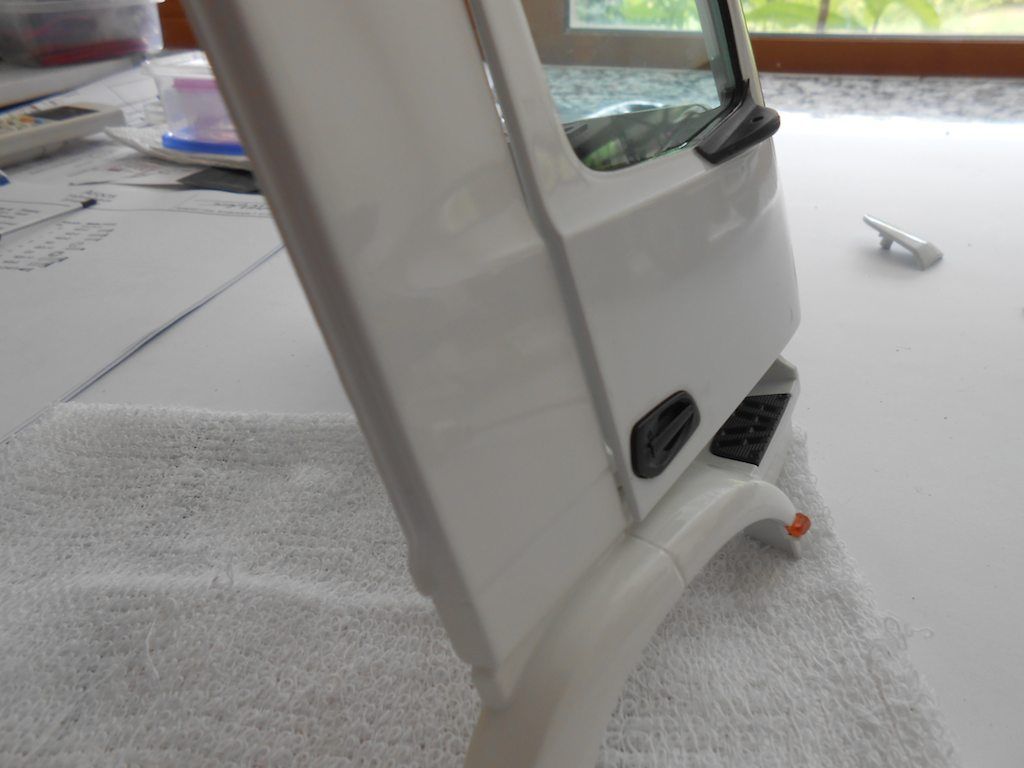 The other side same problem 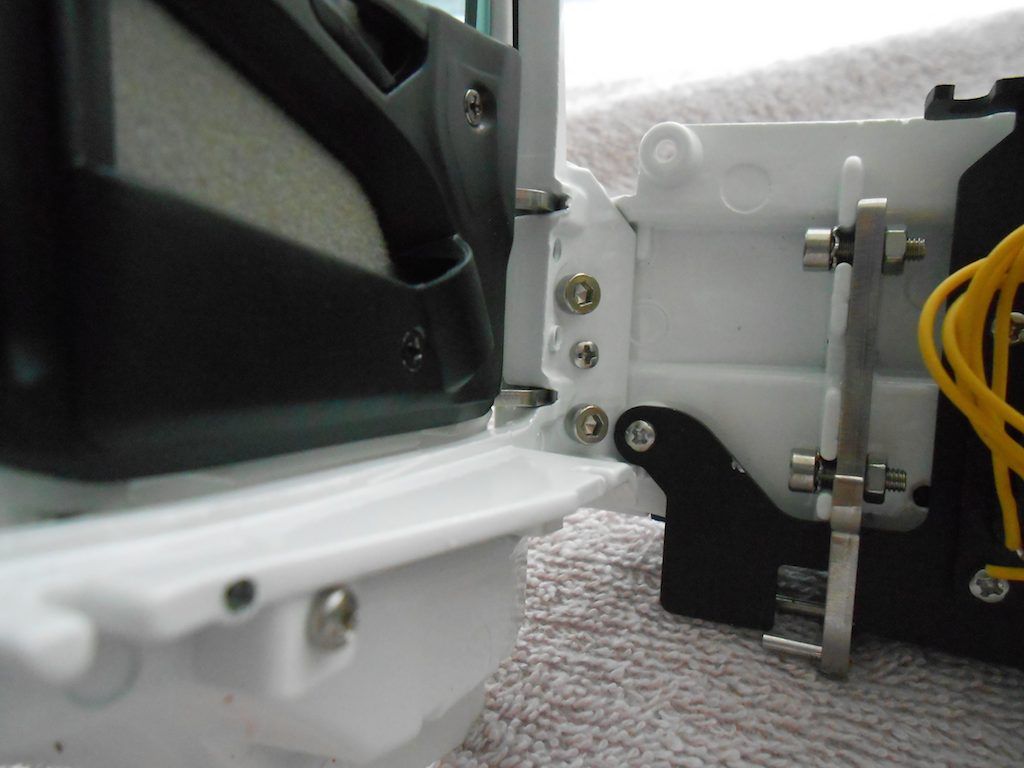 Didn't yet sort it out. Just bolted it up as it was. Will sort it out tomorrow. Both sides installed 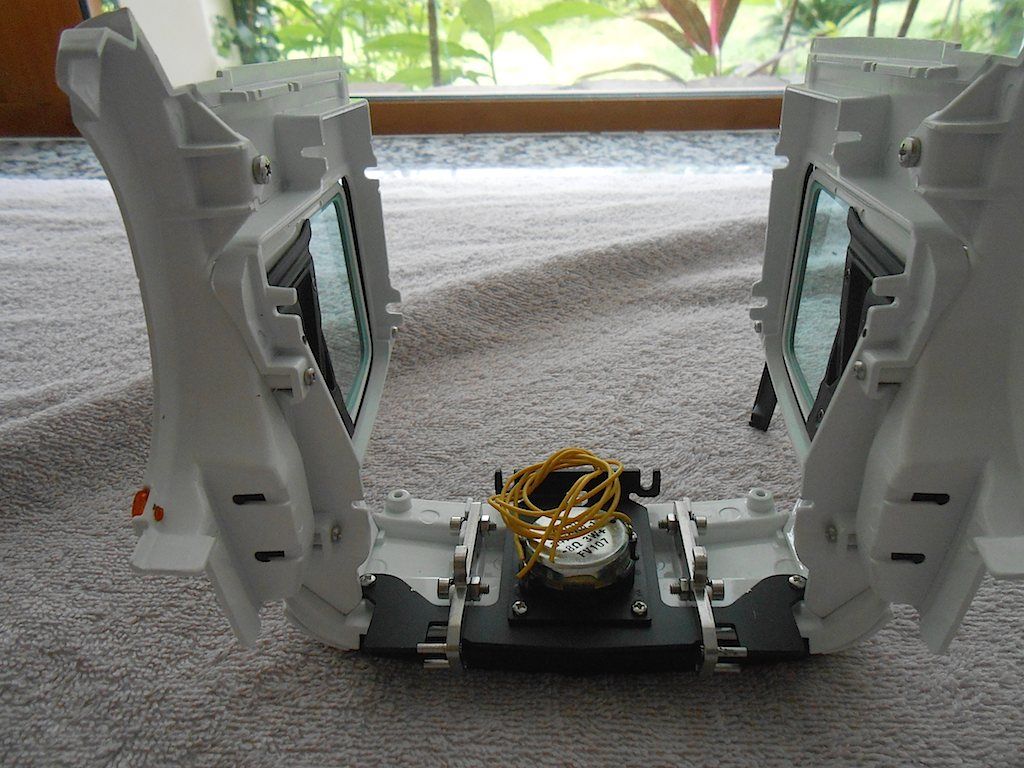 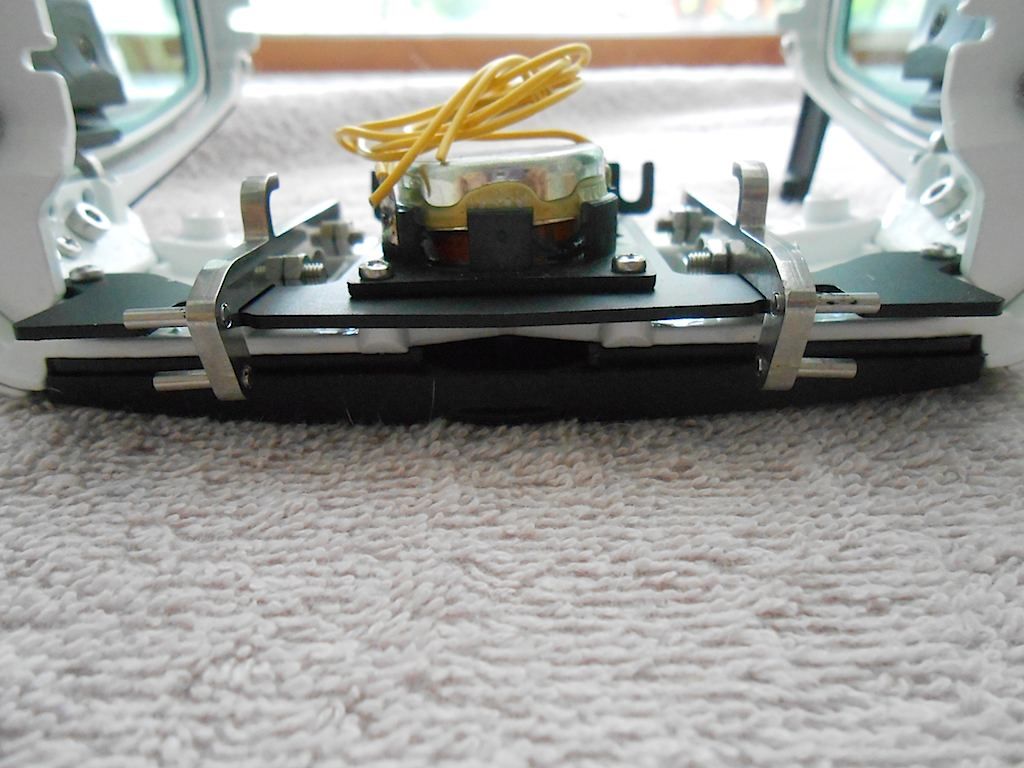 And a quick fit on the frame to get an idea. (Cab leans too far back because it's not properly supported yet) 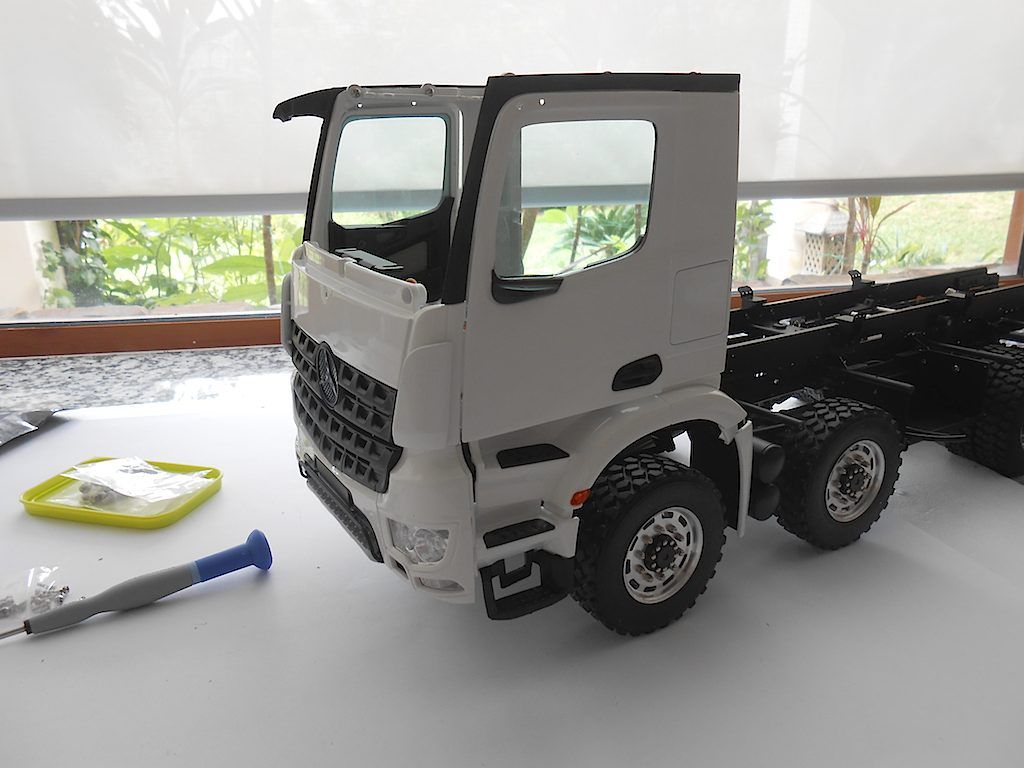 So I guess tomorrow I will be filing away at the door frames
__________________
Cheers, Stephan (Rakthi is the one in the avatar) |
|
#91
|
||||
|
||||
|
Looking fantastic. Some epic engineering on his rig. Shows you where your money is going.
|
|
#92
|
||||
|
||||
|
While the truck does look outstanding and does have some great engineering in it, it should not have all of the design flaws in it for what you pay for the kit. Even for an early production kit, there have been too many small errors to correct for the cost. I know that I would have been pulling my hair out long ago over the many errors that have been corrected in just the chassis and now to find more in the body. This is not acceptable in my eyes.
I am not ripping the truck as it does look great, just the many overlooked design flaws which Scaleart should have addressed before marketing the truck.
__________________
LYNN |
|
#93
|
||||
|
||||
|
Quote:
|
|
#94
|
||||
|
||||
|
Hi Prop, yup, bolting this thing together I keep being impressed by the way things fit together, holes line up etc etc. Someone spend a lot of time thinking about this. When I put the front bumper on the frame I was expecting some problems because you got a lot of parts and assemblies coming together there. The only "problem" was finding the access for the Allen key.
Which brings me to tc1cat's comment ... Yes, the kit is expensive, but I do feel I have gotten value for the money. I have no idea which design flaws caught your attention. I didn't notice any. There were 4 missing hydraulic parts, a couple of wrong sized screws (easily replaced), one ball joint with a wrong thread, missing insulator on rear lights and the sliding hook part of the hydraulic mechanism that turned out to be a bit of rough machining (easily sorted). The missing parts were send out after an email. If I had found the balljoint with the wrong thread and the missing insulators at the same time, they would have included those too. So no problems there. Follow up is fantastic. The raised exhaust not fitting well. Considering this variation is sold without exhaust, it was upon me to sort it out. The raised exhaust is not meant for this model, so can't blame them for it not fitting. For the rest, everything went together as it flawlessly. Some of it required a bit more thinking than others, but most of that was because I didn't strictly follow their guidelines or misinterpreted the technical drawings. Most if not all of the mistakes in this thread are caused by my own inattention or simple stupidity like mounting the supports for the locking mechanism on the wrong side or putting things in the wrong order. The rough casting where the door hinge fits I sorted just now in about 10 minutes. Not a deal breaker for me. Neither is having to run a 2mm drill through a hole to make life easier, shortening a screw a tad or remove some paint to make something fit. All I can say is that 99.99% of the parts fit perfectly and the 0.01% is an easy fix. Just looking at the workmanship and engineering of the parts is a pleasure. Would I buy one again (given enough disposable money)? No question about it. This kit is an absolute pleasure to assemble. Now off to locate my soldering stuff ... next step is the roof and for that I need some wiring sorted out. Will post the pics of the fitting of the doors in the next update. Cheers.
__________________
Cheers, Stephan (Rakthi is the one in the avatar) |
|
#95
|
||||
|
||||
|
Stephan,
Design flaws are anything that does not fit correctly the FIRST time. Not after you modify a part or screw to get things to fit. This is something that most of us expect with a Tamiya kit due to their use of plastic parts which are known to bend during production. The needed filing of the door hinge slots is the last one you showed us. Lack of fore thought on Scalearts part to allow for paint/powdercoat thickness is a design flaw to me. Having to modify a bolt head to get a part in place is a design flaw. You have had to do this more than once if I remember correctly. You saying that most of the little things that you had to fix are not deal breakers is fine BUT you should not have to do this in a Scaleart vehicle. Scalearts attention to detail should make for a kit that goes together flawlessly. Their use of longer than necessary bolts that you need to shorten during assembly is a cost saver for them which should not be necessary for a kit of this expense. Even the most inexpensive Tamiya kit uses correct length screws and bolts. While I haven't looked at the frame rails in your latest pics, they looked like someone's test rails from 2 or 3 trucks with all of the holes in them. Hopefully, these holes have all been used by now. If not, this is a flaw for me plus it weakens the frame if not used. I know that you mentioned that these rails are used for several different trucks but give me a break. Extra holes are still unacceptable in a frame unless you remove a part from a stock frame rail. Please remember that this in my opinion and not someone elses. With all of this said- would I get a Scaleart vehicle--- YES!!! But probably not as a kit unless it was the only way to get it. Their attention to detail would be the reason. Have to win the lottery though to be able to purchase one  
__________________
LYNN |
|
#96
|
||||
|
||||
|
Concidering kits like this and Capo are 10 times more intricate then your standard rc kits. The amount of deficiencies are on par. If a standard kit takes 100 steps to build and you find one problem, no one says anything. A 1000 steps for something like this and you find 10 small issues and people seem to only see the bad. Or think that for something that costs so much it should be perfect. It all seems pretty relative to me though. **** ive built most of RC4WD's offerings for instance. And the problems with their models well exceed any ive encountered building Capo's. Given the choice to have 4 or 5 run of the mill scalers from the mainstream manufacturers, or just one super scale offering from Capo or Scaleart, or Afv or whoever. I'll go with the super scale offering every time.
|
|
#97
|
||||
|
||||
|
Hi tc1cat, well if you want to see it that way ... About the screws I trimmed down. The ones from the under run protection can be installed without trimming. But that means you have to paint the little parts separately. Easier to grind a bit of the screws. The other one, where I had some trouble with the transfer case, well, shouldn't have moved the support of the oil tank one opening over so its fastener came in te way.
Allowing paint thickness? Considering the size of the parts and the fact that it is a human doing the painting, would be asking a bit much I think. The openings in the frame ... yeah, actually to be true to scale, they need even more of those. Might not be like that with US trucks, but EU trucks all have lots of holes in their frames. Have a look at the Mercedes-Benz UK website. And the screws that need shortening ... there are probably more screws in the frame than in your run of the mill kit. Why add another €100 to an already pricey kit if all it takes is 15 minutes to shorten them. We can keep arguing about this till the cows come home.  Cheers! Stephan
__________________
Cheers, Stephan (Rakthi is the one in the avatar) |
|
#98
|
||||
|
||||
|
Didn't get much done today ... soldering is not my strong point.
Since I was doing it, did the 2 LEDs for the indicators as well as the position lights which will go in the roof of the cabine. They supply ample wiring and shrink tubing 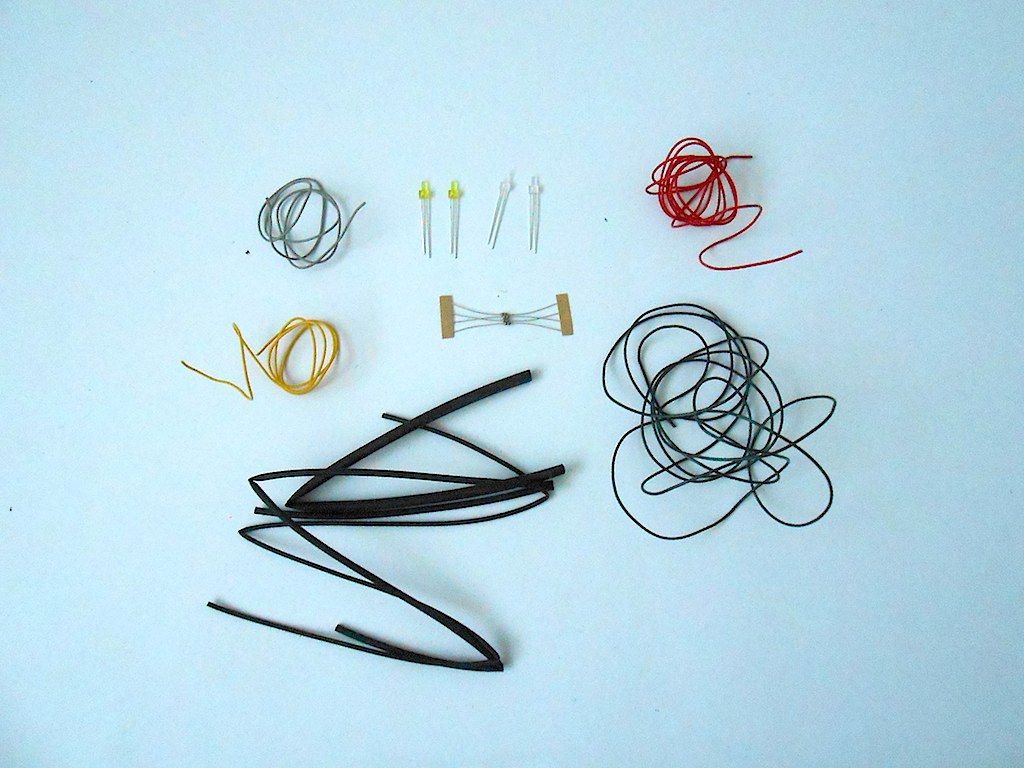 The resistors are not needed because I use ScaleART's bus system. Finished product: 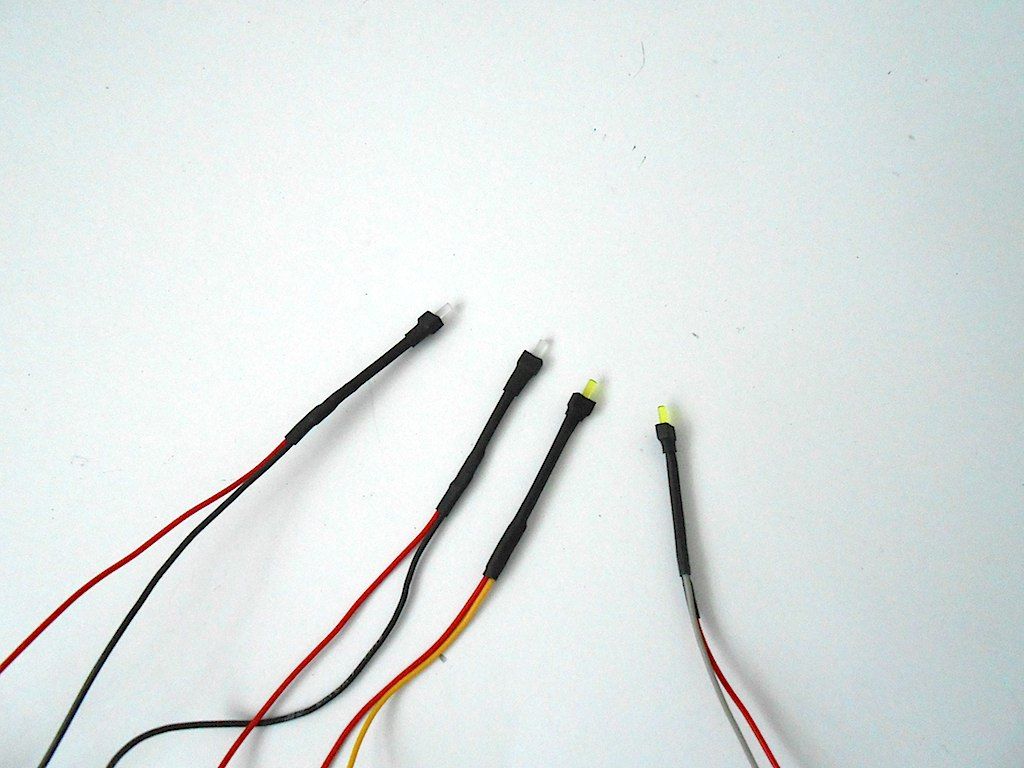 After this I painted the outside of the white LEDs black so only the tip has the light come through. (A tip from Christian - aka Newcomer_2). Then couldn't continue with the roof because I had to wait for the paint to dry. Didn't take pics during soldering. basically, solder red wire to long + of LED. 2 mm shrink tube, then solder black one to the short - of LED, 3mm shrink tubing to go over both, followed by 6mm shrink tubing over the LED. The indicators get a yellow and grey wire instead of a black one so you can keep them apart. Here the pics of the doors after the filing (as luck would have it, I have a file of exactly the right width): 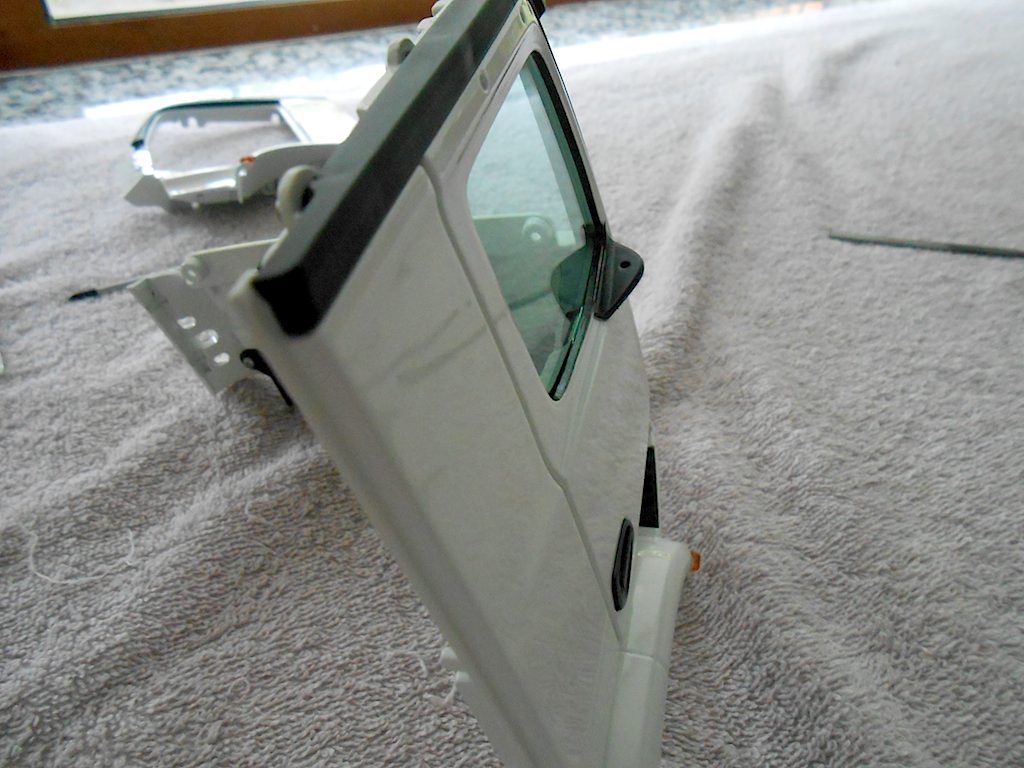 While I had it all apart some pics of how it fits together. This is really thought out. 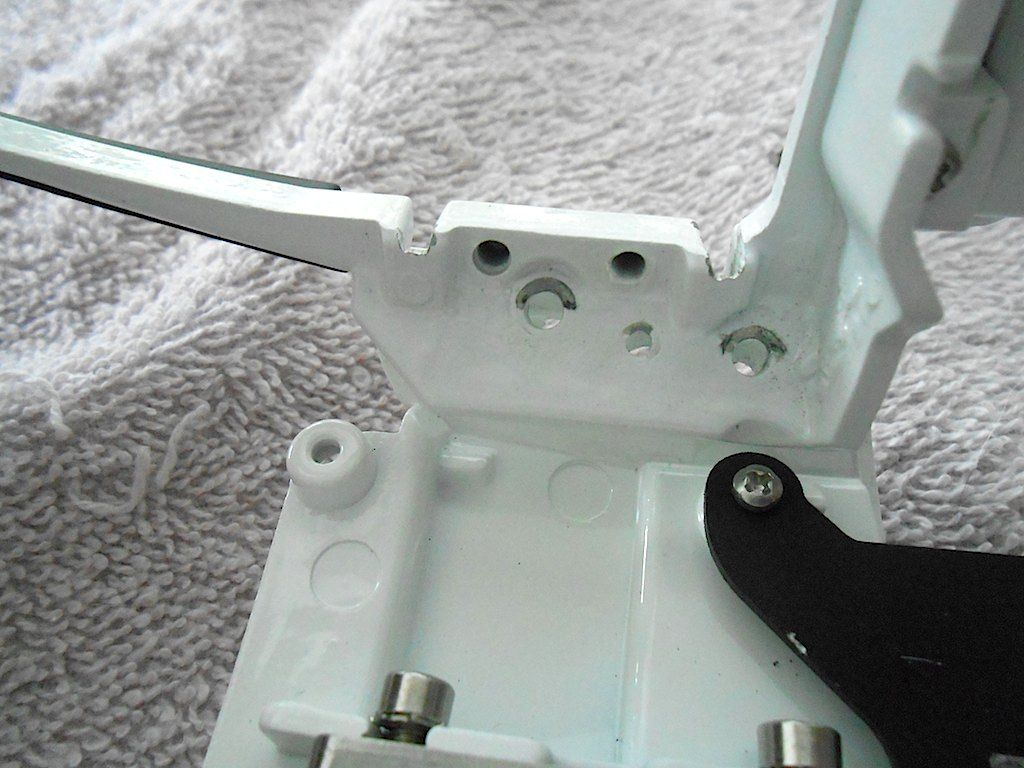 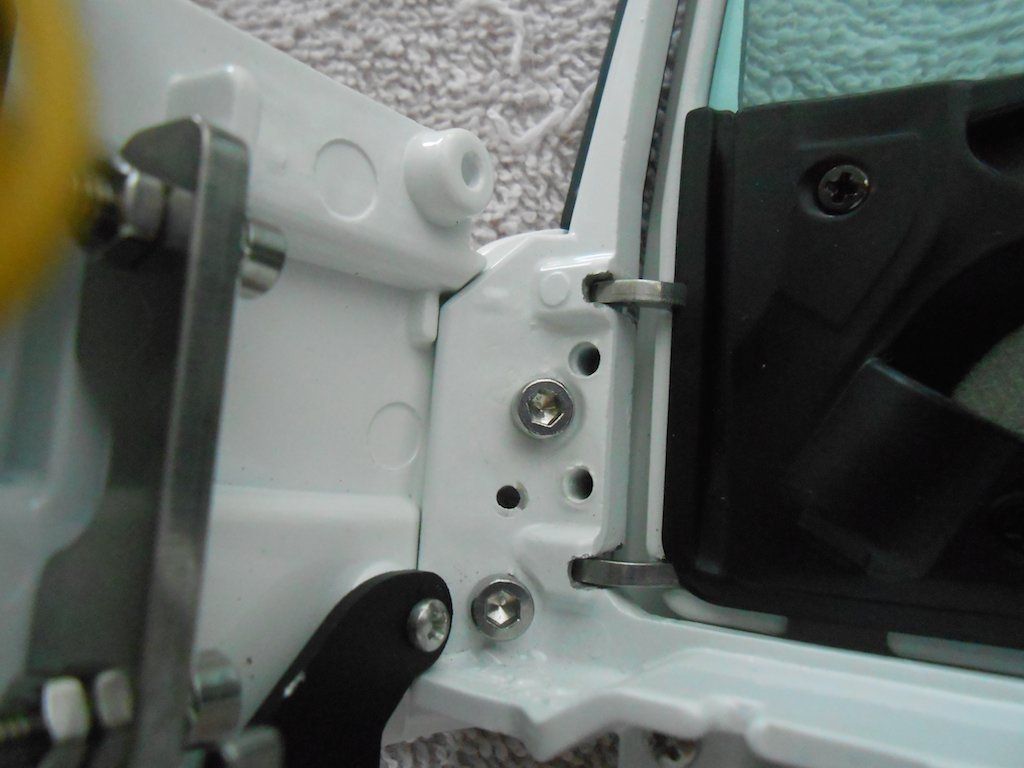 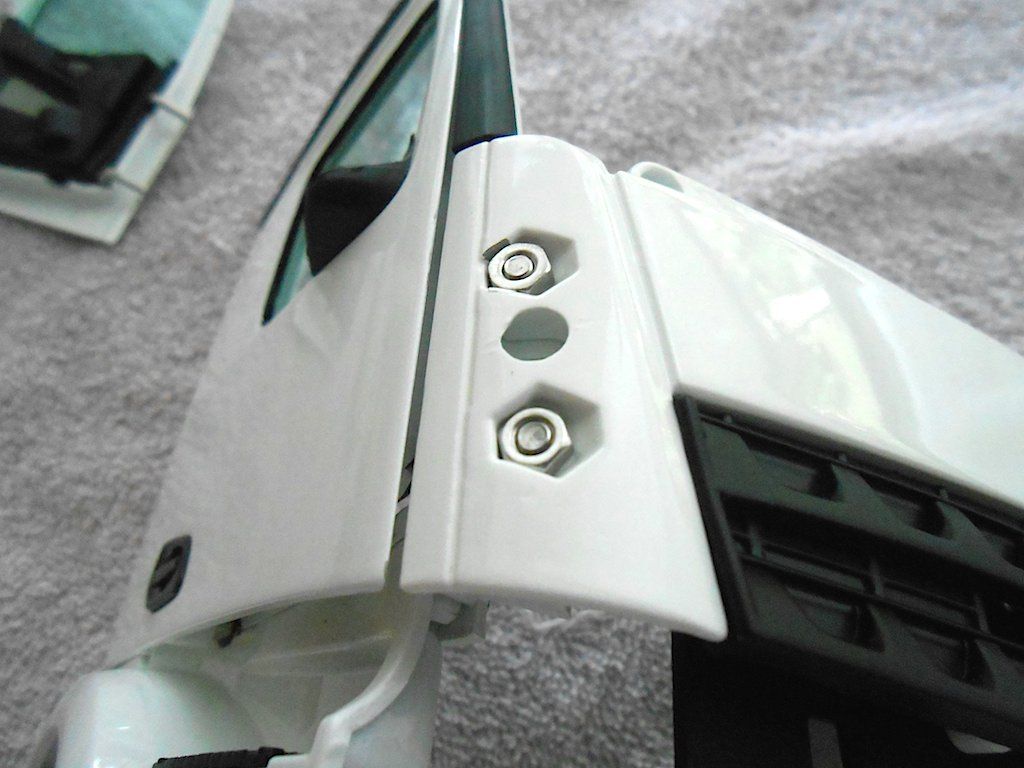 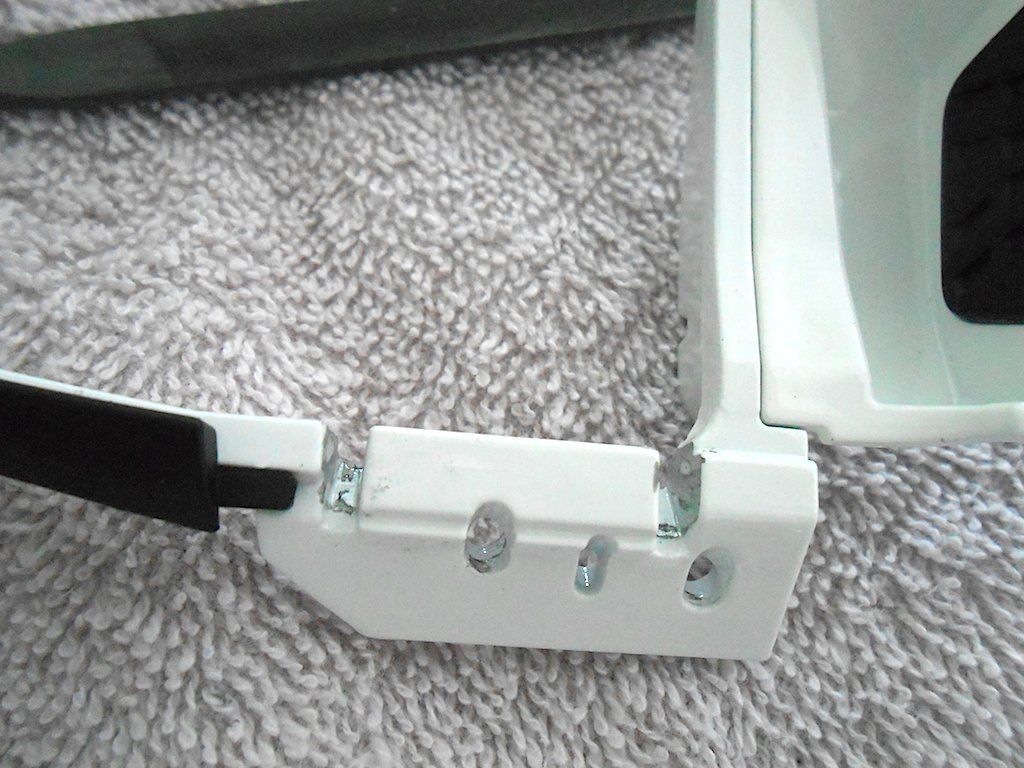 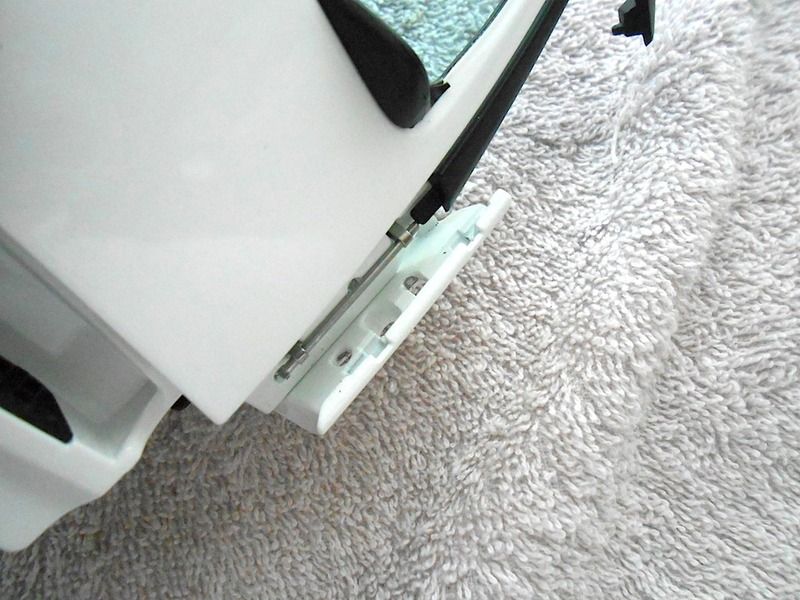 Next up the roof and the sun vizor ...
__________________
Cheers, Stephan (Rakthi is the one in the avatar) |
|
#99
|
|||
|
|||
|
nice updates you do, didn't think it was that long ago i took a look last, but **** there has happened a lot, keep up the good work!
__________________
René ____________________________________________ To view links or images in signatures your post count must be 10 or greater. You currently have 0 posts. To view links or images in signatures your post count must be 10 or greater. You currently have 0 posts. To view links or images in signatures your post count must be 10 or greater. You currently have 0 posts. ____________________________________________ |
|
#100
|
|||
|
|||
|
I can't even imagine how much this kit costs,, don't get me wrong,, its pretty amazing looking but , wow
|
 |
| Tags |
| 8x8, arocs, scaleart |
| Currently Active Users Viewing This Thread: 4 (0 members and 4 guests) | |
| Thread Tools | |
| Display Modes | |
|
|