
 |
|
|
|
#1
|
||||
|
||||
|
That gear stock material is really nice to machine. You may want to put a center hole and use the tail stock for better support. You should be able to hog more off faster.
As far as taking all day; It's a hobby you aren't making any money and its the fun of doing this. I would go with the one piece gear and shaft. Less worry, besides by the time you make a shaft key it bore the gear and broach you will have way more time than just turning the gear stock. |
|
#2
|
||||
|
||||
|
Forgot to mention, More feed may push the gear into your collet. Do you have a stop in it?
|
|
#3
|
||||
|
||||
|
No stop, but I did center hole and live center. That was one thing I was worried about, pushing the shaft. I turned a piece of alum and cut it into three for a soft jaw. Clamped down pretty good but still having the teeth there. Have been checking it a couple times.
Yeah, I've got more time than anything  . Thanks Steve, see you in a couple weeks? . Thanks Steve, see you in a couple weeks?
__________________
Always wasting money, as the wife says. To view links or images in signatures your post count must be 10 or greater. You currently have 0 posts. |
|
#4
|
||||
|
||||
|
Quote:
 We have been very busy here at work with not much time for play. We have been very busy here at work with not much time for play.
|
|
#5
|
||||
|
||||
|
Yeah I need to start getting stuff around for the show also. Messed up my shoulder with work stuff, can't lift above my head so hand cranking wheels at home has been therapy
 . You are right about that gear stock being easy to cut. I guess I base my steel experience on hardware store stock. Doesn't cut well, and never a good finish. Last project I got steel ordered, easy to machine kind. Slowly learning to get the correct materials to make the job easier. That shaft wasn't bad to cut . You are right about that gear stock being easy to cut. I guess I base my steel experience on hardware store stock. Doesn't cut well, and never a good finish. Last project I got steel ordered, easy to machine kind. Slowly learning to get the correct materials to make the job easier. That shaft wasn't bad to cut  my inexperience showing again my inexperience showing again . . 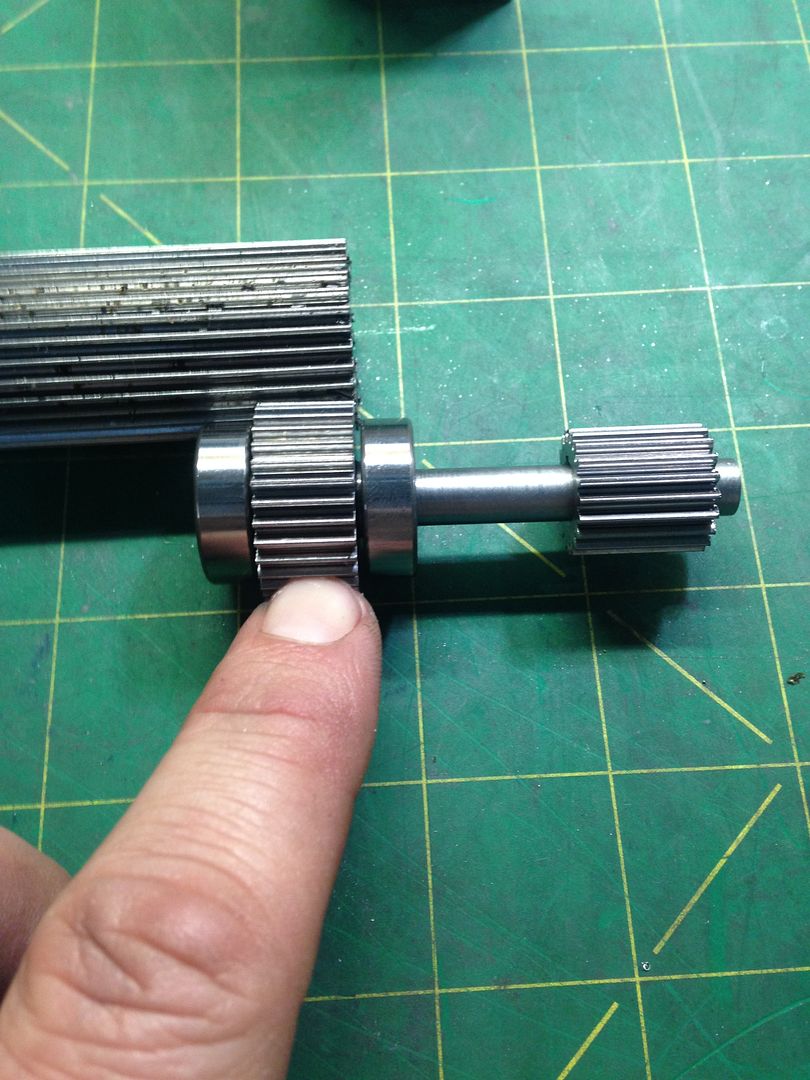 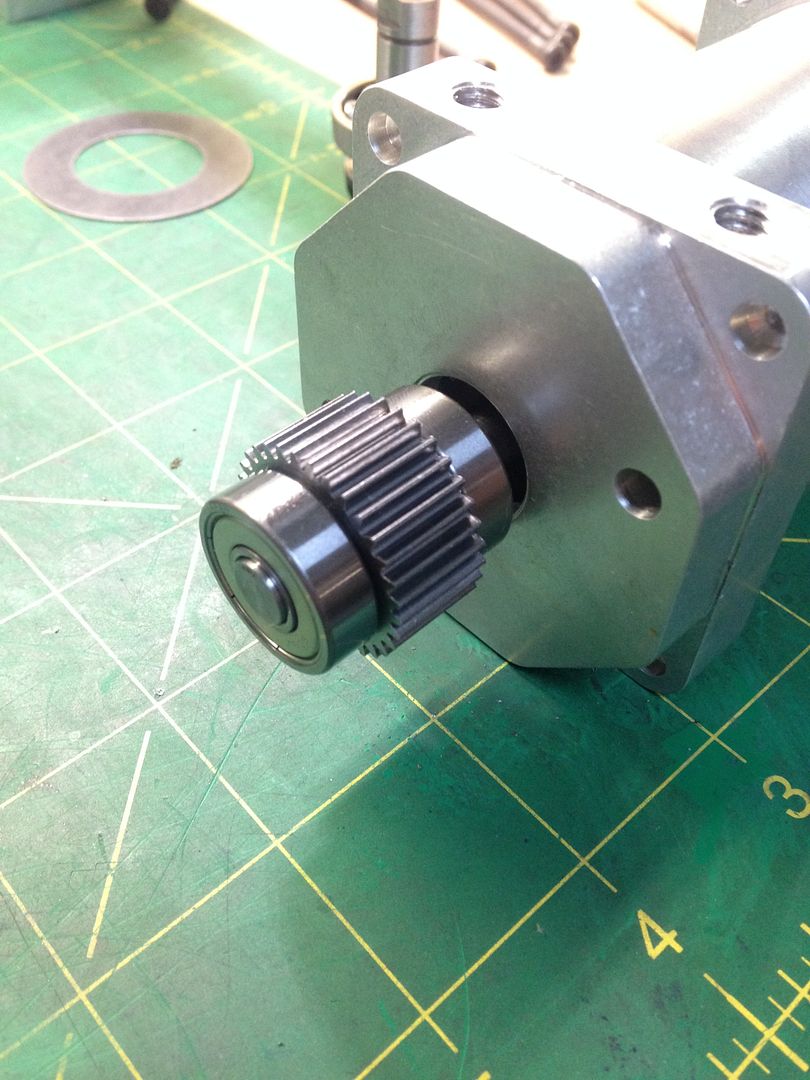 The smaller gear on shaft is the one inserted into gearbox, it will be keyed to shaft. Top gear will be connected to a driveshaft. Only hard part now is getting the correct spacing on gears into gear housing.
__________________
Always wasting money, as the wife says. To view links or images in signatures your post count must be 10 or greater. You currently have 0 posts. |
|
#6
|
||||
|
||||
|
Lookin good! When I built the rears for my 850 KW I used a piece of regular paper sandwiched between the gear mesh and then took the measurement for the spacing. Gear lash seamed to be pretty good and hasn't given me any grief just yet.
|
|
#7
|
||||
|
||||
|
Quote:
 . .
__________________
Always wasting money, as the wife says. To view links or images in signatures your post count must be 10 or greater. You currently have 0 posts. |
|
#8
|
||||
|
||||
|
__________________
Always wasting money, as the wife says. To view links or images in signatures your post count must be 10 or greater. You currently have 0 posts. |
|
#9
|
||||
|
||||
|
Nice...well done!!!
|
|
#10
|
||||
|
||||
|
its starting to look like something! what are you building again??
|
|
#11
|
||||
|
||||
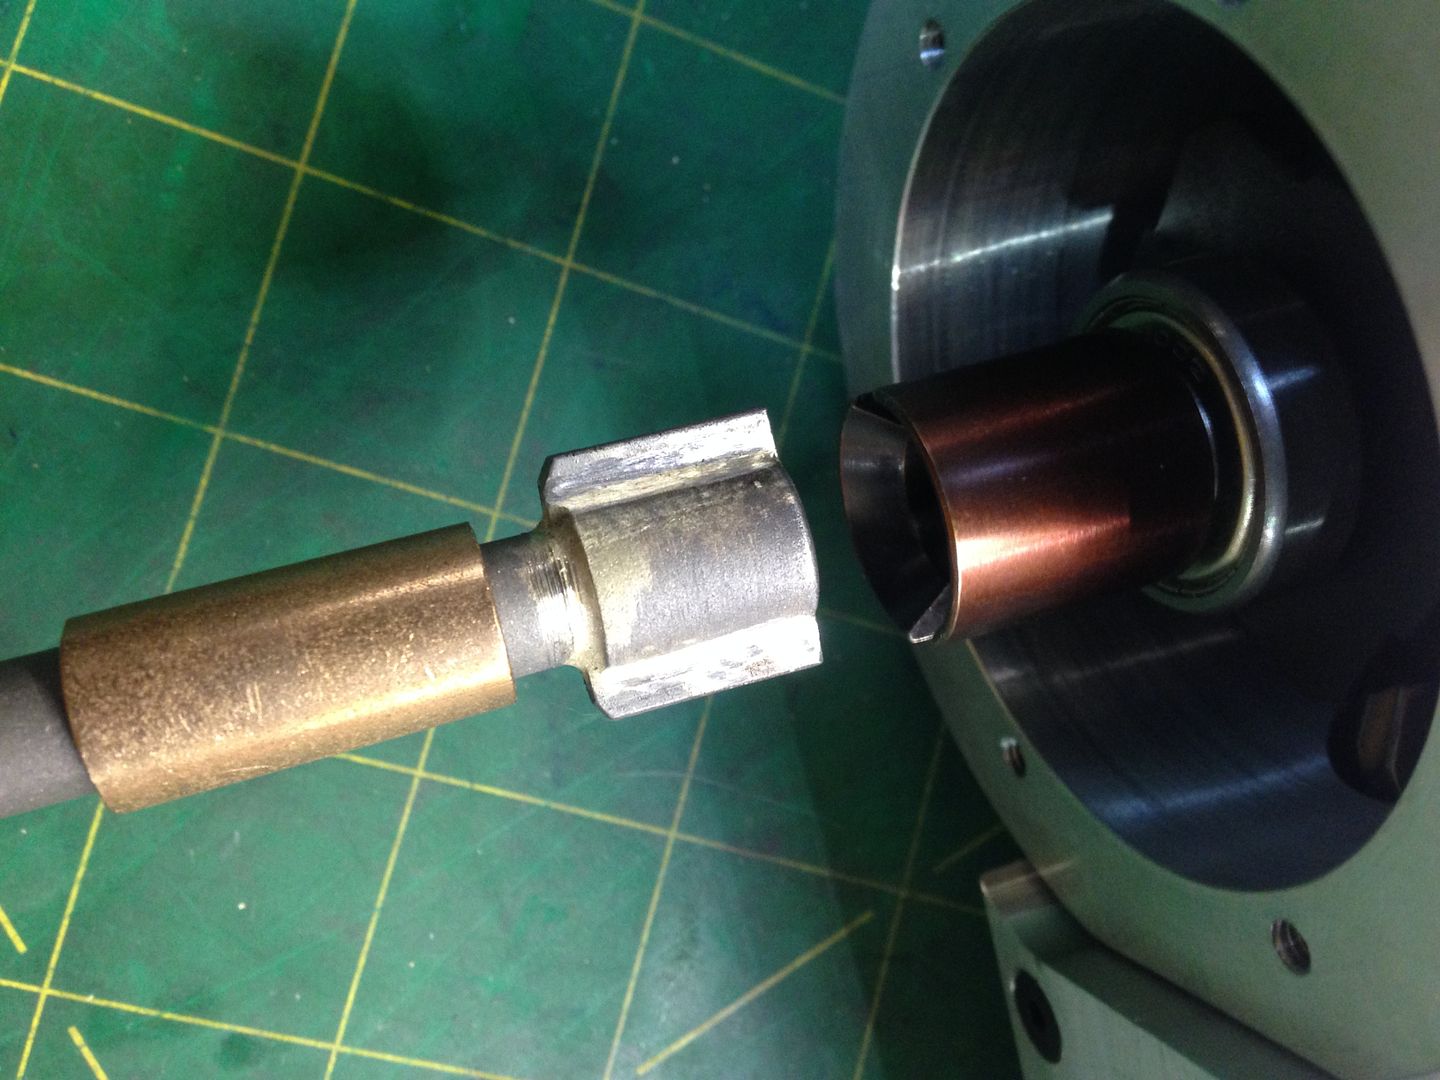 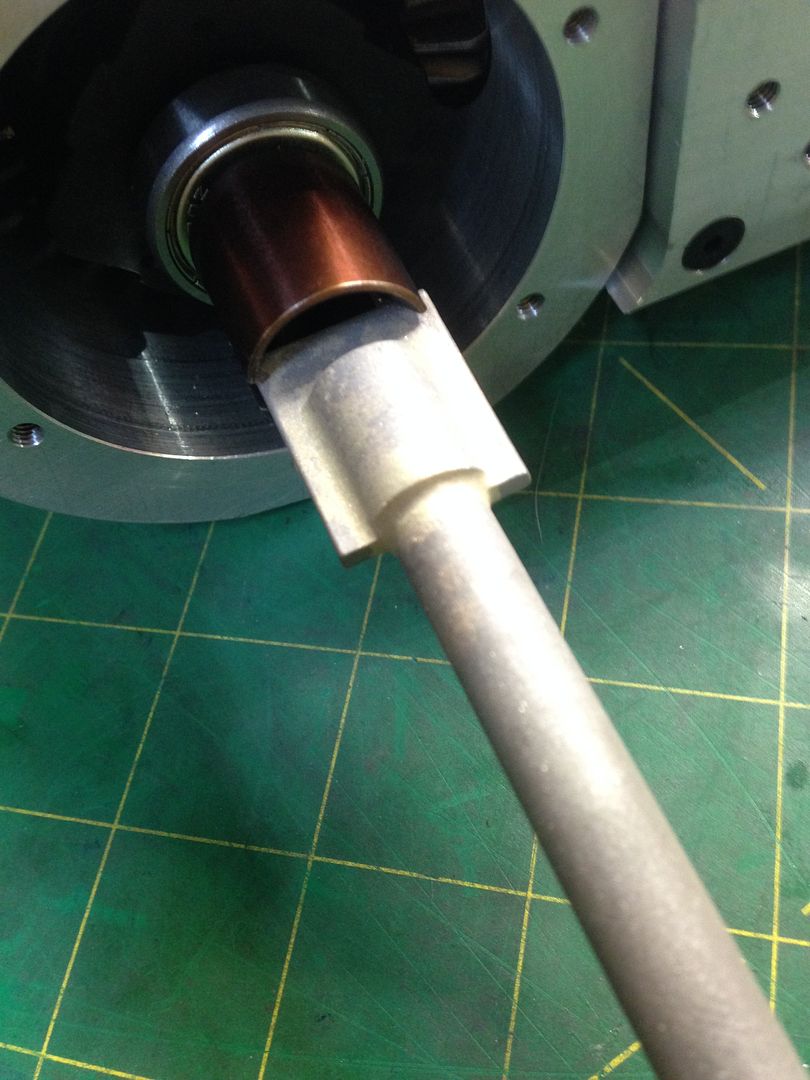 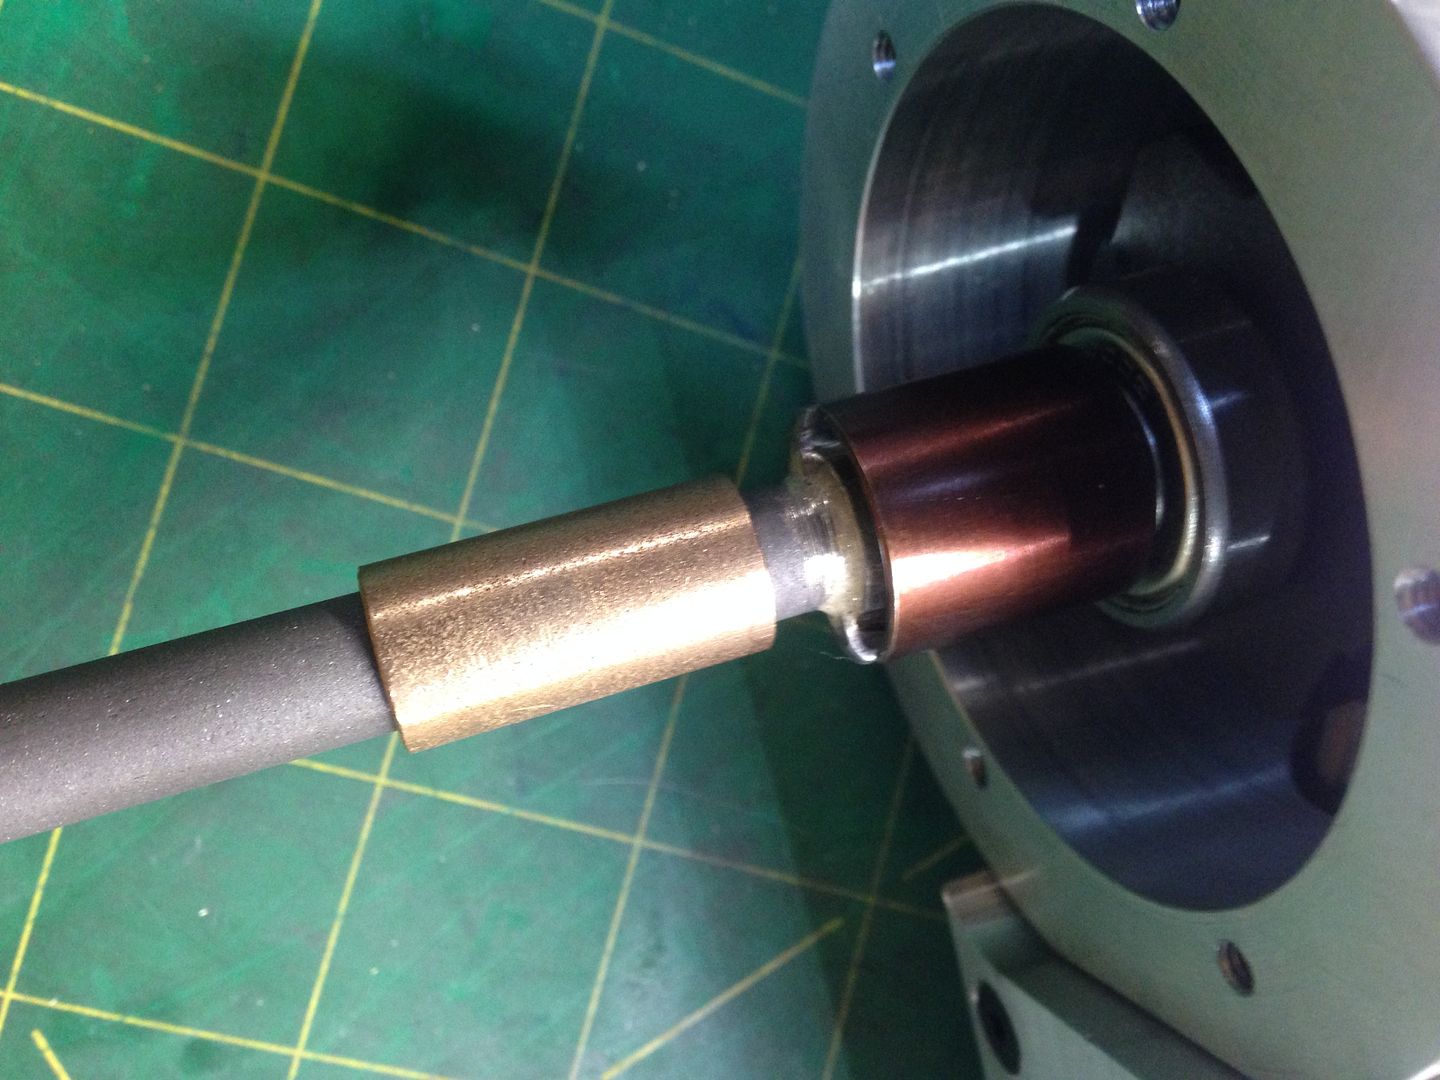 Brazed an end onto the final driveshaft. Had to make the end a bit bigger diameter so no slop would be in the diff ends. Some play, and the bronze is a bushing for shaft to rotate in. No weight on that just torque, figured a bushing would help guide it. 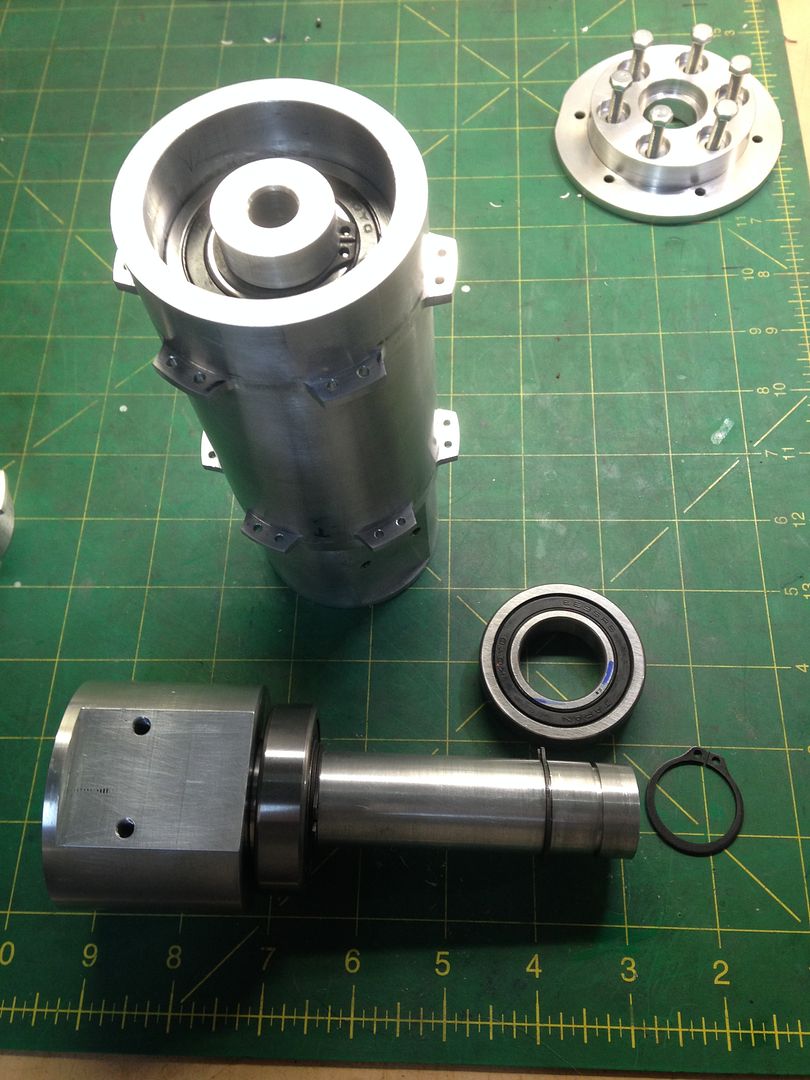 Internal and external snap rings will "lock" the bearings to hub and driveshaft housing. Now all the lateral forces will be eliminated from hub. That's what I'm working on next. Wanted to broach a hex pocket in hub,,, but way too much $ for rotary broaching. So most likely set screws or locking pin.
__________________
Always wasting money, as the wife says. To view links or images in signatures your post count must be 10 or greater. You currently have 0 posts. |
|
#12
|
||||
|
||||
|
What size hex are you trying to broach?
|
|
#13
|
||||
|
||||
|
Through hole or blind hole for your broaching ? You can make your hexes on the rotary on the mill if they are blind hole
 . If through hole, a hex broach similar to your key broaches aren't that expensive . . If through hole, a hex broach similar to your key broaches aren't that expensive .
__________________
RIP FreddyGearDrive 2-12-59/12-19-11 To view links or images in signatures your post count must be 10 or greater. You currently have 0 posts. |
|
#14
|
||||
|
||||
|
Was thinking around 5/16. If I went the broaching way I would make the female part out of steel not alum. That would be the wheel hub cap. 1 , I don't have 2.5" steel stock, 2, not my favorite material to work with using small size drills/mills. (If I used the rotary table ).
I don't think a steel hex shaft would last too long in a aluminum socket, do you guys? Referring to the aluminum wearing quick, developing slop. What's your guys opinion on making the female hex socket in alum? My thoughts are on this small size 5/16 or 1/4" it wouldn't last. Or would a square hole be better? That is if I don't just go with set screws and a flat spot.
__________________
Always wasting money, as the wife says. To view links or images in signatures your post count must be 10 or greater. You currently have 0 posts. |
|
#15
|
||||
|
||||
|
i think your best bet is the K.I.S.S method
|
|
#16
|
||||
|
||||
|
This build is going to be so big n so heavy, KISS got thrown out the window long time ago.
 
|
|
#17
|
||||
|
||||
|
Quote:
  
__________________
Always wasting money, as the wife says. To view links or images in signatures your post count must be 10 or greater. You currently have 0 posts. |
|
#18
|
||||
|
||||
|
Is this for a drive hex similar to the trucks ? If so , .3125" is a lil small . The more surface area the better . Steel to alum. should be an issue if you go bigger other then the reaction you get when steel and alum are mated ( can recall the term
 ) )
__________________
RIP FreddyGearDrive 2-12-59/12-19-11 To view links or images in signatures your post count must be 10 or greater. You currently have 0 posts. |
|
#19
|
||||
|
||||
|
I decided to go with set screws, I have three equally spaced radially onto drive shaft. Using cone point set screws and will make small divits into shaft for added security. The shaft is just rotational force, retaining rings internal and external lock bearings to not allow wheel hub assembly to slide off.
She finally is showing signs of life, a temporary heartbeat from dewalt but some forward progress,,,,,,,, http://youtu.be/zE10GtlxjUo
__________________
Always wasting money, as the wife says. To view links or images in signatures your post count must be 10 or greater. You currently have 0 posts. |
|
#20
|
||||
|
||||
|
|
 |
| Currently Active Users Viewing This Thread: 13 (0 members and 13 guests) | |
| Thread Tools | |
| Display Modes | |
|
|