 |
|
|||||||
| Construction Equipment If it digs, pushes, hauls dirt "off road" post it here. |
 |
|
|
Thread Tools | Display Modes |
|
#21
|
||||
|
||||
|
Wow!!! I see what you mean about being tired of sanding after seeing how many areas you want to dress up. Well that's part of the fun with building, you are never done... You will have a lot of fun with this build. It looks like a very nice model!
|
|
#22
|
|||
|
|||
|
Well I did it. I sprayed the silicone lubricant on the tracks and am waiting for it to dry completely. Earlier this morning I was modifying my transmitter.
First I tucked the antenna inside. Then I replaced the annoying speaker with a red LED. Just soldered it in, nothing fancy. Ok the tracks. I washed and dried them and then placed them on some tape with the sticky side up. Here is the silicone lubricant I used, picked it up at Home Depot. Here are the tracks after being sprayed and drying for about 2 hours. Also I held the board upside down for awhile and tilted it in different directions. I put on too many coats at once. About the sanding, I kind of enjoy that kind of "work". Anyway I am tiiiired, hopefully more updates tomorrow. Last edited by avel; 02-04-2018 at 02:54 PM. |
|
#23
|
|||
|
|||
|
Just woke up about 30 minutes ago and still slightly wet. I wish I had gone with thinner coats. Then again it hasn't even been 24 hours.
|
|
#24
|
|||
|
|||
|
Putting the tracks together, just finished one side. Taking a break. Also covered some areas in JB Weld on the main chassis, areas where if I screw up it won't be seen, not that it can't really be fixed. Also glad I read up on how to properly use it, found out that rubbing alcohol is to be avoided for cleaning, also anything with petroleum distillates in it. Acetone, lacquer thinner and soap and water are recommended. I bought some acetone. Also last night I installed ER9X on the transmitter. Has a lot more options and capabilities.
|
|
#25
|
|||
|
|||
|
I dropped the "bell crank" replacement from Leimbach onto the floor and bent it, yay me.
|
|
#26
|
|||
|
|||
|
Bent the crank back into shape as best as I could.
I replaced the grease in the drive motors, filed and sanded down the valve servos to fit. Finally figured out how to use ER9X on the transmitter. JB welded the bucket and some of the body. Lots of sanding. Painted the bucket and some of the body. Got frustrated with painting. Sanded, painted some more. Oh and finally broke my SD card for the camera, more tape and glue than plastic. Here I mixed too much JBWeld so I thinned it with acetone, pressed a track pad into some regular clay and poured it in. Just for fun. Phone picture Last edited by avel; 02-04-2018 at 02:54 PM. |
|
#27
|
||||
|
||||
|
You probably already know this but get some cheap fingernail files like you wife uses to do her nails. You can bend them in tight places or break them off, they work pretty well on sanding down the cold weld.
Good luck, you have some tight places to work in there. |
|
#28
|
|||
|
|||
|
The sanding is done. I totally forgot about fingernail files, I have a whole pack of them. I bought them for my other hobby, model railroading.
I used a Dremel and sandpaper to smooth everything out. |
|
#29
|
||||
|
||||
|
Any progress?
|
|
#30
|
|||
|
|||
|
No not much. I tacked the plastic cab/body shell together with low temp hot glue, and found out that I don't have to cut anything to get the battery in if it sits at an angle. Also soldered some wires to the drive motors.
Last edited by avel; 02-04-2018 at 02:54 PM. |
|
#31
|
|||
|
|||
|
Screw painting, I want to play! Well I spent the last 6 hours assembling, everything except the hydraulics and details like the railing and other plastic parts. I must of spent an hour trying to get the spring clip onto the center pin for the front suspension piece. Basically supports the tracks near the front of the body, anyway yeah, took a loooong time. I finally ground off a tiny bit of metal so that the pin stuck through enough to where I could squeeze the spring clip on. I even turned the pin around so that the spring clip was on the outside of the chassis, its hidden from view anyway. This also gave me more room to push it into the slot around the pin.
Also for anyone who has built the LR634, has anyone used the extra track pads to put 38 instead of 37 track pads on each side? Quite a struggle to walk the tracks on. Glad I took the advice on here to assemble before painting. Last edited by avel; 04-23-2014 at 10:54 PM. |
|
#32
|
||||
|
||||
|
Looking good so far Avel.
Keep up the good, I know how bad you feel, you just want to finish so you can play with it. Regards Cameron.
__________________
Sees no evil, Hears no evil, Speaks no evil To view links or images in signatures your post count must be 10 or greater. You currently have 0 posts. |
|
#33
|
|||
|
|||
|
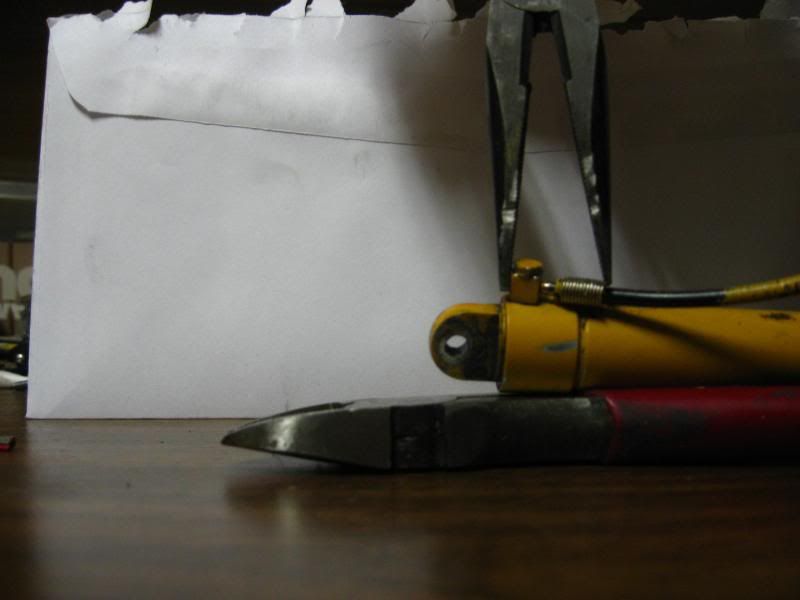
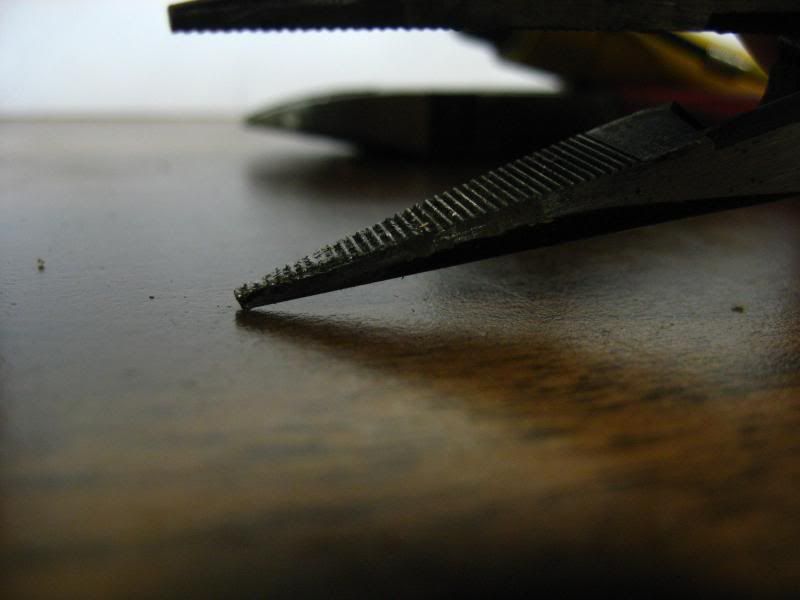
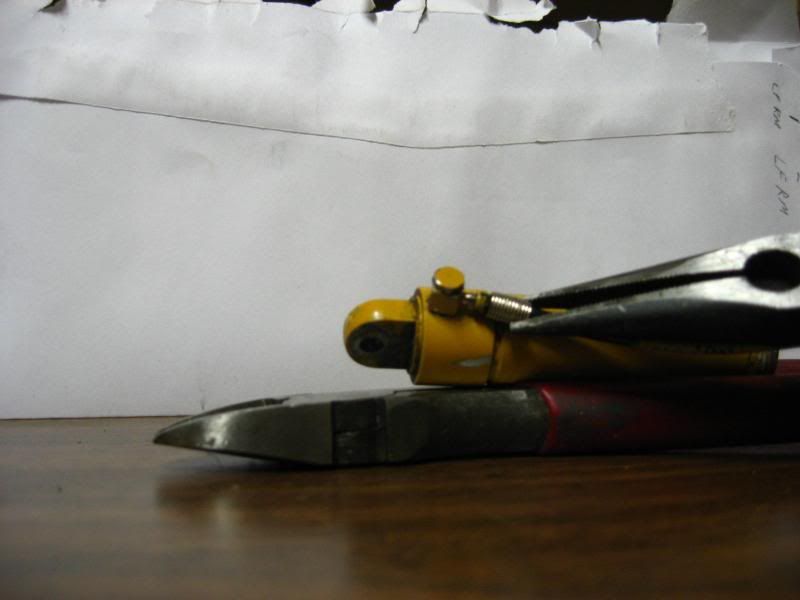
OK, anyone NOT use pliers to slide the locking sleeve over the hydraulic hose?
I used some made for putting loops in wire, sold in the jewelry/bead aisle. I tried with my fingers, and some cloth but all that happened is I pulled the skin back under my thumb and started bleeding. I even had boiling hot water to help soften the hose enough to slide over the nipple. todays update Installed the thicker hoses between the pump, filter, and control valves. Centered the servos and installed them too. I want to finish this tomorrow so I can play! Any tips for cleaning up hydraulic fluid? |
|
#34
|
||||
|
||||
|
Indeed, those compression collars are hard on the fingers to get on... I try to use these small needle pliers where I can. The trick to do it the easiest way possible, start the hose over the 1st barb, then slide the collar on, it will push the hose completely onto the barb & the collar all the way to the fitting.
  Doing it this way, you gotta be careful not to squeeze the pliers too hard while pushing so not to distort the circumference of the collar. 
__________________
Sharing knowledge is one thing that defies basic arithmetic logic --- the more you share, the more you get! Joe |
|
#35
|
|||
|
|||
|
Also the first two fittings I completed, I pushed the hose completely on then had to trim some off so that the collar could slide on. The others I did it properly. I was also afraid of distorting the collar doing it my way.
I will try your way tomorrow. There is plenty of the smaller hose in case I slip up. Also tomorrow, pictures. |
|
#36
|
|||
|
|||
|
Ok, this is the E-Clip/pin that was causing me issues. It still isn't fully seated in the slit that is around the pin.
Looks ugly, but the low temp hot glue is mainly to protect against abrasion. Here you can kinda see the Garage Sale sign plastic I used to hold the servos. Like a spacer, kinda. The return tubing kinked because of the hot glue, so far it hasn't caused any issues while testing. The number "3" is to help me remember that channel 3 is that servo/function. The pliers I used covered with hot glue to lessen the damage to the collars, it helped. This collar I slightly damaged. It was really hard for me to get the tubing on too because the metal elbow would swivel away. Finally I used an allen key between the two metal elbows to stop it moving. Also helped alleviate my fear of the elbow snapping off from the pressure required to apply the collar. Last edited by avel; 02-04-2018 at 02:56 PM. |
|
#37
|
|||
|
|||
|
G'day mate,
Thanks for posting your build, my next builds are going to contain alot of hyd functions so im reading all these threads closely to see what I can learn(which thanks to kind people like yourself is quite abit). As for your method of compressing the collar, could you make an attachment similar to these pliers (or modify them for this purpose ) http://www.banggood.com/Ball-Link-Pl...FY2CvQod0UAABg That way your pressing from behind the fitting and thus not flaring the fitting. Working in HCAV recently we had a suby do around 30 shody flare connections some were at 30degree some were correct at 45 but had the most tiny of scratches on the flare needless to say (and due to poor management) the system leaked, $15k + labour to fix, but honestly those scratches were so small it was unbelievable the connections failed, fyi those systems run around 300psi so its made me reevaluate our connections much more thoroughly - im still looking for an answer; and reinventing a square wheel im sure. Also the kinked pipe you may want to swap out, while im unsure in hydraulics cavitation has caused huge issues for us in other systems and considering the pressures we're dealing with here i could envisage a frothy result. Last edited by footprint; 04-25-2014 at 09:12 PM. Reason: cavitation |
|
#38
|
|||
|
|||
|
Luckily the kink is on the low pressure return side, but if I have problems I will replace it.
Also I was looking at different pliers today, and the pliers/type you linked to, are exactly what I was thinking of. I found a pinion gear removal tool that I have, and I can use it to push the collars on. It rides up on the collar to about the second ridge, but applies the pressure to half of the circumference of the collar. Shaped like the Ball link pliers, a "U" shape. I learned a lot while assembling this kit, and hope I don't have any leaks. Wanted to add that it wasn't the hot glue that kinked it. To soften the tubing I had it in hot water and when I took it out I struggled to slip it over the nipple and held it against the corner of the valve block. I actually do have another slight kink on the high pressure side going to the valve block because I stuck more of the tubing into the hot water than was needed. If I immerse that section in some hot water I am sure I can get the kink out. That one can cause cavitation like footprint said. Last edited by avel; 04-25-2014 at 10:36 PM. |
|
#39
|
||||
|
||||
|
Actually both P & T lines are high pressure b/c the returning oil to the tank has to go through the pressure relief valve before entering the reservoir. If there any question that the structural integrity of either hose has been compromised, change them now b/c it aint no fun cleaning oil from everything after a hose has exploded... BTDT

__________________
Sharing knowledge is one thing that defies basic arithmetic logic --- the more you share, the more you get! Joe |
|
#40
|
|||
|
|||
|
LOL
Yeah that oil goes everywhere. |
 |
| Currently Active Users Viewing This Thread: 1 (0 members and 1 guests) | |
|
|