|
|||||||
| Construction Equipment If it digs, pushes, hauls dirt "off road" post it here. |
 |
|
|
Thread Tools | Display Modes |
|
#82
 06-17-2015, 11:09 PM
|
||||
|
||||
|
Jared,
Thanks! I was waiting on the 2-56 screws so I could assemble a complete set and start checking the pitch and freedom of operation. I do plan on 6 lower and 2 top rollers. In fact, I think they should help keep the pads and tumblers in line for better operation. Been working on the tension system brackets and mount. Jim 
|
|
#84
06-27-2015, 06:44 PM
|
||||
|
||||
|
Going to redo the tension system. I wanted to use 4-40 but the wheel collars happened to be 6-32 which I think looks too big.
Just putting on the tensioner even without the proper setup helps control the runout and makes me think if I get it all lined up, add the upper and lower rollers and get the tumblers refined a bit more that I may actually get a working unit.  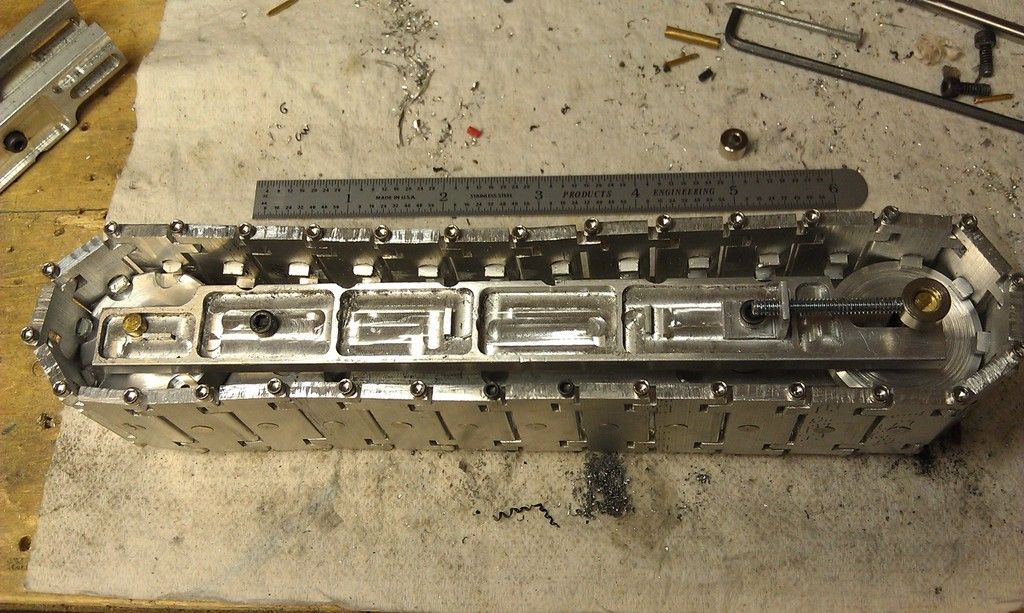 Jim
|
|
#85
06-27-2015, 06:49 PM
|
||||
|
||||
|
Looking good Jim. Hope to see it in about 6weeks.
|
|
#87
07-01-2015, 09:00 AM
|
||||
|
||||
|
Brief update:
I once AGAIN made new side rails. Decided to try putting the tension adjusters thru the end of the beam and thread into the axel shaft on the idler tumbler. I like this design, the brackets on the outsides were difficult to the size down so they didn't look out of scale. I might have to drill a few pads with access holes to get at the adjuster screws. 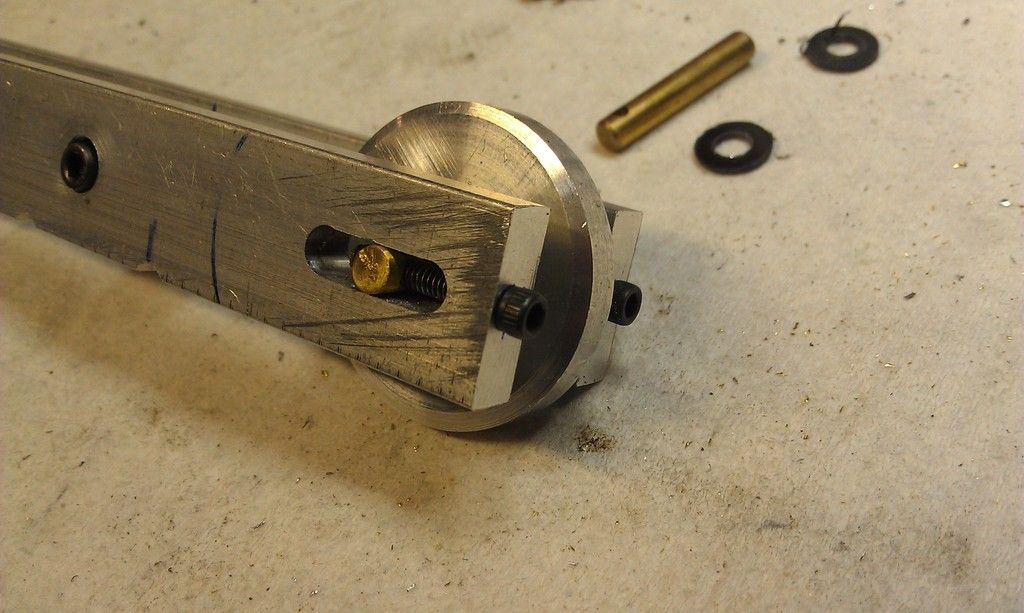 I drilled and taped the drive tumbler and powered it with my drill. I still have an problem with the pads shifting to one side and then the drive and/or idle tumbler catches the drive dog on one pad as it starts or tries to enter the drive tumbler. Today I am going to make the lower and upper rollers and see if that helps keep things lined up. Also going to try standard pulleys and O Rings instead of sprockets. I can make them easily, they will provide a lot of "give" if something binds and I have the parts on hand. Hope to still use sprockets and chain at some point.
|
|
#88
07-01-2015, 12:18 PM
|
||||
|
||||
|
Added a solid lower guide to test my suspicion about keeping everything lined up helping with operation. With the guide I was able to easily identify two pads that had drive dogs a bit off center. I replace those and tried a motion test with the drill motor.
Trouble going into reverse from this direction with no guide or rollers on the top, the pads want to shift to one side just enough to try and ride up on the tumbler. http://youtu.be/rLnZibly4JY Jim
|
|
#90
07-01-2015, 09:57 PM
|
|||
|
|||
|
How about this for tensioner screws, Jim?
https://www.microfasteners.com/home.php?cat=576 With a hex head screw you could make a wrench to reach in from the side and avoid drilling holes in those nice pads.
|
|
#93
07-02-2015, 10:59 AM
|
|||
|
|||
|
Jim-that is probably a better system for tension adjustment but as I said before, once you get the tension set correctly I don't think you will need to adjust it again. Keep working!!
|
|
#94
07-02-2015, 07:06 PM
|
||||
|
||||
|
I had to stop and pose the crawler for a motivation photo, it seems like there is a never ending list of parts to be made, re-made, and fine tuned, and I still feel like I don't get too far for all the time I spend on it.
this sort of view helps me keep going!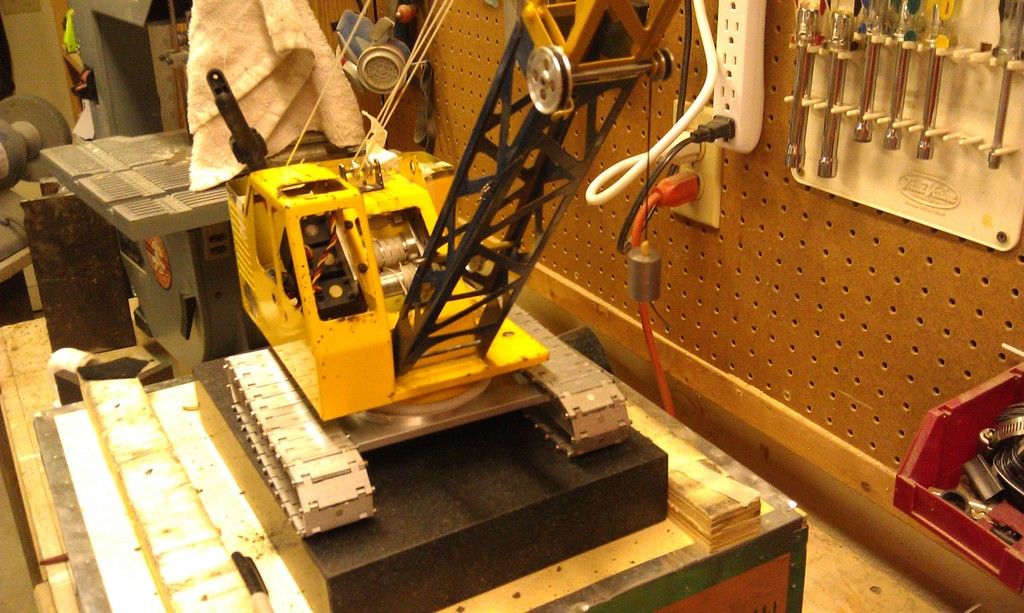 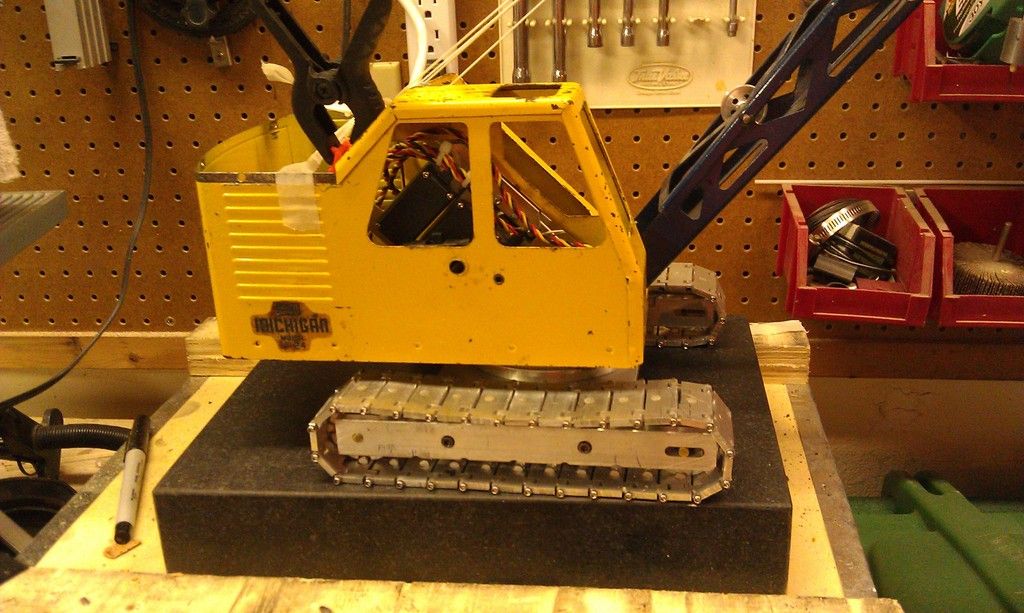 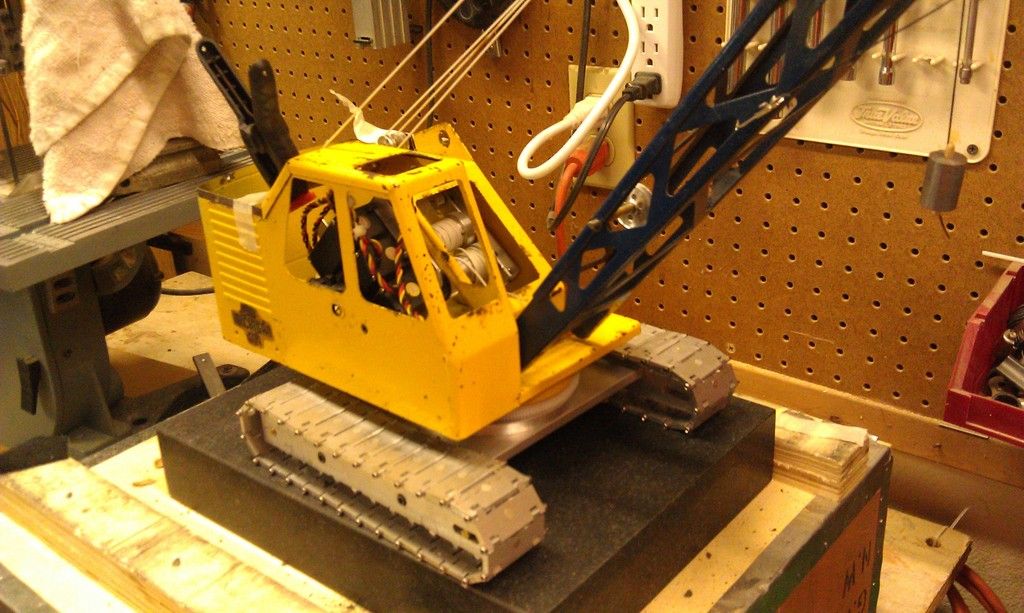 Still to do - slip ring and mount the rest of the ring gear and spacer Pick and mount motors, make pulleys for the drive tumblers And at least a dozen other things I have forgot about...  Jim Last edited by Rvjimd; 07-02-2015 at 07:20 PM.
|
|
#97
07-03-2015, 12:07 PM
|
||||
|
||||
|
Tom,
Thanks for the video! Those work good and it ALL looks good too! After seeing your mold the other day it makes me want to try again with a narrower pad front to back and something different than my riveted drive dogs. I'll keep plugging away at what I have and learning what to do different on the next one ") Jim Last edited by Rvjimd; 07-03-2015 at 12:08 PM. Reason: Terrible spelling and typos!
|
|
#98
07-03-2015, 01:45 PM
|
|||
|
|||
|
Your welcome jim-your project is looking good. Looking ahead,narrower pads will probably work better. It will take more of them but they will make the circle easier. From what I see on machines today the pads are getting more narrow and they probably work better than the older machines. Did you decide against the button-head screws holding the pads together?
|
|
#99
07-03-2015, 03:41 PM
|
||||
|
||||
|
Ya, the button head was a bit larger than the 1/8" pad and I didn't think it looked as good as the cap screw. I might put a bunch of them on and look again, but I think I ordered them a bit too long which won't work...
 Jim
|
|
#100
07-06-2015, 06:06 PM
|
||||
|
||||
|
Motor mount. About one time in ten or twenty I feel like I machine something and it turns out like I planned. I had some 1-1/2" 1/4" wall aluminum tubing, cut off a chunk, had to square it up cause my bandsaw decided it should start out wedge shaped.
then I cut it in half, drilled and tapped for 4-40 screws. I'm not sure how this mount and drive arrangement is going to work out? I don't like how it is going to force me to raise the ring gear and everything else up higher than I planned. We will just have to see how it goes.I thought about using the threaded mount holes in the end bell of the motor, but I didn't like that due to tight tolerance where if I mis drilled a hole it was no way going to line up good. 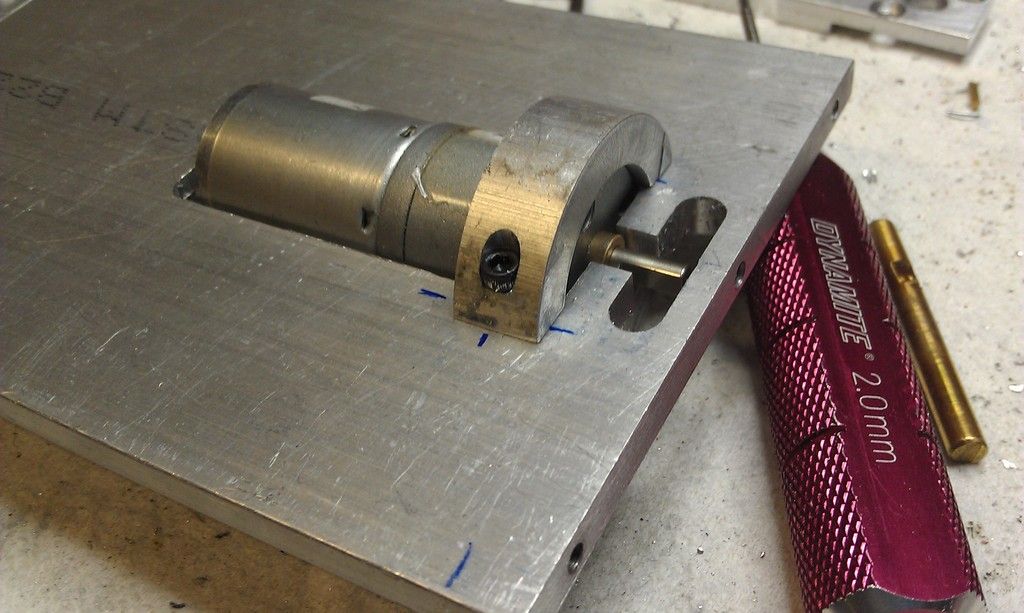 No, make a small and large pulley for an O ring to drive the tumbler. Jim
|
|
| Currently Active Users Viewing This Thread: 2 (0 members and 2 guests) | |
|
|


 Linear Mode

