|
#142
 02-08-2014, 07:30 PM
|
||||
|
||||
|
Quote:
 Cheer's, Neil. 
|
|
#143
02-09-2014, 04:55 PM
|
||||
|
||||
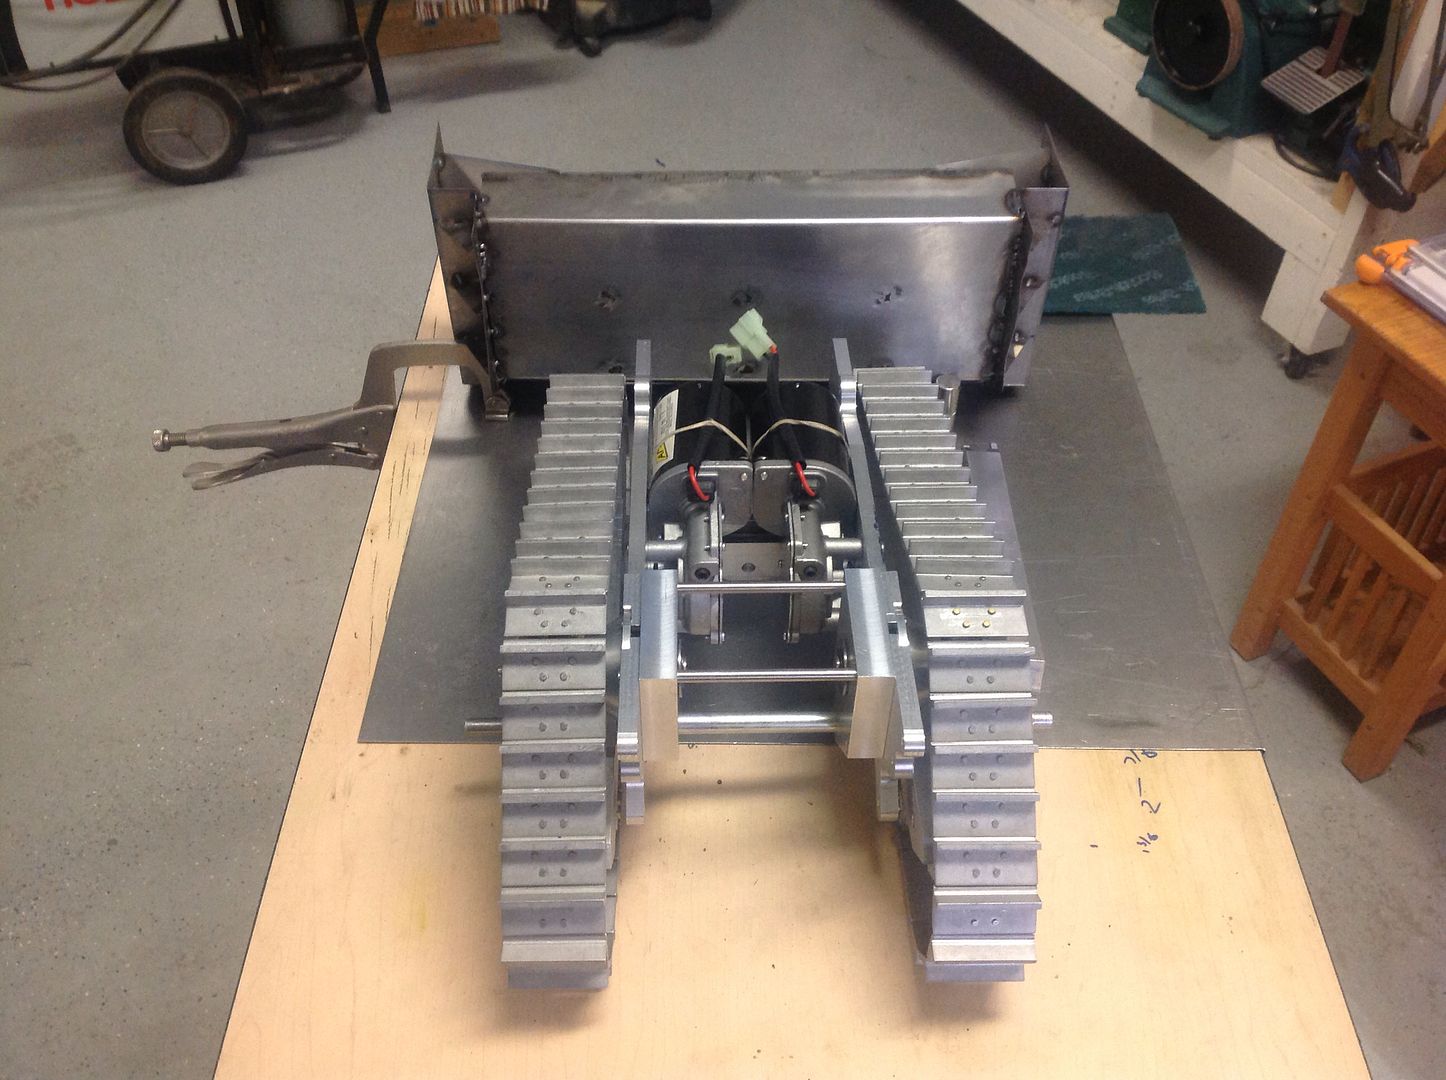
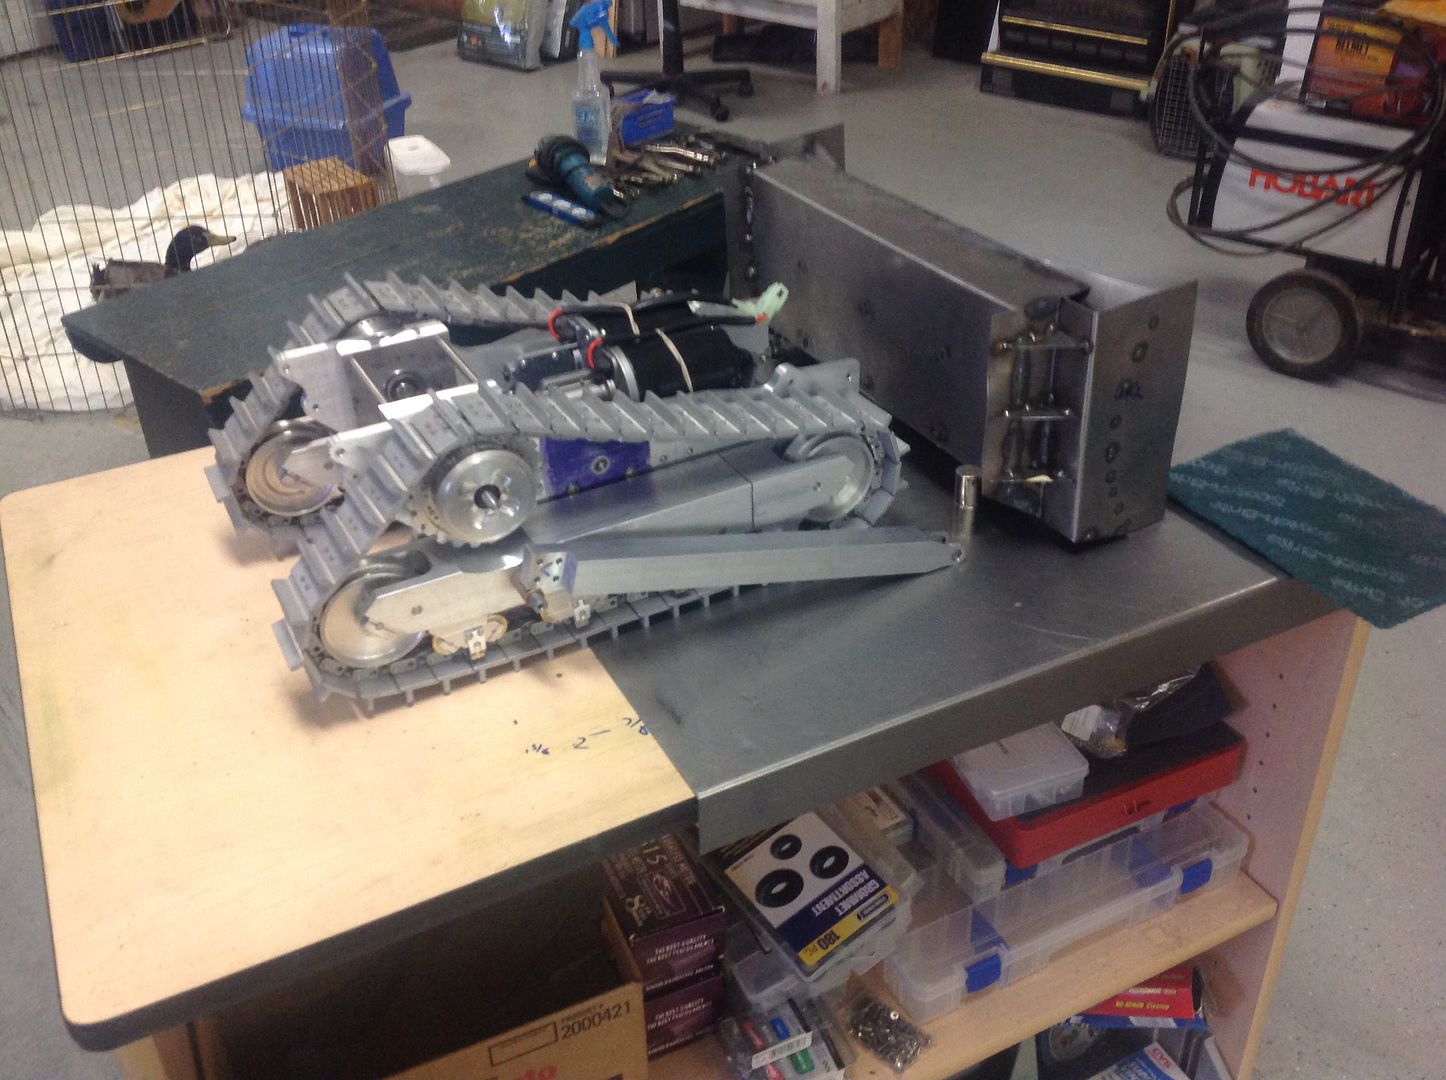
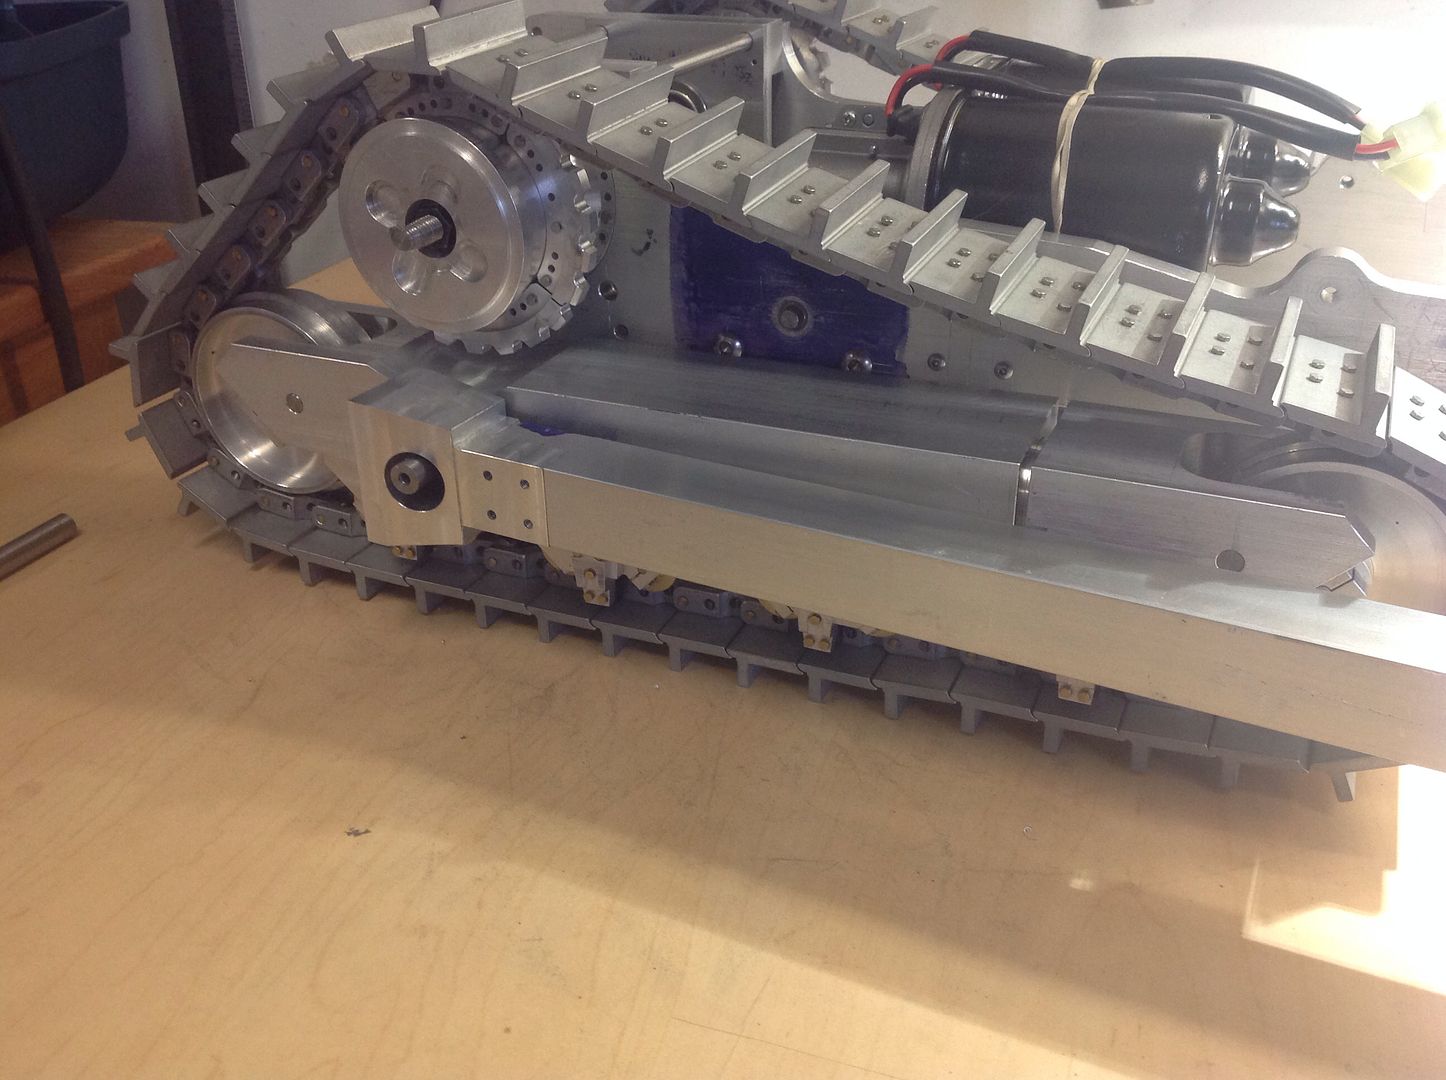
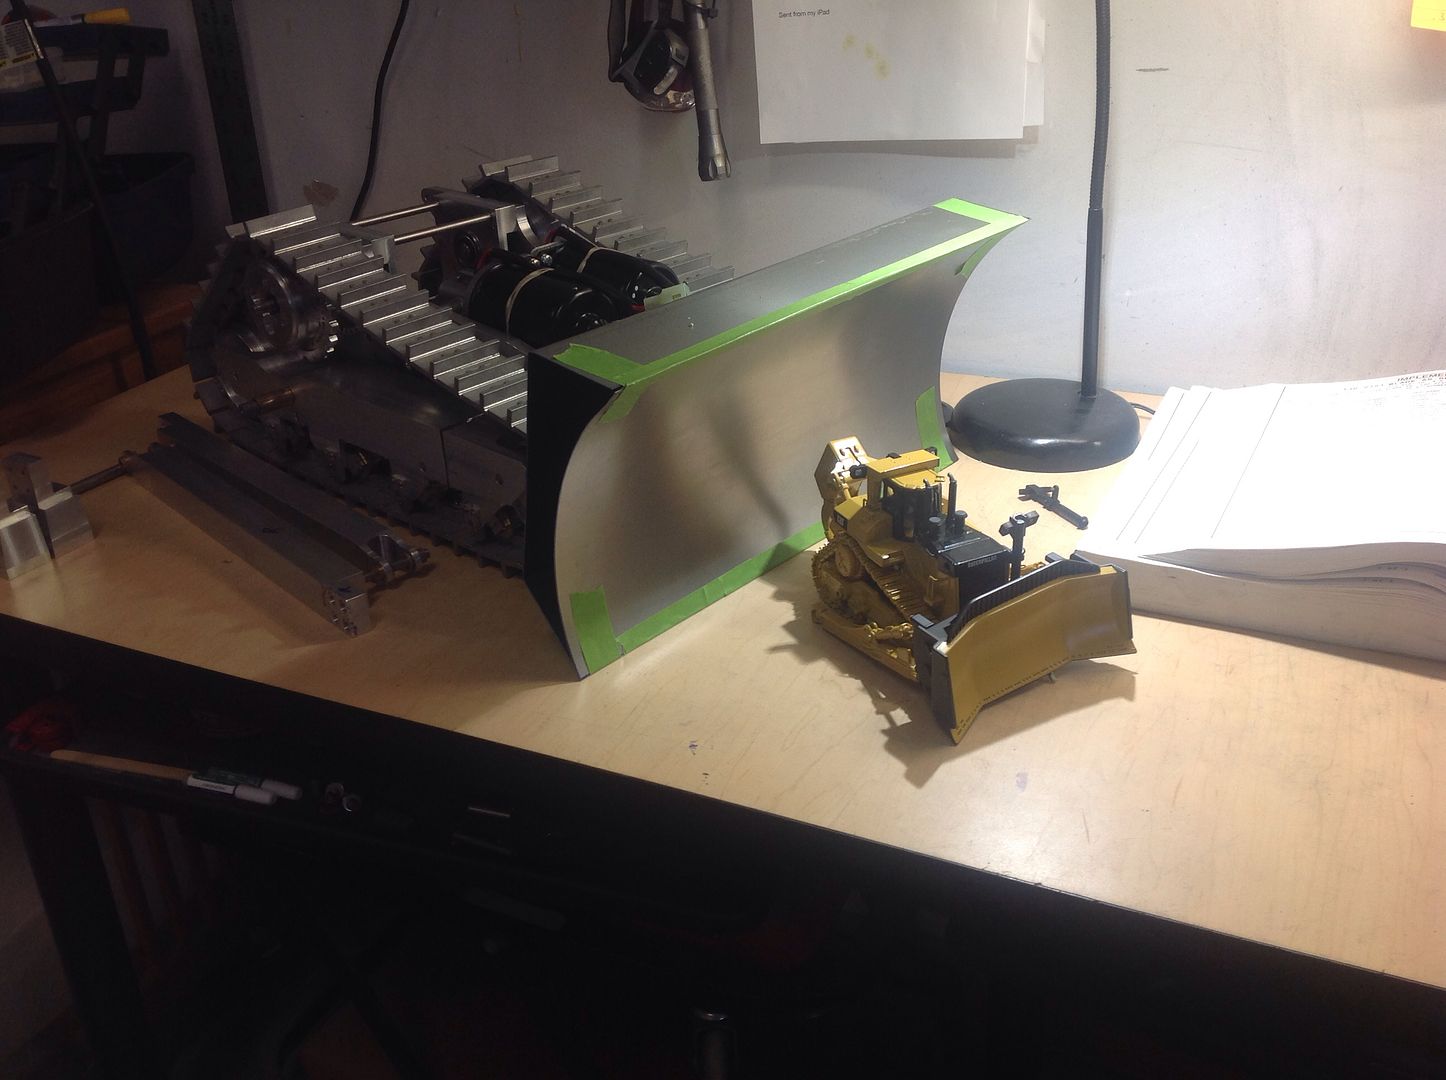 Starting on the blade. It would be so nice to make a straight pusher blade, I could just stick sides on and be done. But,,,,, I've got no experience in metal fabrication, so what fun would that be  . These are the first two pieces of metal I have ever sheared or rolled. I'm planning on making the carry/dump blade with cutting edges. I don't think I'm going to get too detailed with all the bends but would like to make the ends somewhat realistic. My welding skills are,,,well we will have to see if I post any of them. . Lol!!! I weld like an old hit n miss engin, sometimes good and sometimes bad in the same bead. . These are the first two pieces of metal I have ever sheared or rolled. I'm planning on making the carry/dump blade with cutting edges. I don't think I'm going to get too detailed with all the bends but would like to make the ends somewhat realistic. My welding skills are,,,well we will have to see if I post any of them. . Lol!!! I weld like an old hit n miss engin, sometimes good and sometimes bad in the same bead. 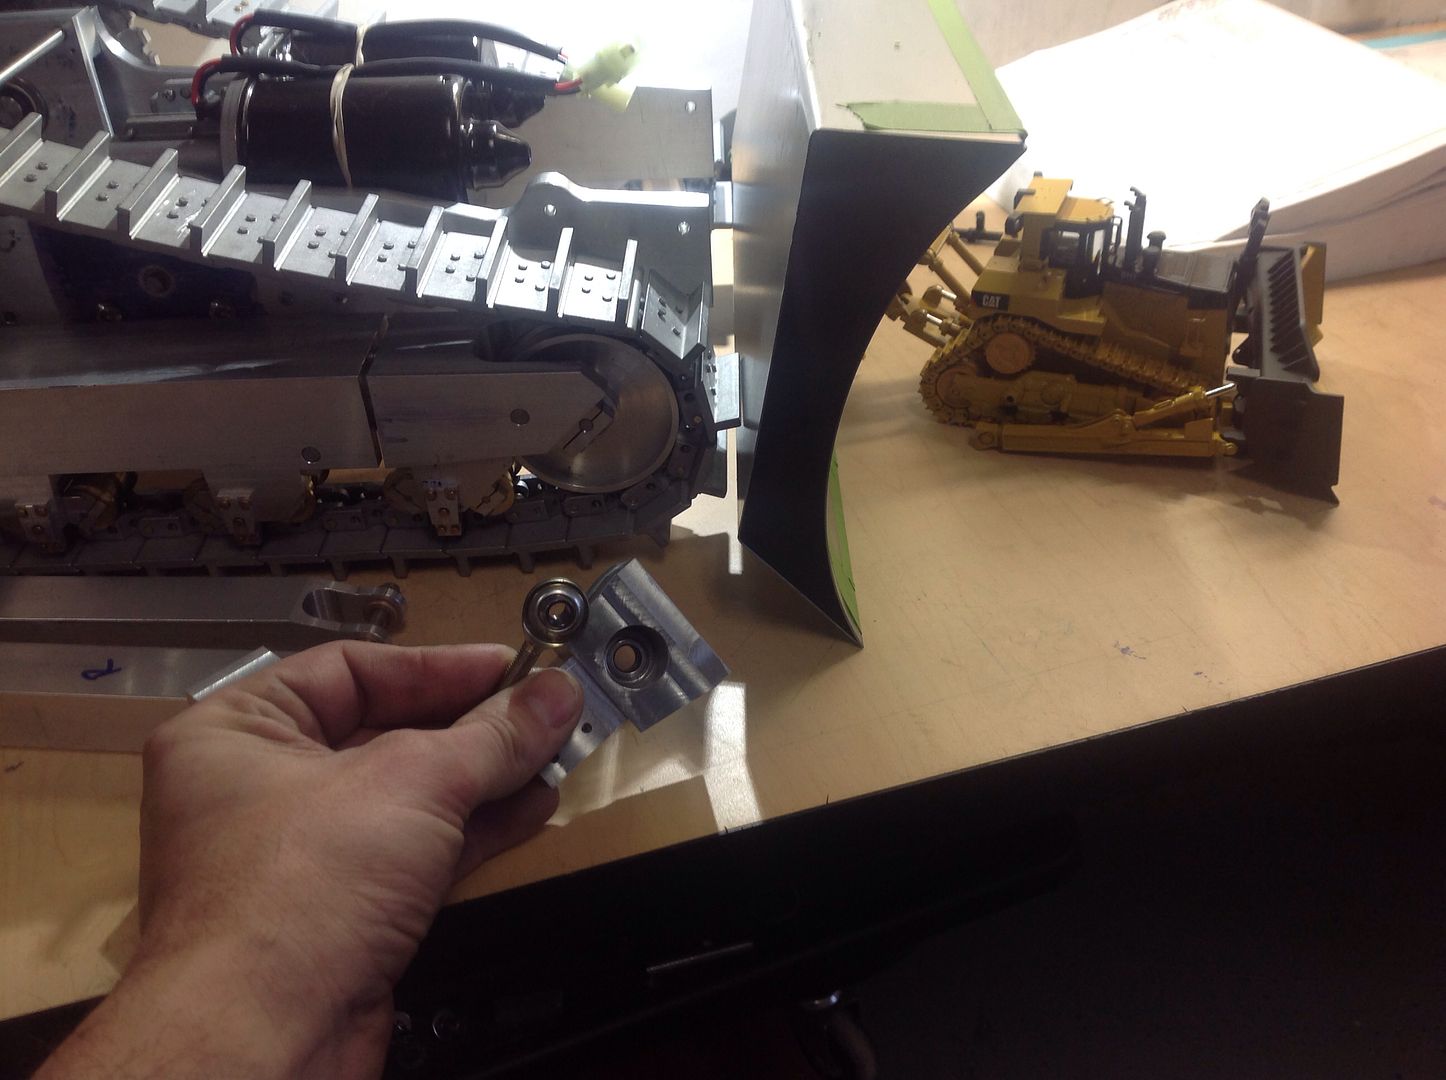 I originally was using hard rubber grommets for the degree of movement in the blade arms. Had to go to hardware store this morning and found they have rod ends. I cut off the threads and ground to close to round then pressed them into the hole. They will definitely not be coming out. But now I have a nearly indestructible pivot point. And got some for the stabilizer bar too.
__________________
Always wasting money, as the wife says. To view links or images in signatures your post count must be 10 or greater. You currently have 0 posts.
|
|
#144
02-09-2014, 05:00 PM
|
||||
|
||||
|
Quote:
. Damm,,, got to go plow more snow!!!!! I was born in Florida and need to get back to the sand and sun ")
__________________
Always wasting money, as the wife says. To view links or images in signatures your post count must be 10 or greater. You currently have 0 posts.
|
|
#145
02-09-2014, 05:03 PM
|
||||
|
||||
|
Quote:
__________________
Always wasting money, as the wife says. To view links or images in signatures your post count must be 10 or greater. You currently have 0 posts.
|
|
#146
02-09-2014, 06:31 PM
|
||||
|
||||
|
Quote:
http://www.cabinfeverexpo.com/index.html
|
|
#147
02-09-2014, 06:41 PM
|
||||
|
||||
|
Quote:
__________________
RIP FreddyGearDrive 2-12-59/12-19-11 To view links or images in signatures your post count must be 10 or greater. You currently have 0 posts.
|
|
#149
02-09-2014, 07:15 PM
|
||||
|
||||
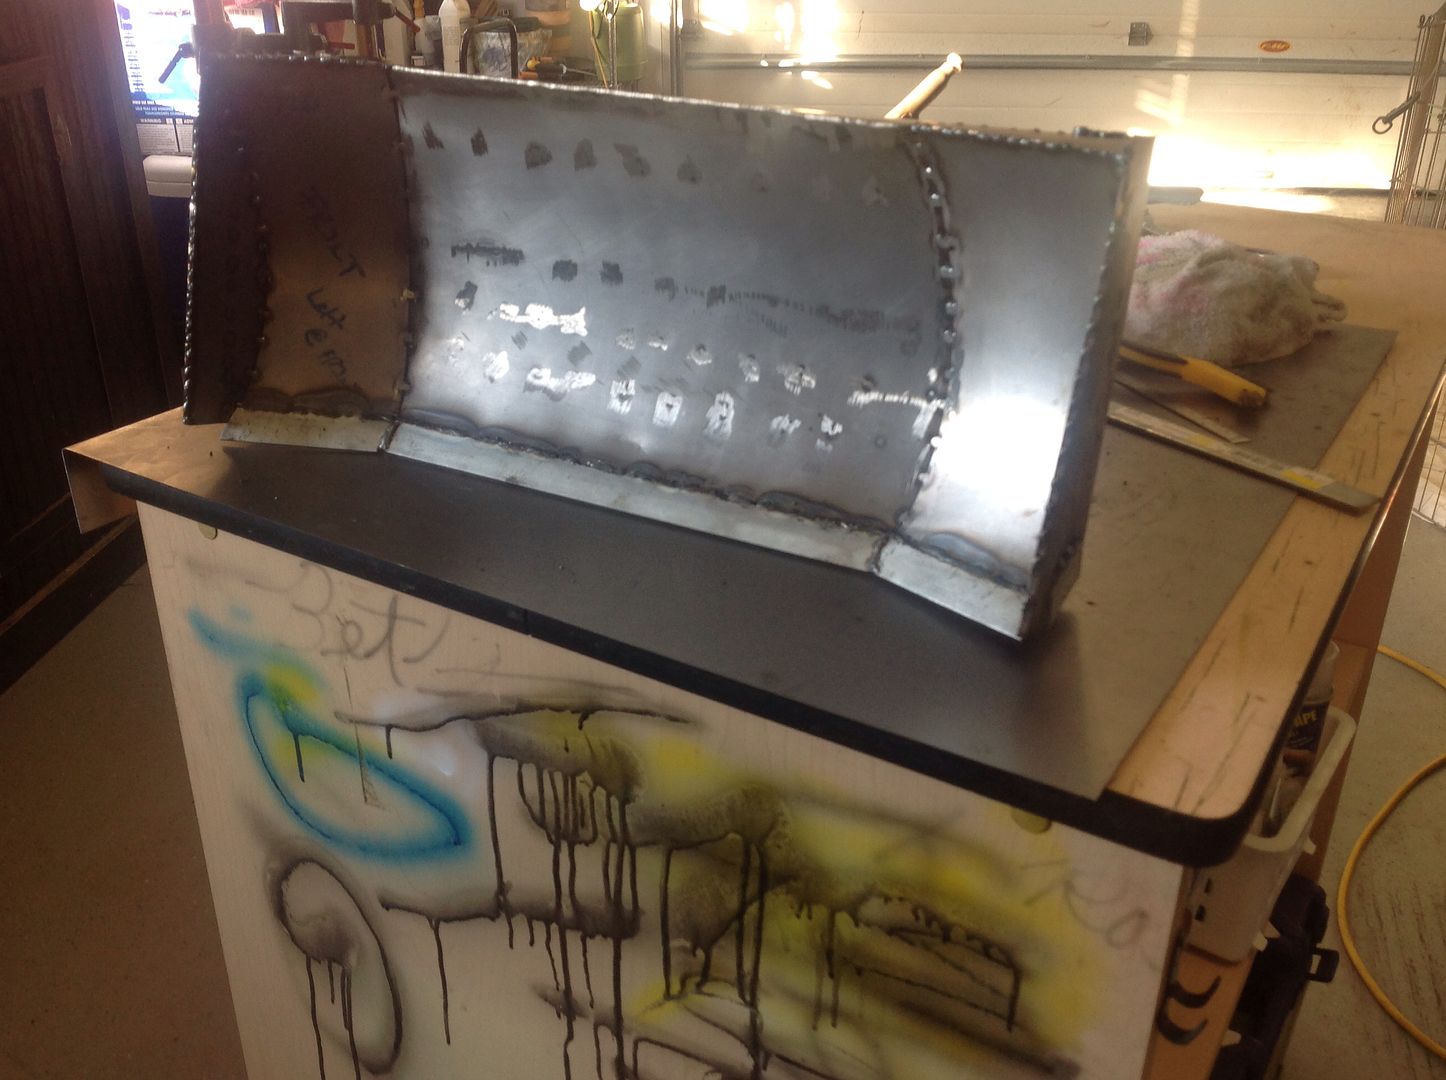
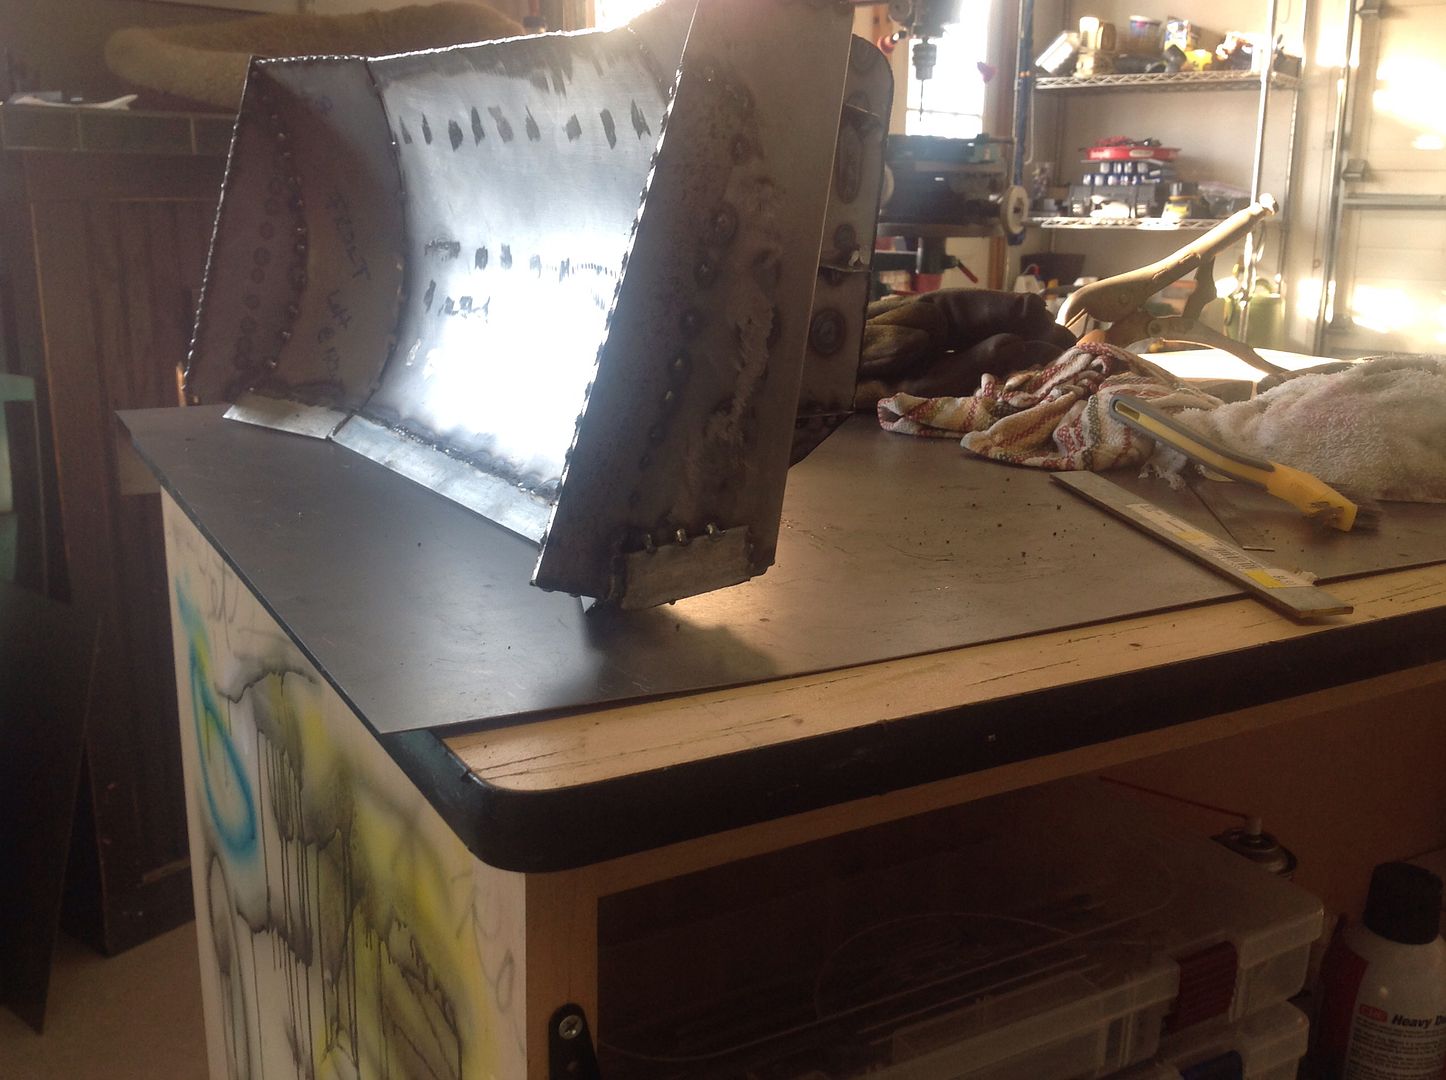
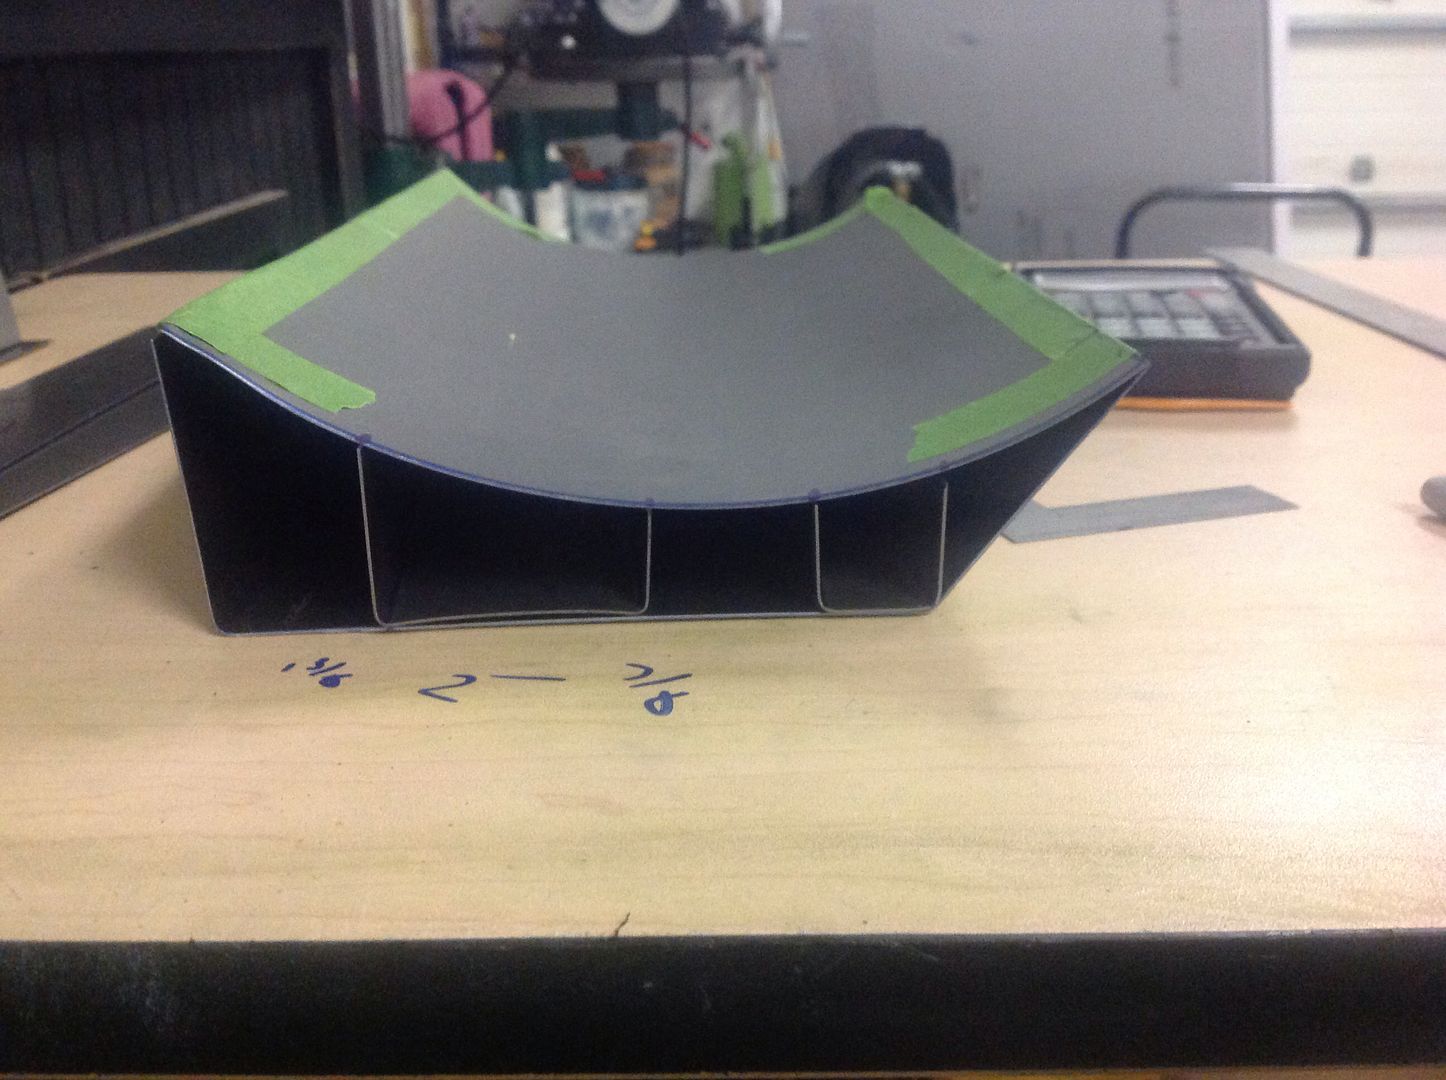 Figured I need to have some sort of internal support. Using 22guage steel. I figure I can weld onto the blade then together with a couple holes in the back plate. Then I will be able to have a few spots welded to the back as well. Will be able to hide them easily too. Yes I will be doing that Neil, using the cardboard sheet for perishable templates will make things a lot easier for my right angle mind. Always have fits when installing cove moulding on slanted ceilings around corners!!!! And I will definitely be trying to make some time for any shows in or around my area.
__________________
Always wasting money, as the wife says. To view links or images in signatures your post count must be 10 or greater. You currently have 0 posts.
|
|
#150
02-09-2014, 08:44 PM
|
||||
|
||||
|
Quote:
__________________
Sharing knowledge is one thing that defies basic arithmetic logic --- the more you share, the more you get! Joe
|
|
#151
02-09-2014, 09:15 PM
|
||||
|
||||
|
Quote:
Cheers, Neil.
|
|
#153
02-10-2014, 05:40 PM
|
||||
|
||||
|
Just remember , what you are about to see is from a professional metal welder/fabricator. Reality------my welding skills are a work in progress,,, first time welding on such thin material!! I have to trim the sides and build rock guard, cutting edges, mounting brackets but the big idea is done. Well it's definitely a carry blade.
 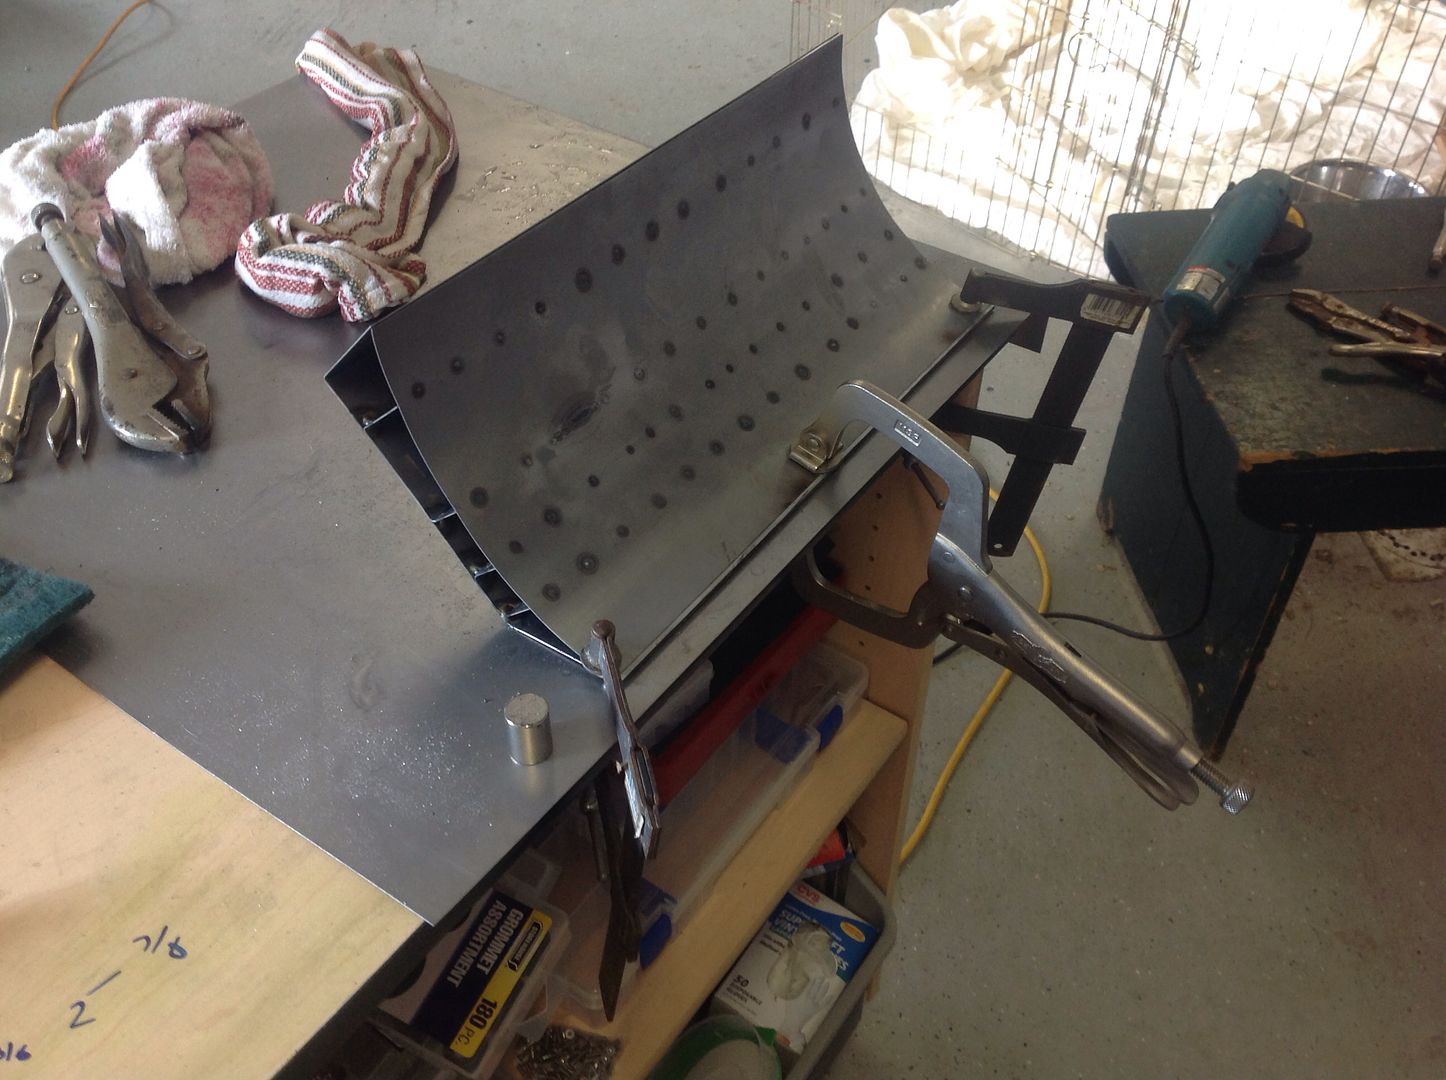 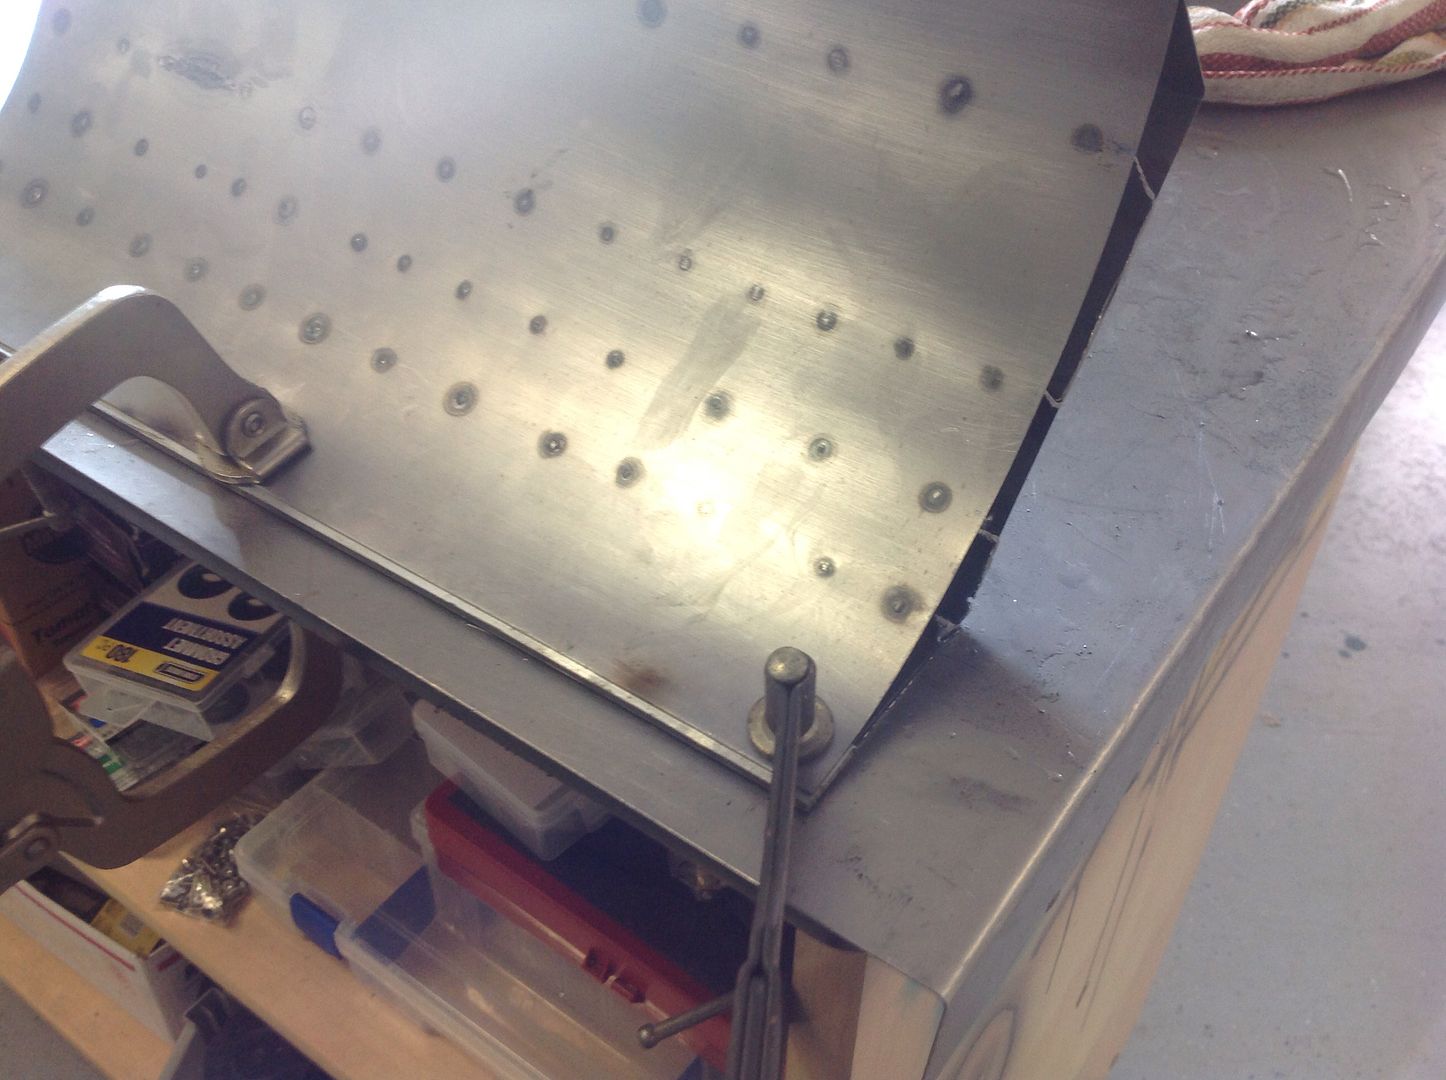 I did get the internal bracing in and it really stiffened it up!! 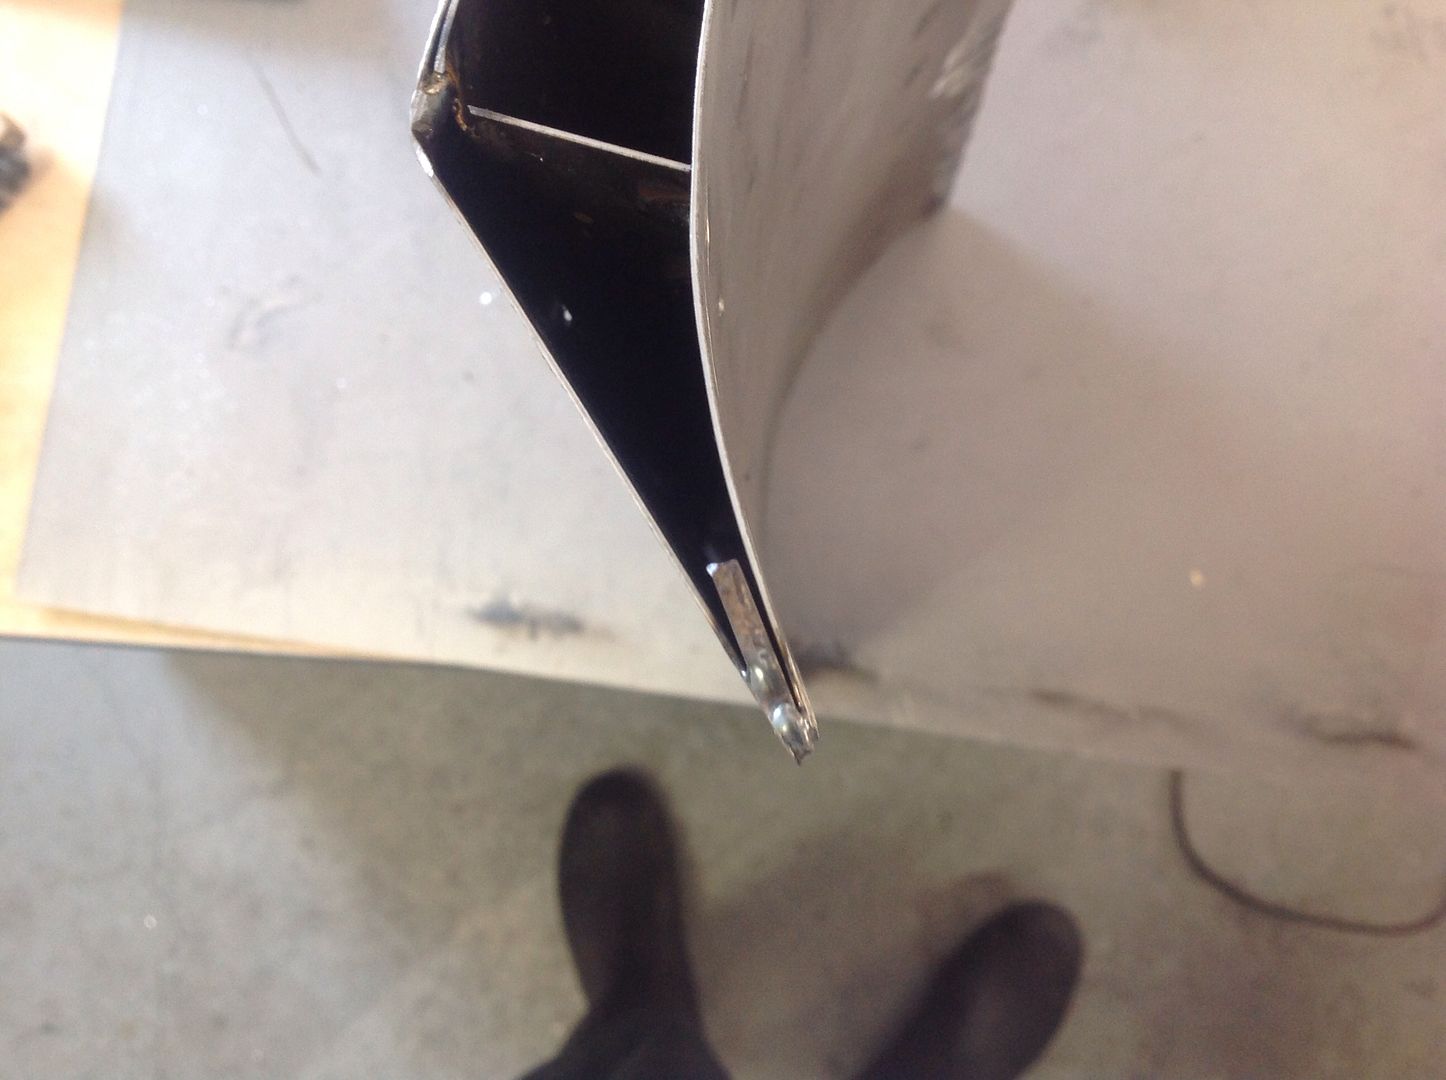 I added a small strip of steel so I will have something to bolt cutting edges to. 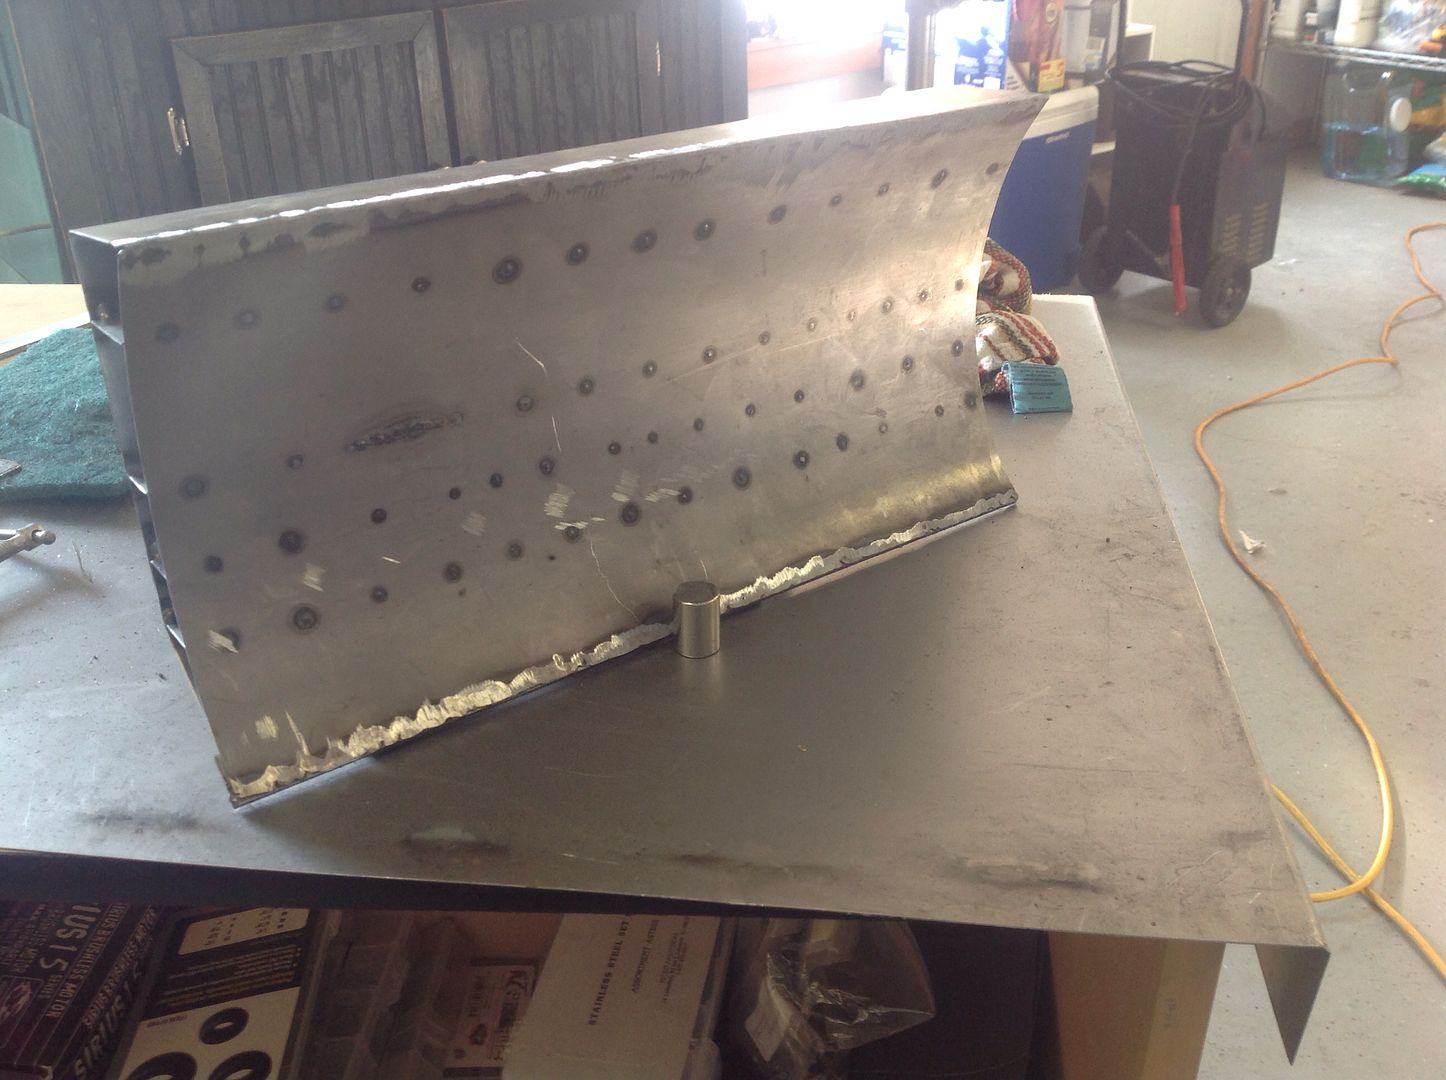
__________________
Always wasting money, as the wife says. To view links or images in signatures your post count must be 10 or greater. You currently have 0 posts.
|
|
#154
02-10-2014, 05:42 PM
|
||||
|
||||
|
And the bottom side
 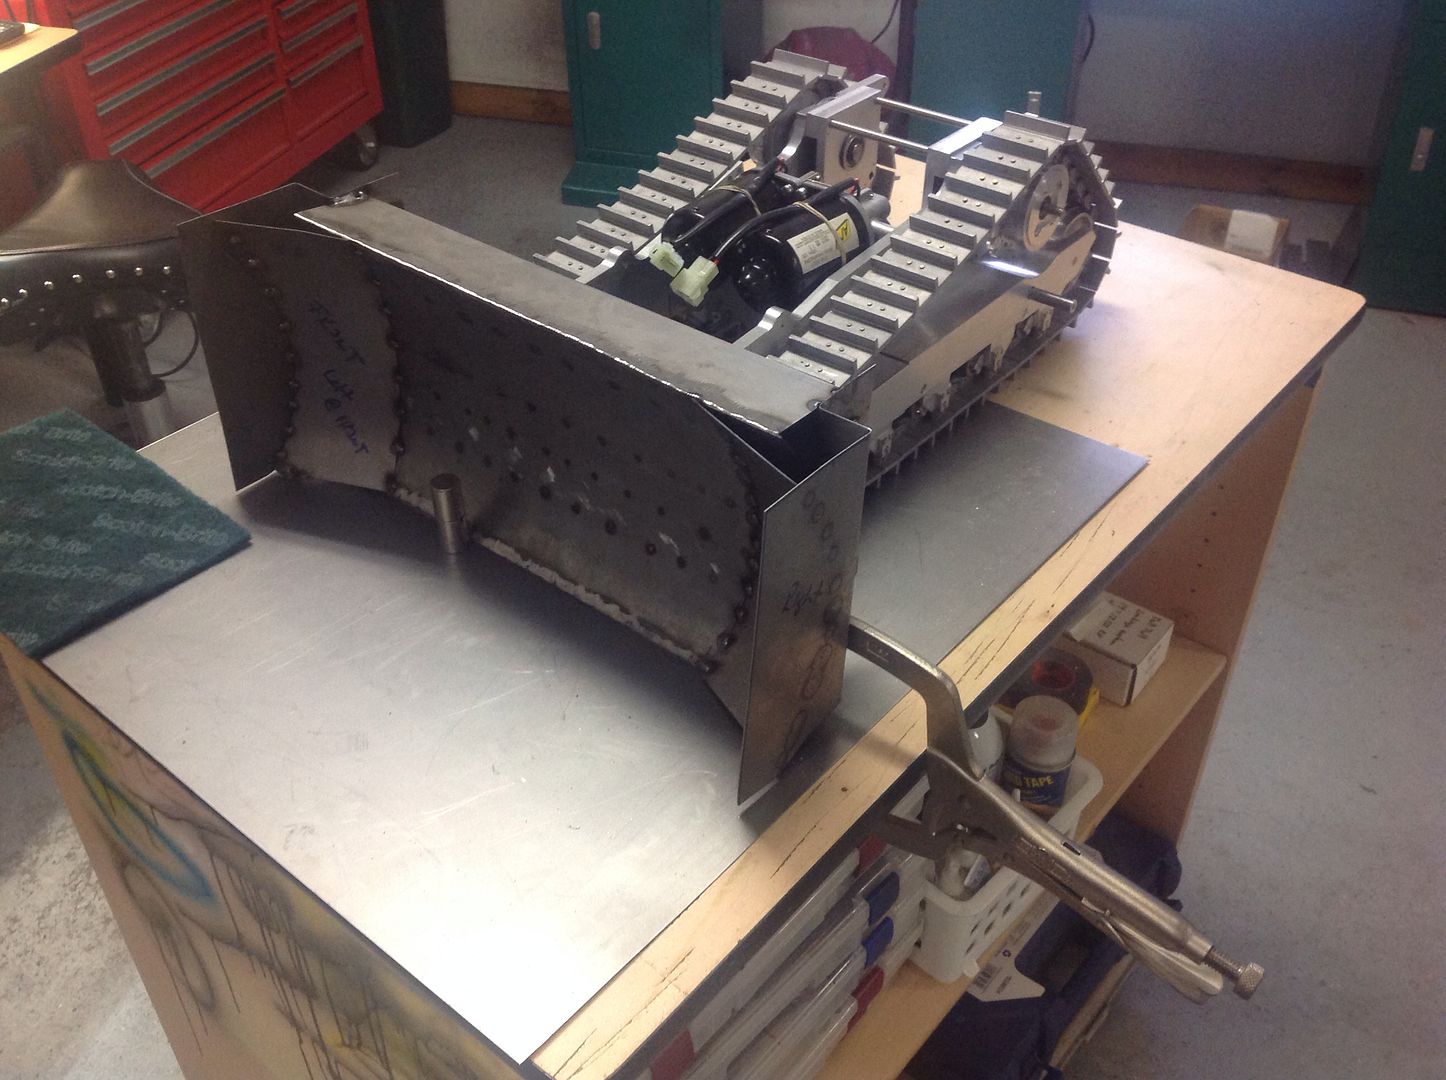 Topside with tractor 
__________________
Always wasting money, as the wife says. To view links or images in signatures your post count must be 10 or greater. You currently have 0 posts.
|
|
#155
02-10-2014, 05:48 PM
|
||||
|
||||
__________________
Always wasting money, as the wife says. To view links or images in signatures your post count must be 10 or greater. You currently have 0 posts.
|
|
#156
02-10-2014, 05:49 PM
|
||||
|
||||
|
Oh forgot two, and can anyone say bondo??? Lol.
__________________
Always wasting money, as the wife says. To view links or images in signatures your post count must be 10 or greater. You currently have 0 posts.
|
|
#157
02-11-2014, 03:56 PM
|
||||
|
||||
  Got cutting edge and side edges on. I was going to have a scale bolt on cutting edge, but I decided to save some time and skip that. Now I have to grind welds down and have some automotive metal filler. I guess its like bondo but a little stronger? Maybe it's just a half gallon bucket do jb weld. Lol!! This should be able to have the final outcome pretty smooth and straight, I hope.
__________________
Always wasting money, as the wife says. To view links or images in signatures your post count must be 10 or greater. You currently have 0 posts.
|
|
#159
02-11-2014, 07:30 PM
|
||||
|
||||
|
Boy, you first build guys really know how to show even the veterans up! The Cat D11 is looking very nice, and you are making excellent progress. Keep it up. I never get tired of watching builds like yours come together.
__________________
Nathan
|
|
#160
02-13-2014, 07:51 PM
|
||||
|
||||
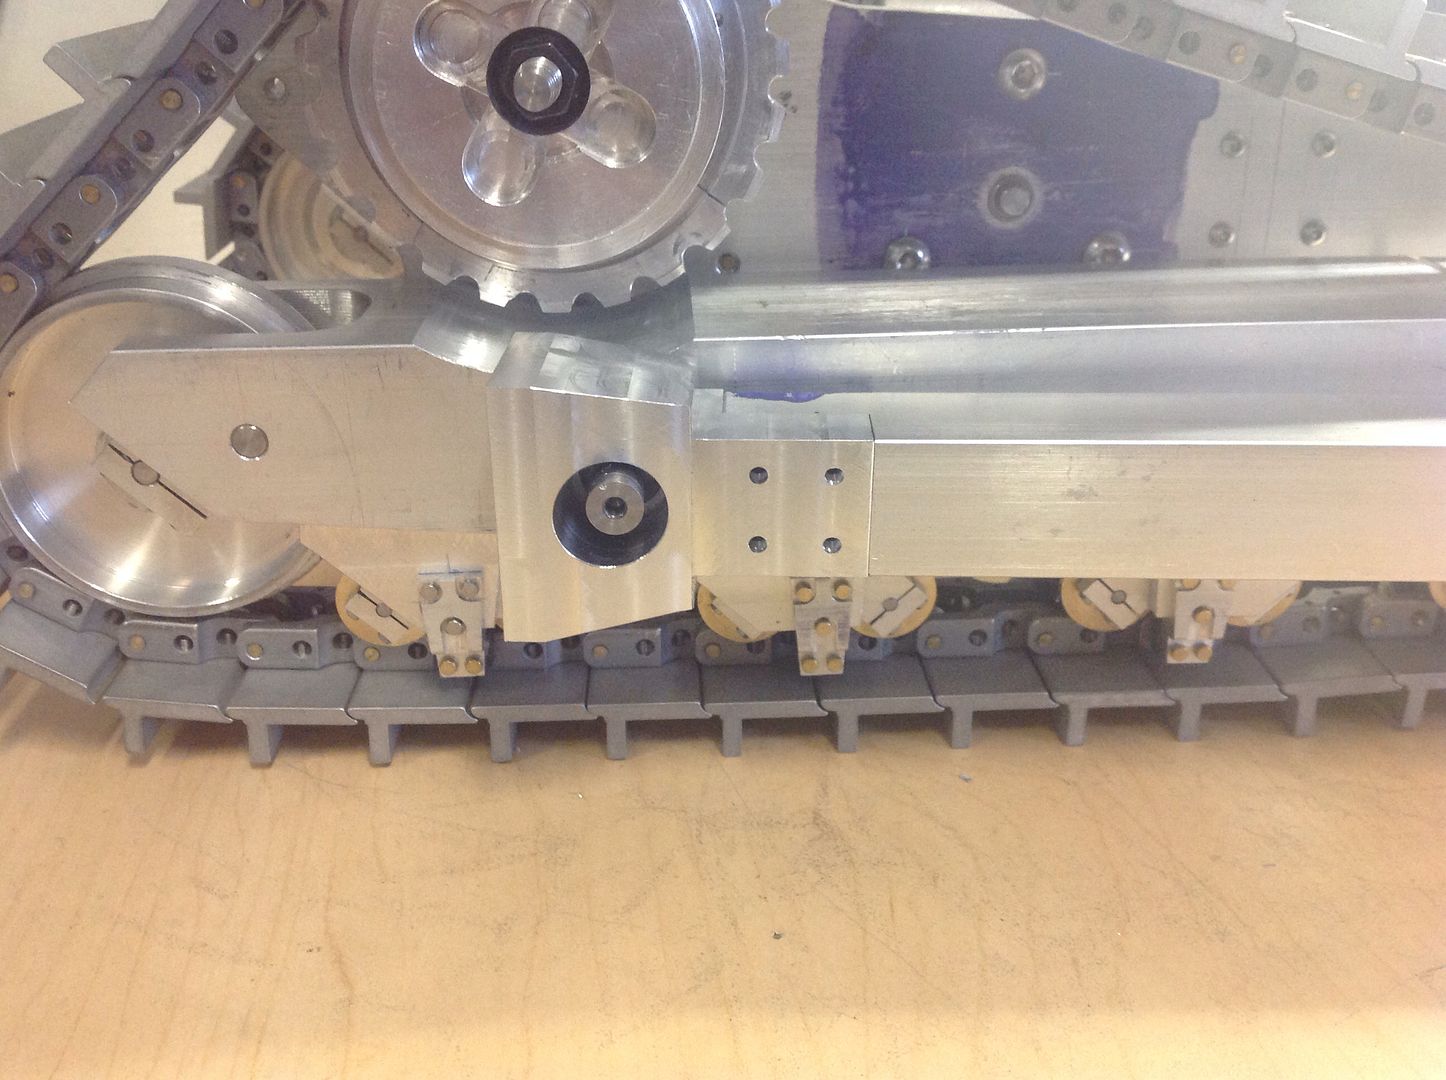
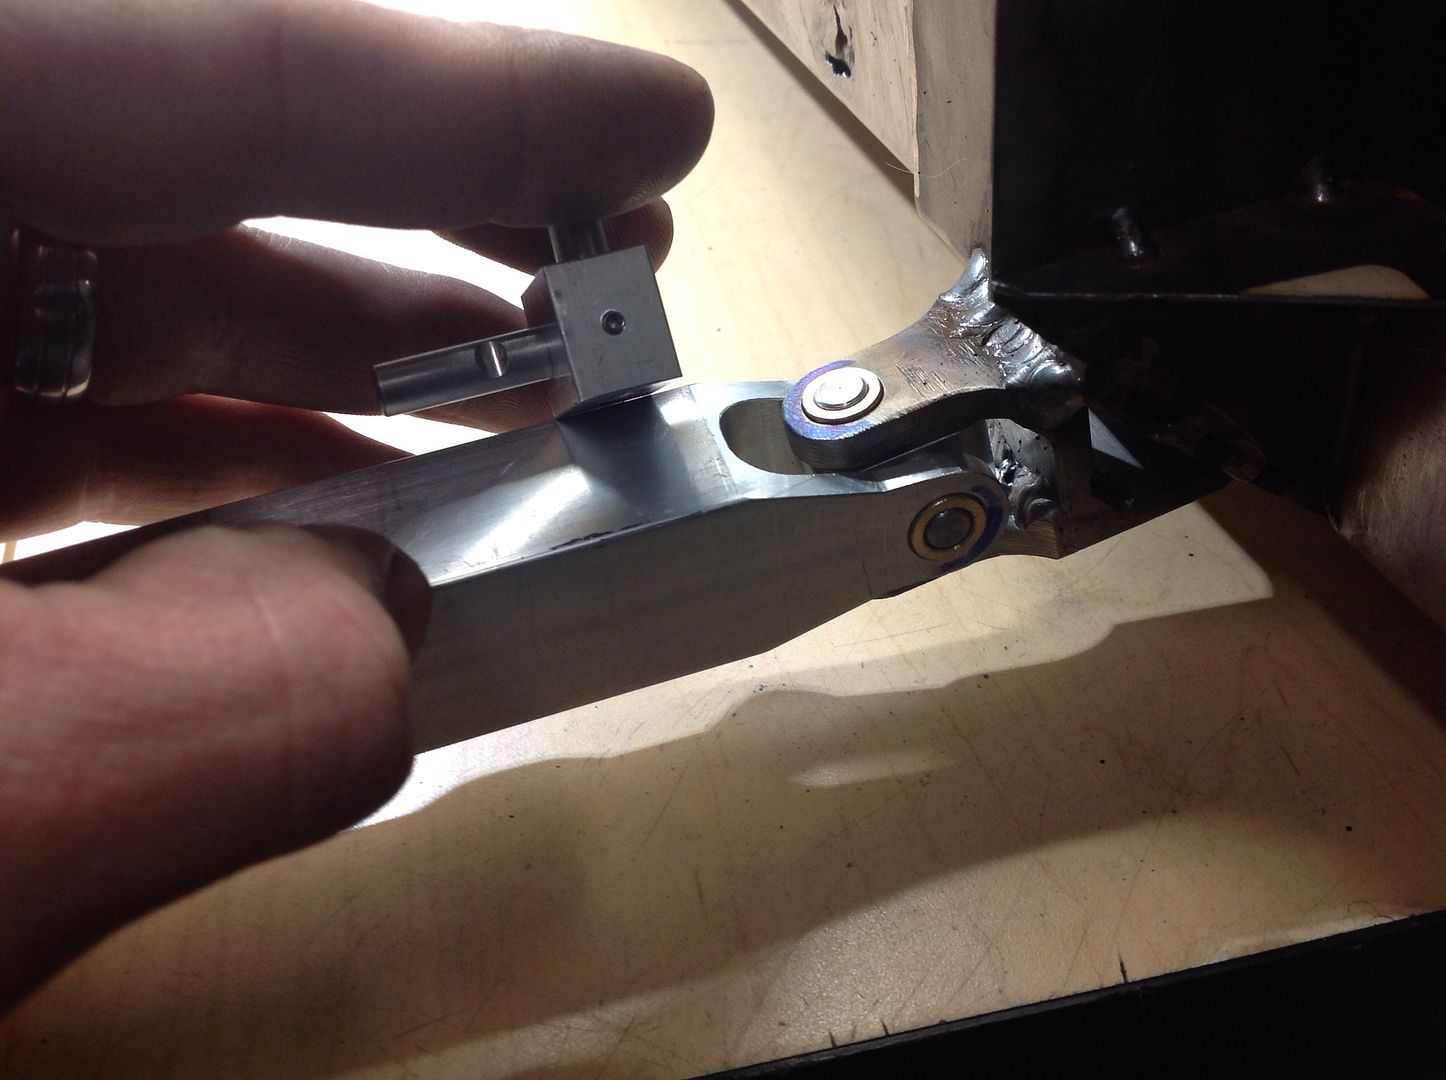 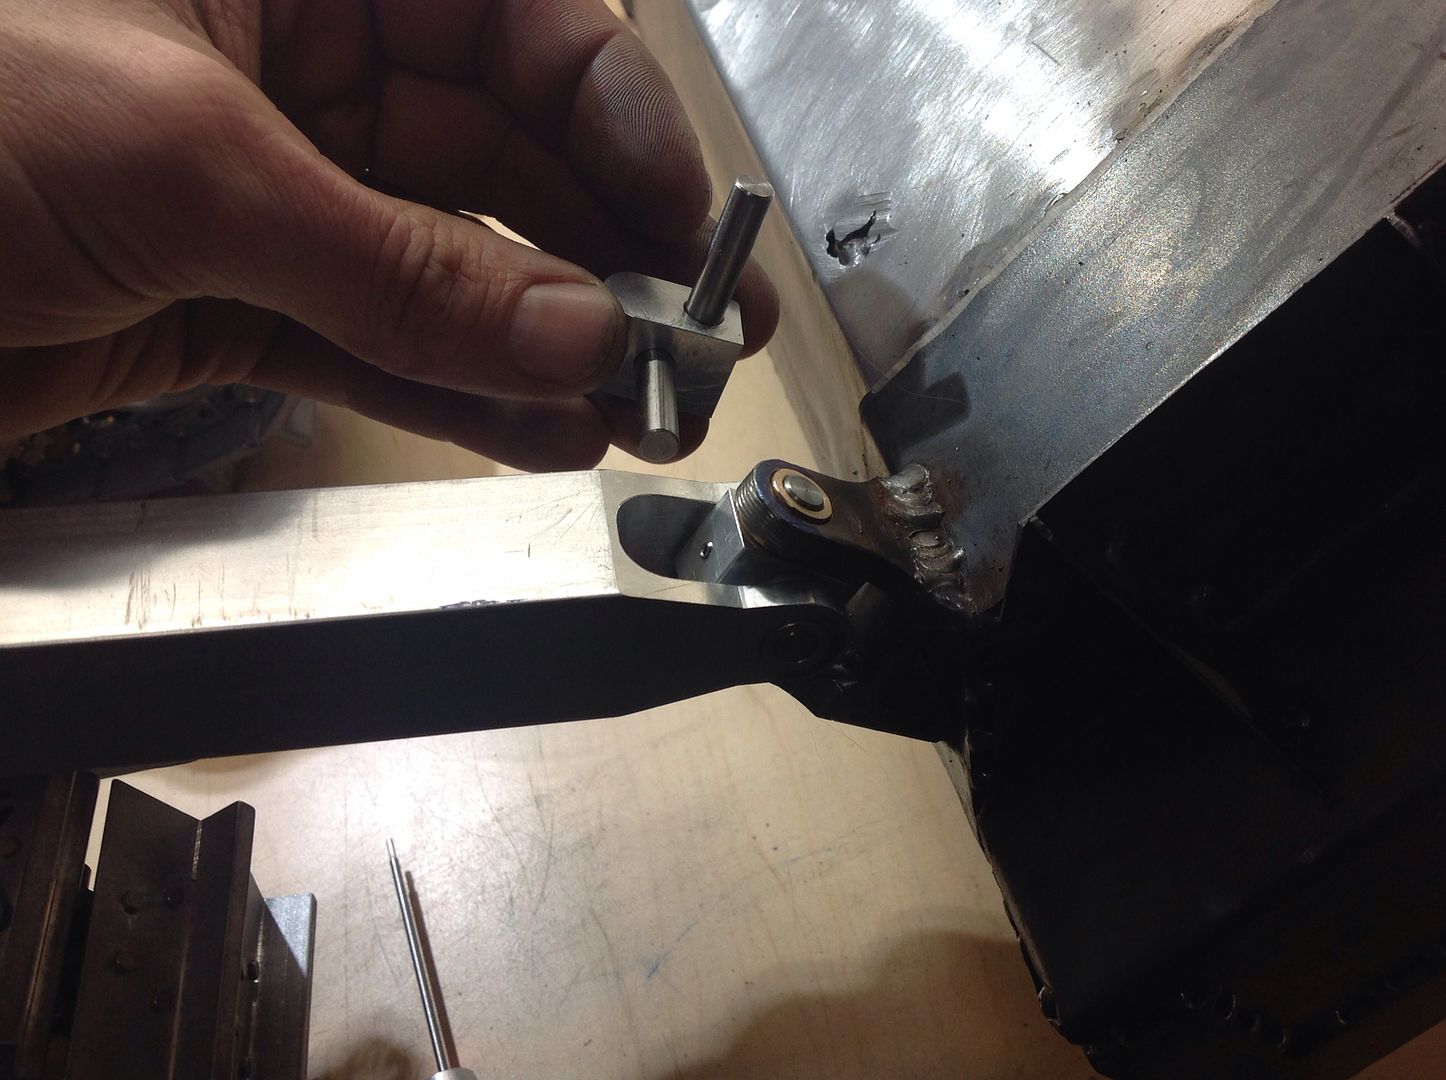 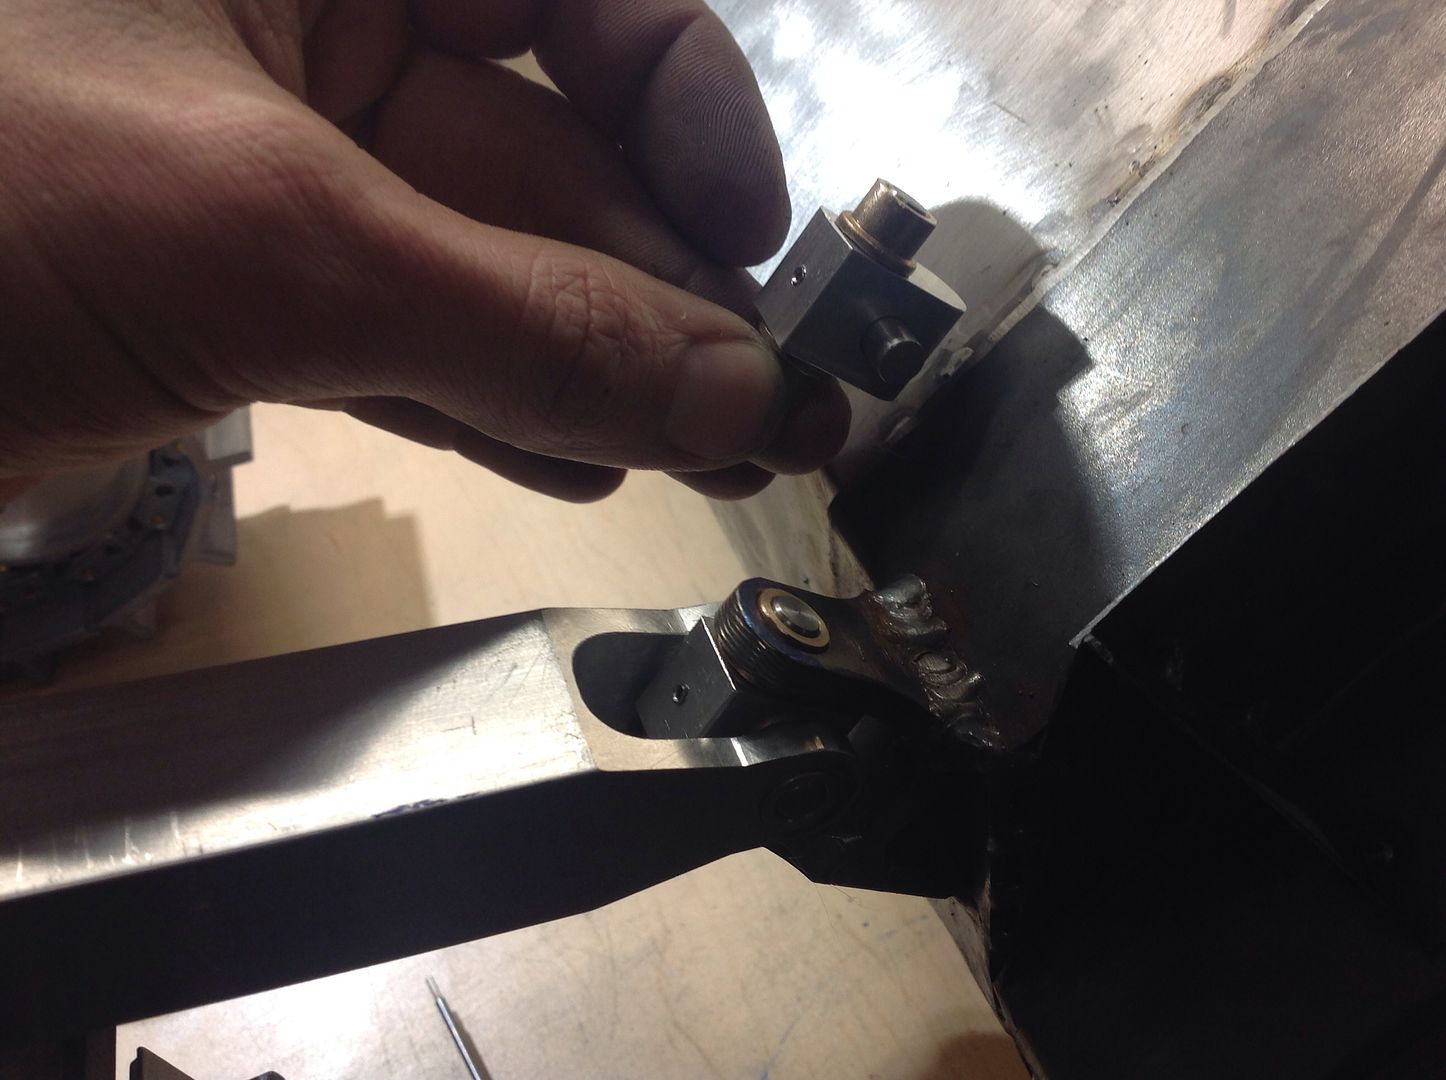 So far this little piece has given me the most fits!!!! I'm not an engineer so I figure the mechanics of real machinery is working so use similar. I made this pivot block to where only one set screw will be needed and will be hidden. Gonna have to start thinking about hydros. Where do you guys get your bushings/ seals for piston rods and what size hose and fittings should I be getting? 1:14 scale.
__________________
Always wasting money, as the wife says. To view links or images in signatures your post count must be 10 or greater. You currently have 0 posts.
|
 |
| Currently Active Users Viewing This Thread: 1 (0 members and 1 guests) | |
|
|


 Linear Mode

