|
|||||||
| Construction Equipment If it digs, pushes, hauls dirt "off road" post it here. |
 |
|
|
Thread Tools | Display Modes |
|
#41
 02-26-2020, 06:57 PM
|
|||
|
|||
|
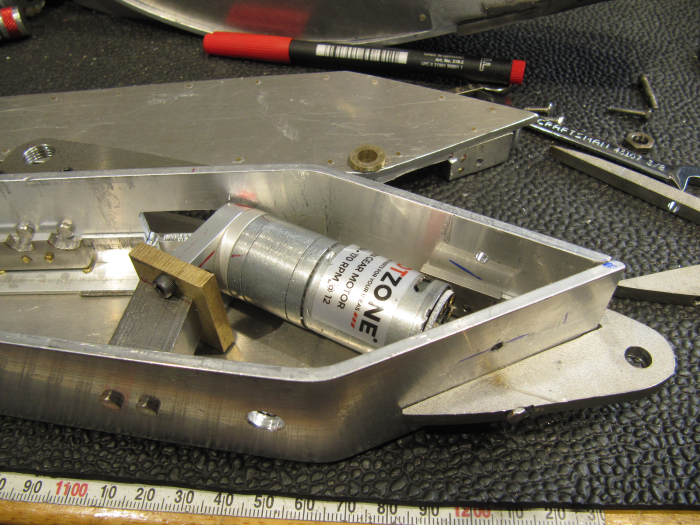
Got a chance to wire up the motor and reassemble them boom, to give it a first motion test. This test was done with a 98 rpm gearmotor, I have faster and slower ones to let me dial in the max movement speed. After testing, I dont think I'd want it any slower (its on a speed control on the radio so it will do slower speeds depending on the joystick movement).
https://youtu.be/_X8LaI4TmHg The intermittant clunking noise when the stick is coming in is the flex cable just rubbing on the edge of the slot in the boom - need to grind back the slot end just a little more. Also, I checked the force it gives, and that seems reasonable (didnt have enough hands to do that on camera, did not have the tripod handy). Overall, happy with it for a first run! Work will continue on the bucket linkages and that cylinder, also need to rig up some limit switches on the movement to keep from over-running the ends of the leadscrew. A little insulation in the boom should knock down the motor noise some too. 

|
|
#42
02-27-2020, 02:07 AM
|
|||
|
|||
|
That’s absolutely amazing ! Can’t believe the progress your making and now I feel like I’m slacking 😂
Are you going to swap the motors out for faster ones and test ? Looking really good
|
|
#43
02-27-2020, 10:27 AM
|
|||
|
|||
|
Hi Rob,
For the stick I am tempted to leave that motor in place, have been online looking at videos of real excavators at work, and the stick speed is about like that. If I go faster, it wont be by much. The bucket speed may need the faster motor. Guess I'll find out when more is together, and see how it all looks working as a system. I need to open the side of the boom up again anyway (sure it wont be the last time! ) to fix the cable rubbing issue and do the limit switch work. Six screws and the side panel will pop off, so that is easy (glad its not painted yet). There is enough room in the boom that I may go up a level on the gearmotor to a stronger one, I think that I have to stick with this size for the bucket motor, the stronger ones wont fit there. Chris
|
|
#44
02-27-2020, 02:46 PM
|
|||
|
|||
|
Quote:
Don
|
|
#45
02-27-2020, 07:56 PM
|
|||
|
|||
|
Quote:
|
|
#46
02-29-2020, 09:25 AM
|
|||
|
|||
|
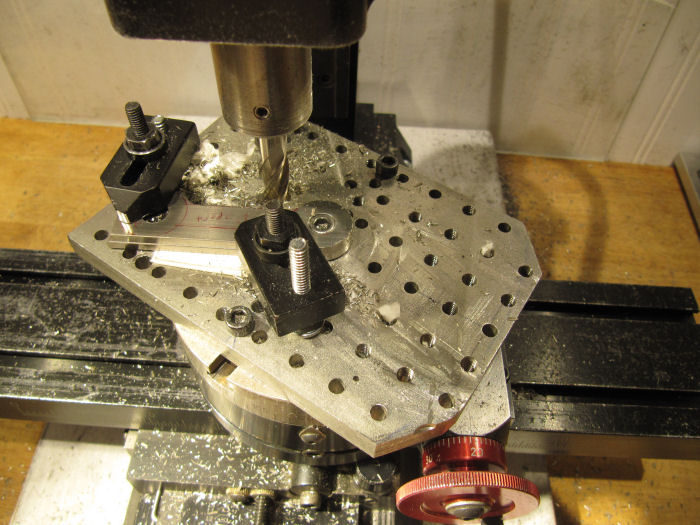
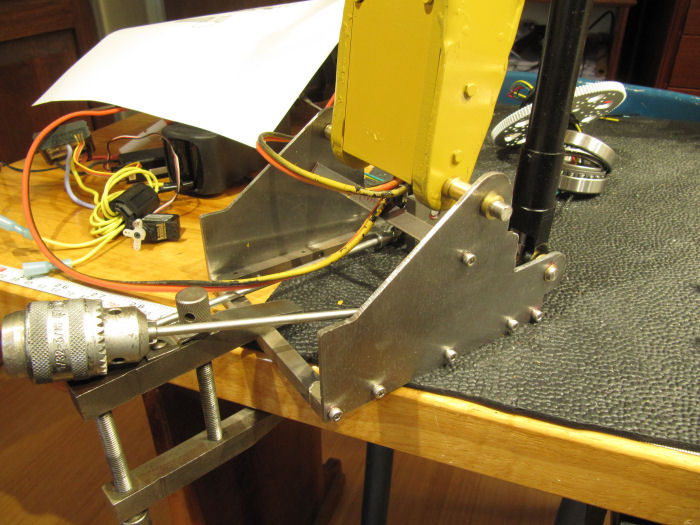
Started in on the mechanisms in the stick, got the motor mounted - tight fit...
 the opening for the drive cable from the motor to the cylinder:  and also drilled for the bushings at the bucket end for the linkages: 
|
|
#47
03-03-2020, 11:03 AM
|
|||
|
|||
|
Some more work done on the excavator - working on the linkages from the cylinder to the bucket. The side links were milled from flat bar stock on the rotary table:
 The solid link from there to the bucket is being pieced up from a thicker piece of flat bar and two round bars with slots milled in. They will be silver soldered together and then more shaping done. 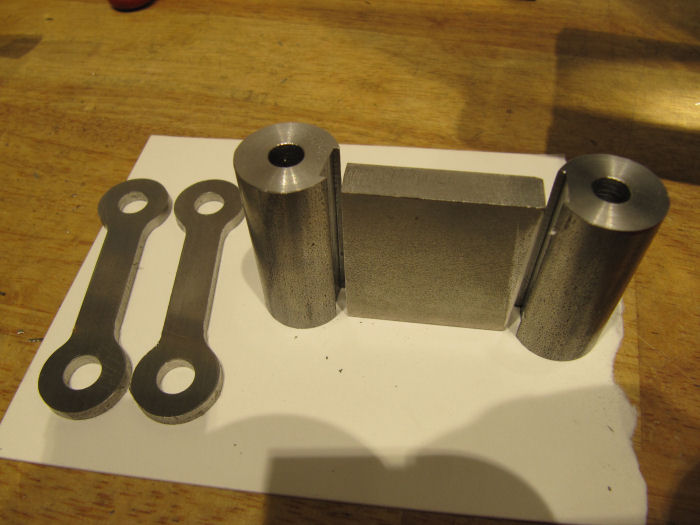
|
|
#50
03-04-2020, 12:03 PM
|
|||
|
|||
|
This morning got the pivot rods threaded and nuts made, and installed the motor in the stick. Here is a quick video of the motion test for the bucket linkage - better get started on the bucket!
https://youtu.be/qg6FHjgabfc
|
|
#51
03-14-2020, 07:20 PM
|
|||
|
|||
|
Been a bit since I've made any progress on this build, it is still happening, but I've been focussed on the final parts for my Stanley engine model, should be back on the excavator next week. I got some steel plate for the bucket, need to make up a bending form for the curved center section, then will trace the actual part to cut the sides out. Most likely it will be all silver soldered together since I do not have equipment or the know-how to weld it.
|
|
#52
03-17-2020, 05:03 PM
|
|||
|
|||
|
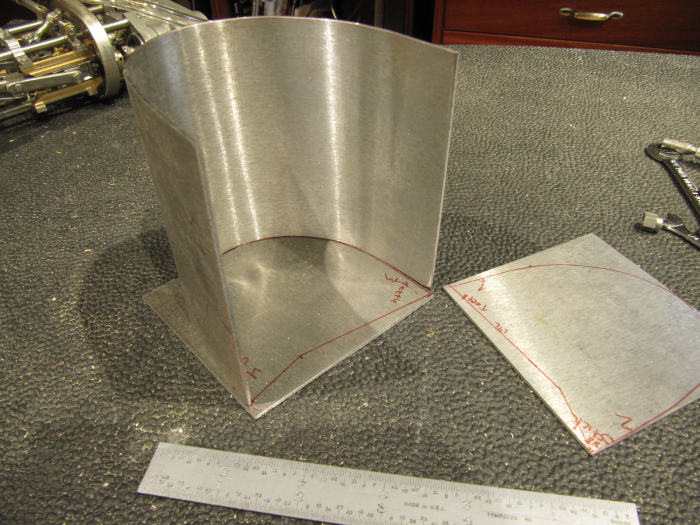
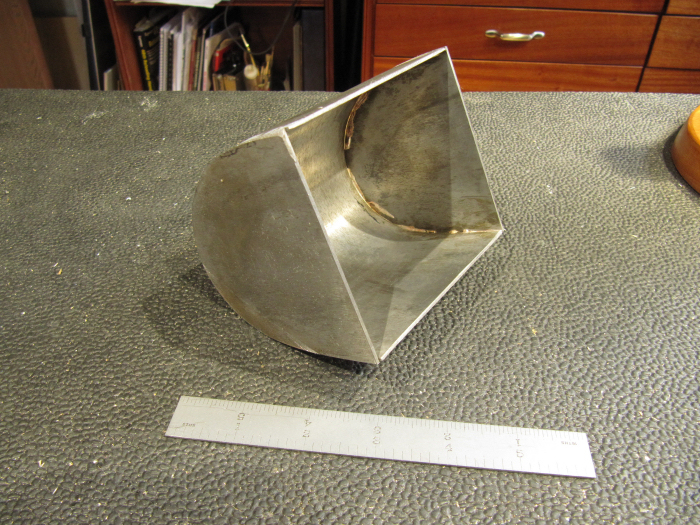
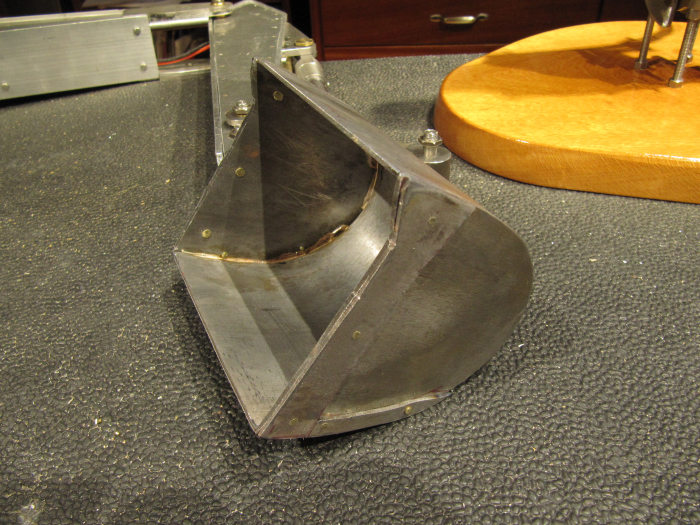
Getting back on the excavator build finally - started with some 3/32" steel flat stock, and bent the center section of the bucket over a wood form. The side plates are rough cut. The parts will be silver soldered together once ready. Still a number of pieces to shape out...
|
|
#57
04-02-2020, 12:51 PM
|
|||
|
|||
|
Here is a shot of the boom/bucket assembly for the excavator all assembled and ready for the base bracket and lower cylinders.
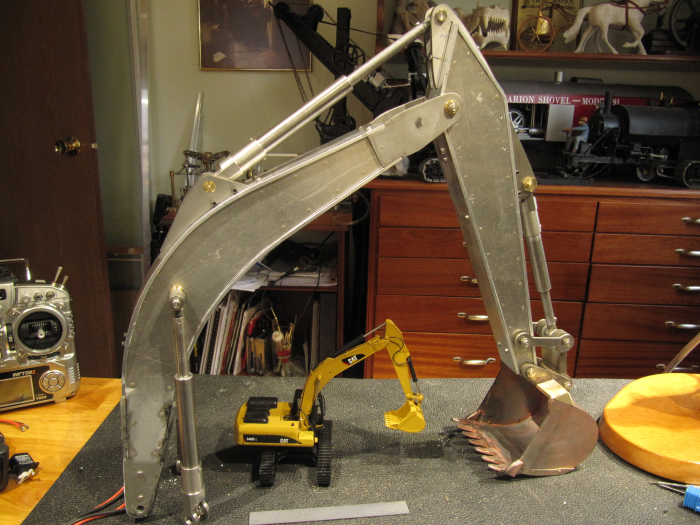 And a shot of it painted. The yellow is actually from rattle cans of Cat paint, they sell it for touchup and repairs, covers amazingly well for a yellow paint. This is one coat. The black is Duplicolor ceramic engine enamel. 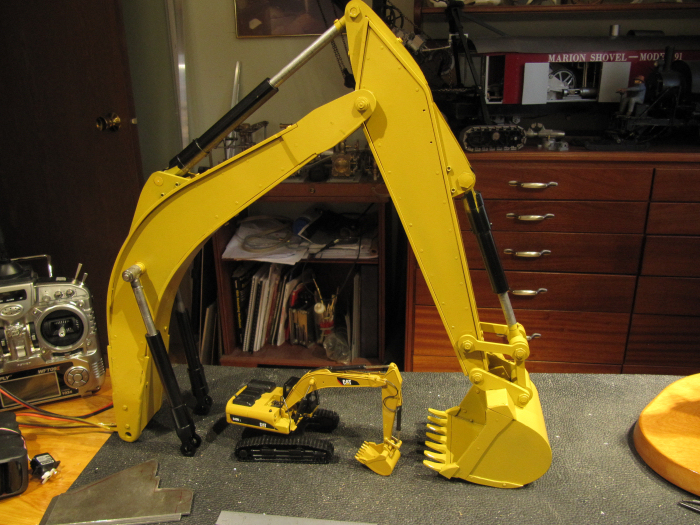 Underneath the boom you can see the little die-cast model that I am scaling up from. Next parts are the steel plates that form the framework that the base of the boom attach to, rough cut plates are in the lower left of the photo.
|
|
#58
04-02-2020, 12:53 PM
|
|||
|
|||
|
I am getting the base for the booms pieced together - from the weight of the boom assembly, I am wondering if I'll be able to use the same gear motor for it as I did for inside the booms, given how heavy the parts are. Even with the two cylinders, I may need to go to a larger/more powerful motor for this last one, but fortunately there is plenty of room inside the cab block. May wind up with a car seat motor or something like that. Possible that just another gear set will do - the two cylinders need to be kept in sync, so will be driving both from one motor with a line of three gears, motor on the center one. That gear set could be a 2 or 3:1 combination.
|
|
#59
04-02-2020, 12:54 PM
|
|||
|
|||
|
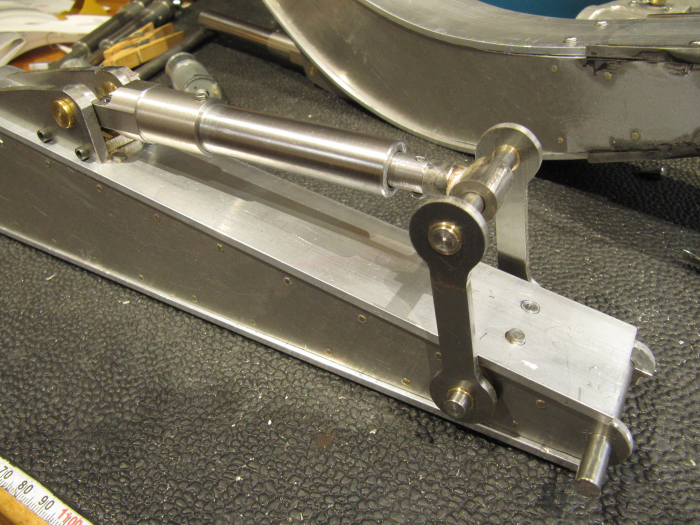
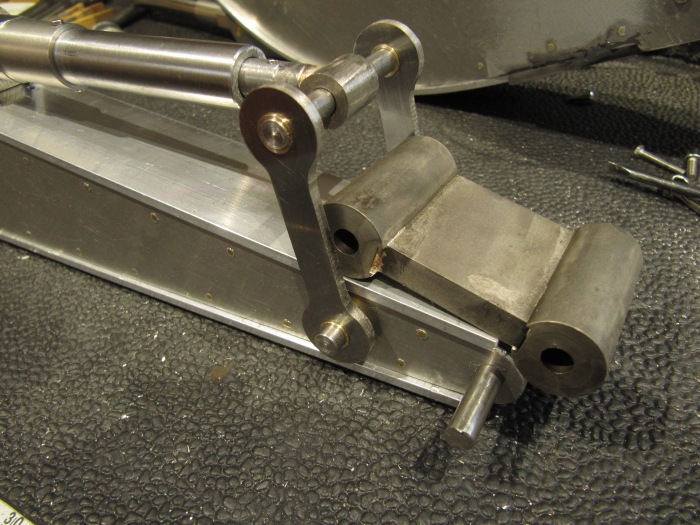
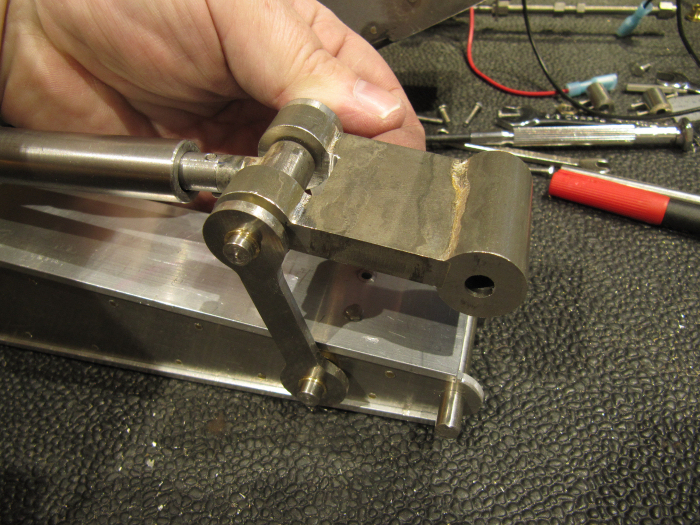
Okay, catching up on this side project build - been busy setting up a new computer, and all the time that always takes! Will be better suited for all the CAD work I am doing these days, so well worth the time. Anyway, I got the part in to switch the cylinder pair that holds up the entire boom assembly over to single-start Acme threads vs the original 4-start threads, which were just too aggressive on the movements. Here is the base assembly:
 Each cylinder has its own drive shaft - in the picture the one on the right has a small drill chuck on it to make it easier to turn by hand. With the new leadscrews I can turn the shaft and lift/lower the booms with just one cylinder and a reasonable amount of force. Before, that was very difficult. The two shaftws will come back to a common drive gearmotor, have not decided if I'll do a gearbox to link them or use a small chain drive (leaning that way at the moment). Here is a picture showing the entire assembly, bucket lifted off the table - stays there now, before it could spin the leadscrews and lower itself back, which meant that it would have been putting constant strain on the motors. 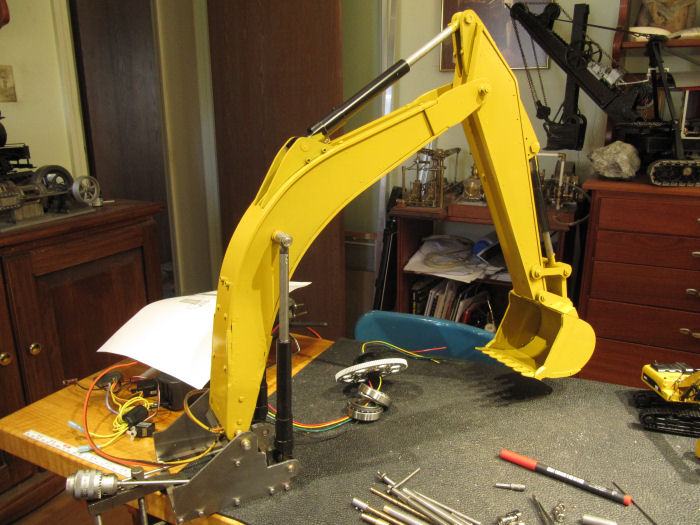 Lots of spare shafts and couplers in the foreground from figuring out the whole thing. Here is a shot showing the part for holding and spinning the cab - there will be a lot of side force at times, so I wanted a strong way to connect things. Wound up with a spare set of tapered roller bearings from a trailer - figure it will be more than strong enough! The gear will be mounted to the track unit underneath, and a motor drive gear in the cab will engage it and turn the cab. There is a slip ring unit there to take the motor leads for the track drive motors down from the cab to the lower unit, but still allow the cab to turn as many full circles as it wants. The spindle will be home made, hollow unlike a normal car axle end to allow the wires through. 
|
|
#60
04-02-2020, 06:01 PM
|
|||
|
|||
|
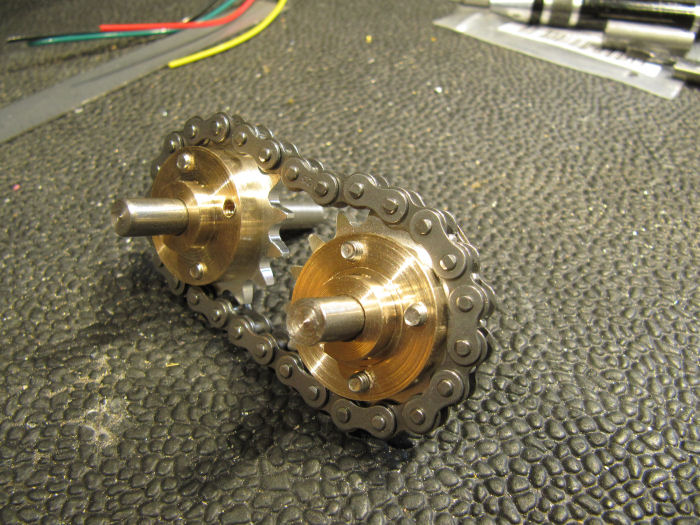
Got the sprocket assembly for the chain drive started - using some .250 pitch chain and sprockets from Servo City for these, nice fine chain for small spaces but plenty strong. They sell the master links and link pin removal tool too. I am going to use the same chain for the track drives too. So far have the sprockets on hubs, next will make up a support to hold the sprockets. The output of each shaft will go to one of the cylinders on the main boom via a shaft with universal joints. The input will be from a gear motor onto one of the shafts. So, one motor will frive both cylinders at a matched speed and direction.
|
|
| Currently Active Users Viewing This Thread: 1 (0 members and 1 guests) | |
|
|


 Linear Mode

