|
|||||||
| Construction Equipment If it digs, pushes, hauls dirt "off road" post it here. |
 |
|
|
Thread Tools | Display Modes |
|
|
|
#4
 06-13-2015, 11:59 AM
|
||||
|
||||
|
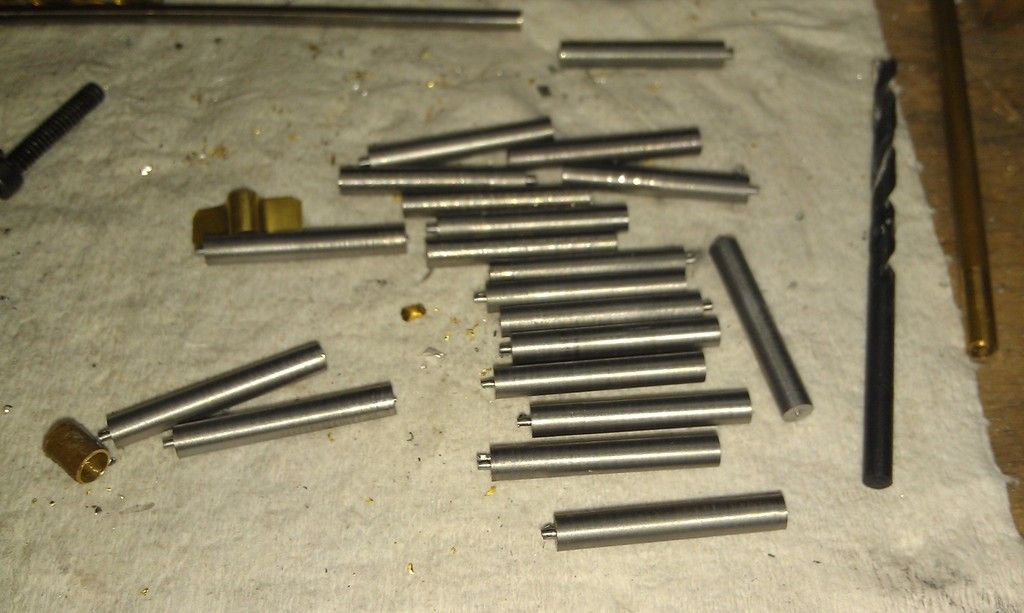
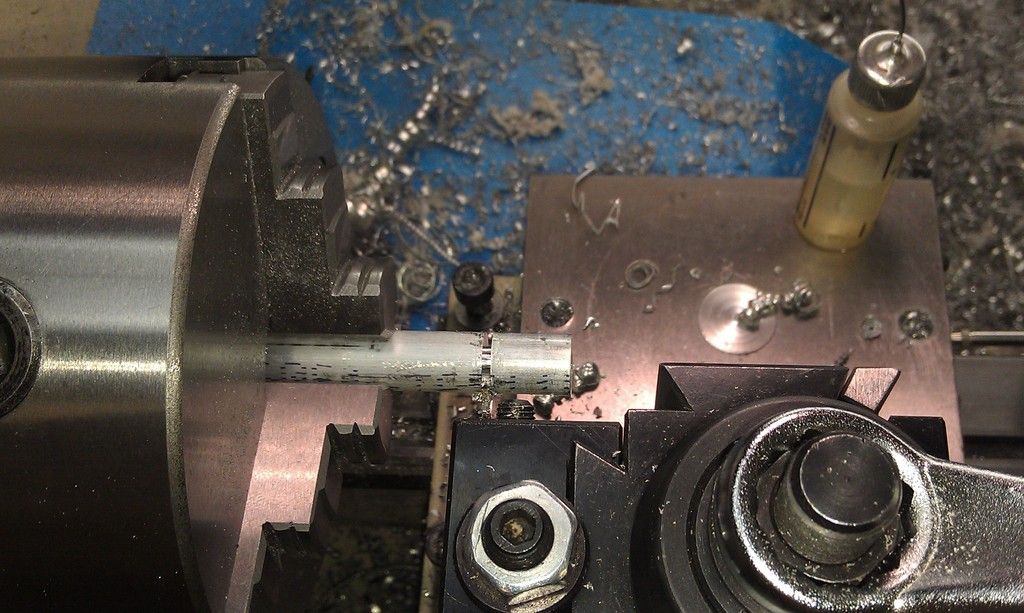
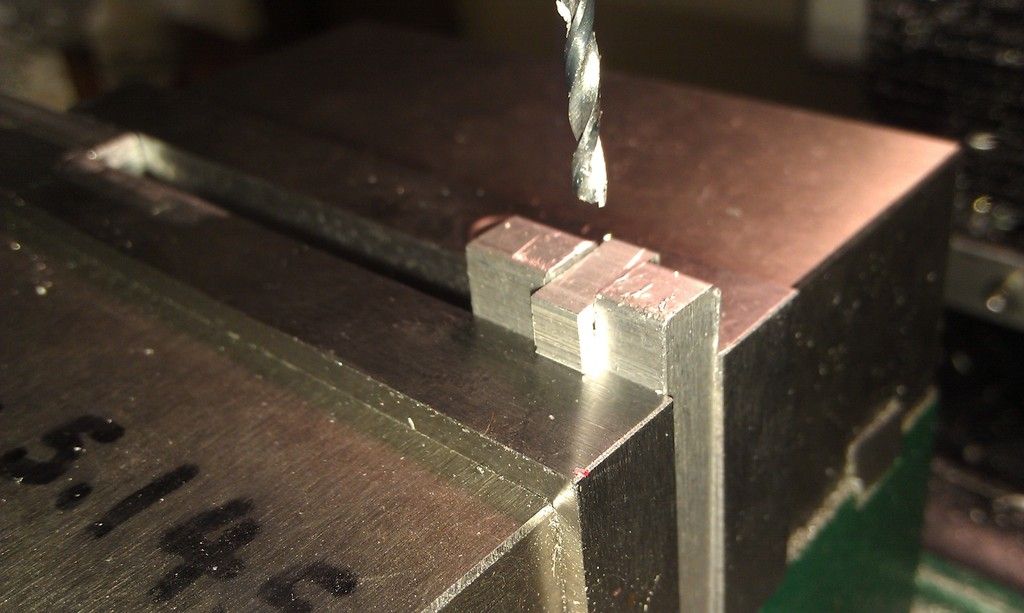
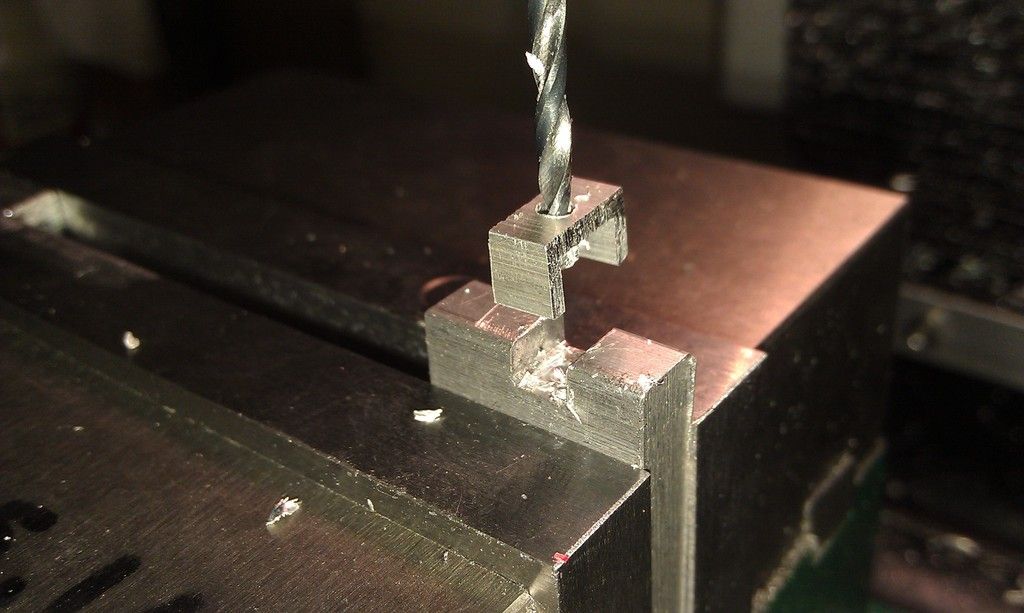
How would you make these idler rollers?
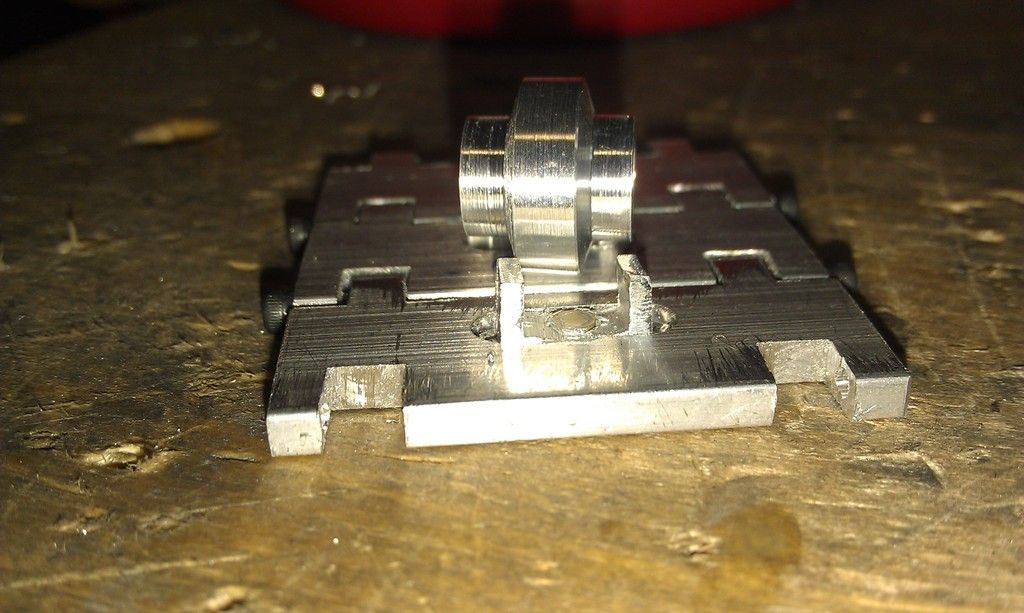 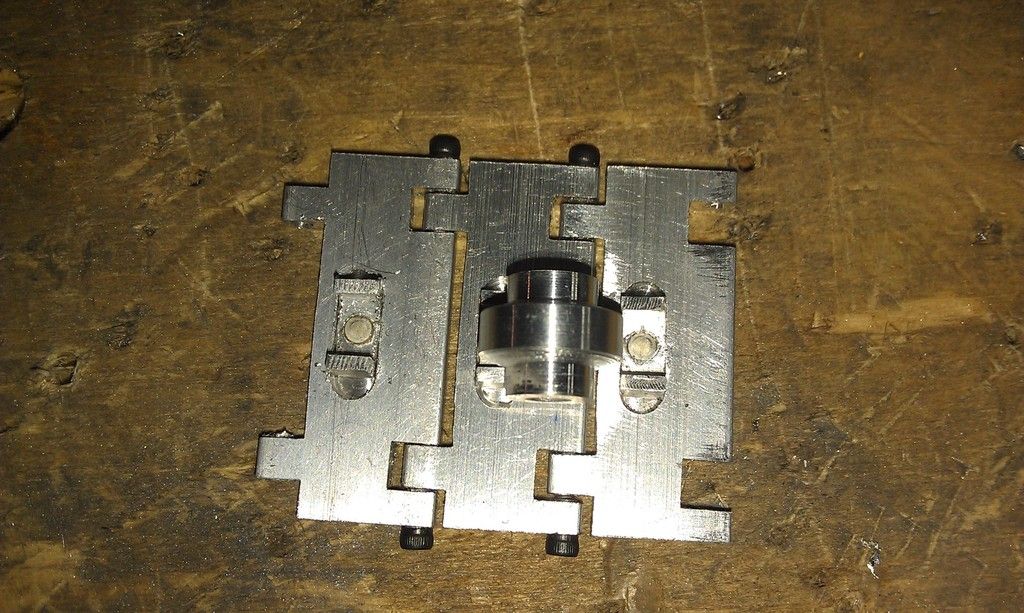 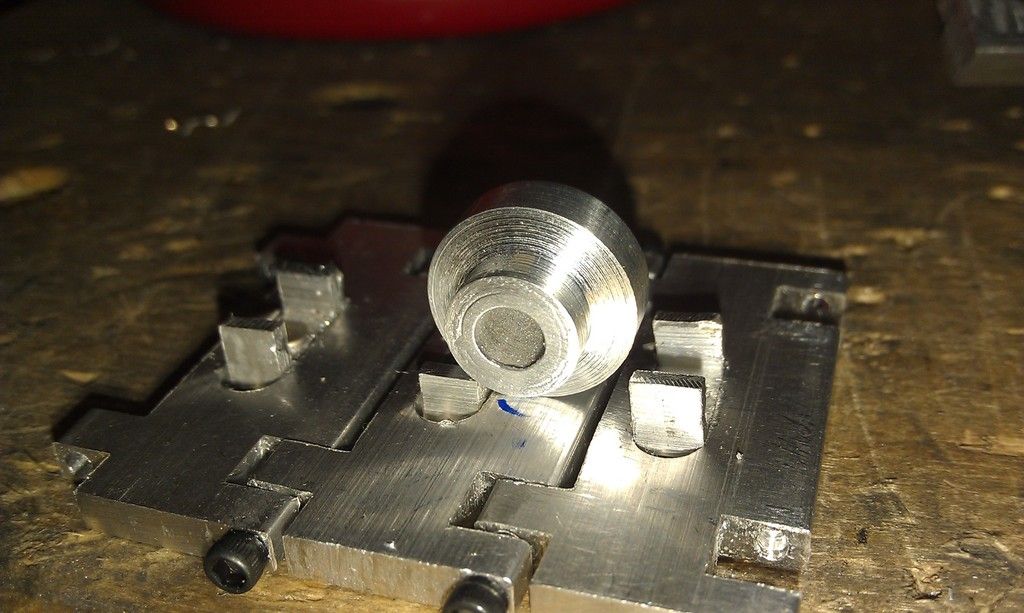 I need to make 12 of them. I am starting with 3/4" round aluminum stock. They have a taper to help clear the drive dog tabs on the pads. This is one of those things that I look at and think " that shouldn't be too hard", and then when I start making them I end up with two or three and NONE of them are the same. I had been trying to make the taper using the side angle on my right hand turning tool bit, but that is problematic when it comes to doing the second (or left hand side if the part stays chucked up for the entire process, which I think it should). So, now it finally dawned on me, use the compound to make the taper. My problems are: Keeping concentricity. (I think I solved this by NOT over drilling the center hole, so that when I pull the stock out, I don't start off on the next part with an off center hole.) Getting the same length on the shoulders on each side. Getting the center rib in the center. I am using my dial indicator on a mag base to move the carriage in as I turn the shoulder. Should I be doing this with the part chucked once for the entire part? If so, should I be using a left hand turning tool for the left hand shoulder and Turing away from the chuck? I think this all comes back to one of my very first questions when I got started with the lathe, "how do you know what steps and what order and how to decide what tool or procedure"? Thanks for any tips or suggestions. Jim 
|
|
#5
06-13-2015, 01:35 PM
|
||||
|
||||
|
Keep the bar chucked through the whole process. Leave enough bar sticking out of the chuck so your tools can do what is needed for say,2 or 4 rollers. Turn the OD , do the step and taper using LH and RH tools, center drill, rough drill, ream to size you need, part off the finished roller making sure the left and right are equal so rib is centered. Now this process will keep everything concentric but don't drill too far because when you have to pull the bar out of the chuck to machine more you will have to face the bar off so it's clean to start another center drill.
|
|
#6
06-14-2015, 12:52 PM
|
||||
|
||||
|
And now, for something completely different...
Here is my first prototype drive tumbler! Still working out the details. 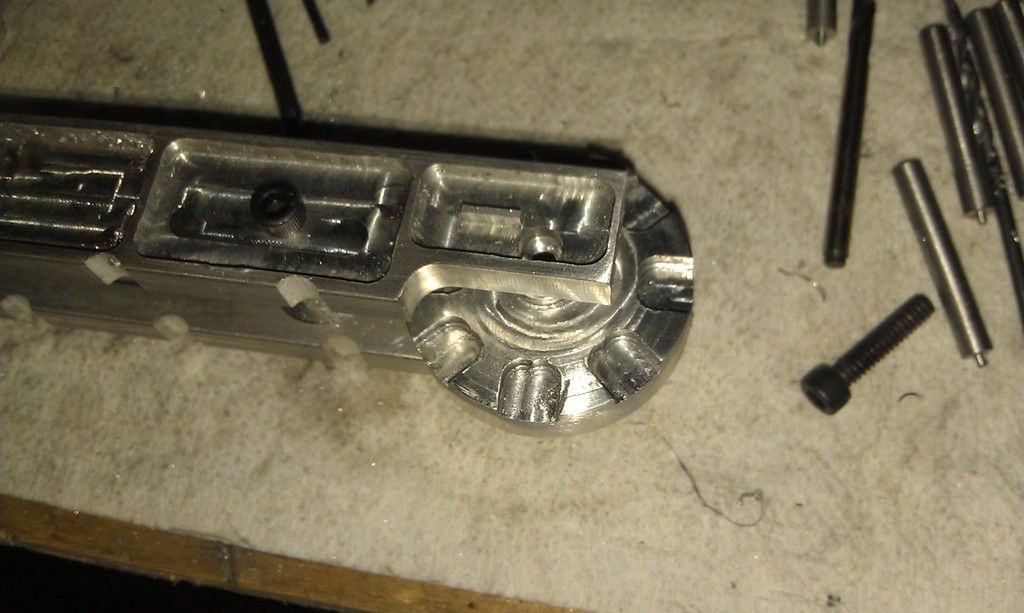 Don't even have the second side formed because I didn't leave enough center hub to hold onto. Back to the lathe... Jim Last edited by Rvjimd; 06-14-2015 at 12:53 PM. Reason: More
|
|
#7
06-14-2015, 06:02 PM
|
||||
|
||||
|
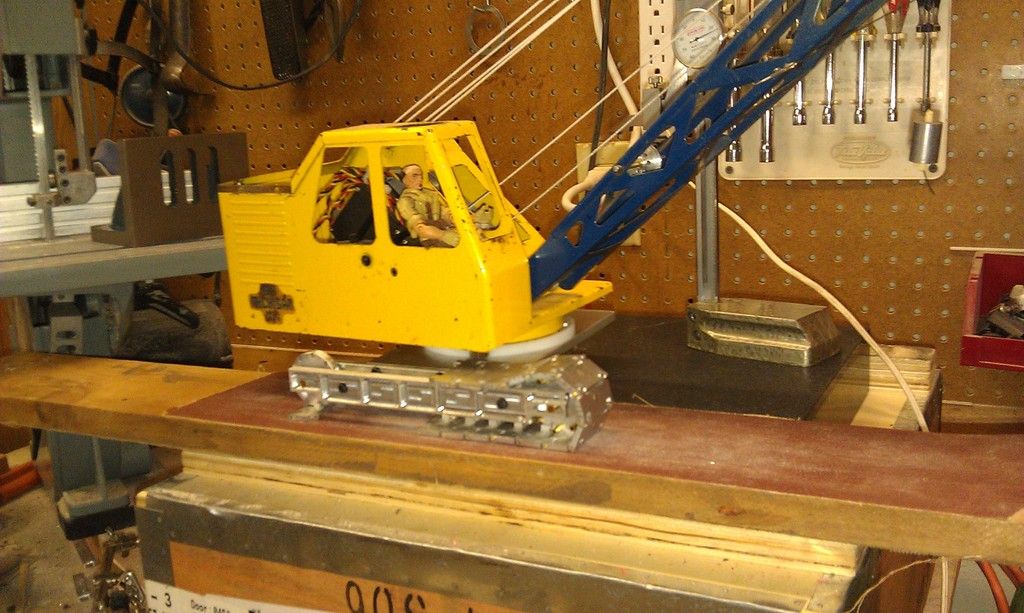
Finally got one tumbler done both sides. I am waiting on hardware so I can assemble an entire unit. Need to have it nearly complete so I can tell what I need to do to the drive dog ears on the pads and the tumbler flanges.
I am pretty sure I am going to need to put a bevel on both, just not sure how much on each. I sure it will be more trial and lots of errors. 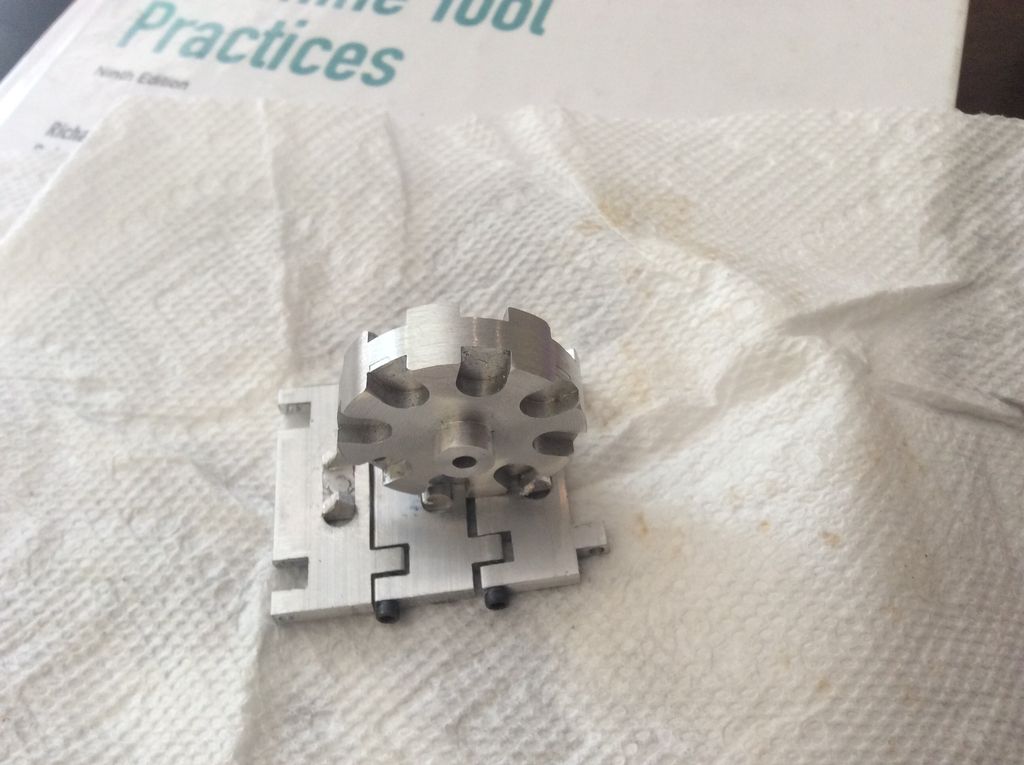 Jim
|
|
#8
06-06-2015, 12:45 PM
|
|||
|
|||
|
Those pads look great, Jim! Keep it up. You're getting me thinking about finishing out the back half of my 40' container so I can set up a my stuff and get working. Be a great winter project.
|
|
#9
06-06-2015, 08:29 PM
|
||||
|
||||
|
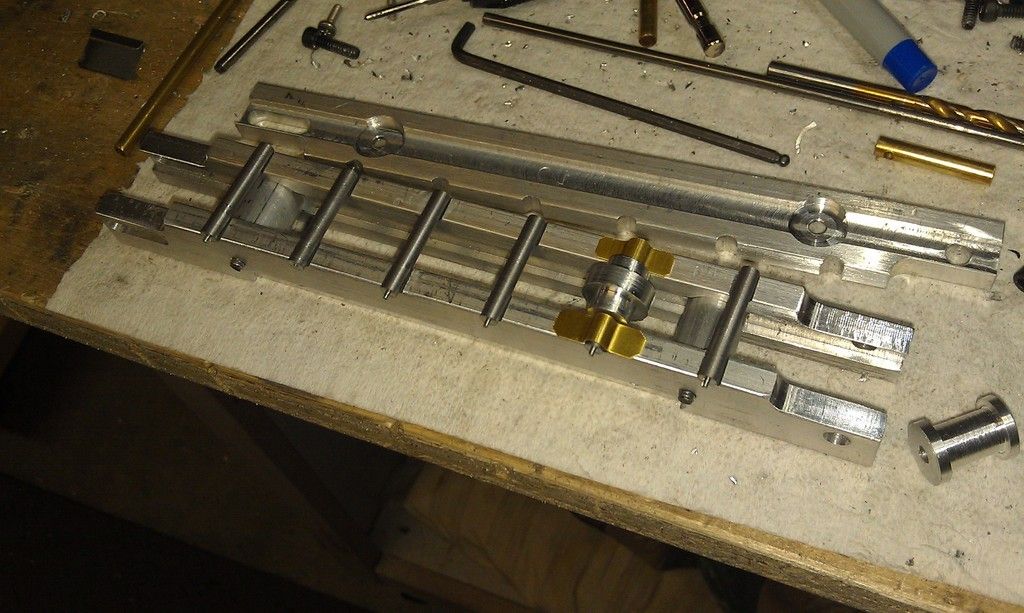
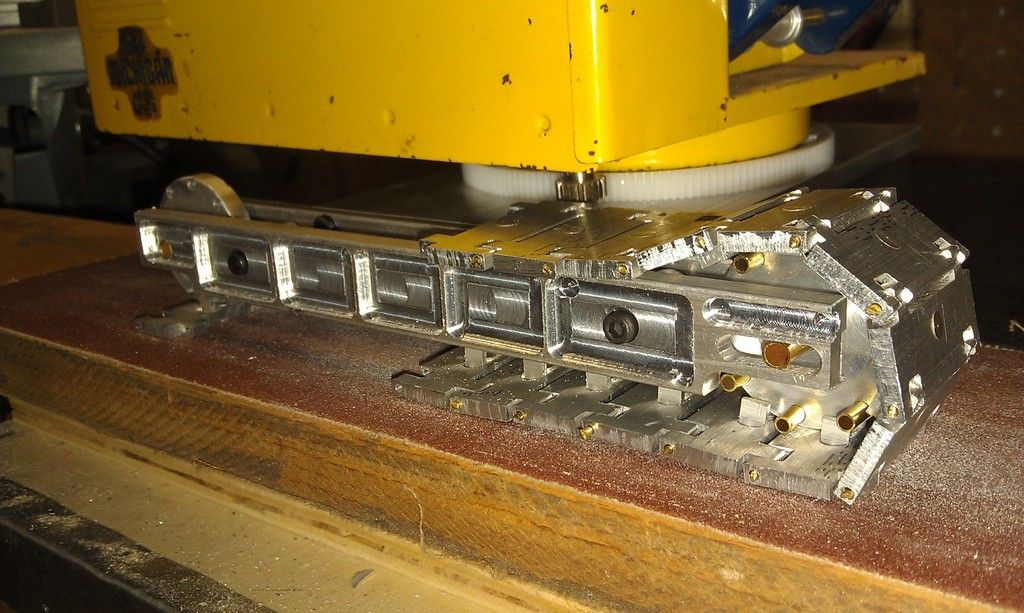
Got four side frame rails made and bolted two of them together. Oh, and if I counted correctly, I got all the pads drilled yesterday. Now all I have left on the pads is riveting the drive dogs into the slots. The pads detail never ends!
 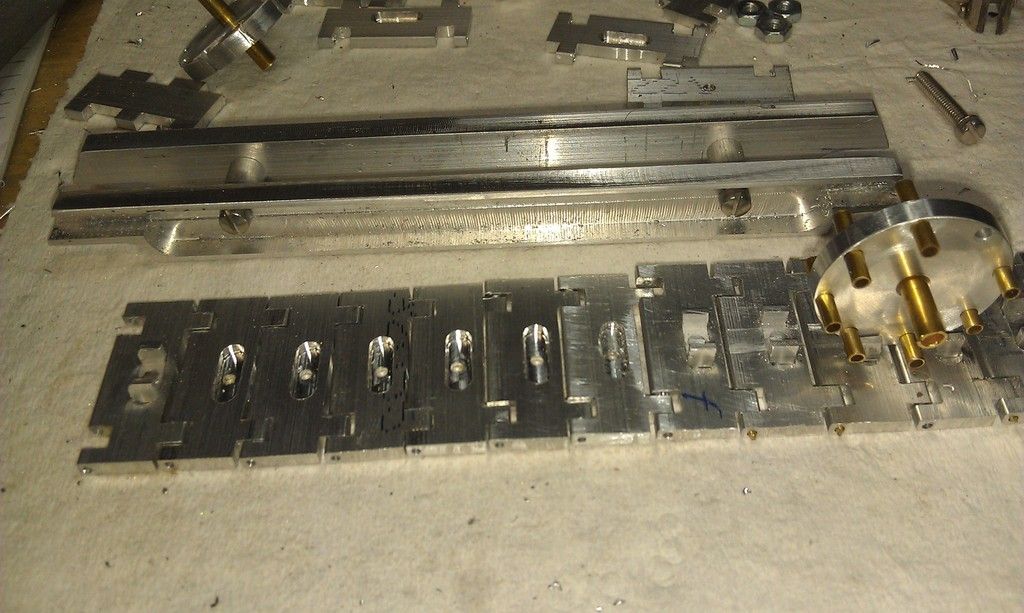 Ya, I need to find some better looking hardware to bolt them together... 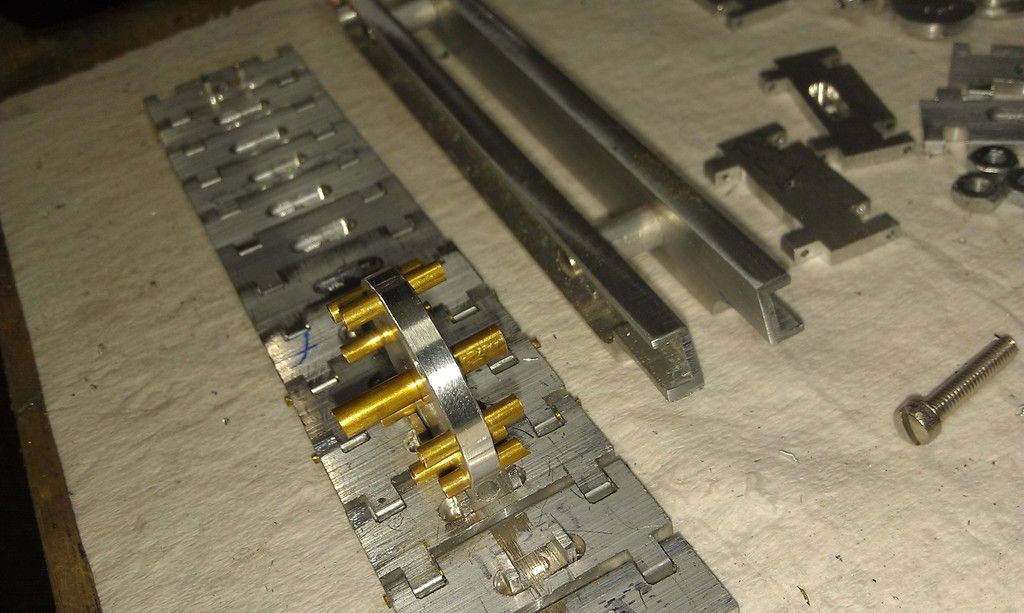 Jim
|
|
#10
06-06-2015, 11:45 PM
|
|||
|
|||
|
looking good
__________________
Steve
|
|
#13
06-07-2015, 04:56 PM
|
|||
|
|||
|
Looking good jim- to me the pads are the most tedious and time consuming job on these types of projects. Once you get those finished you can have some fun milling all the other parts. Are you using a center drill to spot each hole?
Last edited by modelman; 06-07-2015 at 04:58 PM. Reason: adding
|
|
#14
06-08-2015, 09:21 AM
|
||||
|
||||
|
Here is a shot of the micro stop counter sink tool and pneumatic rivet squeezer. I have a bit of aluminum metal work experience and already had these tools, or I would have NOT attempted to do the pads like it did. I countersink the hole in the bottom of the pads to accept the rivet flush.
 The micro stop is fine threaded and allows adjustment so you can get a perfect depth on the countersink to fit the rivet head. I left them a bit high because I didn't want any extra rivet on the inside to get in the way of the tumblers. And, the little channel parts are so small and the hole clearance is way less than it should be so setting the rivet to standards can split or crack the part. I could have used a soft rivet here but had a bunch of standard. 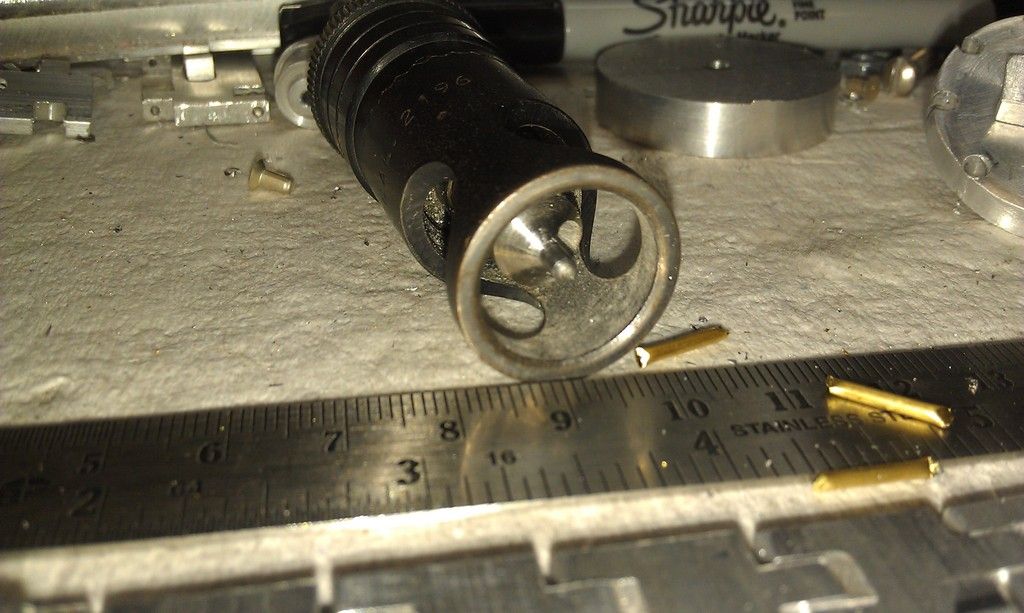 Here is the rivet squeezer, really handy of you have a lot of rivets to squeeze. 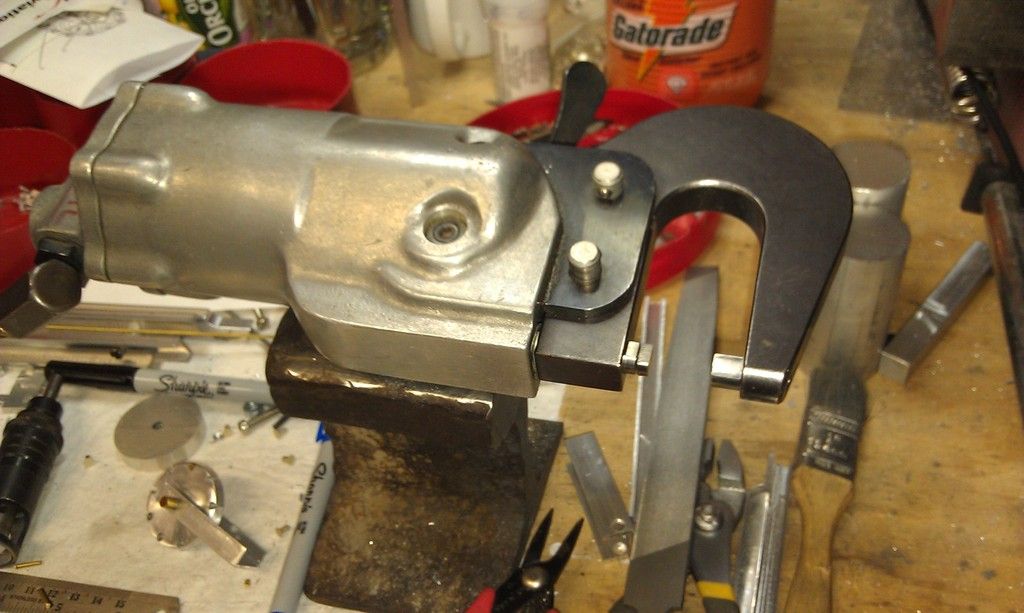 Closeup of the dirt side of one of the pads with the rivet set. 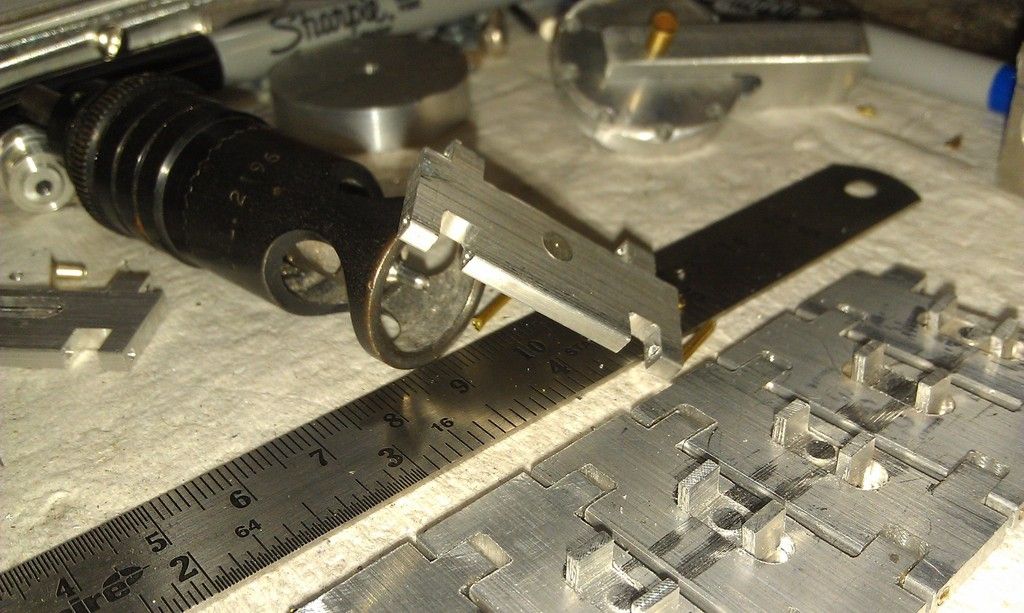 Jim
|
|
#17
06-10-2015, 10:58 AM
|
|||
|
|||
|
Your scale looks good to me jim. Are you happy with it? I like the new frame rails you made. Adds strength, which you probably don't need but it helps the appearance. Are you about ready to make a tumbler and see if this works? Keep cranking on those handles.

|
|
#18
06-10-2015, 11:07 AM
|
||||
|
||||
|
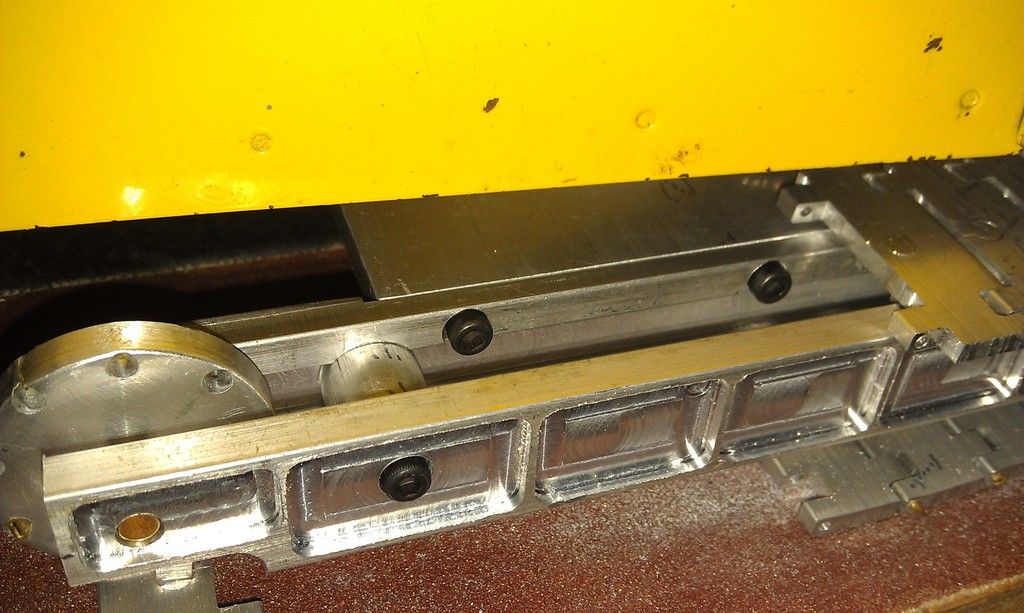
Thanks Tom! Ya I am pretty happy with it. I did the side over just for a better appearance. I have a hard time visualizing stuff like this so I always end up making something to see how it looks and then usually make one or two more until I am happy with it.
I am hesitating on the tumblers only because I don't want to take the vice off to put the rotary table on and then I know I will be going back to the vice. It really isn't a big deal, but I am trying to do as much as I can before the switch over. Decided to put a .050" groove in the bottom of the rails to "hold" the lower rollers.  Thanks to ALL for watching! Jim Last edited by Rvjimd; 06-10-2015 at 11:17 AM. Reason: Added picture
|
|
#19
06-10-2015, 12:08 PM
|
|||
|
|||
|
I know exactly what you mean about changing set-ups. When I got my 2-in-1 machine several people told me I would regret it but the price was just too good to pass up. However, I thought about what I was told every time I was turning something and needed the mill for 1-simple cut and had to change over again and again. Oh well, live and learn.
|
|
#20
06-11-2015, 05:08 PM
|
||||
|
||||
|
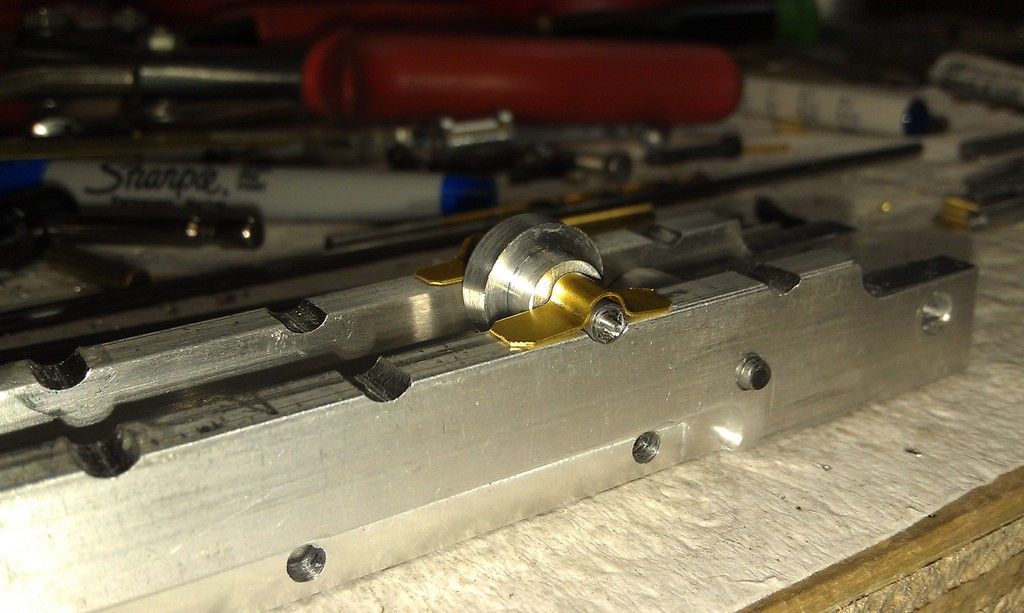
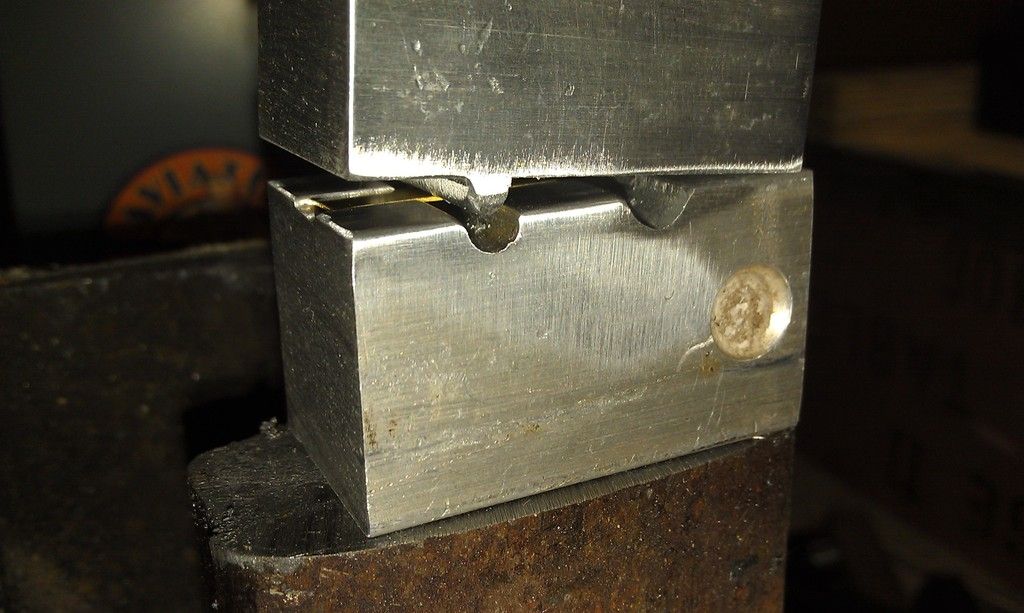
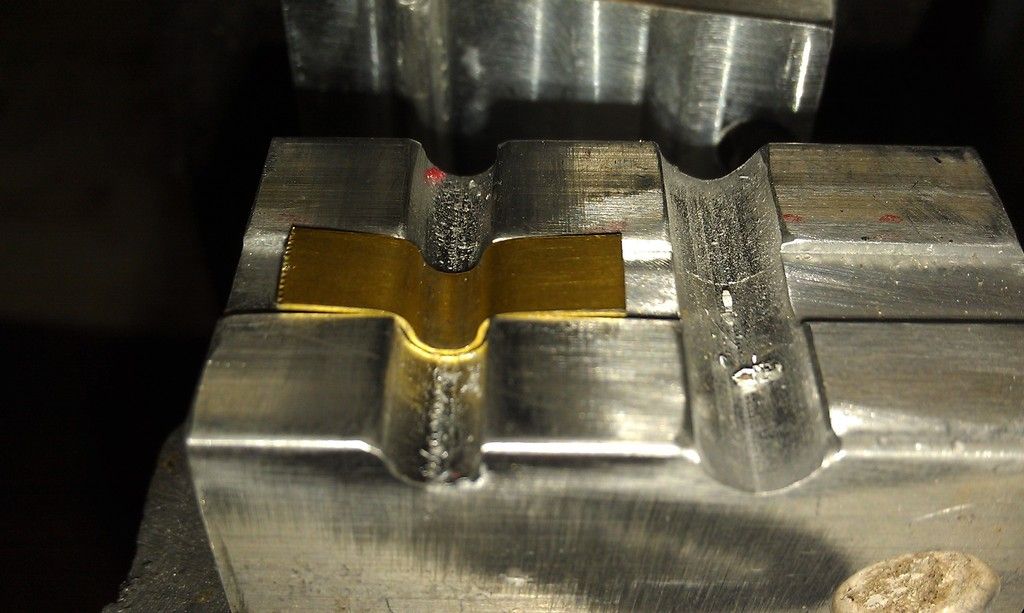
More progress shots! Decided to leave the lower roller shafts round and make little clamps for each end. Will attach them with 2-56 cap screws. Made a little die to form the strap clamps. Turned the 3/16" steel rod down to fit a 3/16" brass bushing to go inside the rollers.
      Jim
|
|
| Currently Active Users Viewing This Thread: 1 (0 members and 1 guests) | |
|
|


")


 Hybrid Mode
