|
|||||||
| Construction Equipment If it digs, pushes, hauls dirt "off road" post it here. |
 |
|
|
Thread Tools | Display Modes |
|
#1
 11-17-2011, 09:00 AM
|
||||
|
||||
|
just a peak of what I've been designing amongst other things
") borrowed pic from machinery trader         thanks for lookin
__________________
RIP FreddyGearDrive 2-12-59/12-19-11 To view links or images in signatures your post count must be 10 or greater. You currently have 0 posts. 
|
|
#2
11-17-2011, 09:25 AM
|
||||
|
||||
|
WOW! That really came out nice!Although! I see you & Travis are useing the same wimpy axles. I gotta have a front row seat for the vid,Can't wait to see this monster get a good full bucket. Then watch the front of the machine go to the ground when you try to lift it.
 Gotta get one in there when I can.  FGD
__________________
To view links or images in signatures your post count must be 10 or greater. You currently have 0 posts.
|
|
#3
11-17-2011, 09:31 AM
|
||||
|
||||
|
Quote:
__________________
RIP FreddyGearDrive 2-12-59/12-19-11 To view links or images in signatures your post count must be 10 or greater. You currently have 0 posts.
|
|
#5
11-17-2011, 11:00 AM
|
||||
|
||||
|
Quote:
Oh, freddy, bench test failed by IHB standards Axle redesign in order
__________________
RIP FreddyGearDrive 2-12-59/12-19-11 To view links or images in signatures your post count must be 10 or greater. You currently have 0 posts.
|
|
#6
11-17-2011, 11:21 AM
|
||||
|
||||
|
Quote:
|
|
#8
11-17-2011, 11:44 AM
|
||||
|
||||
|
4 wheel motors. It'll leave the rear body open for hyd system & electronics. Not to mention much more power than you'll ever get from a motor/trans/axles and alot less mechanics involve.
Review Elliot's & Kalle's Fumotec adt builds for axle design & choice of motors. Looking fantastic thus far, this one could definitely be a money maker for you... providing you alter it a bit so it isn't a Cat, just looks similar.
|
|
#9
11-17-2011, 11:53 AM
|
||||
|
||||
|
Looks great Steve! Ill take one
 Brian
|
|
#10
11-17-2011, 12:21 PM
|
||||
|
||||
|
Quote:
__________________
RIP FreddyGearDrive 2-12-59/12-19-11 To view links or images in signatures your post count must be 10 or greater. You currently have 0 posts.
|
|
#12
11-17-2011, 08:13 PM
|
||||
|
||||
|
Steve, I need an order form, better start making duplicate parts.
Ben
__________________
You are an inspiration to many To view links or images in signatures your post count must be 10 or greater. You currently have 0 posts. , you will not be forgotten. R.I.P. FGD Work Hard, Play Hard! Never Forget- 343
|
|
#13
11-17-2011, 08:31 PM
|
||||
|
||||
|
Quote:
Joe you have no idea of what he is using. Travis
__________________
AKA "00" Biddle RIP FreddyGearDrive 2-12-59/12-19-11
|
|
#14
11-17-2011, 09:12 PM
|
||||
|
||||
|
I've given this issue some thought
 tha housings definately need some up grade it takes over the weight of my pans to bow these housings which is flatening the mammoth tires unfilled . 1 major faill point is the axle extension at the screw area not much meat for plastic and they just look to spinly not big loader like so like my mack , I'll be making new housings steel I think will be overkill . There is plenty of room to fit everything needed + an operator in the cab . tha housings definately need some up grade it takes over the weight of my pans to bow these housings which is flatening the mammoth tires unfilled . 1 major faill point is the axle extension at the screw area not much meat for plastic and they just look to spinly not big loader like so like my mack , I'll be making new housings steel I think will be overkill . There is plenty of room to fit everything needed + an operator in the cab .
__________________
RIP FreddyGearDrive 2-12-59/12-19-11 To view links or images in signatures your post count must be 10 or greater. You currently have 0 posts.
|
|
#15
11-17-2011, 11:22 PM
|
||||
|
||||
|
You're wrong on every point Travy.
My Komatsu is 4yrs old, I have done zero wrenching on it and it has moved several cu/yds of dirt in that time. That wdc I had with its overly complicated drivetrain, I had to split it twice to replace driveshafts. And those wdc ball shafts are a hellva alot more stout than the Tamiya dog bones/cups you're using in your loader. I guess your idea will probably be fine for you b/c you only use your stuff sparingly in rubber dirt at a few shows a yr. If Stevie has any plans to market this loader, then he better do it right or expect alot of negative feedback. Motor/trans/driveshafts/axles = problems ...especially if this loader has any significant weight to it.
__________________
Sharing knowledge is one thing that defies basic arithmetic logic --- the more you share, the more you get! Joe
|
|
#16
11-17-2011, 11:47 PM
|
||||
|
||||
|
1 power source 4 motors the motor that loses traction will spin and the others will stall out. I have ran Izzys loader as well as many others with no problems and yes we do play with it in his yard which is a loamy sand a very heavy combination. Maybe you should scratch build one and show us how its done. http://www.youtube.com/watch?v=rrPnFYrQjo0 http://www.youtube.com/watch?v=h0Yt6K45YNE http://www.youtube.com/watch?v=AfYlIcURP0U http://www.youtube.com/watch?v=ETjkHdpHFY8 Travis
__________________
AKA "00" Biddle RIP FreddyGearDrive 2-12-59/12-19-11
|
|
#17
11-17-2011, 11:47 PM
|
|||
|
|||
|
for sure it should be 4 drive motors. Alot simpler and smoother running with the weight of the machine. You would not need 4 seperate esc. They are alot out there the can run multi brushed motors. The Mamba max pro would be perfect.
|
|
#18
11-17-2011, 11:56 PM
|
||||
|
||||
|
Quote:
Travis
__________________
AKA "00" Biddle RIP FreddyGearDrive 2-12-59/12-19-11
|
|
#19
11-18-2011, 12:26 AM
|
||||
|
||||
|
At low throttle, yes the motor with the least traction will spin alone. At greater than half throttle all four motors go no matter which one has less traction. At full throttle the power is undoubtly equal to all of them.
So you play in the dirt occassionaly... have you even worn the paint off the tracks yet, much less the bucket? ...8 months later What does Izzy figure he has for hrs on his loader in the dirt? I ran my wdc more than 250hrs for sure the 1st two yrs I had it and the Stahl would undoubtably get a 100hrs each yr, the front aluminum edge of the bucket is razor thin, I could probably shave with it, I'm gonna need a new bucket soon. I don't have to scratchbuild my own to prove my point, all the top german companies do it with a motor at each wheel for the power, durability & reliability. wdc is the only bonehead that refuses to change, and their market share diminishes moreso every yr as ppl get wise to their models' lack of substance.
|
|
#20
11-18-2011, 12:56 AM
|
||||
|
||||
|
Something kinda like this.
 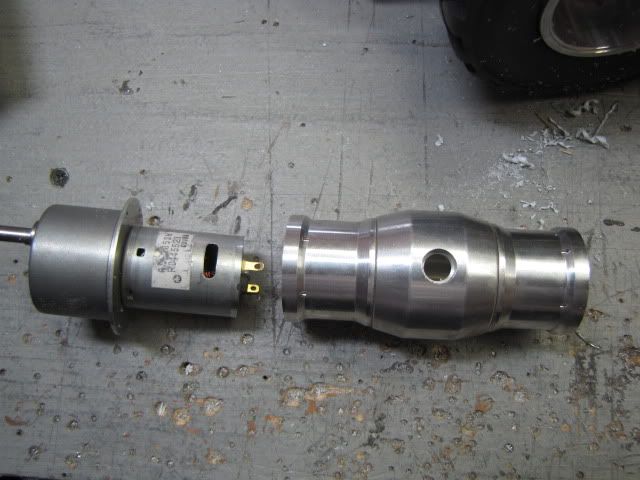 FGD
__________________
To view links or images in signatures your post count must be 10 or greater. You currently have 0 posts.
|
|
| Currently Active Users Viewing This Thread: 13 (0 members and 13 guests) | |
|
|


 Linear Mode

