|
|||||||
| Highway Trucks and Trailers On road trucks and trailers single and twin axle trucks. |
 |
|
|
Thread Tools | Display Modes |
|
#1
 10-21-2013, 06:50 AM
|
||||
|
||||
|
Always wanting one and watching Joe (xj man) building his, I had to do it.
I had a set RC4WD Wheels and just ordered there new grill. Can't wait to get this thing rolling... 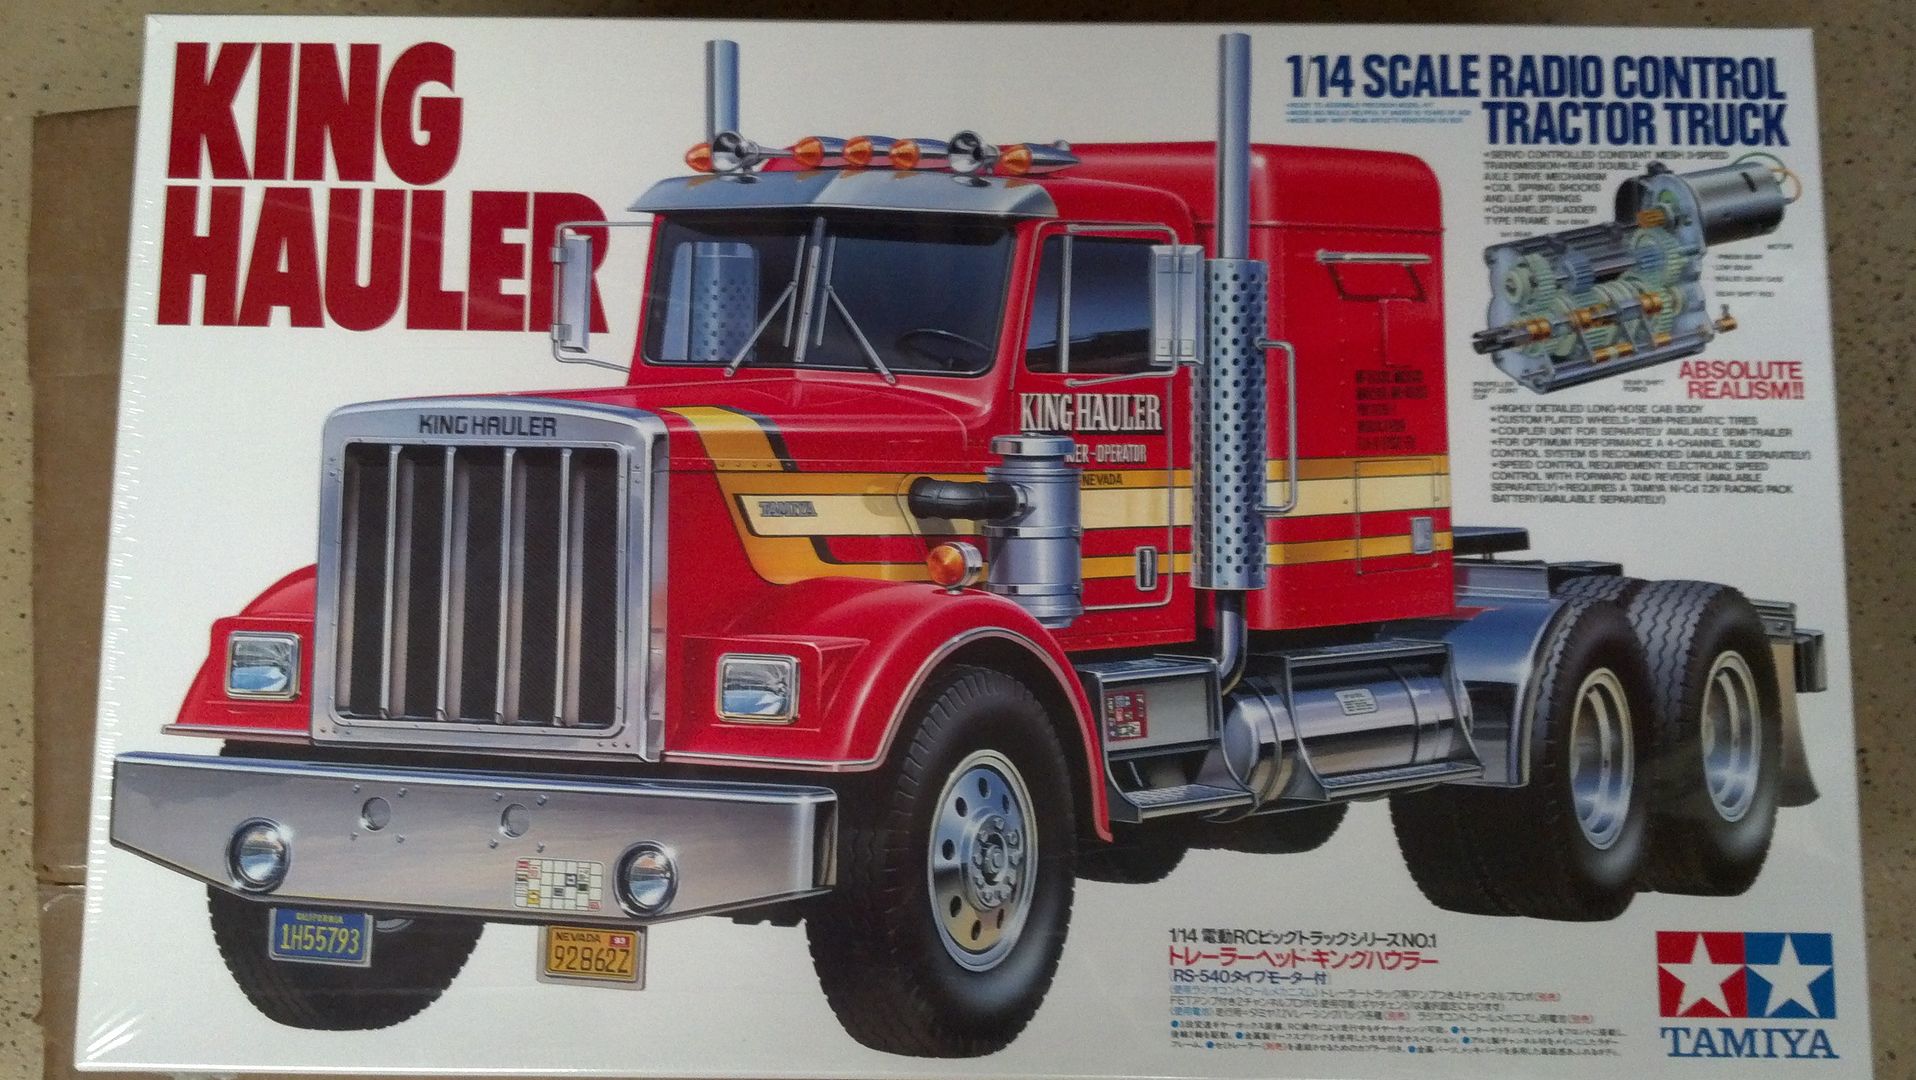
__________________
To view links or images in signatures your post count must be 10 or greater. You currently have 0 posts. To view links or images in signatures your post count must be 10 or greater. You currently have 0 posts. Last edited by sneff; 10-21-2013 at 05:47 PM. 
|
|
#2
10-21-2013, 06:51 AM
|
||||
|
||||
|
I decided that this is going to be a Day Cab Kenworth...
So first thing I needed to do is "cut" the sleeper cab off... 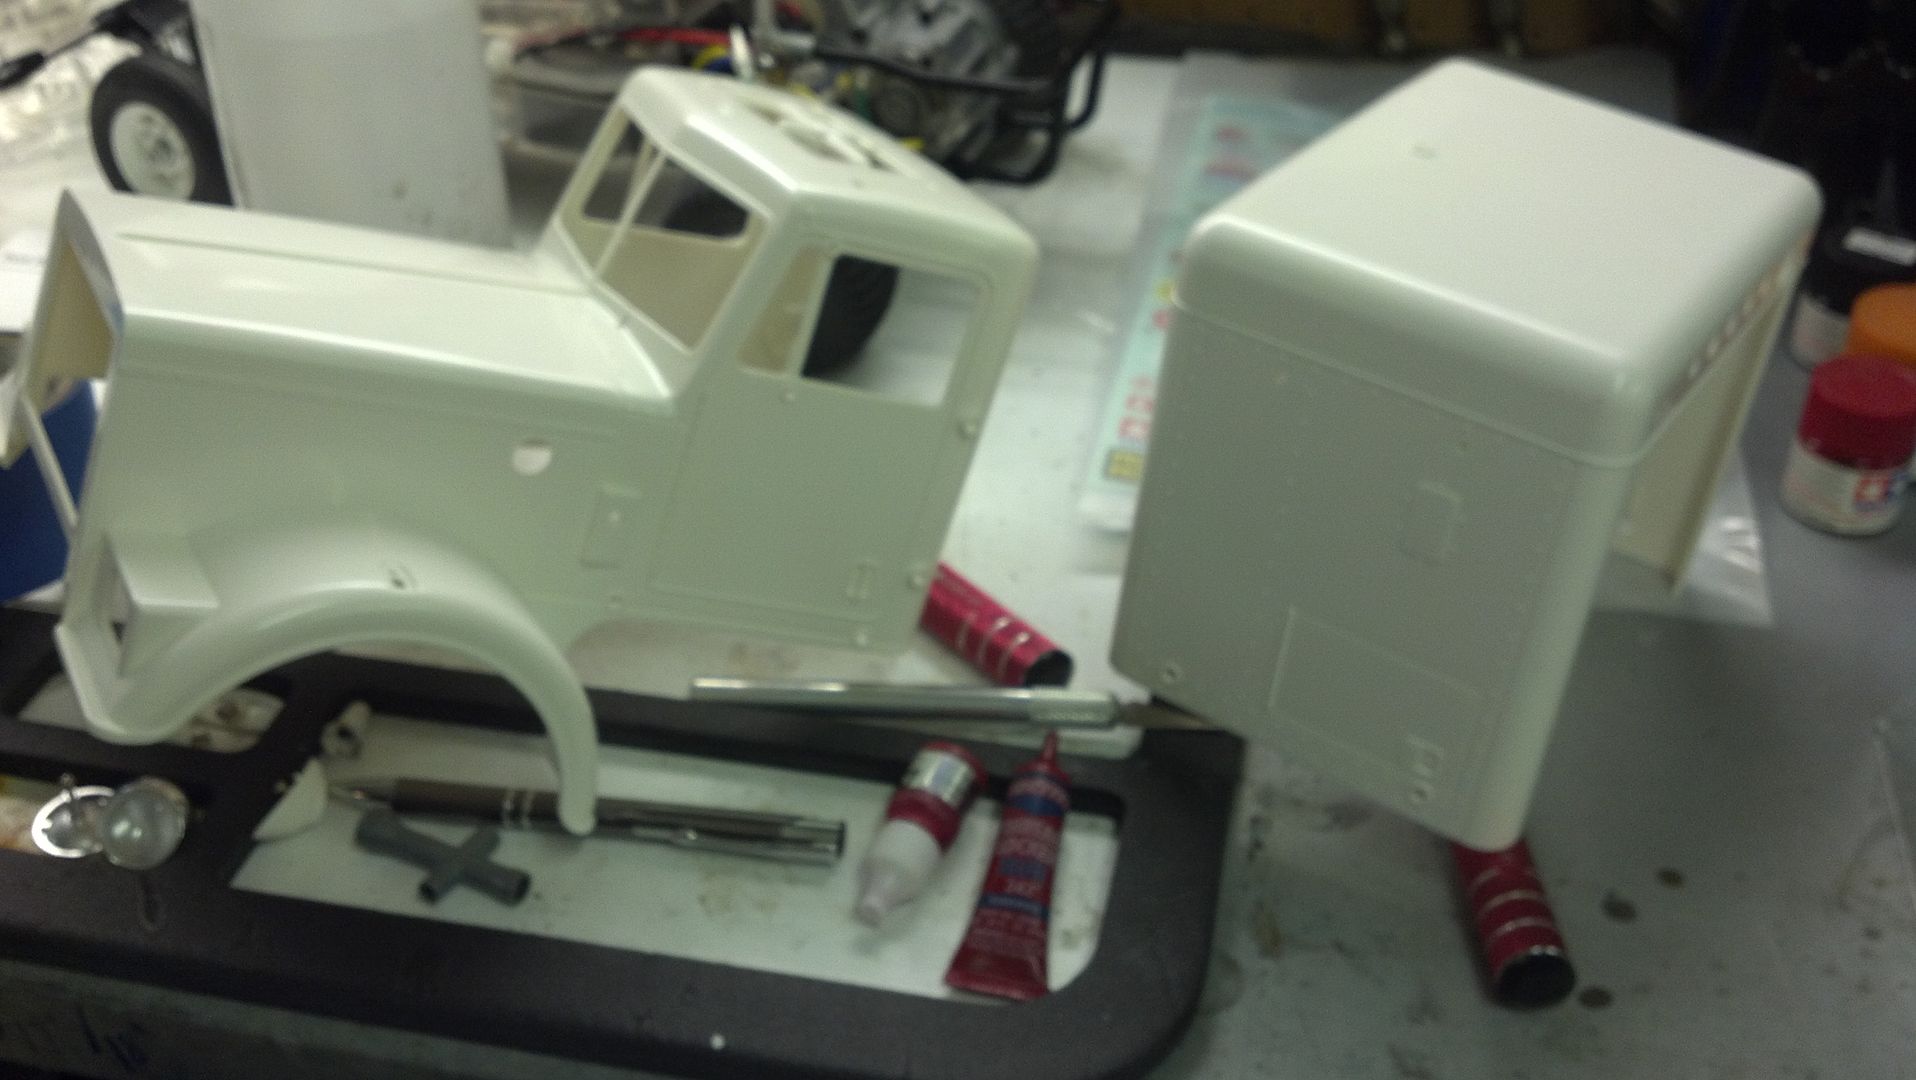 I wanted the older style look like this one 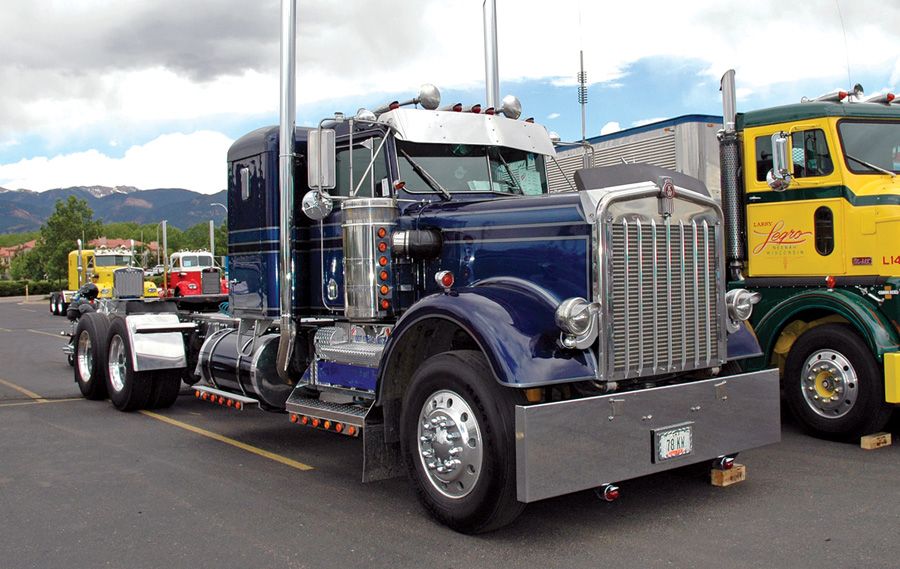 So I needed to get rid of the molded in headlights.  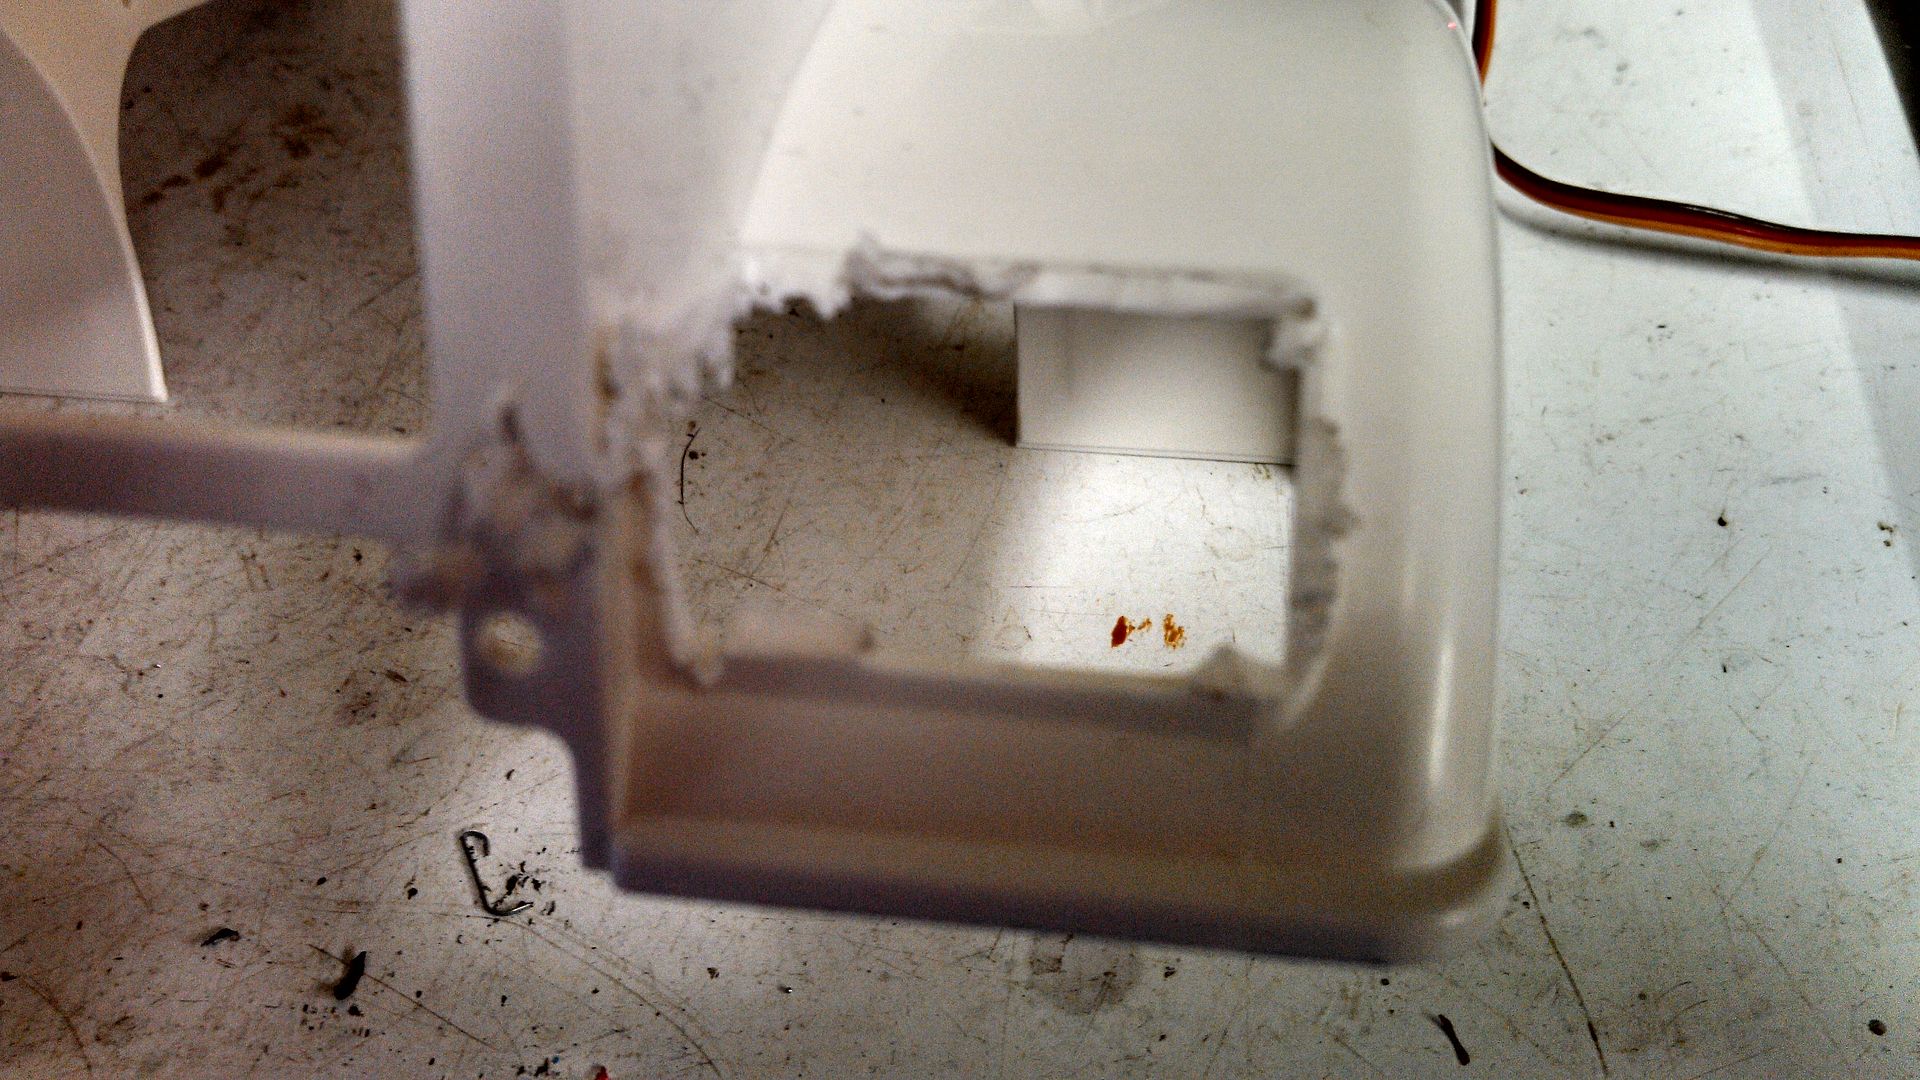 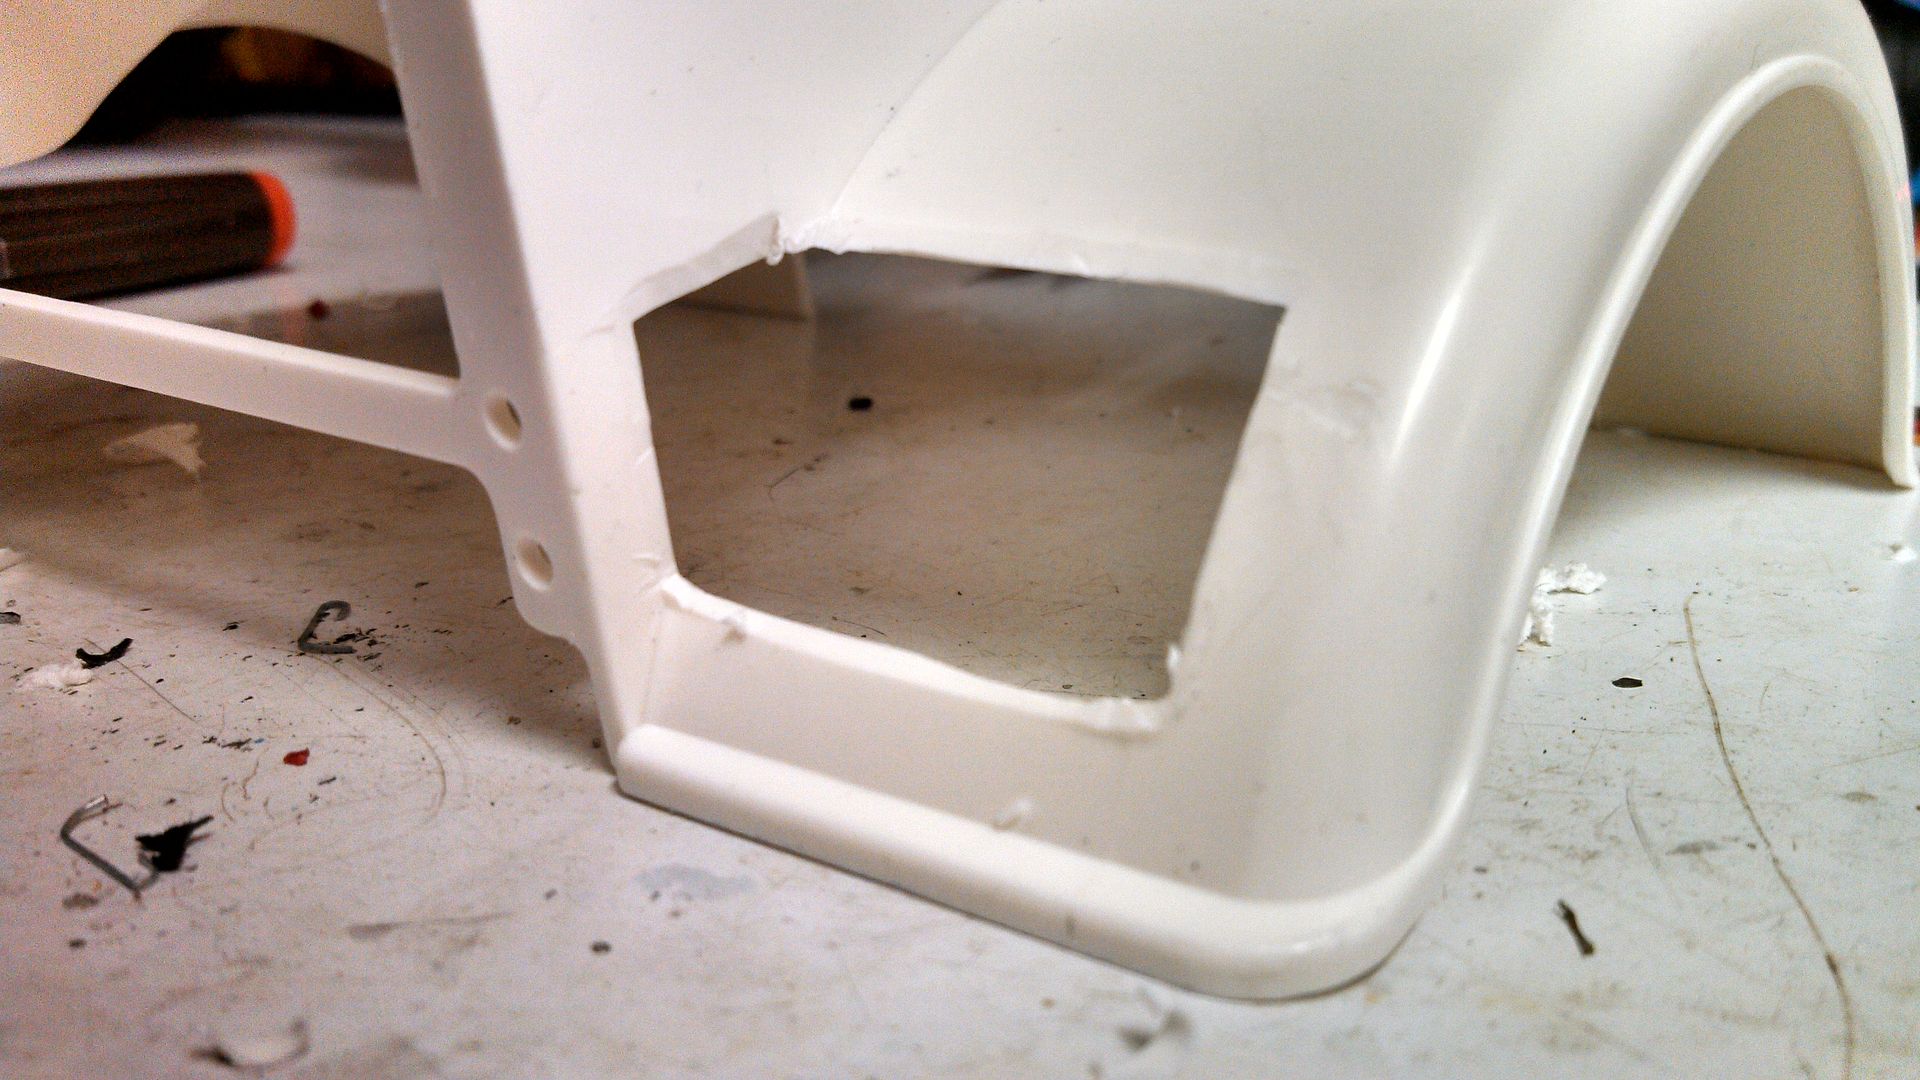 Next will be patching and sanding the fenders down...
__________________
To view links or images in signatures your post count must be 10 or greater. You currently have 0 posts. To view links or images in signatures your post count must be 10 or greater. You currently have 0 posts.
|
|
#3
10-21-2013, 06:52 AM
|
||||
|
||||
|
Gathered up all the stuff I needed...
Plastic Weld Lexan Scissors Xacto Knife Body Filler 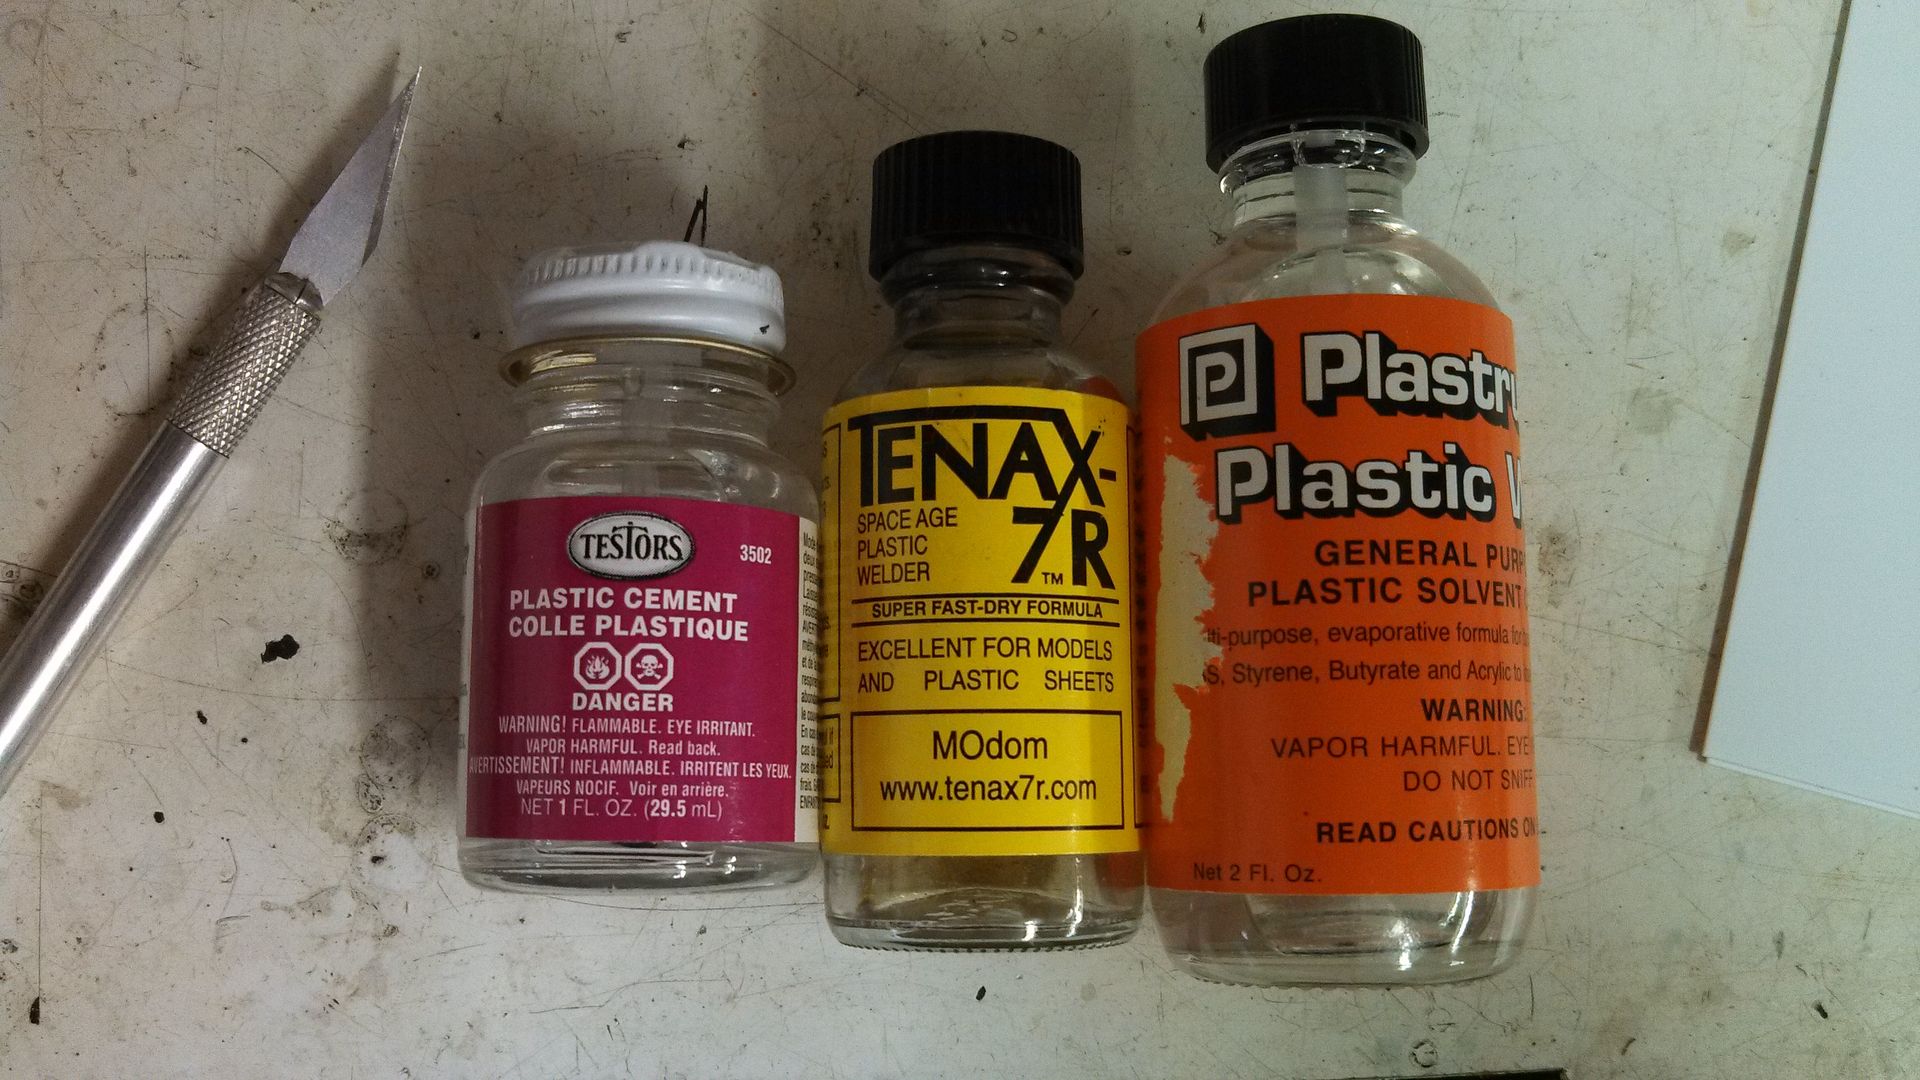  Now it was time time fix these fenders. 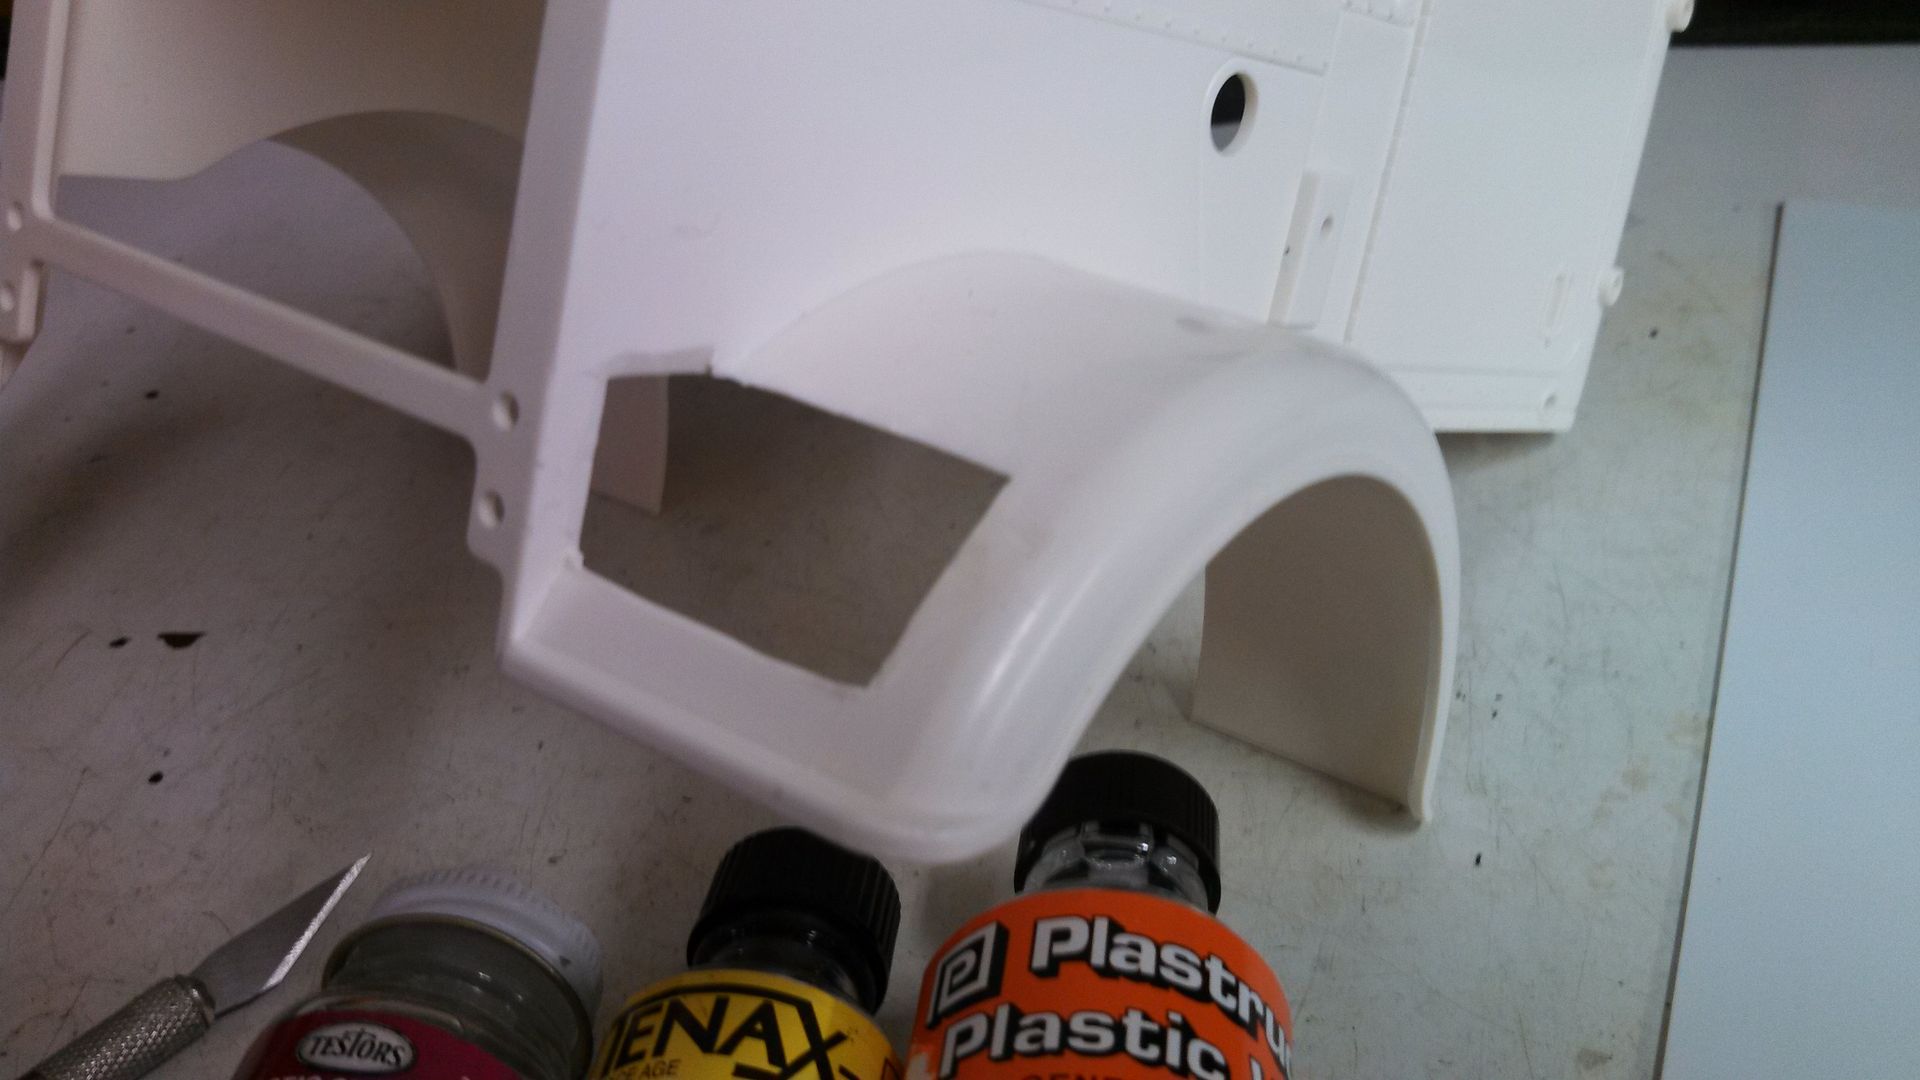 First thing I did was get some thin, flexible styrene sheet to attach to the back to keep the contour of the fender and to close in the hood 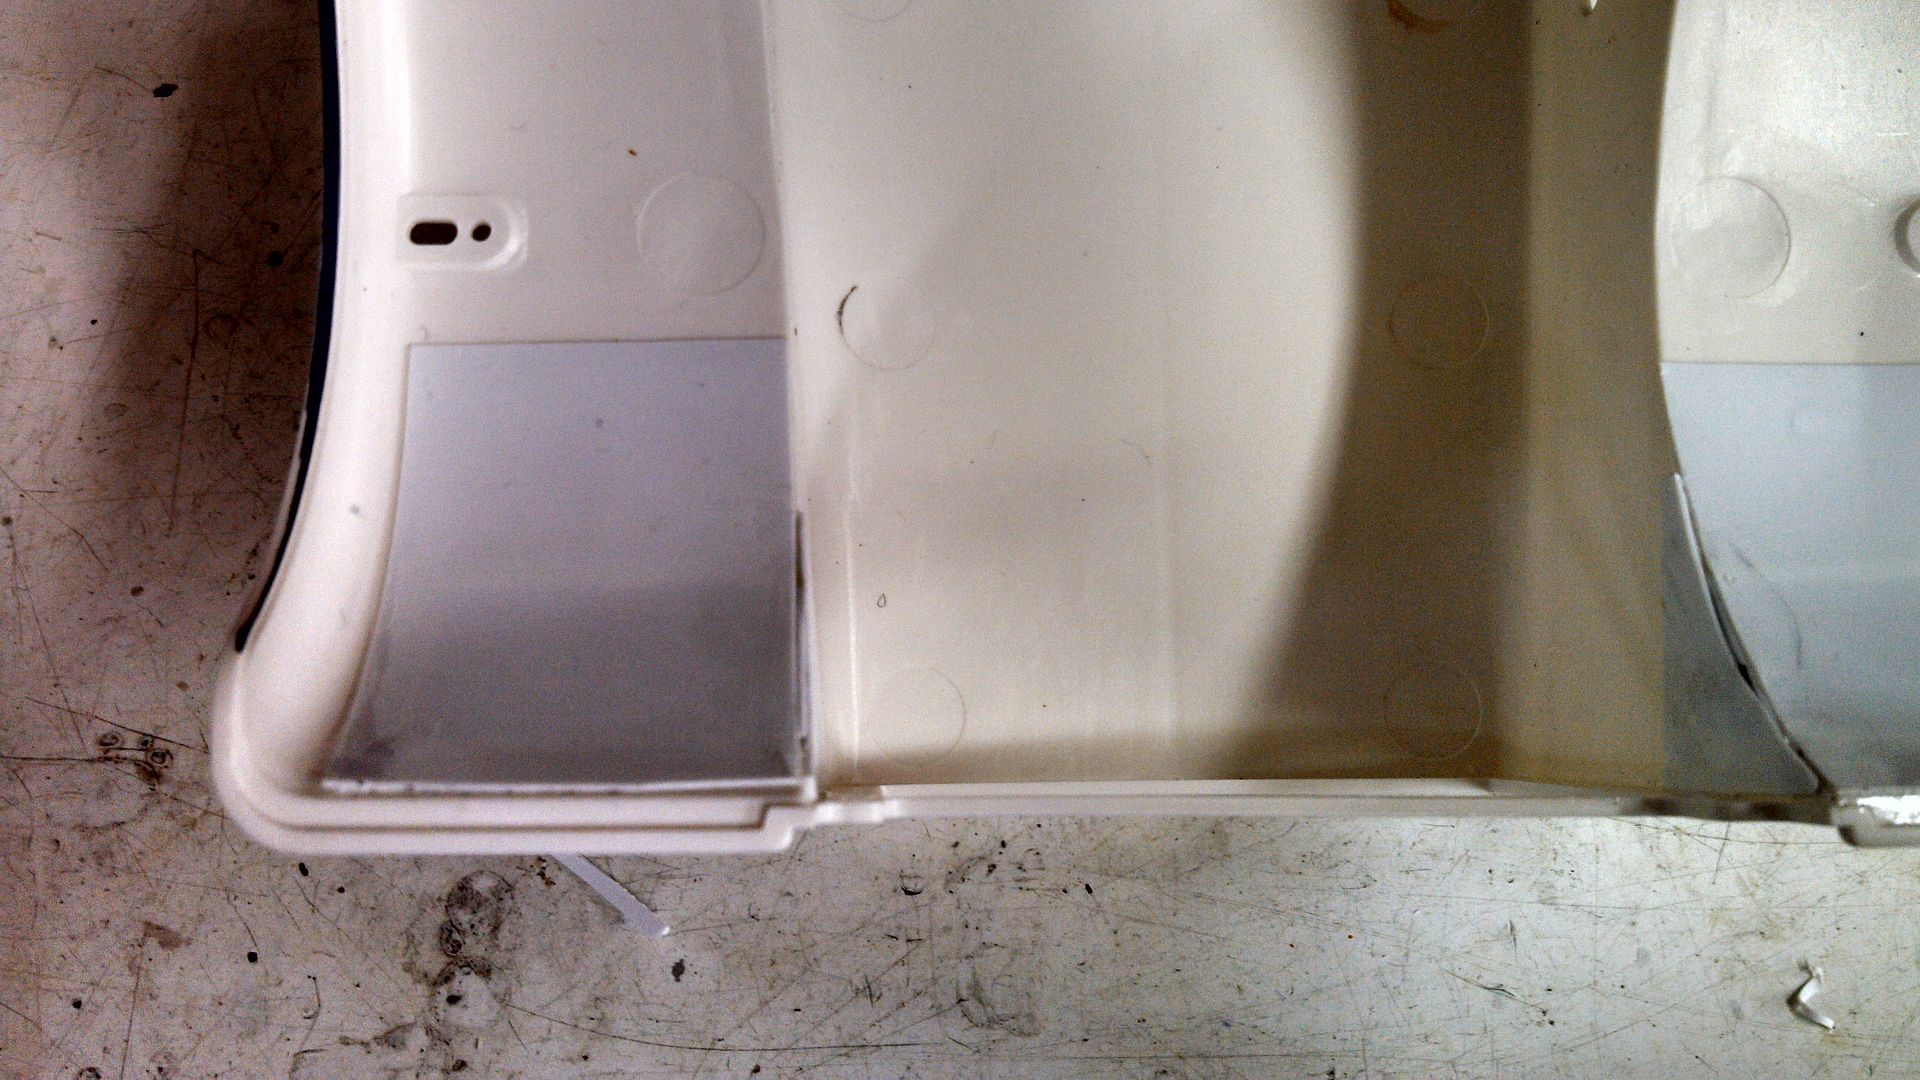 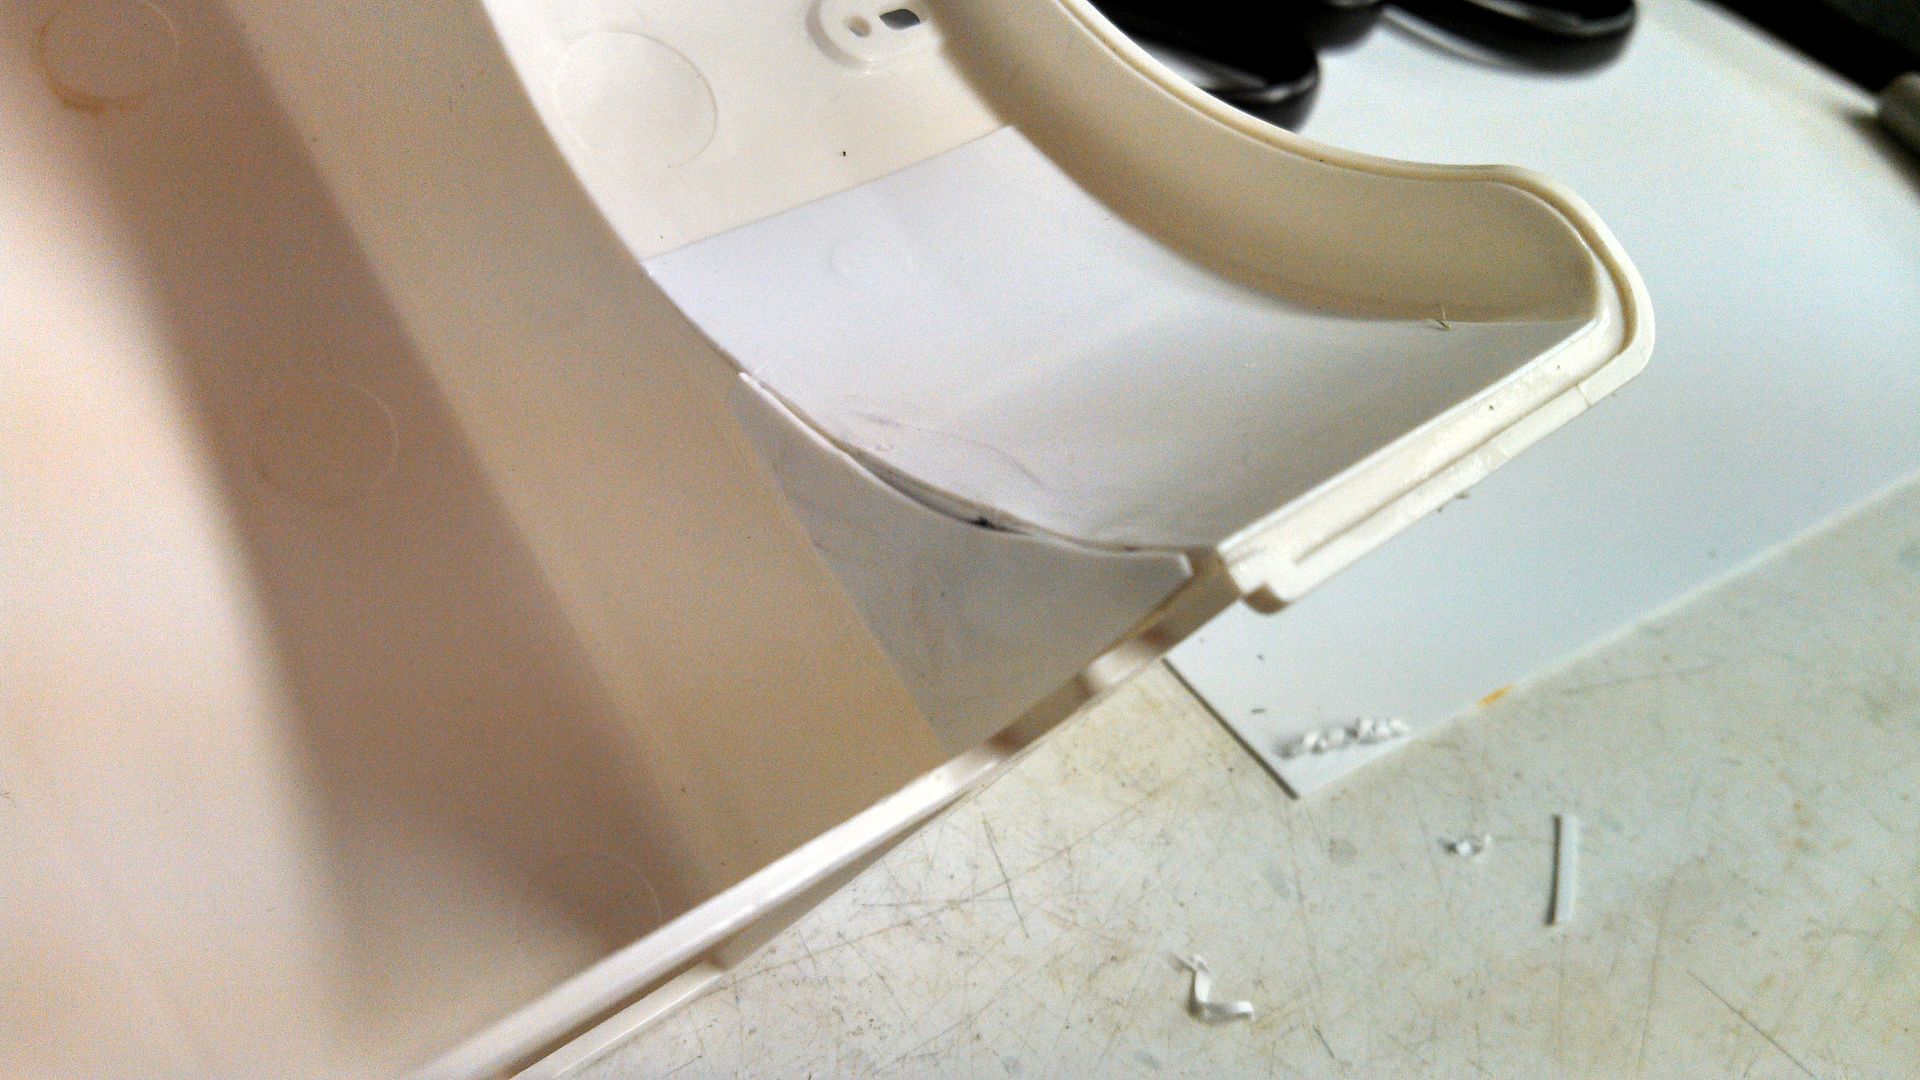 I then cut two pieces to fill in the top part and used the PlasticWeld to adhere it. 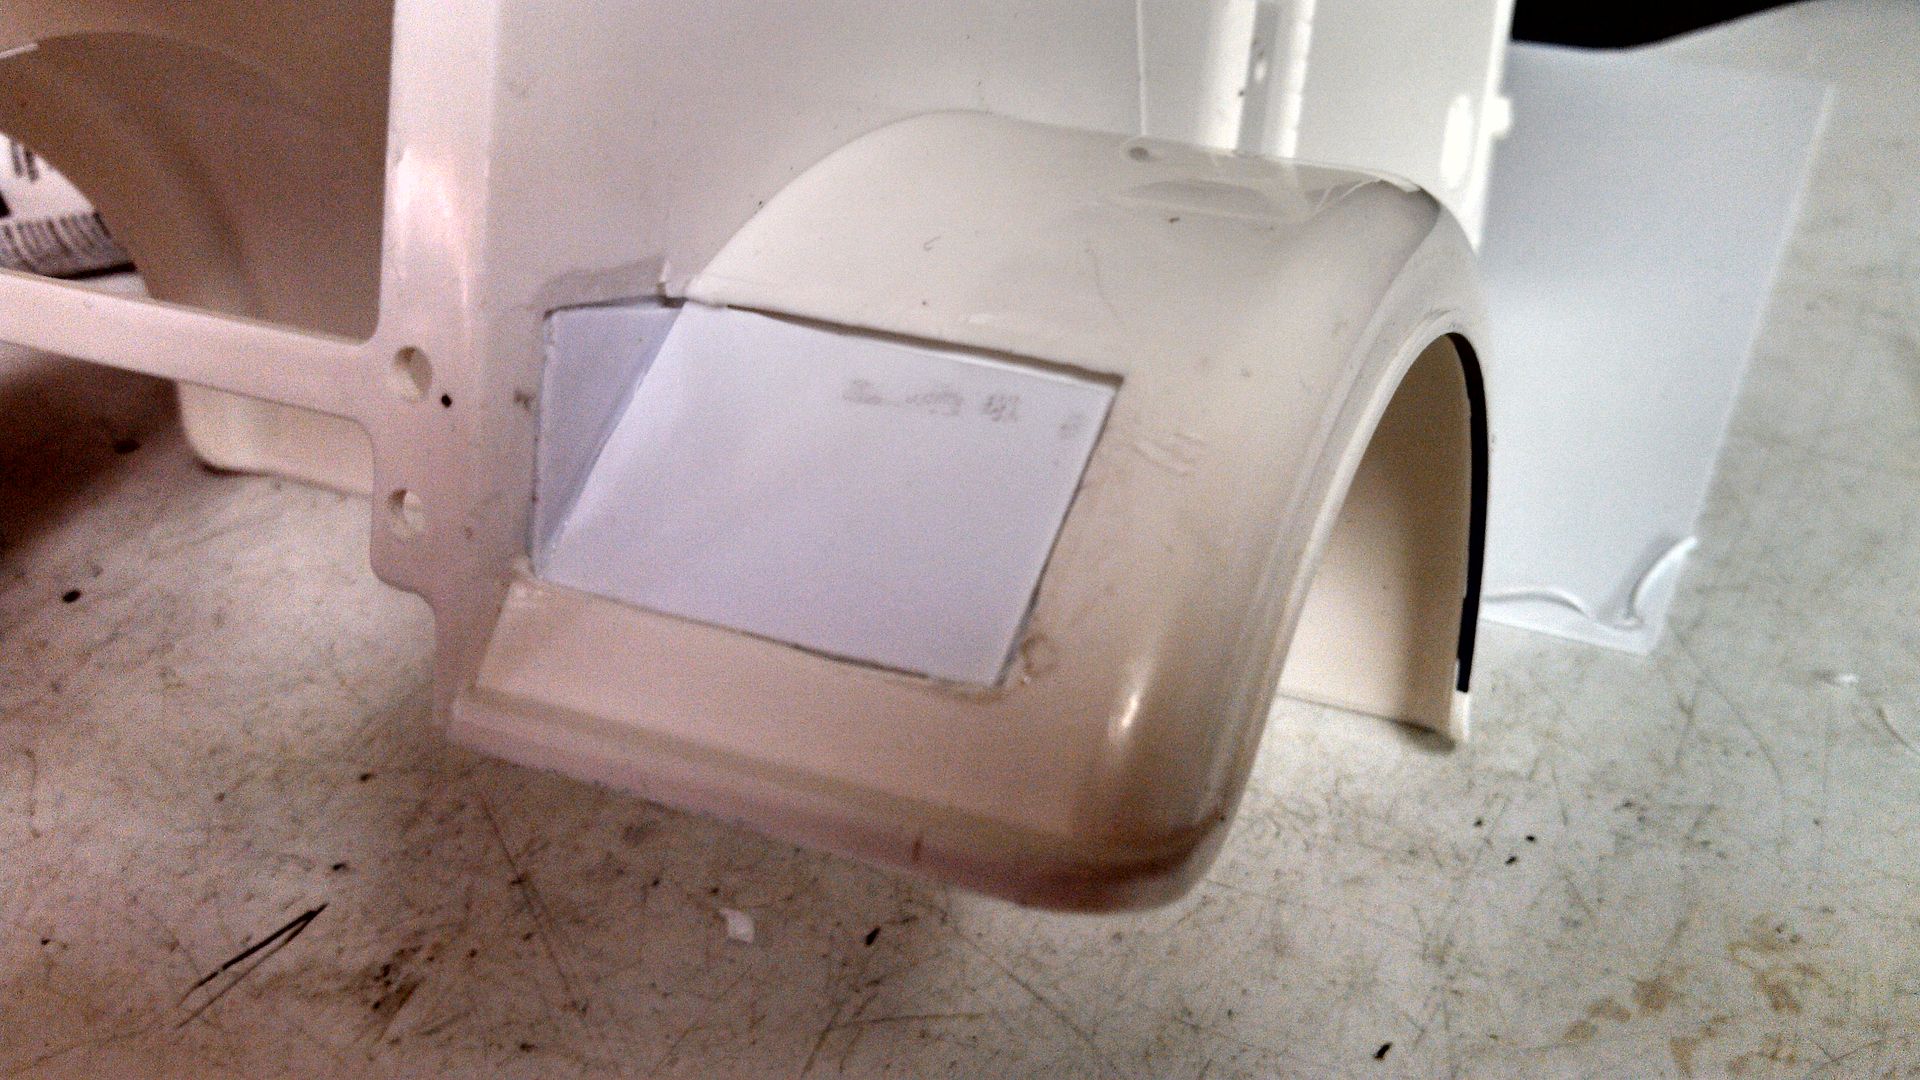 Time to dry.
__________________
To view links or images in signatures your post count must be 10 or greater. You currently have 0 posts. To view links or images in signatures your post count must be 10 or greater. You currently have 0 posts.
|
|
#4
10-21-2013, 06:53 AM
|
||||
|
||||
|
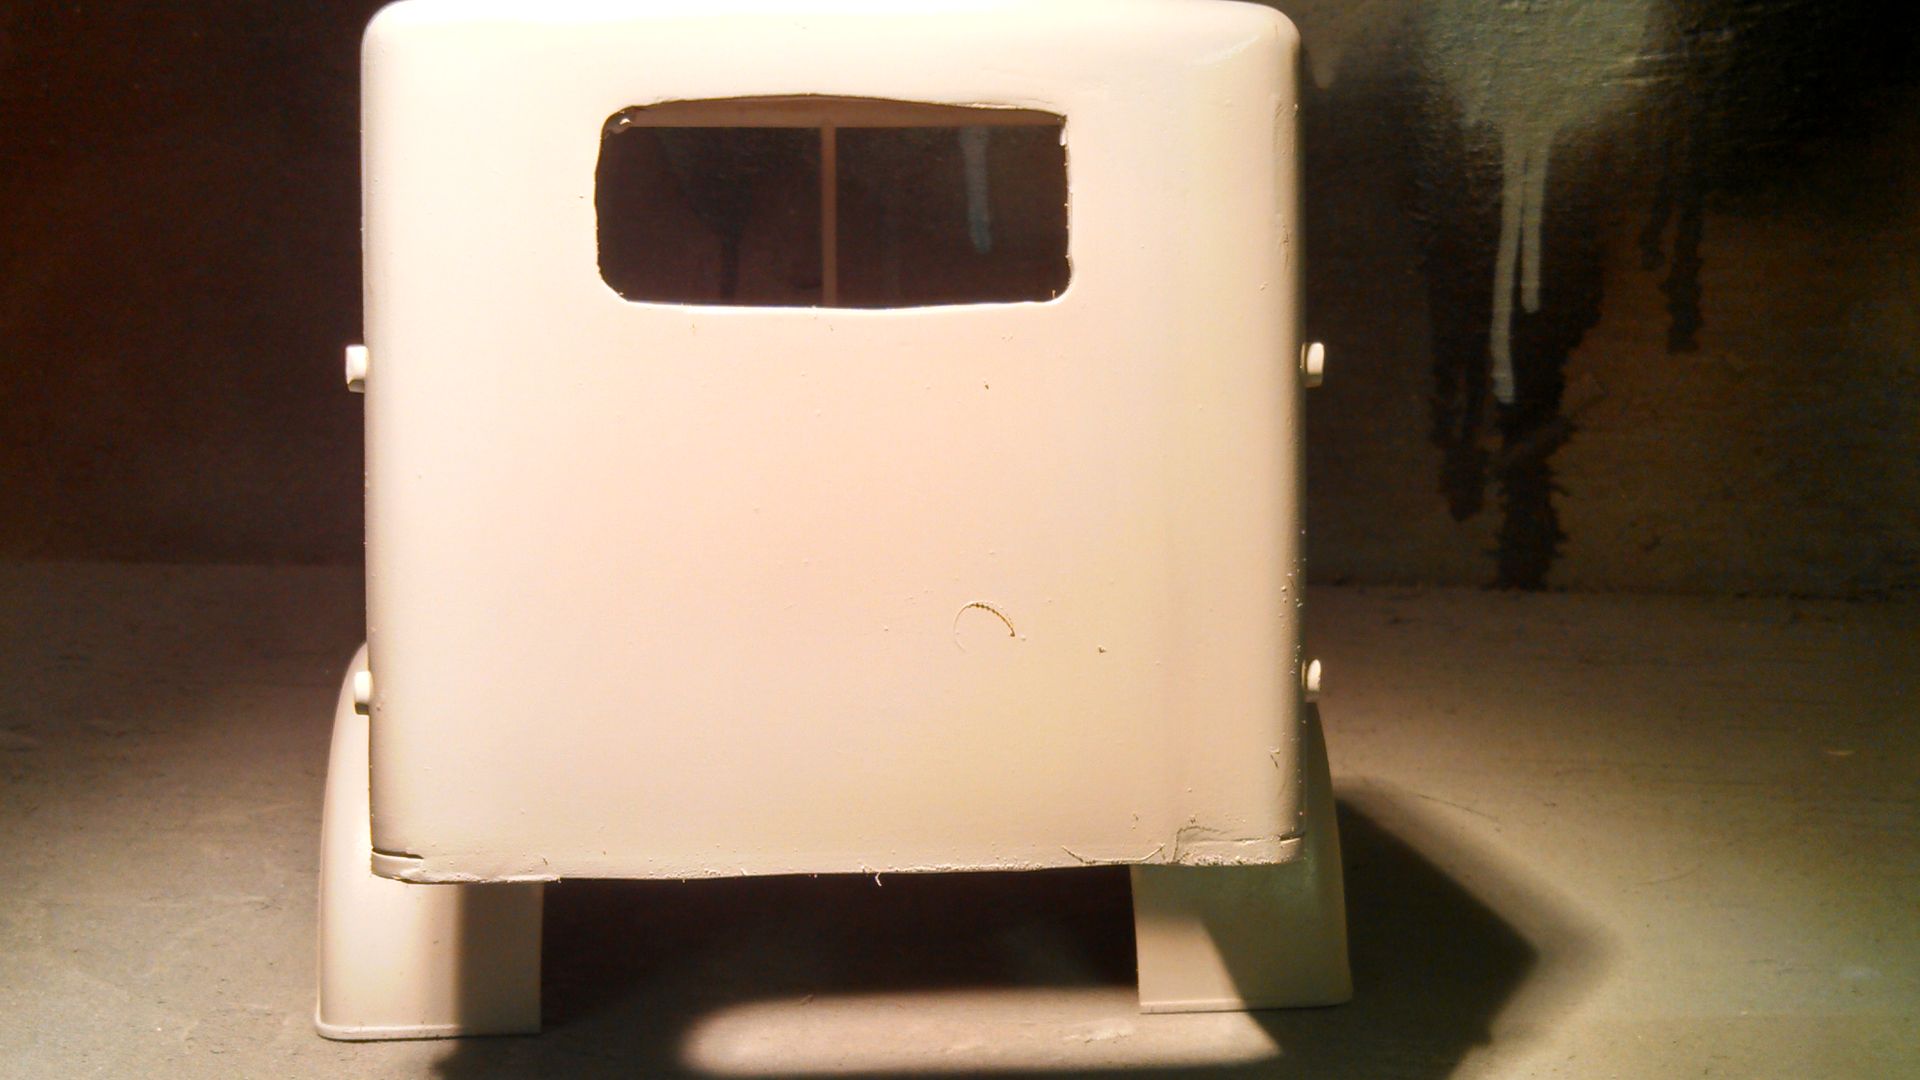
I then started on the back where the sleeper cab was attached.
First thing I needed to do was clean up the edges and cut a piece to fit it there as good as possible. Using tabs to hold the panel, I glued it in place... Then needed to add the rear window. 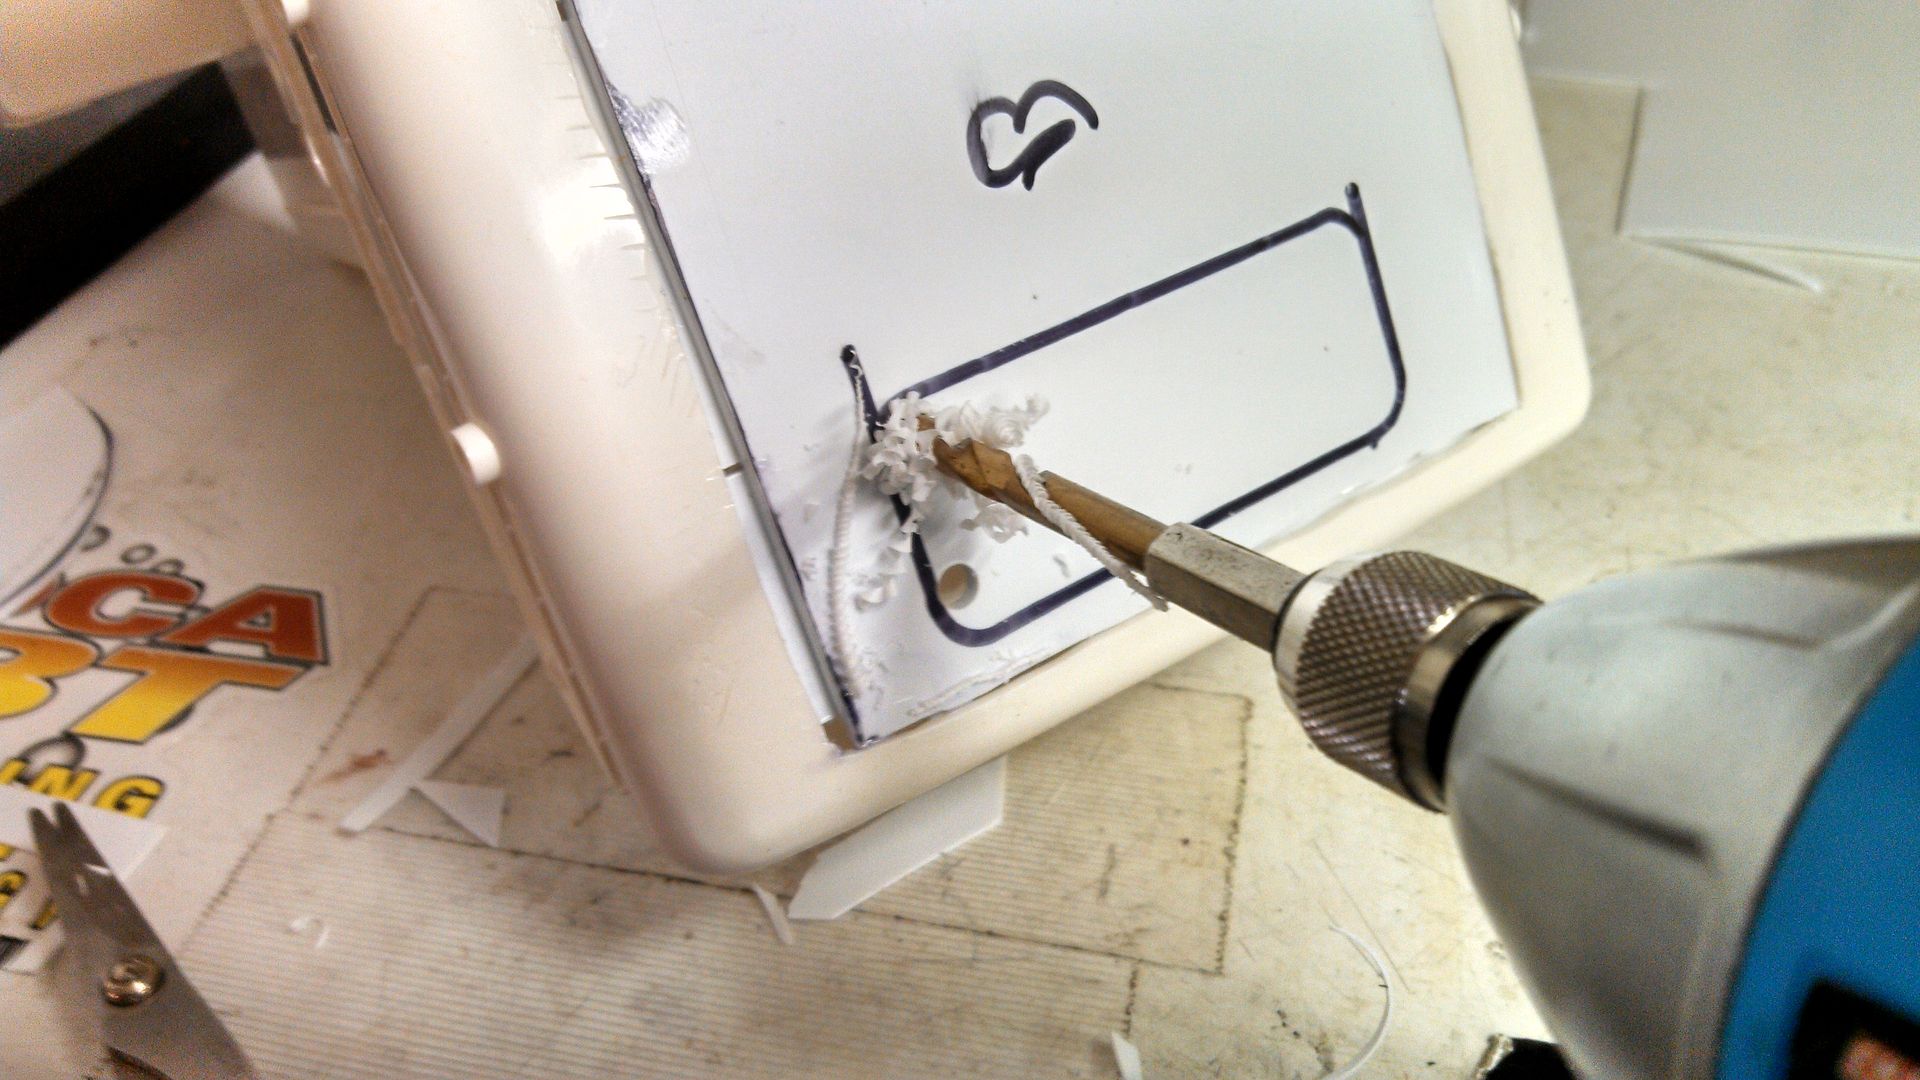 The King Hauler has a Panel on the roof that I do not like. Looks like a sun roof that never was. So I glued it in place and covered all the mounting holes so I don't fill them with putty. 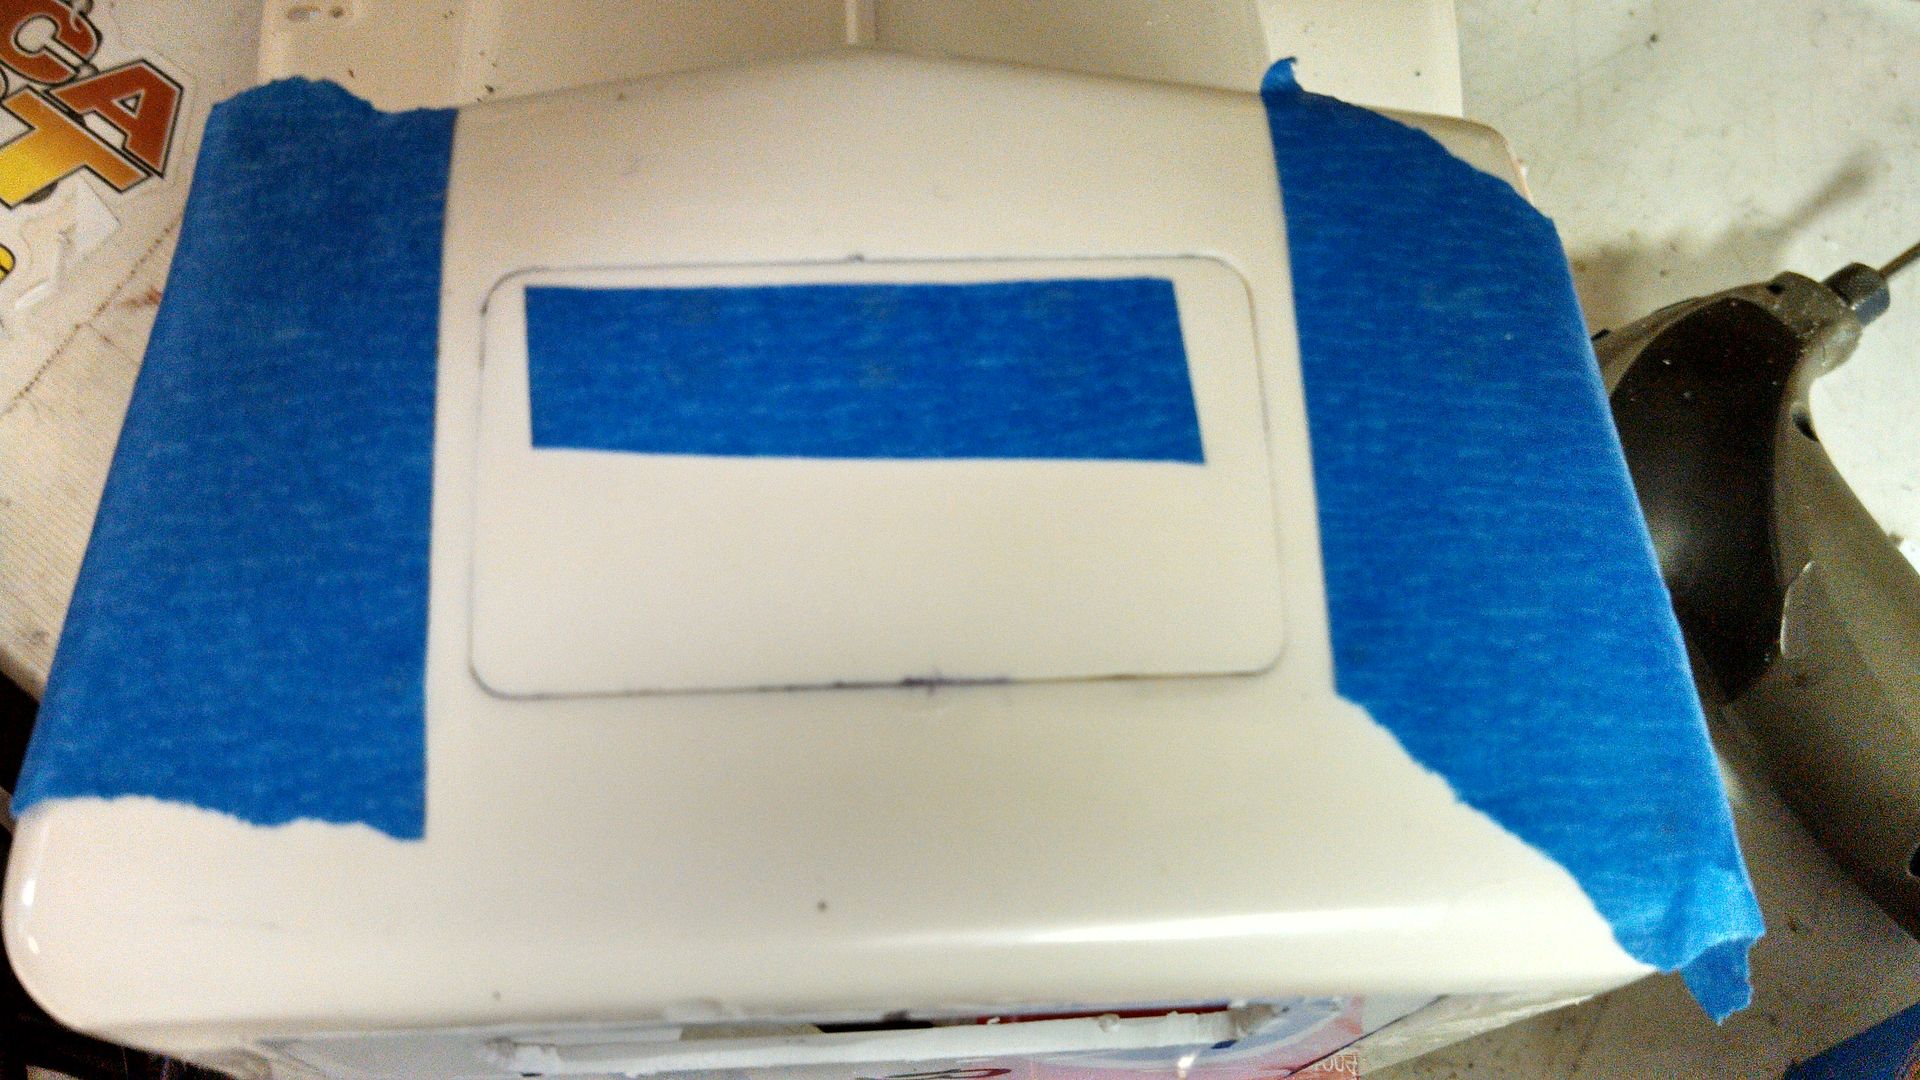
__________________
To view links or images in signatures your post count must be 10 or greater. You currently have 0 posts. To view links or images in signatures your post count must be 10 or greater. You currently have 0 posts.
|
|
#5
10-21-2013, 06:55 AM
|
||||
|
||||
|
It was now time for filling in the gaps and lines.
For the fenders, I needed to make sure that I added a little more than needed so I can sand the curve of the fender. 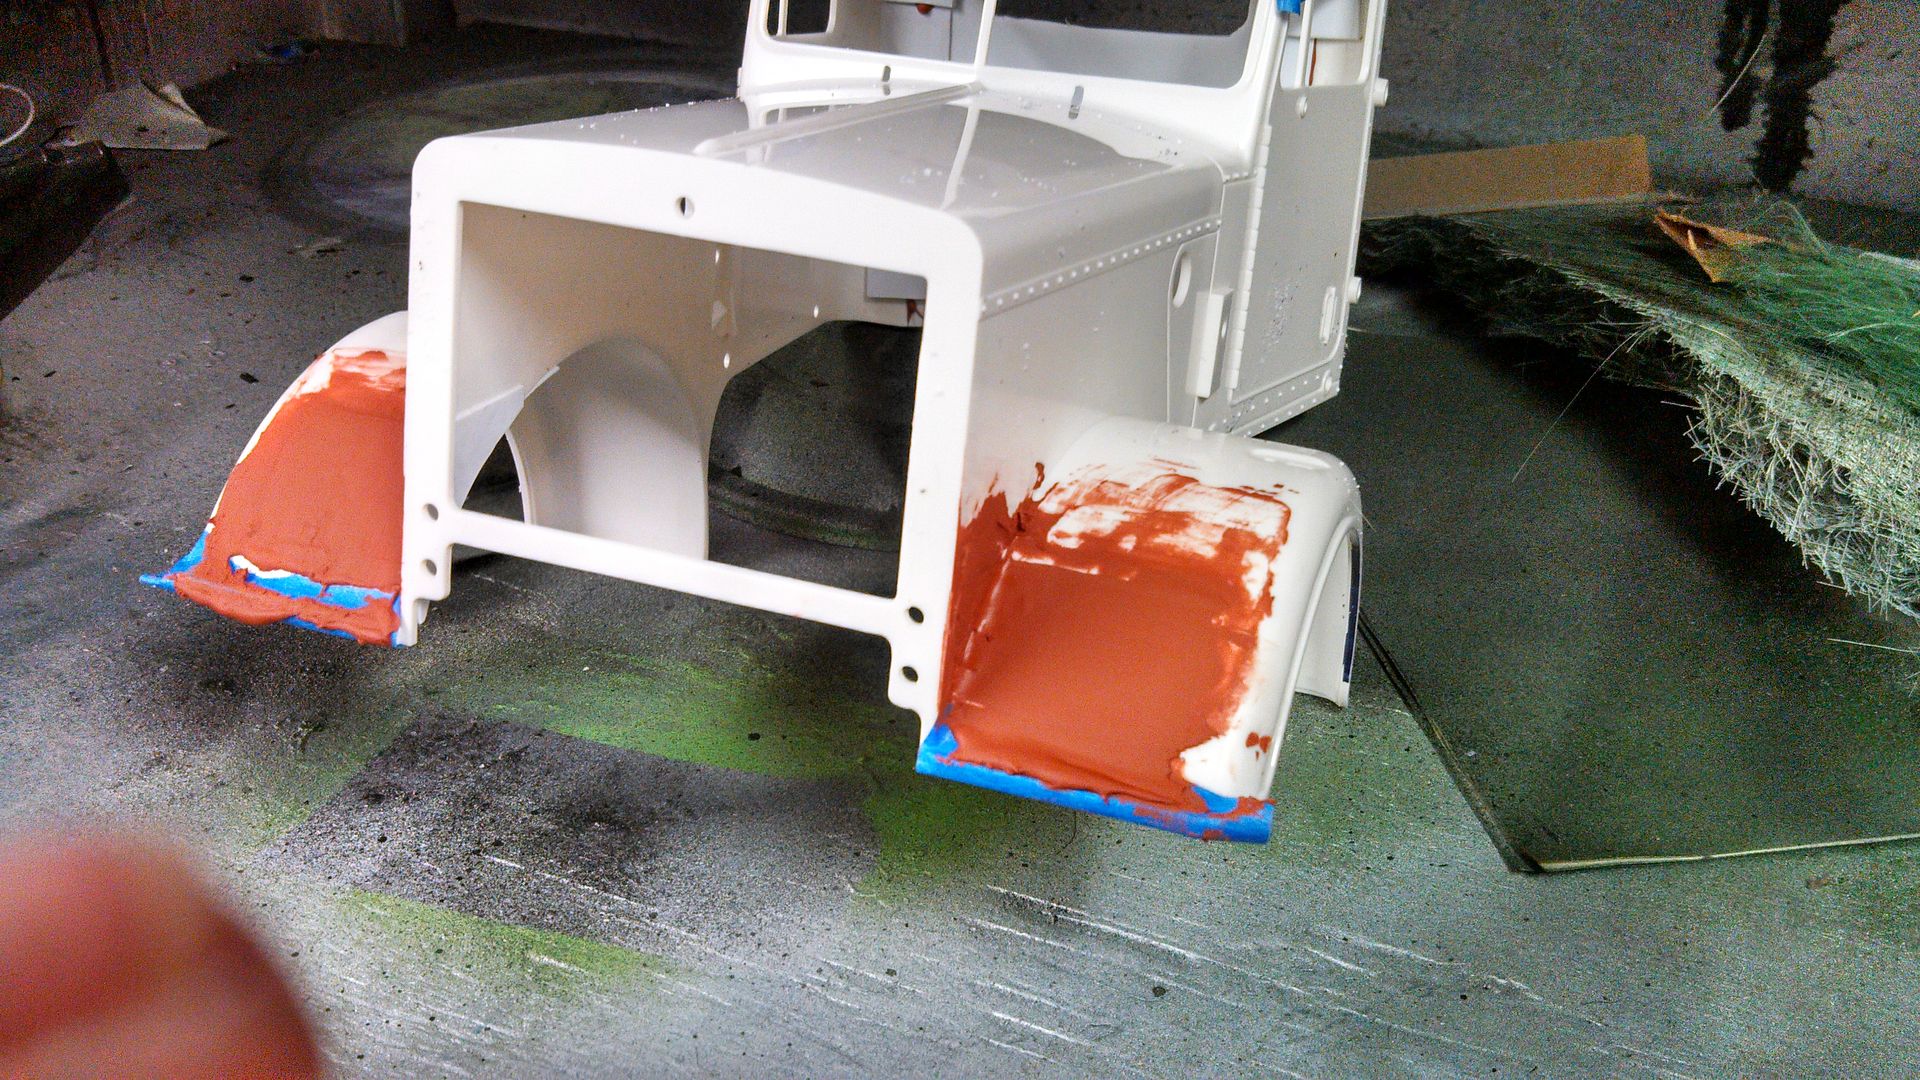 Next was the roof. You can see why I used tape to cover the accessory mounting holes...I would have had to clean everyone out. 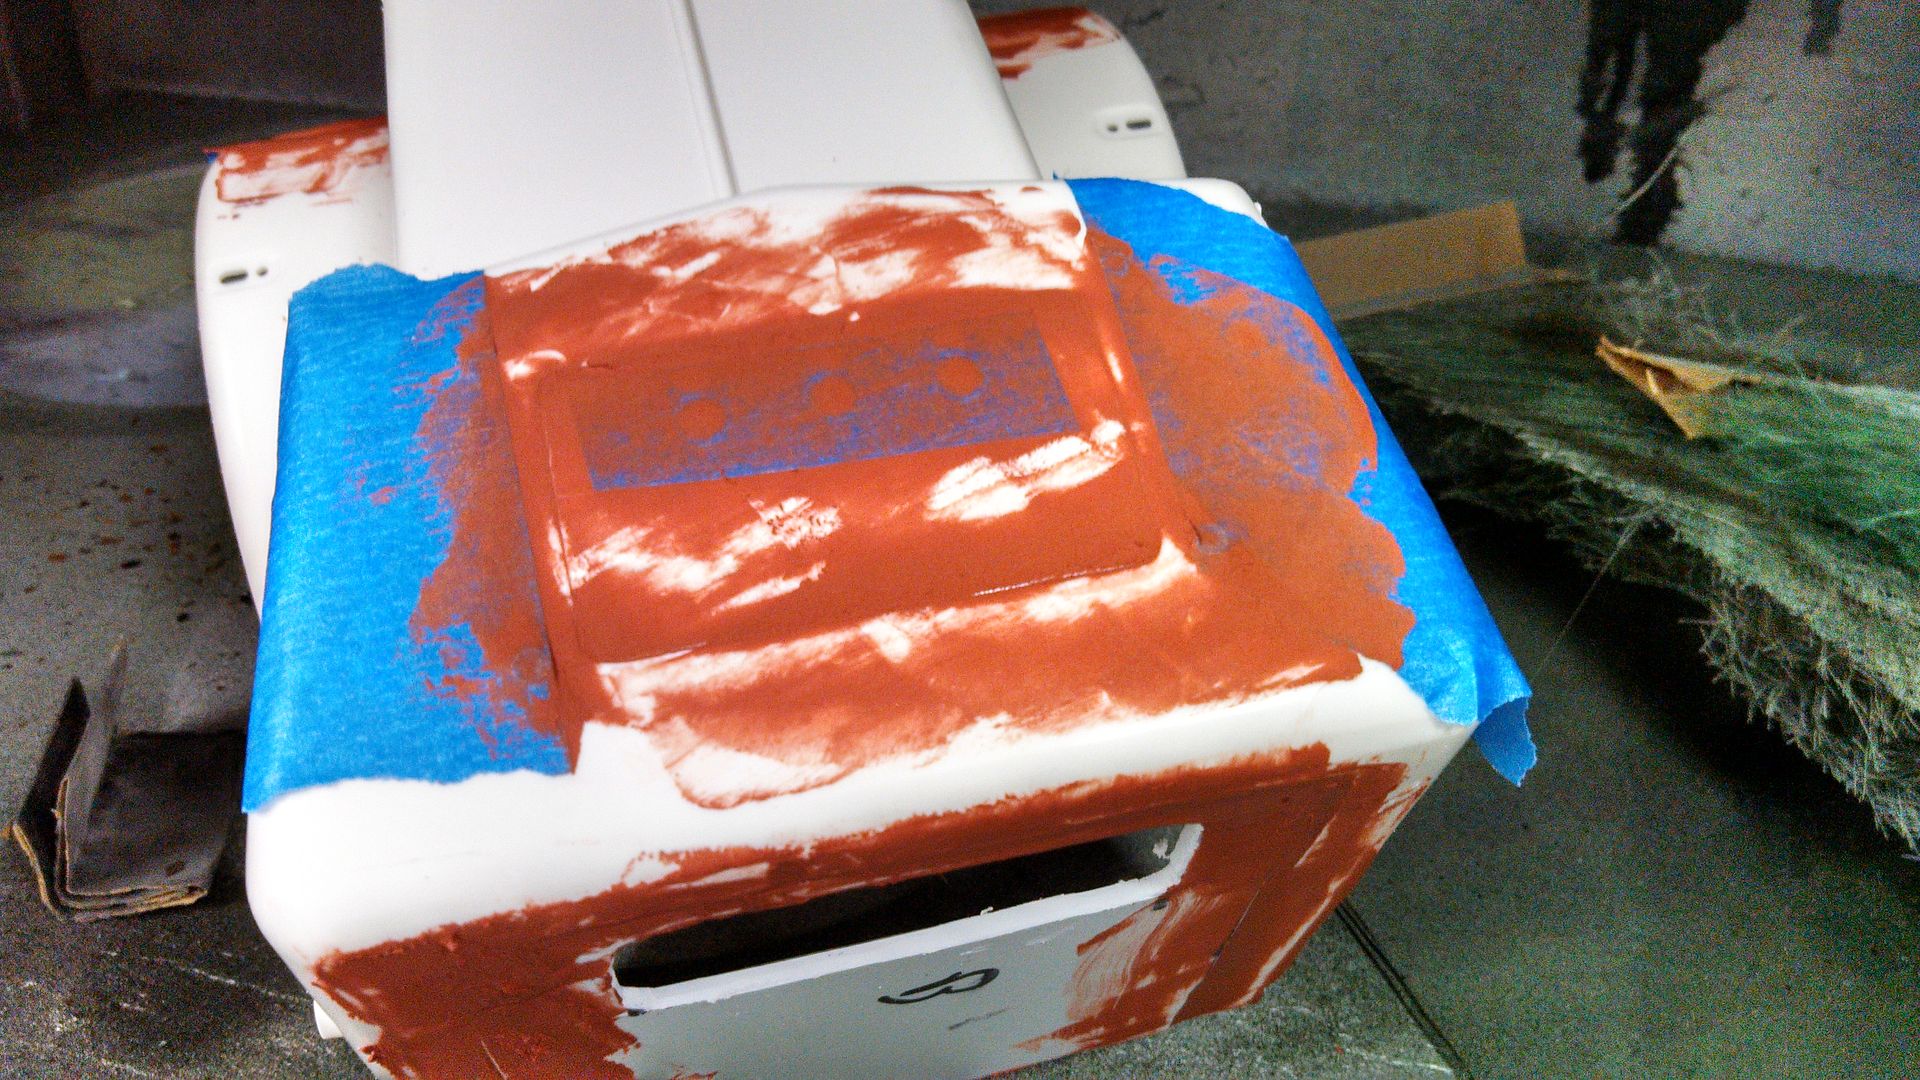 The back is going to be the hardest. I am thinking I will be doing two coats on it. 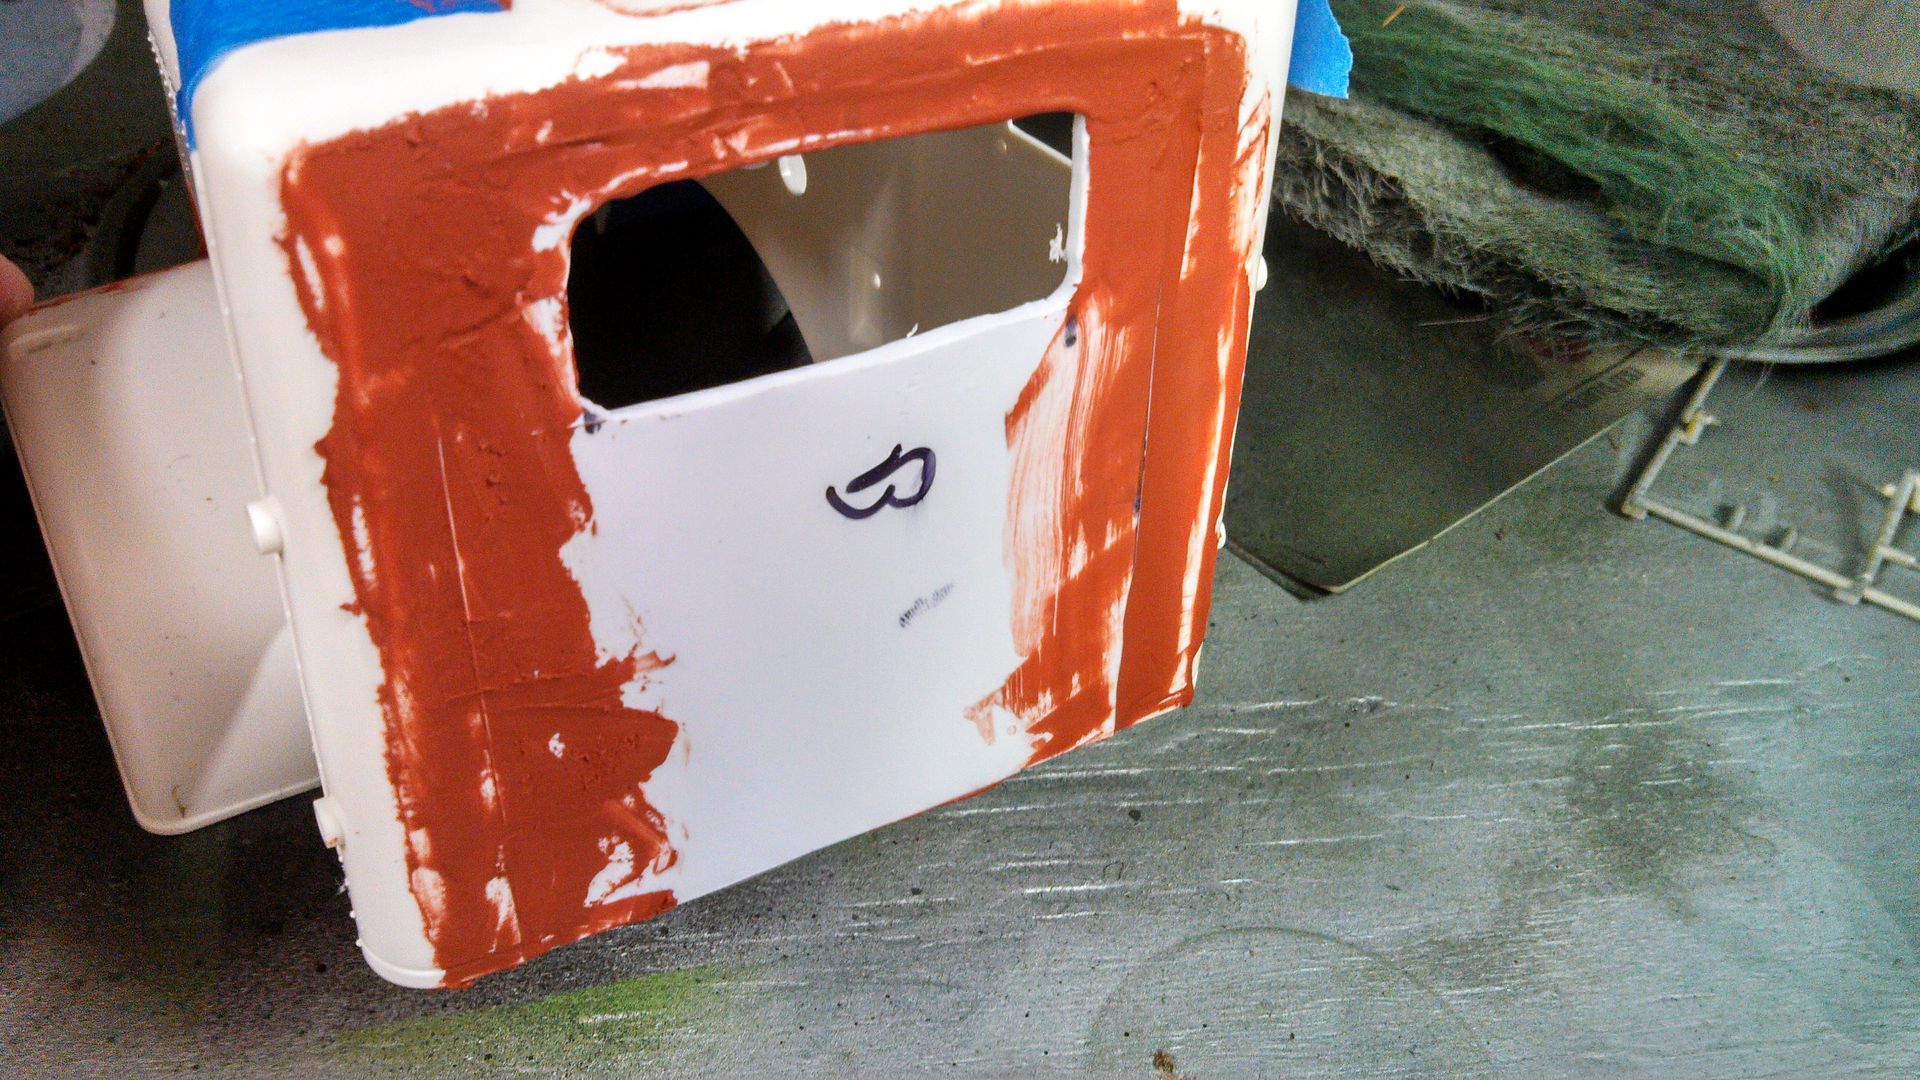 It is now in the paint booth drying...this putty stinks... :confused0068:
__________________
To view links or images in signatures your post count must be 10 or greater. You currently have 0 posts. To view links or images in signatures your post count must be 10 or greater. You currently have 0 posts.
|
|
#6
10-21-2013, 06:56 AM
|
||||
|
||||
|
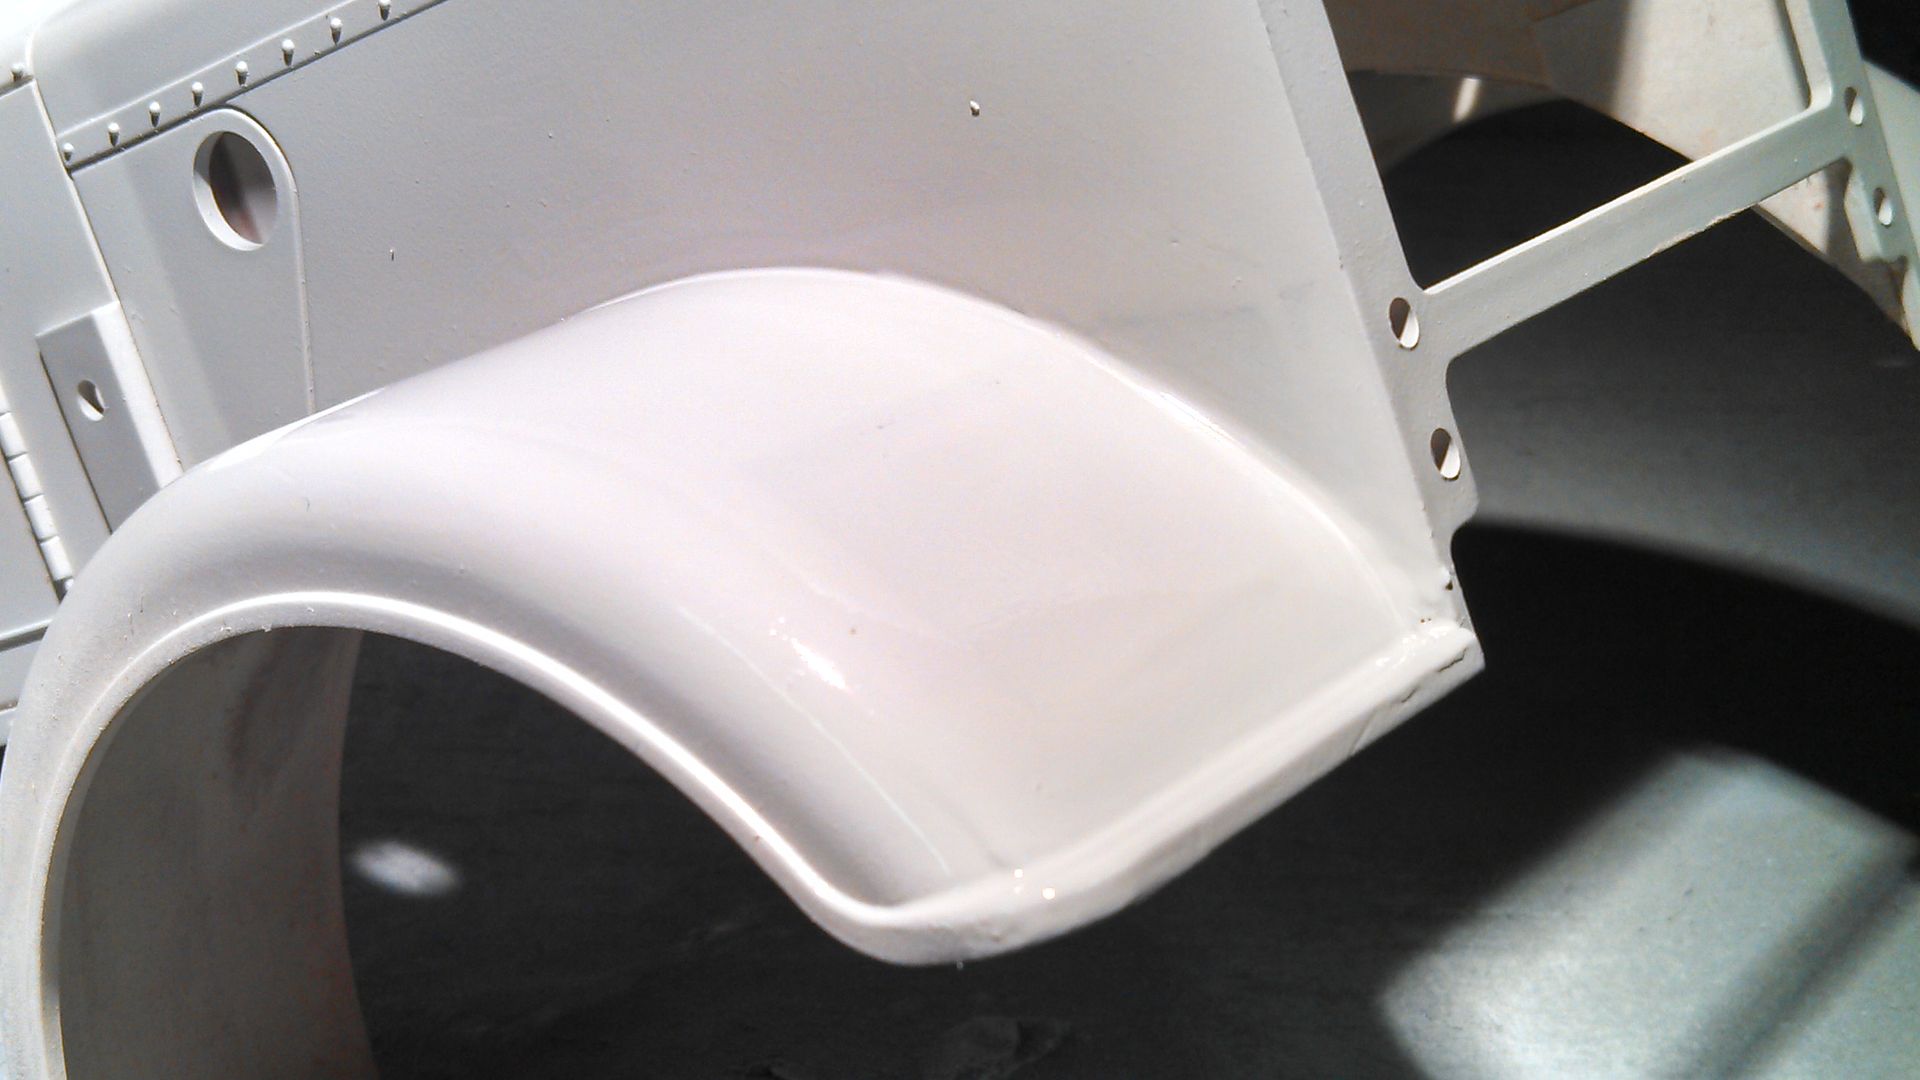
Shot the body with some primer to I can see the parts that need another coat...
 Here's the roof after a sanding 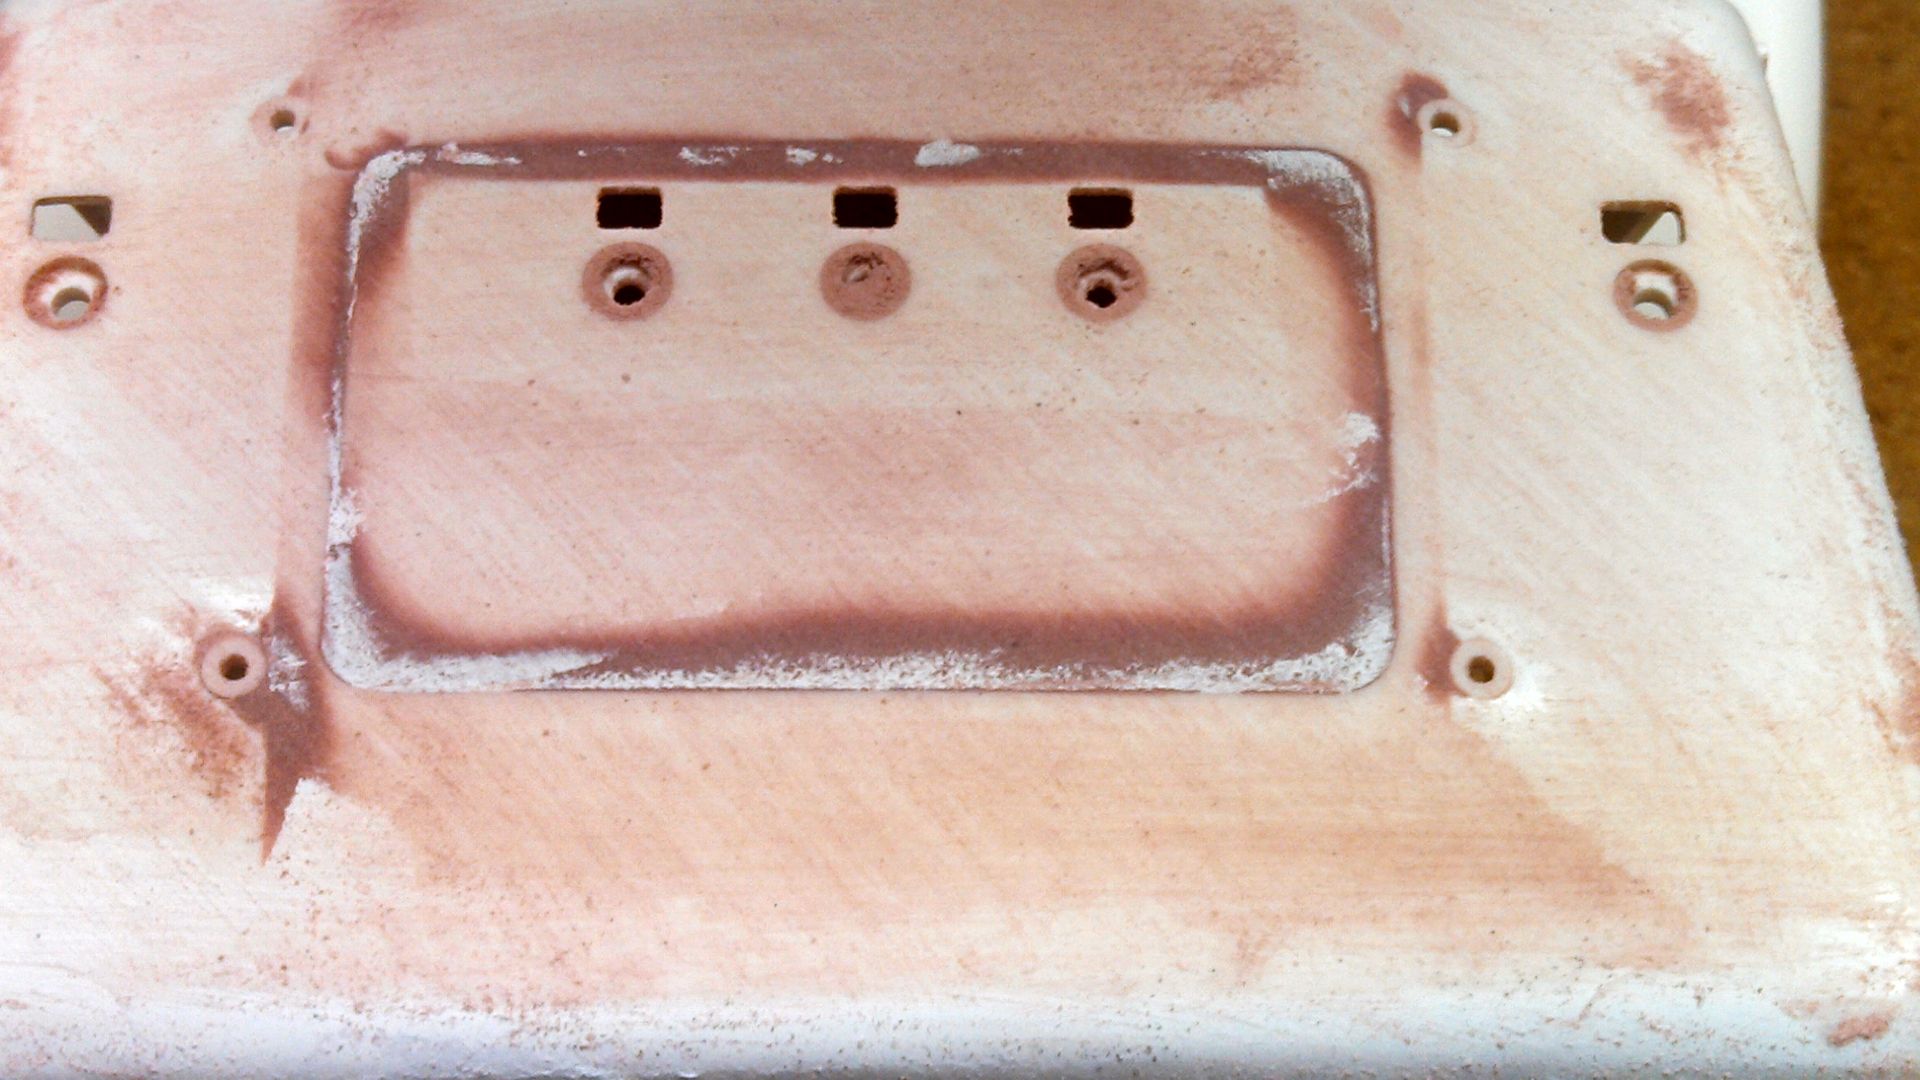 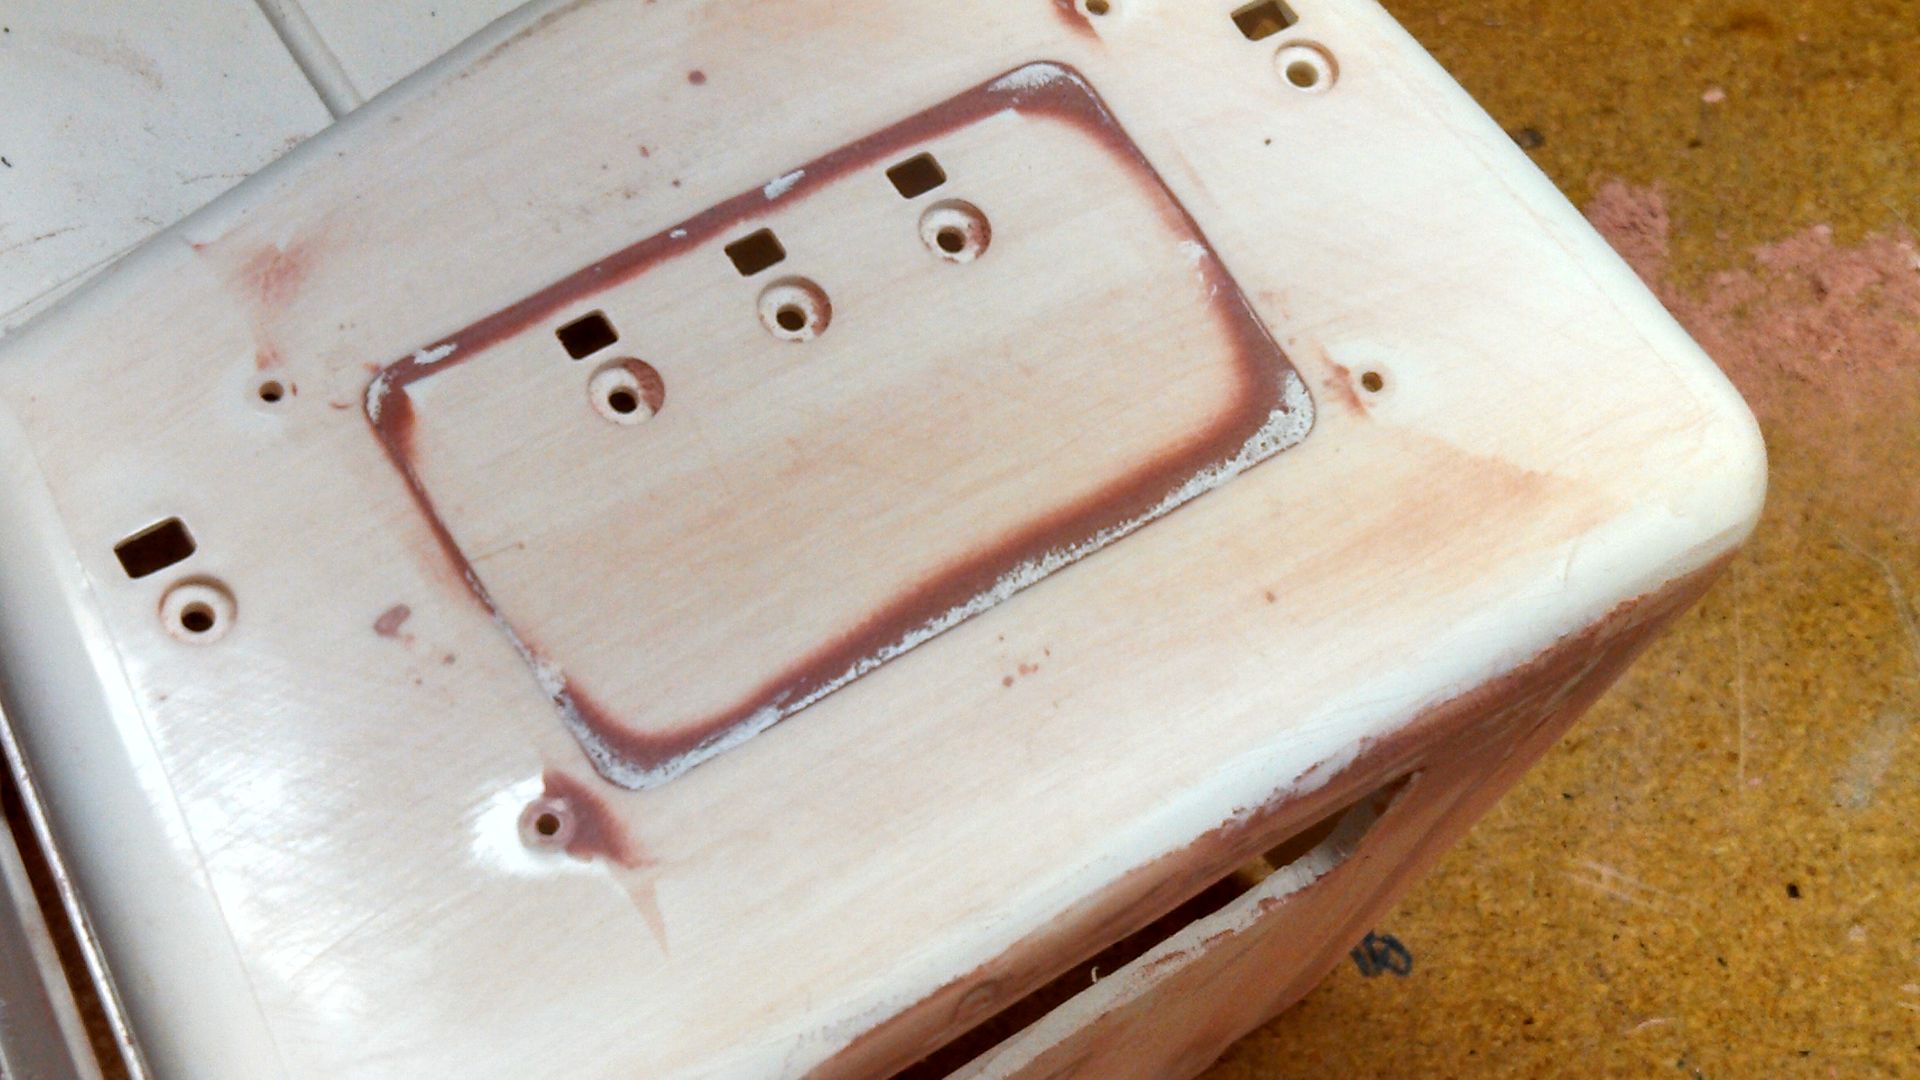 Fenders are not bad...well the right wasn't...left needs some help 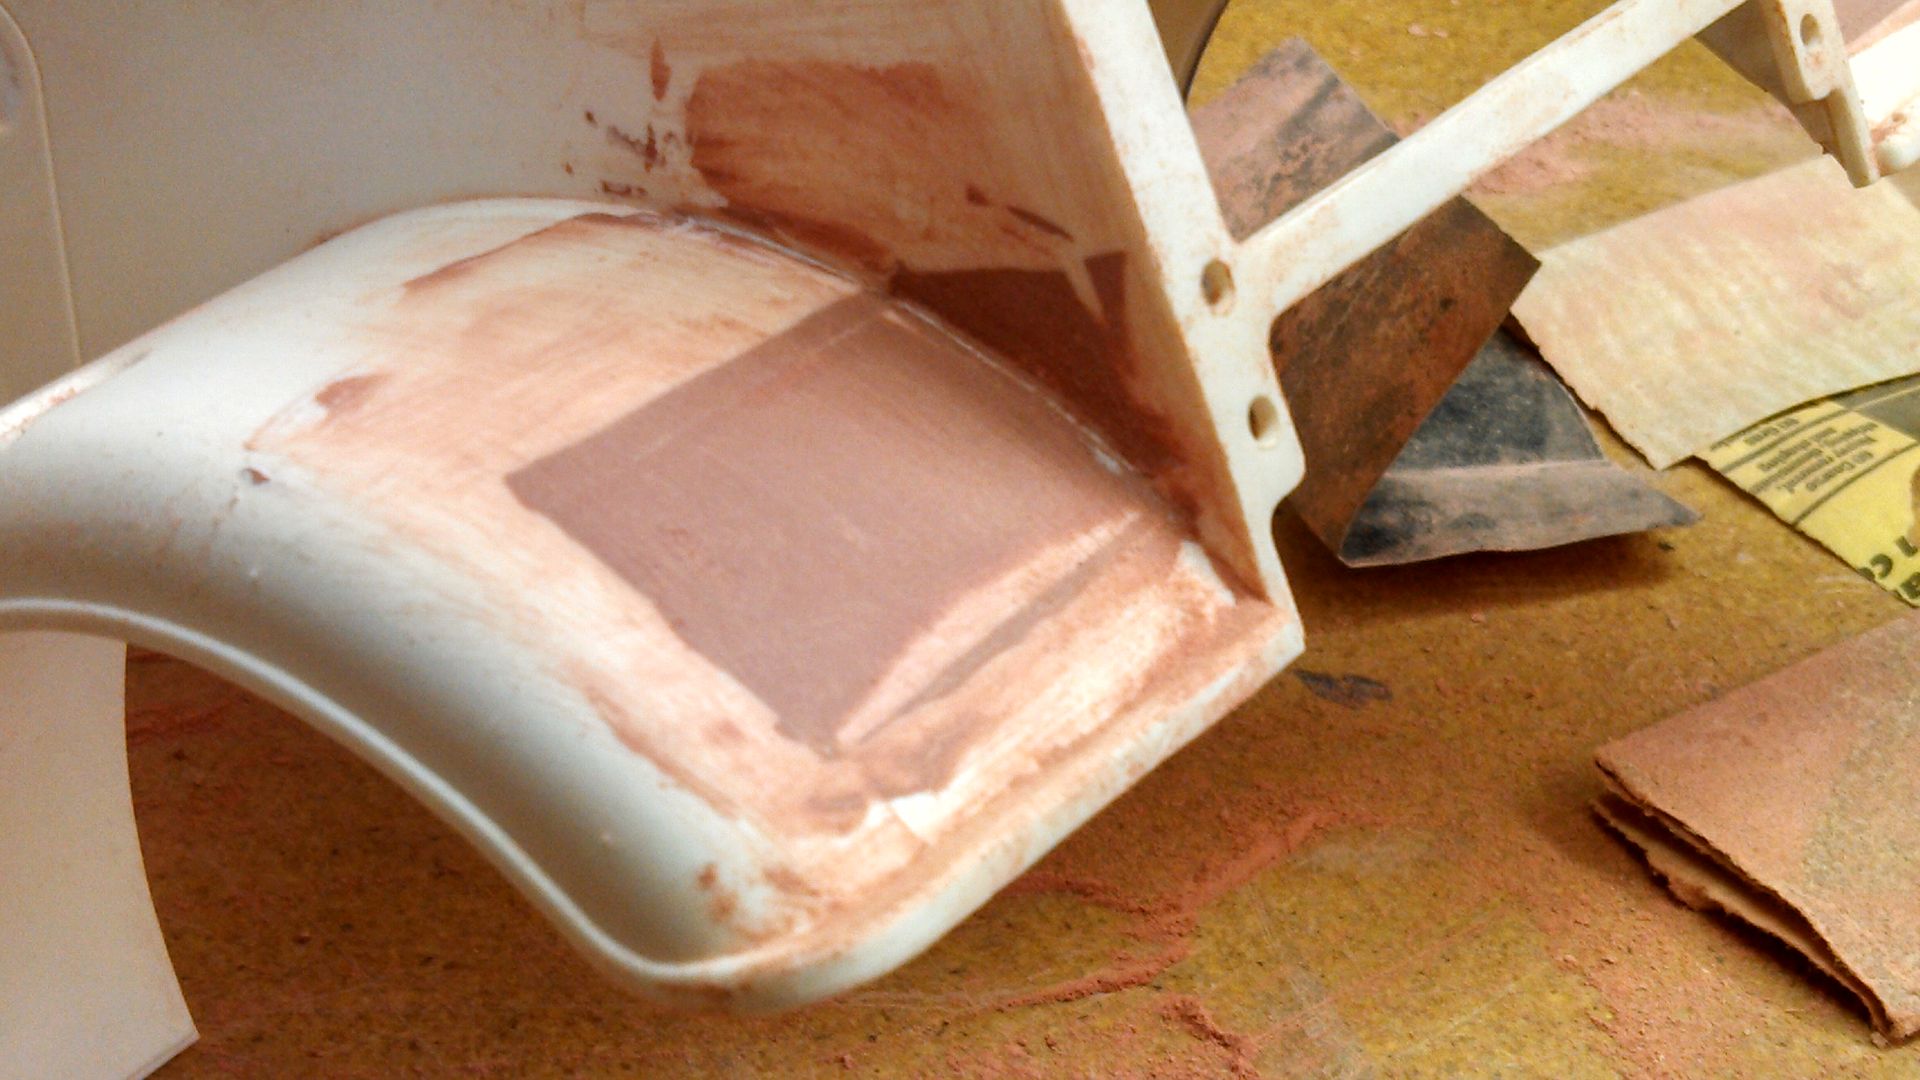 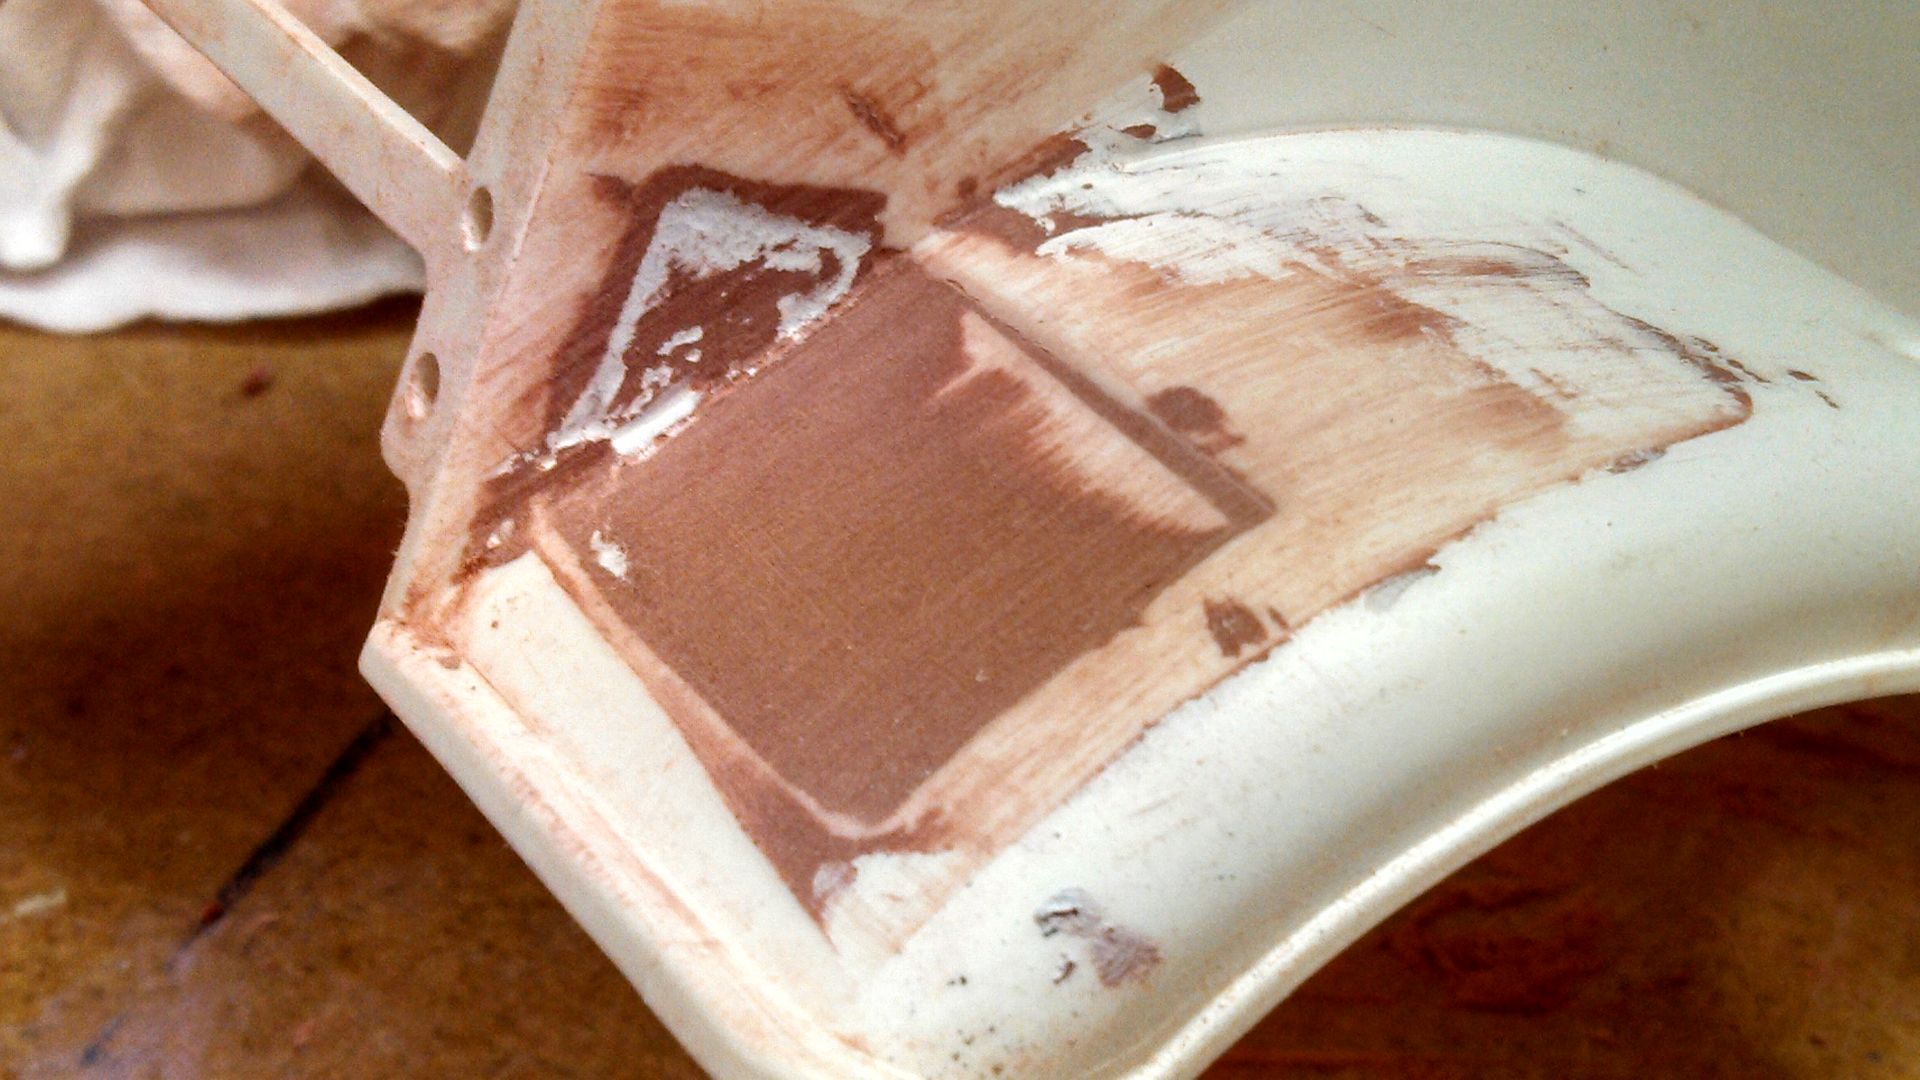 Put a thin skim on and should be all I will need...I hope 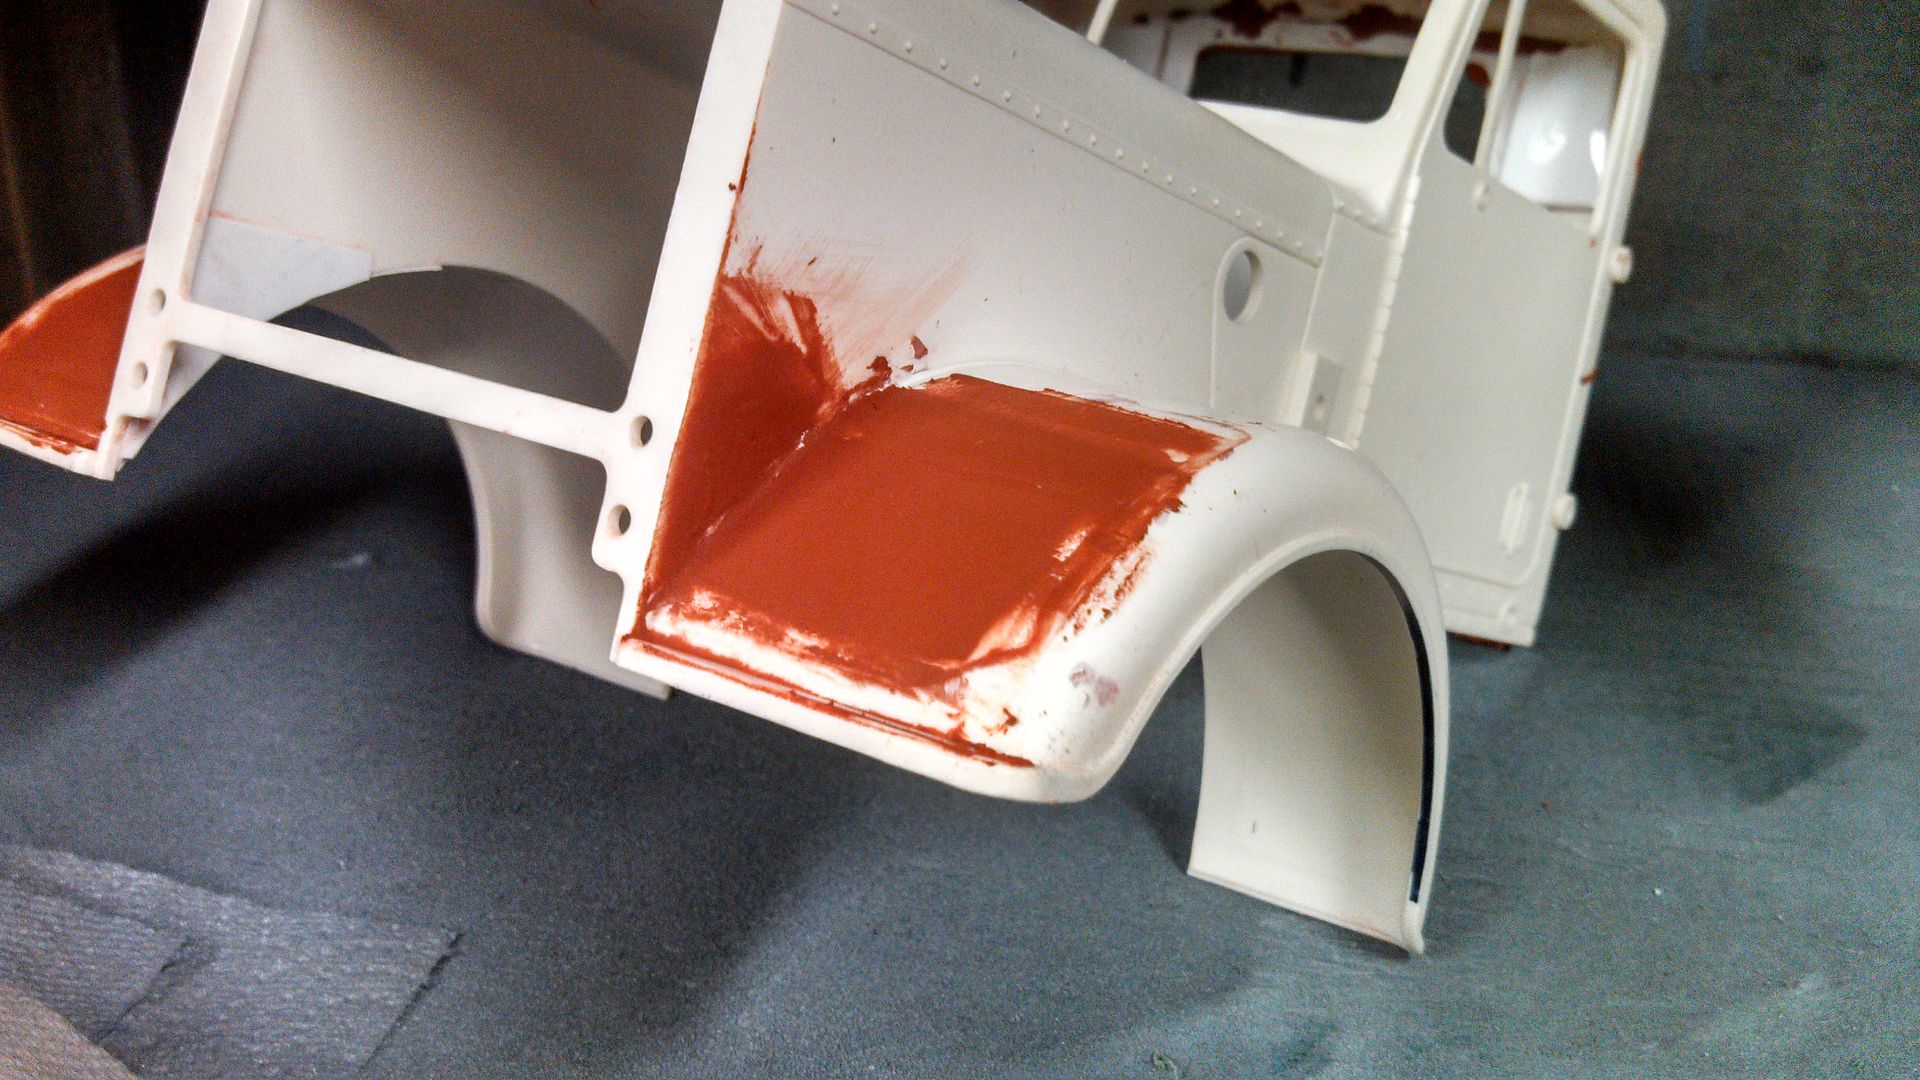
__________________
To view links or images in signatures your post count must be 10 or greater. You currently have 0 posts. To view links or images in signatures your post count must be 10 or greater. You currently have 0 posts.
|
|
#7
10-21-2013, 06:57 AM
|
||||
|
||||
|
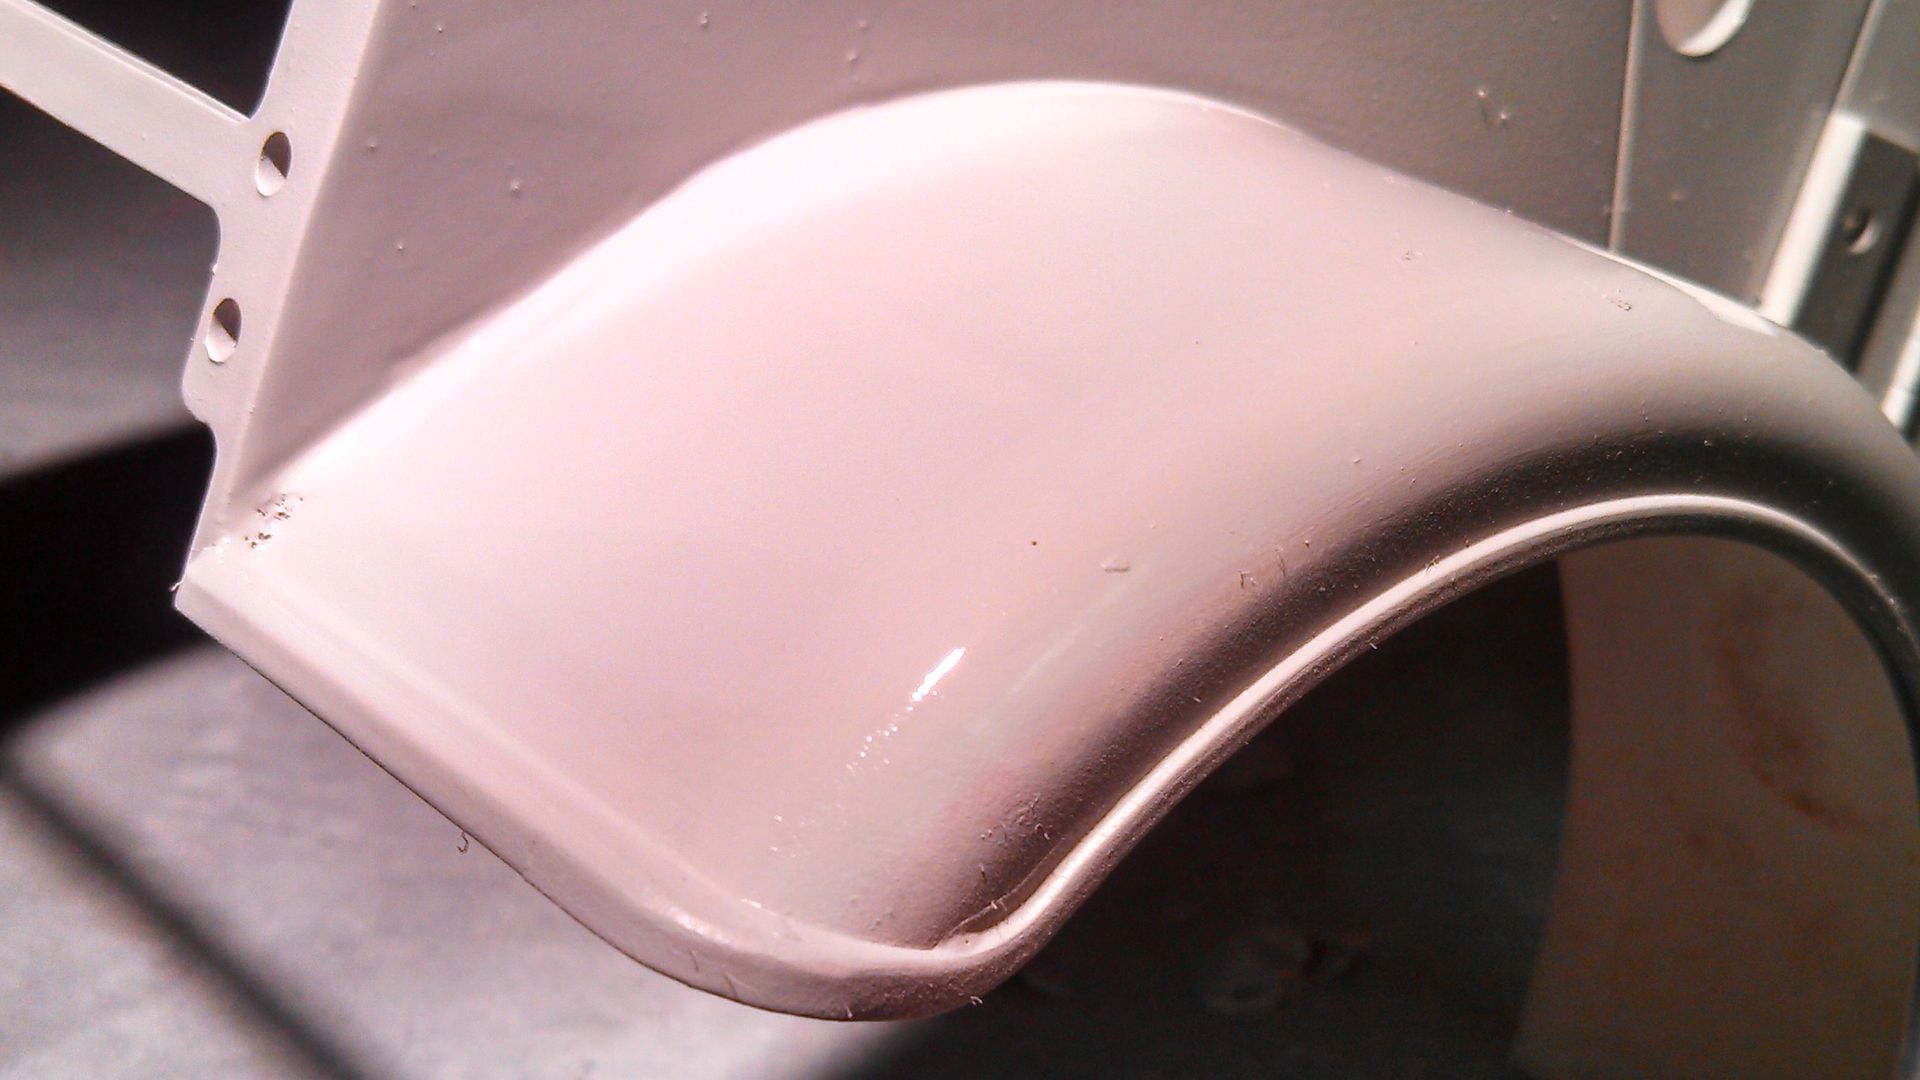
I'm getting really excited for this one and the way it is turning out...
I shot it with primer again to look for imperfections... 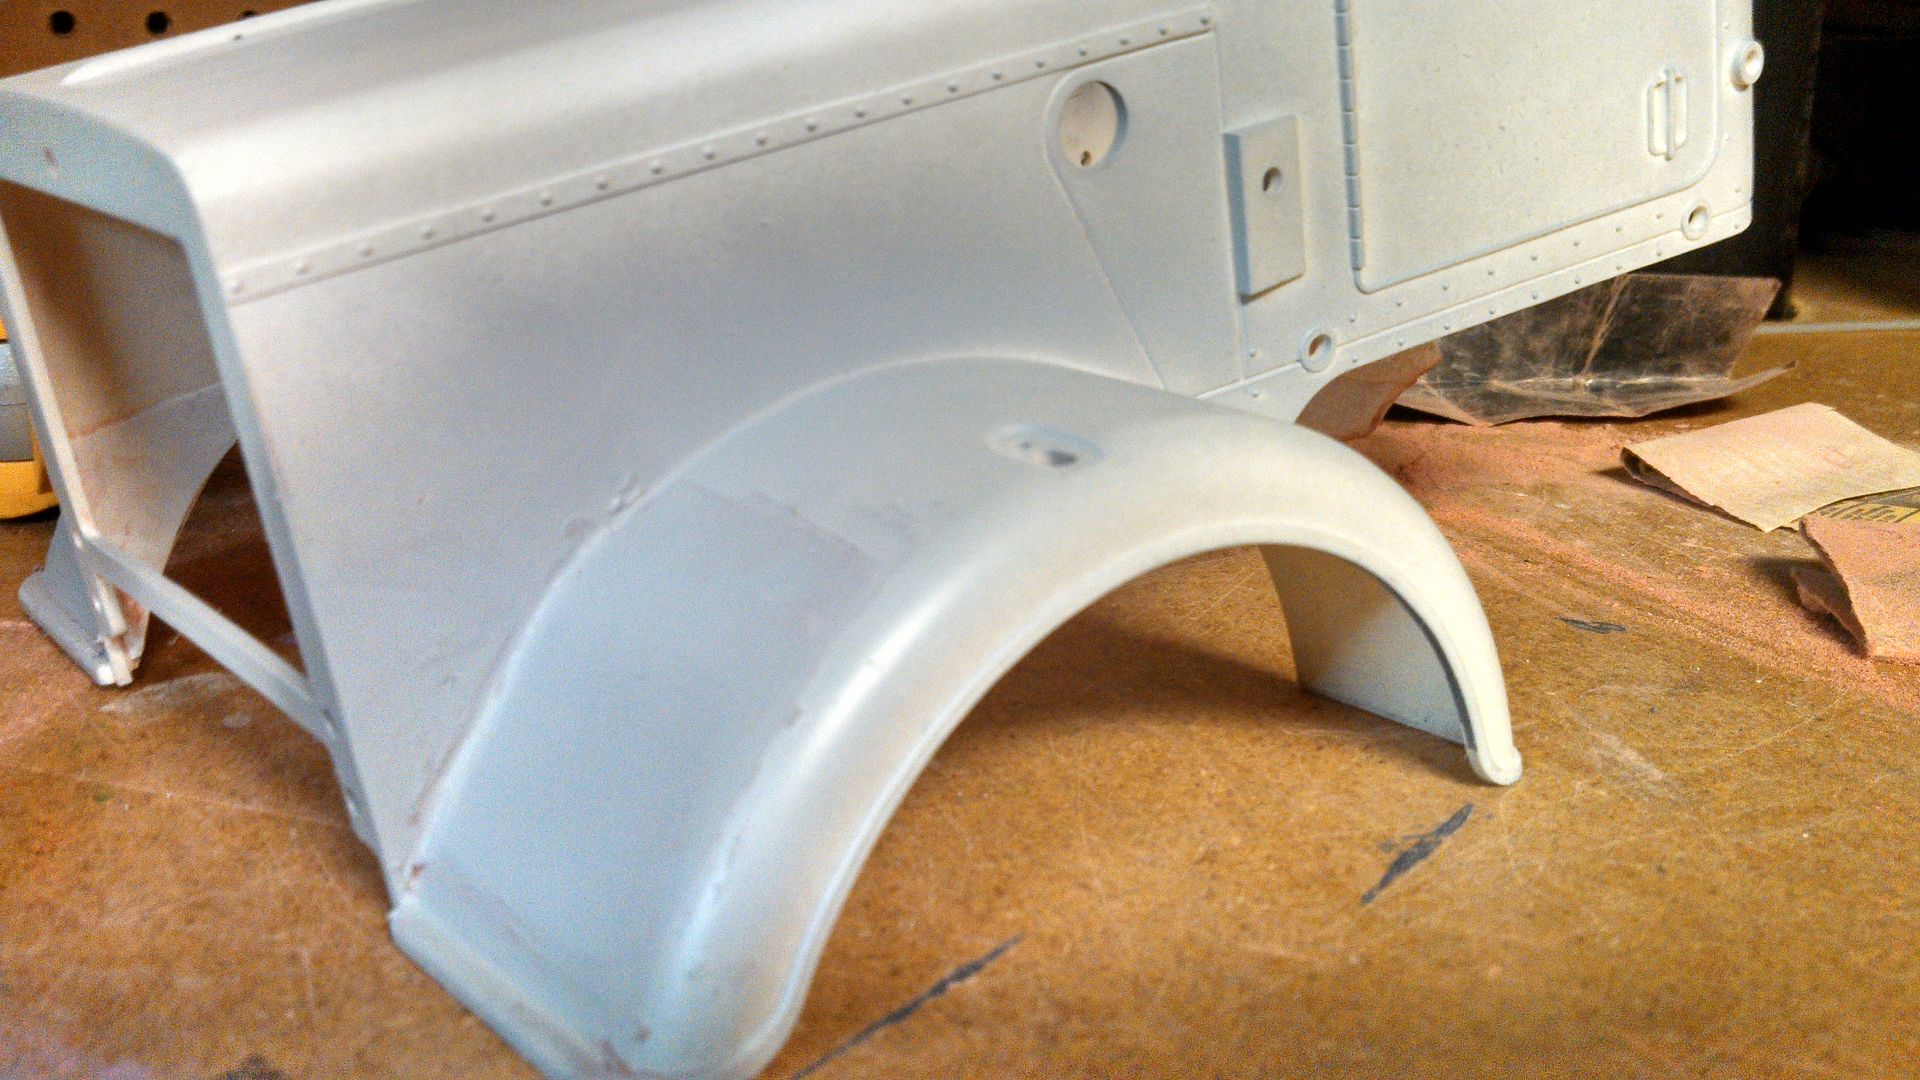 Started with 220 grit paper 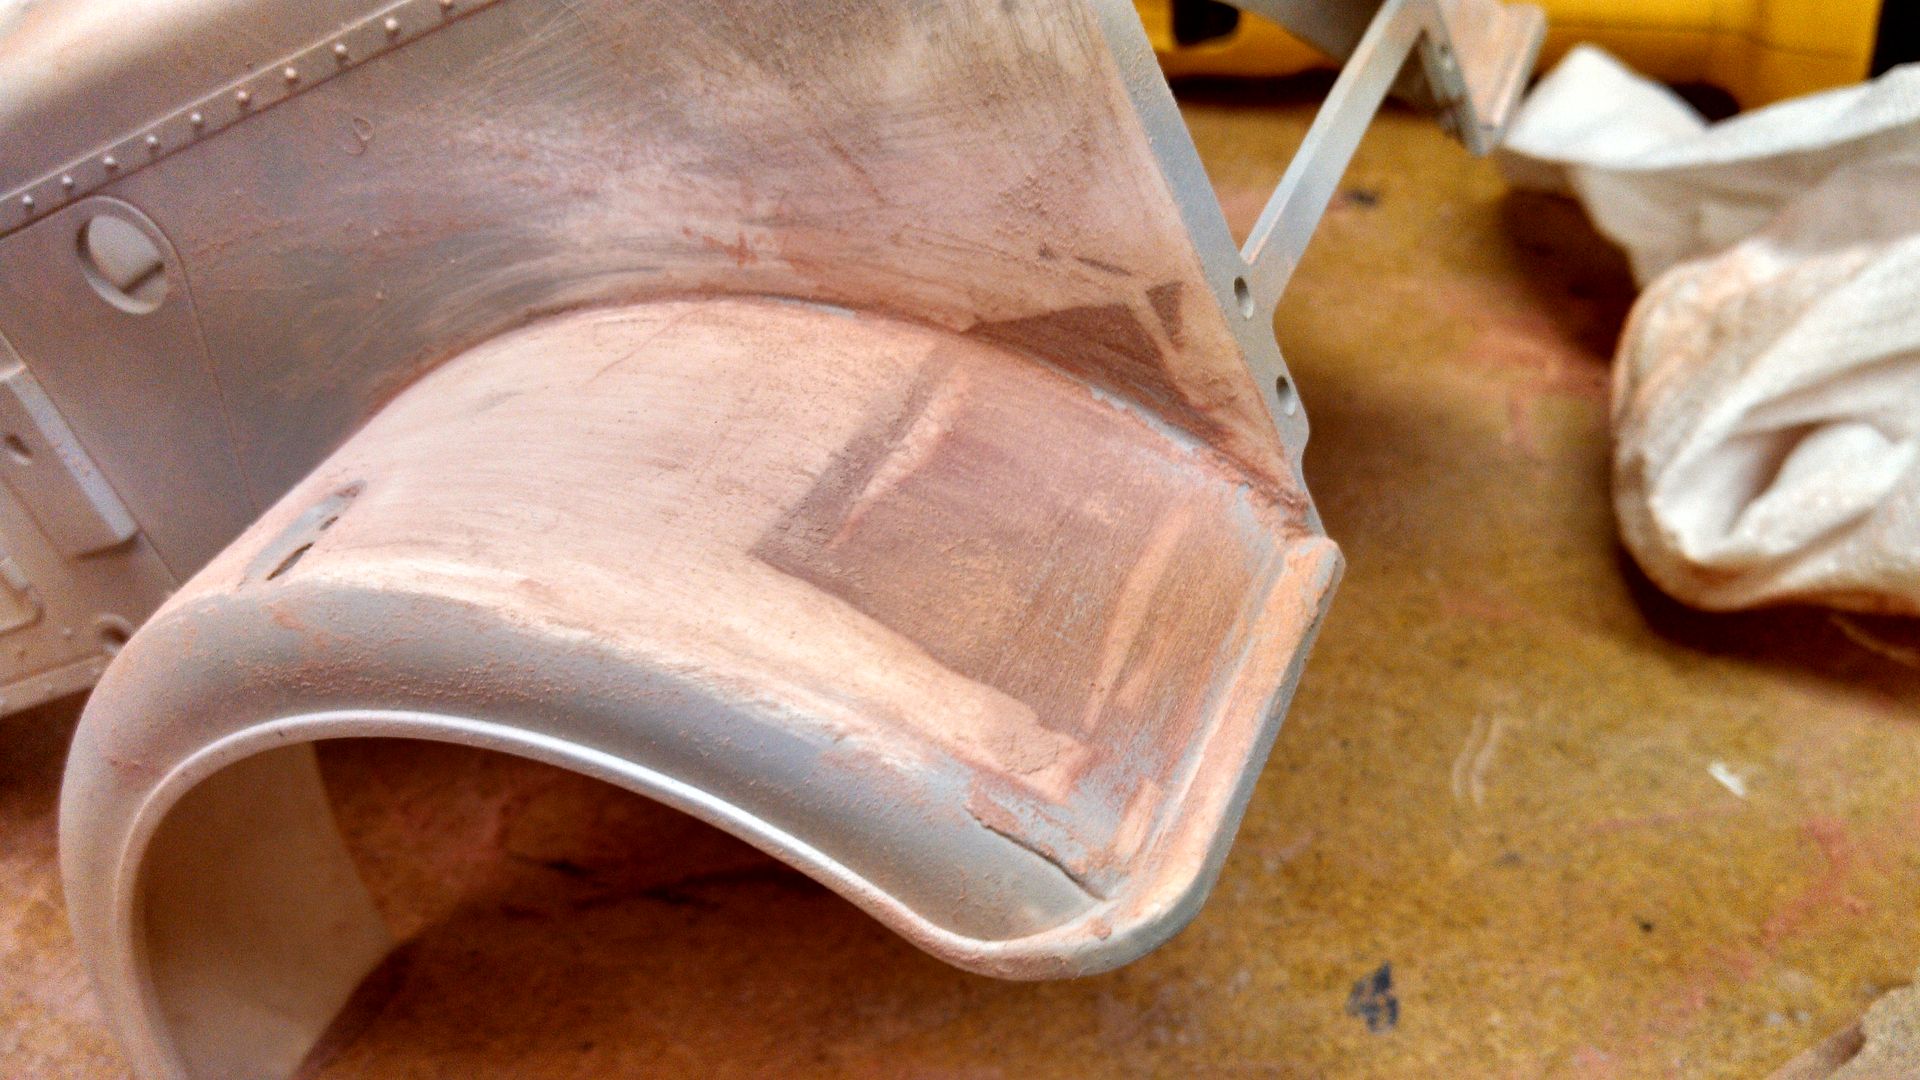 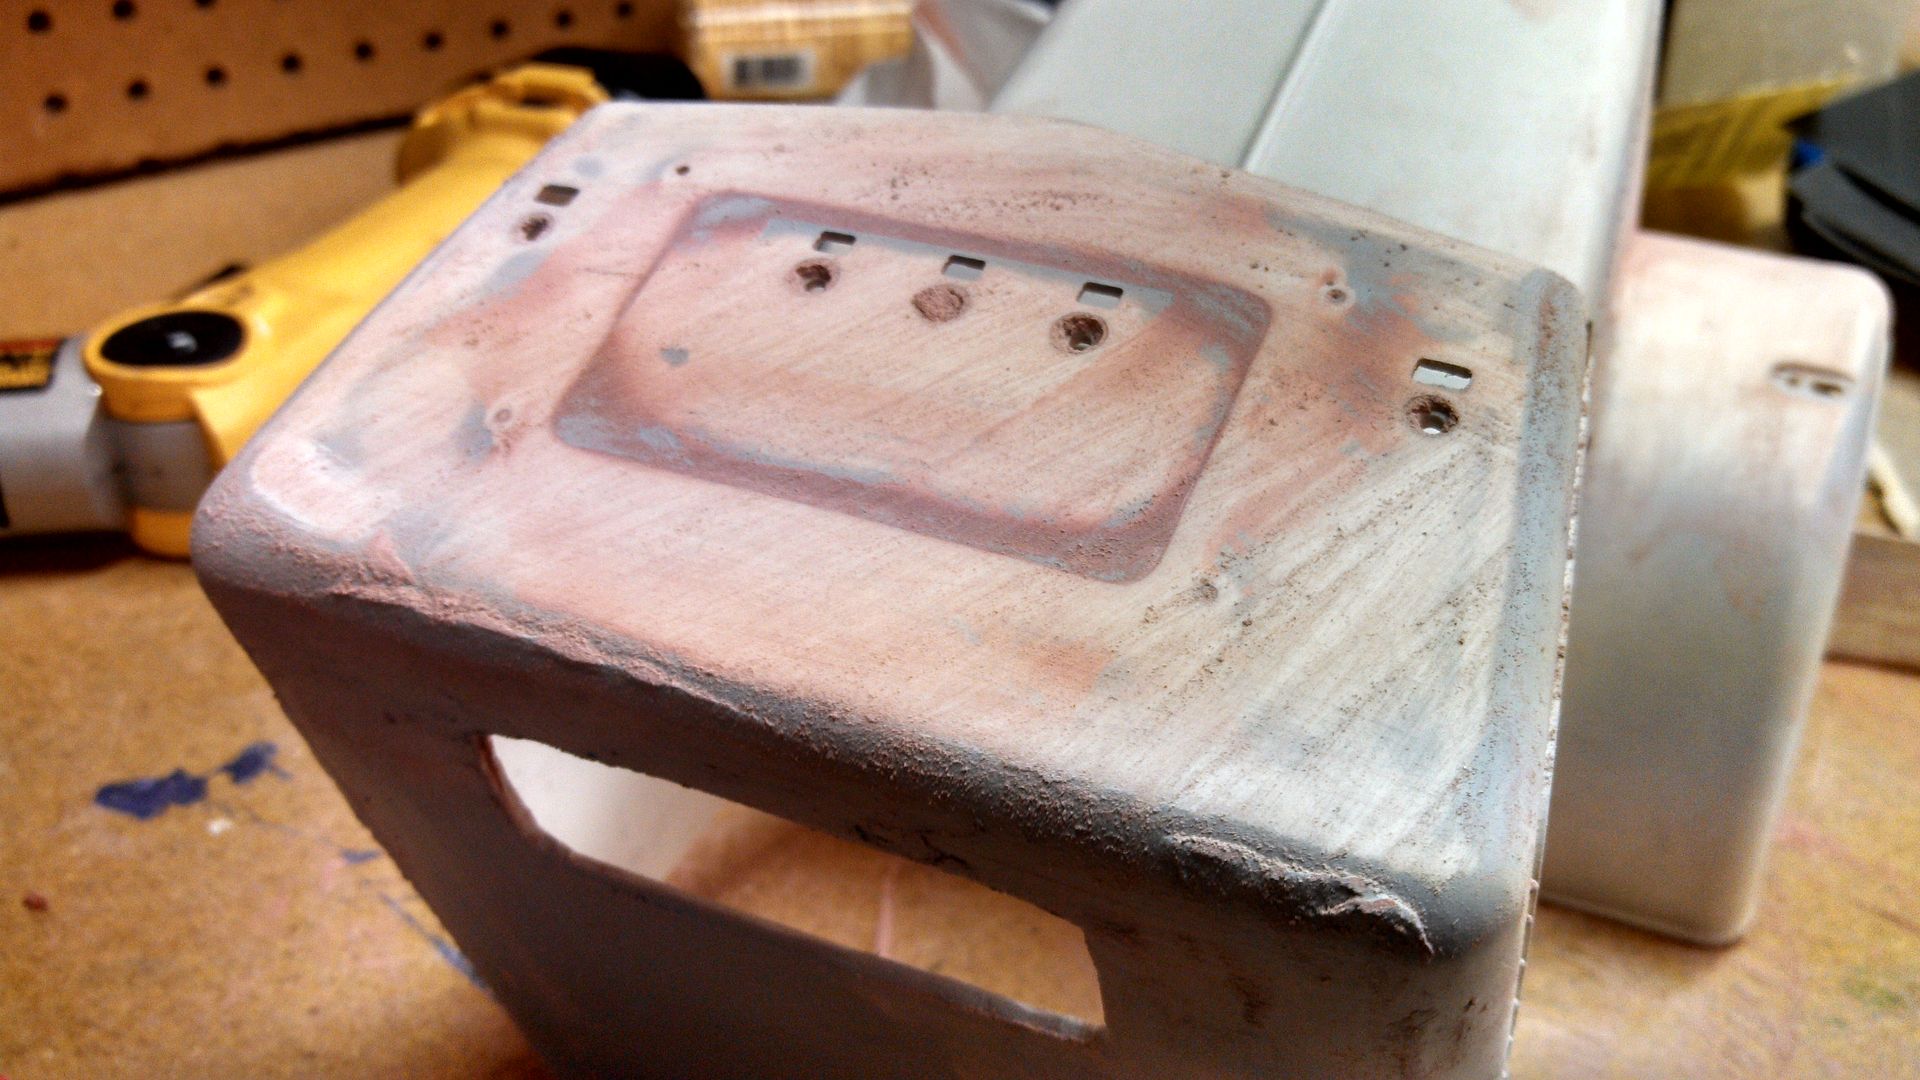 Went down to 600 grit and then used a tack cloth to remove all the dust 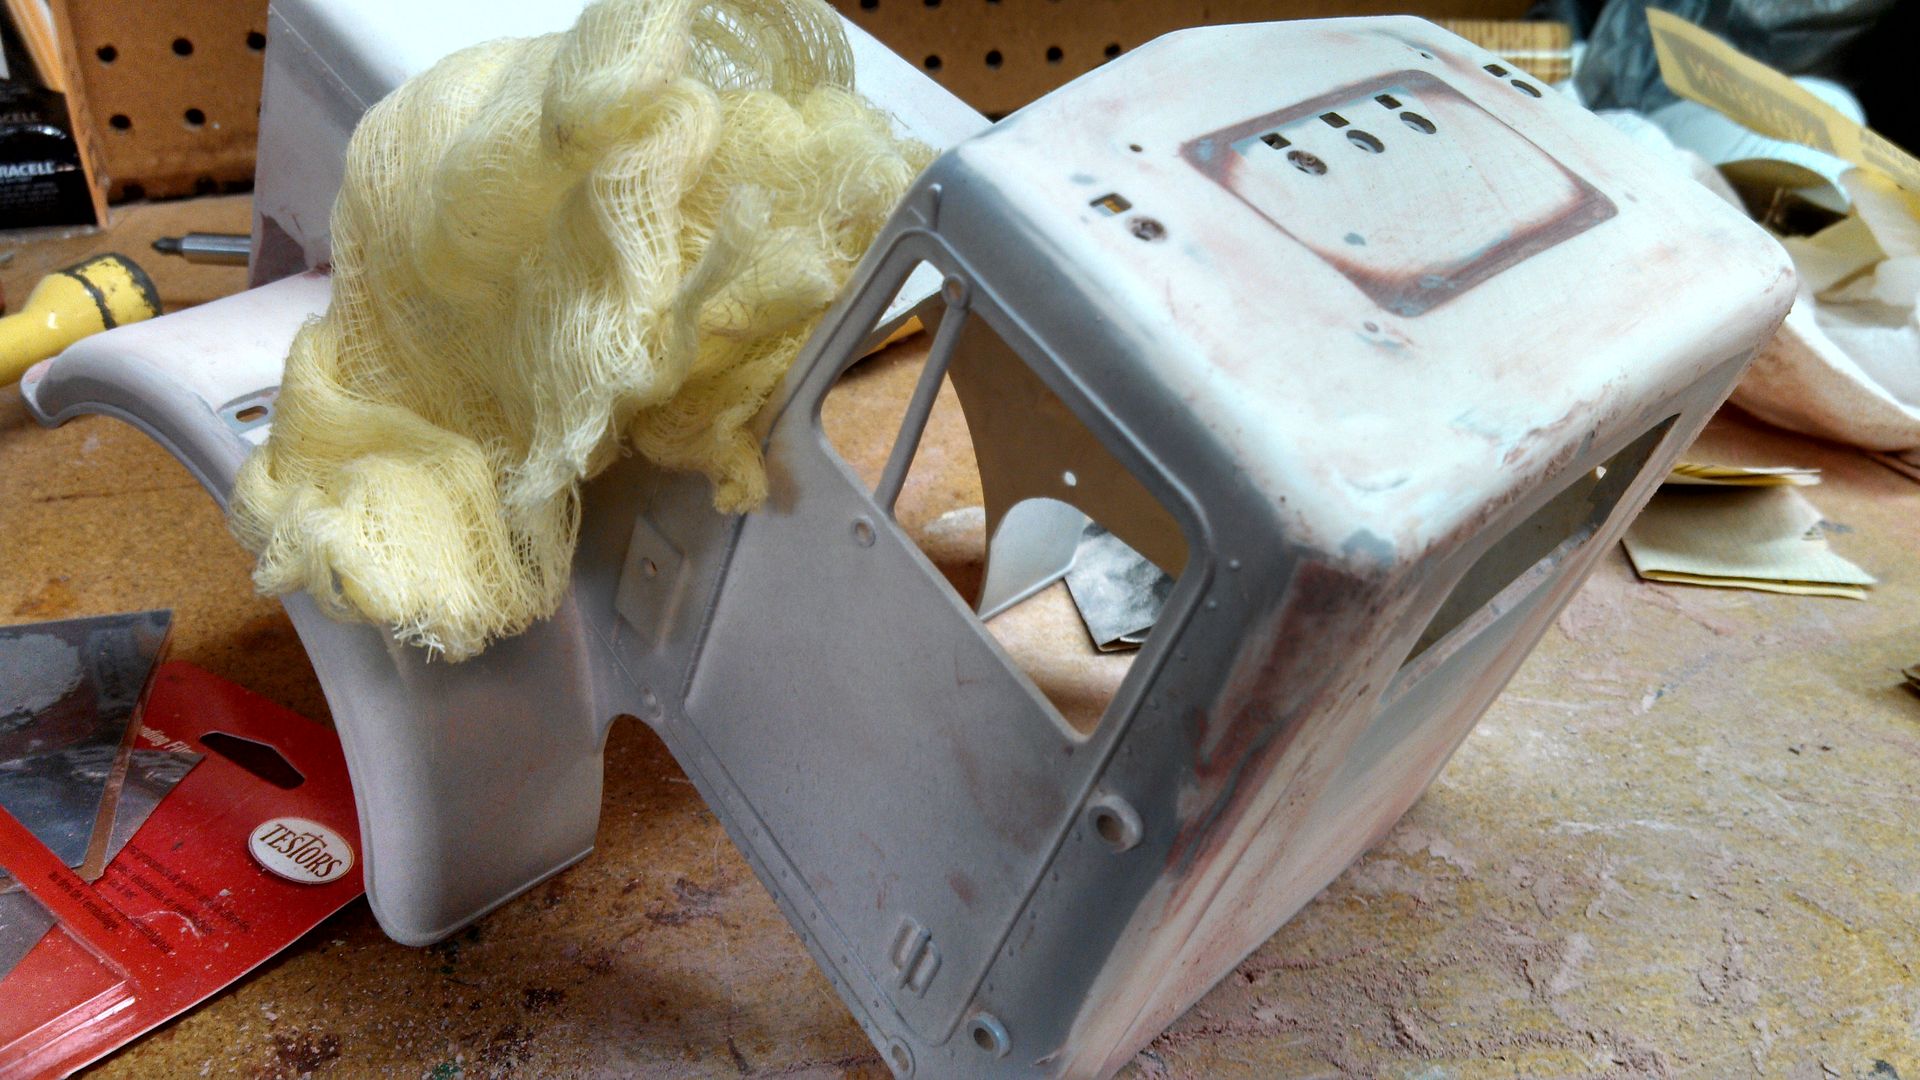
__________________
To view links or images in signatures your post count must be 10 or greater. You currently have 0 posts. To view links or images in signatures your post count must be 10 or greater. You currently have 0 posts.
|
|
#8
10-21-2013, 06:58 AM
|
||||
|
||||
|
Laid down some primer and it's looking good...
  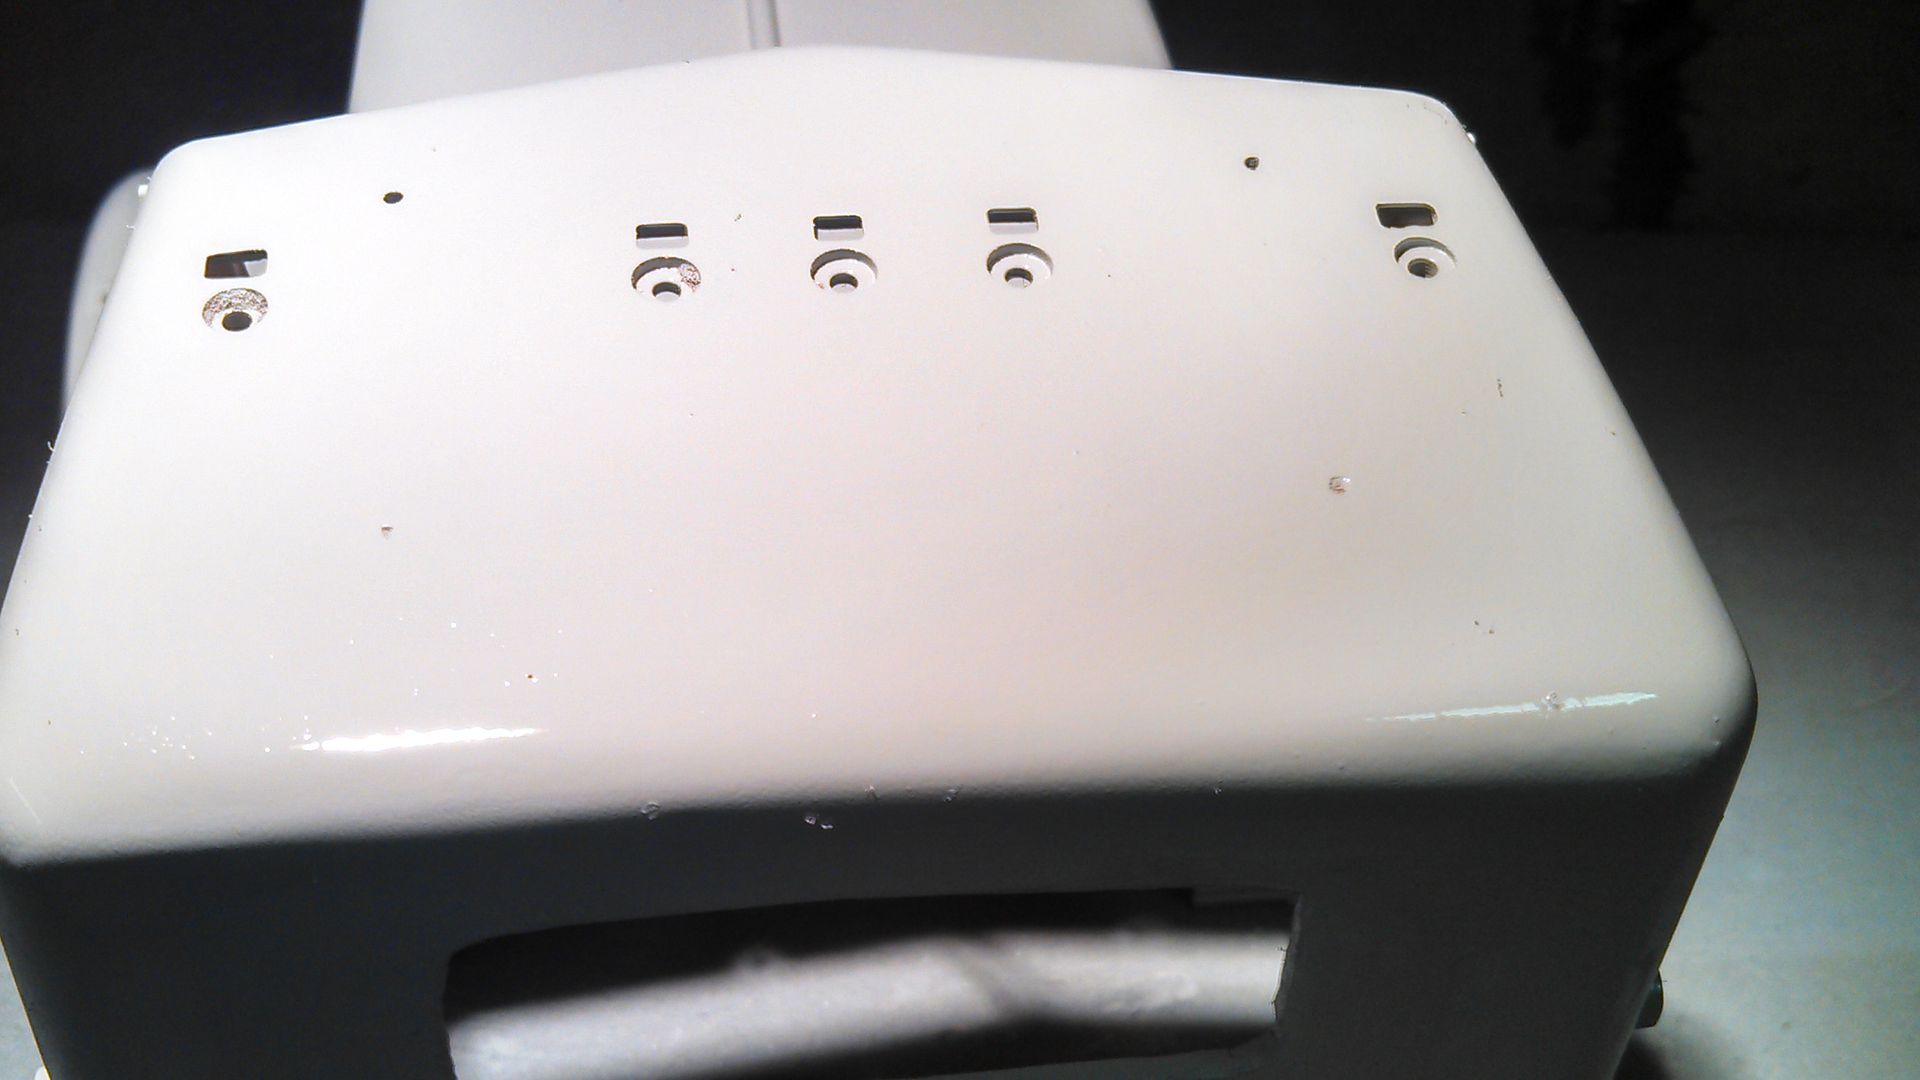  Will let it go and then hit the whole body with 1000 grit then the final coat of FINE Primer...
__________________
To view links or images in signatures your post count must be 10 or greater. You currently have 0 posts. To view links or images in signatures your post count must be 10 or greater. You currently have 0 posts.
|
|
#9
10-21-2013, 07:00 AM
|
||||
|
||||
|
Will try to hit it with 1000 grit tonight but had to do a mock up....
When will those parts get here... :dunno: 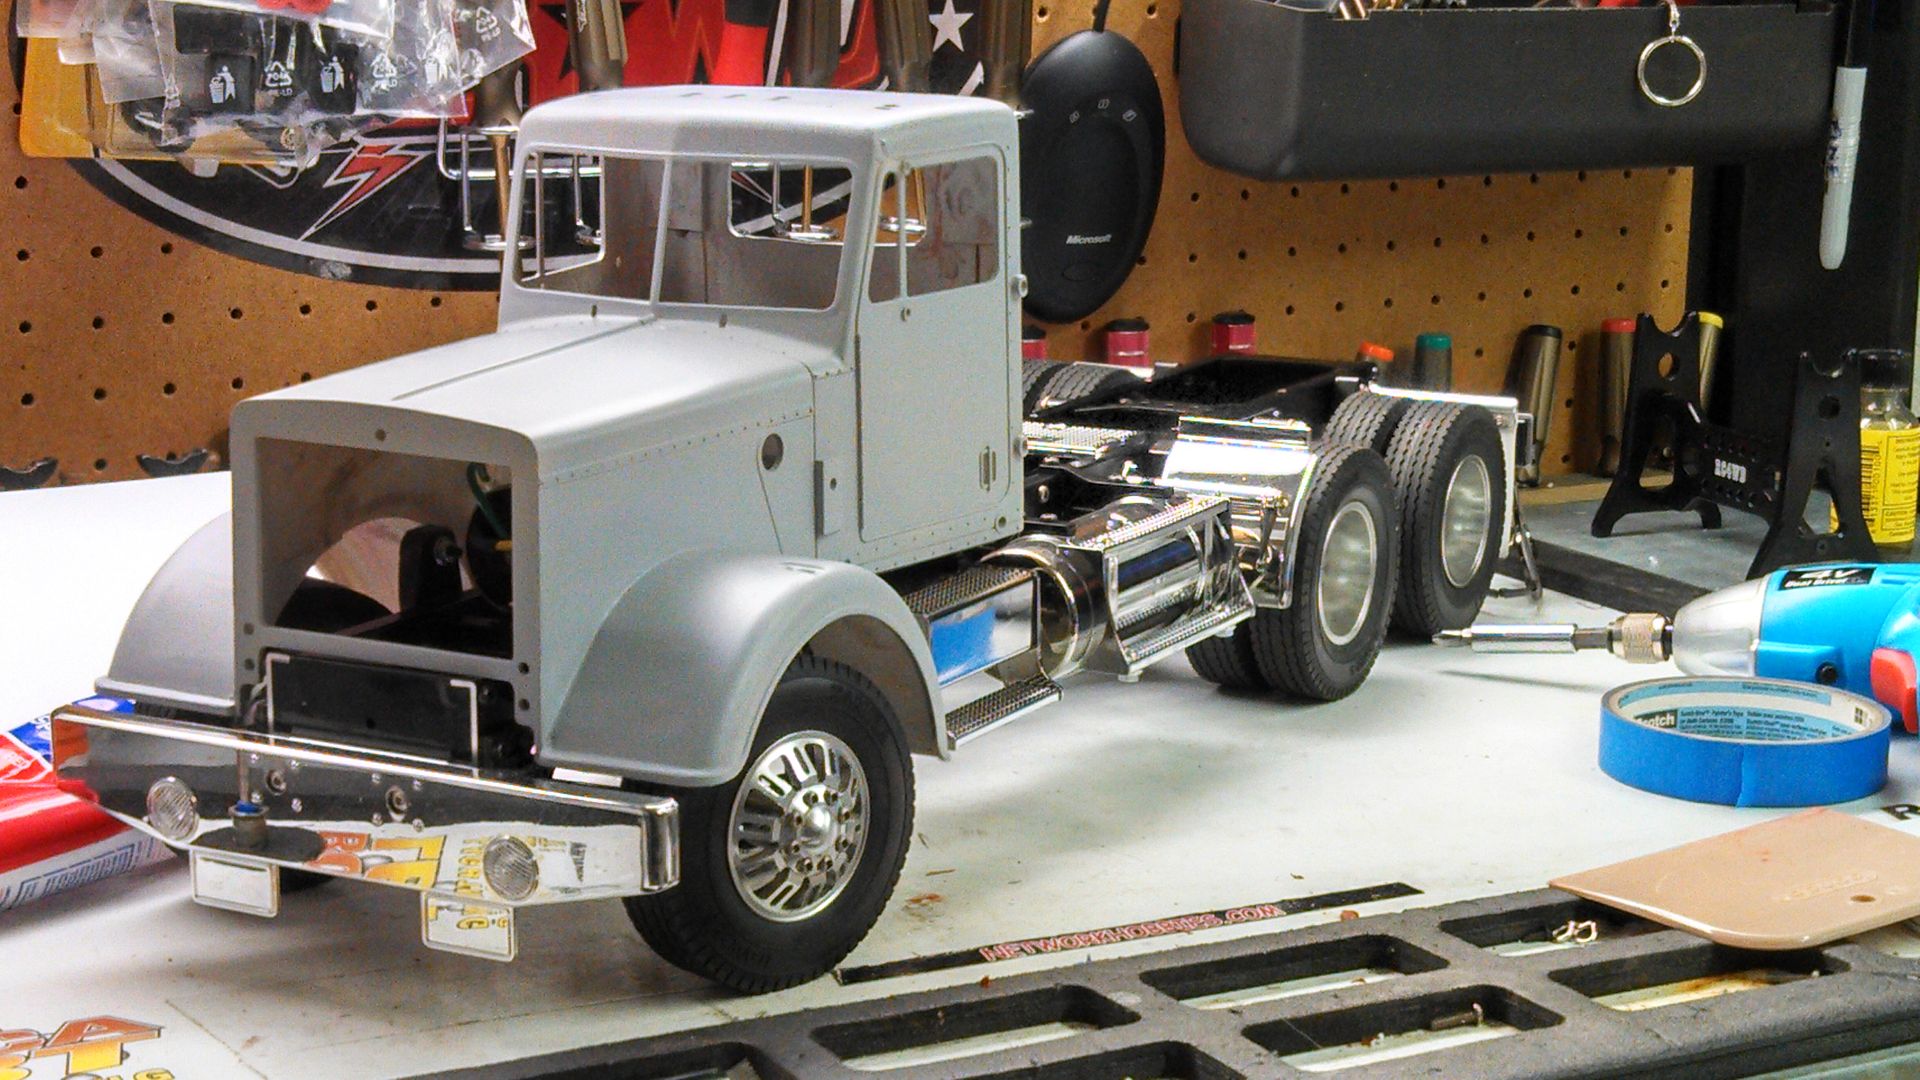 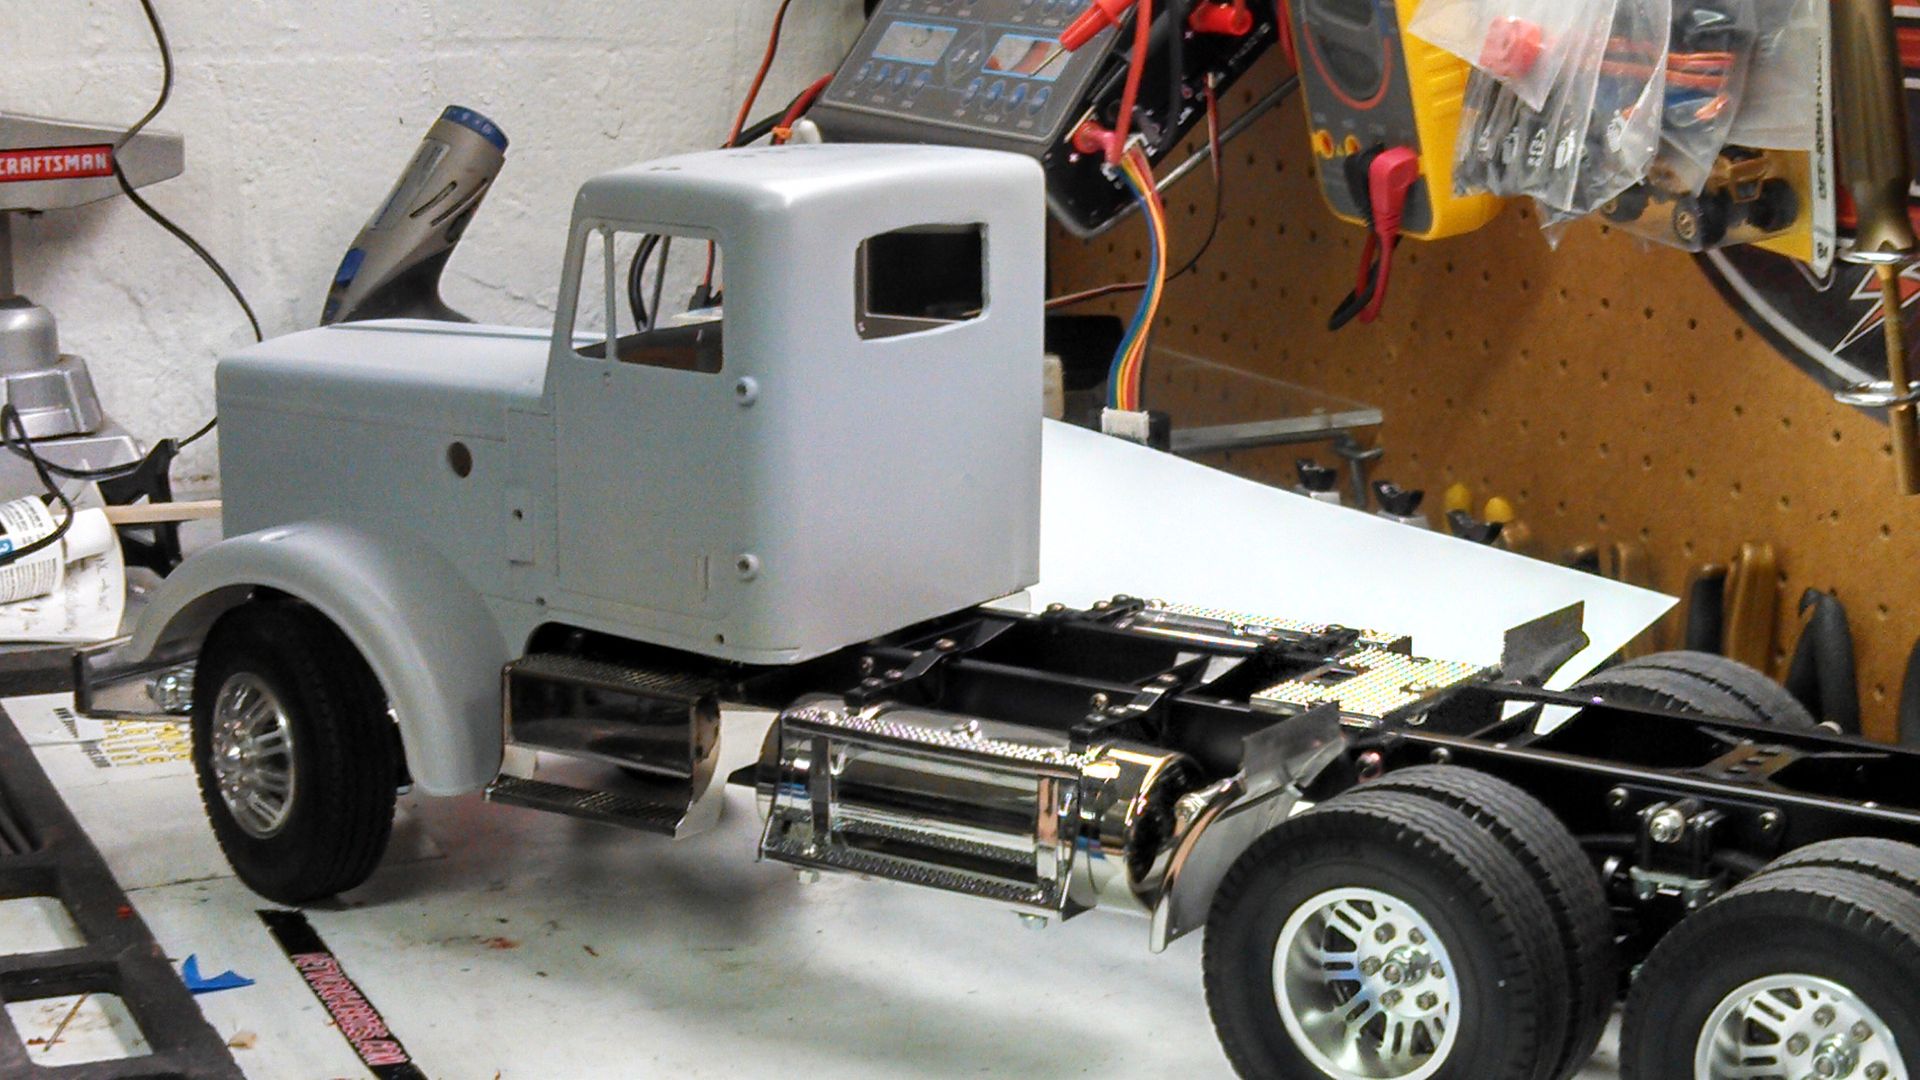
__________________
To view links or images in signatures your post count must be 10 or greater. You currently have 0 posts. To view links or images in signatures your post count must be 10 or greater. You currently have 0 posts.
|
|
#10
10-21-2013, 07:01 AM
|
||||
|
||||
|
Running behind a day cab yesterday and it clicked that I needed molding around the rear window.
Dug through my styrene stock and found 2mm quarter round... The key is to go slow and use plastic weld to attach as you go. I've tried to preform it but it is more of a pain. Get your starting point...glue it, wait for it to dry and then attack your bends... If you bend slow and use your fingers to warm it up, it works perfect 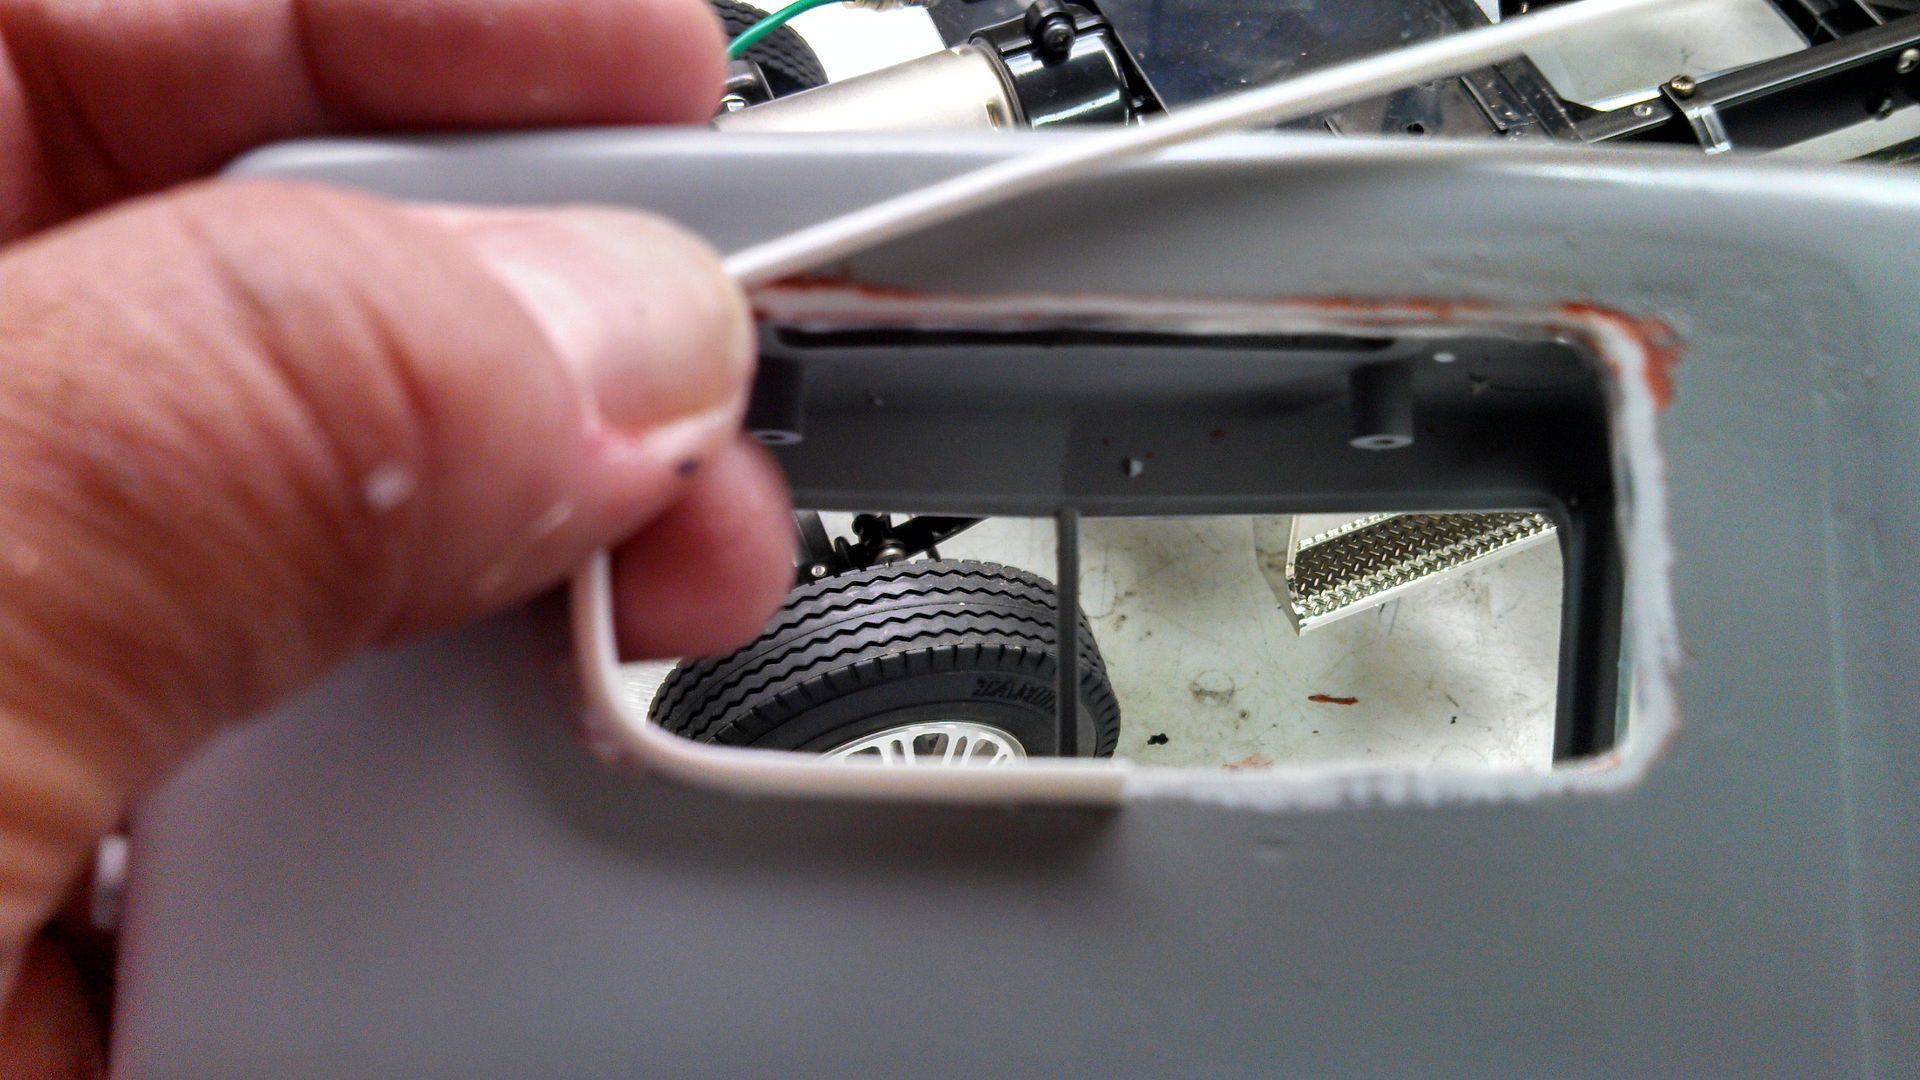 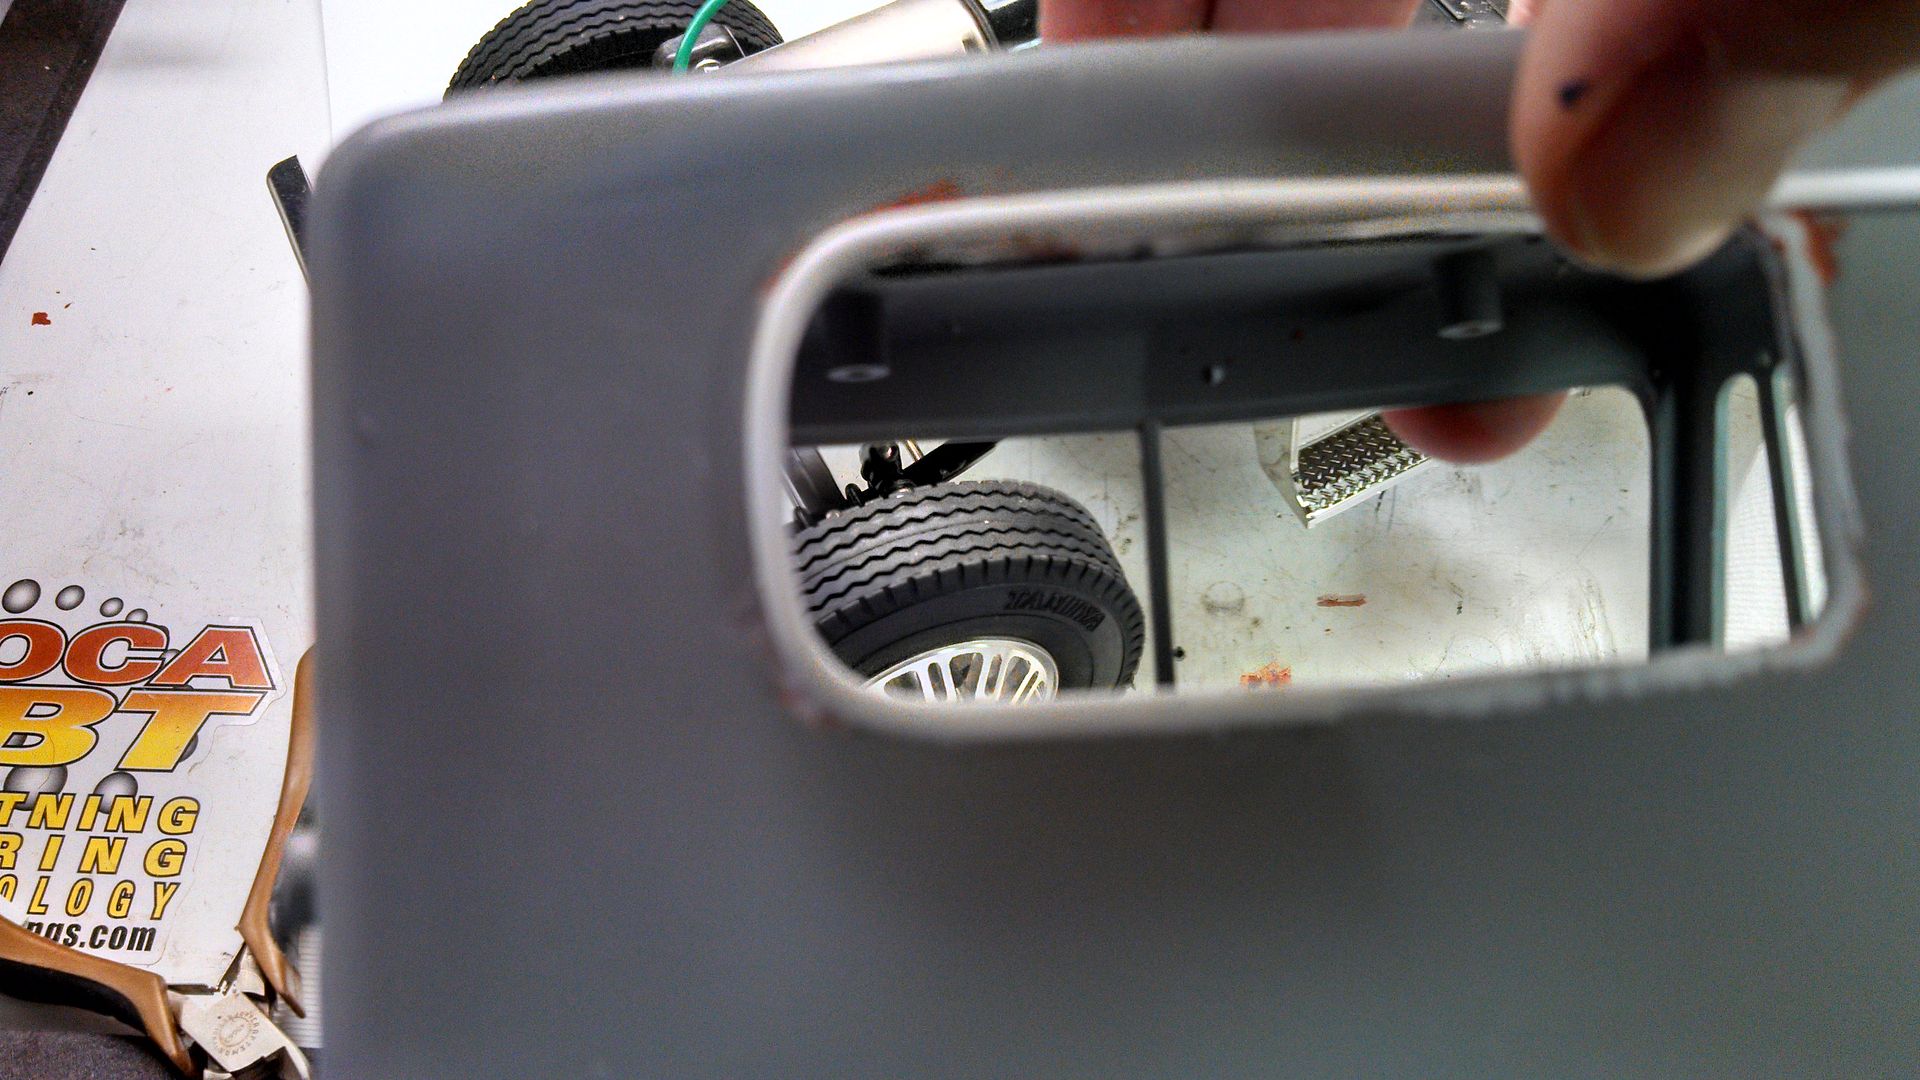 The patience pays off 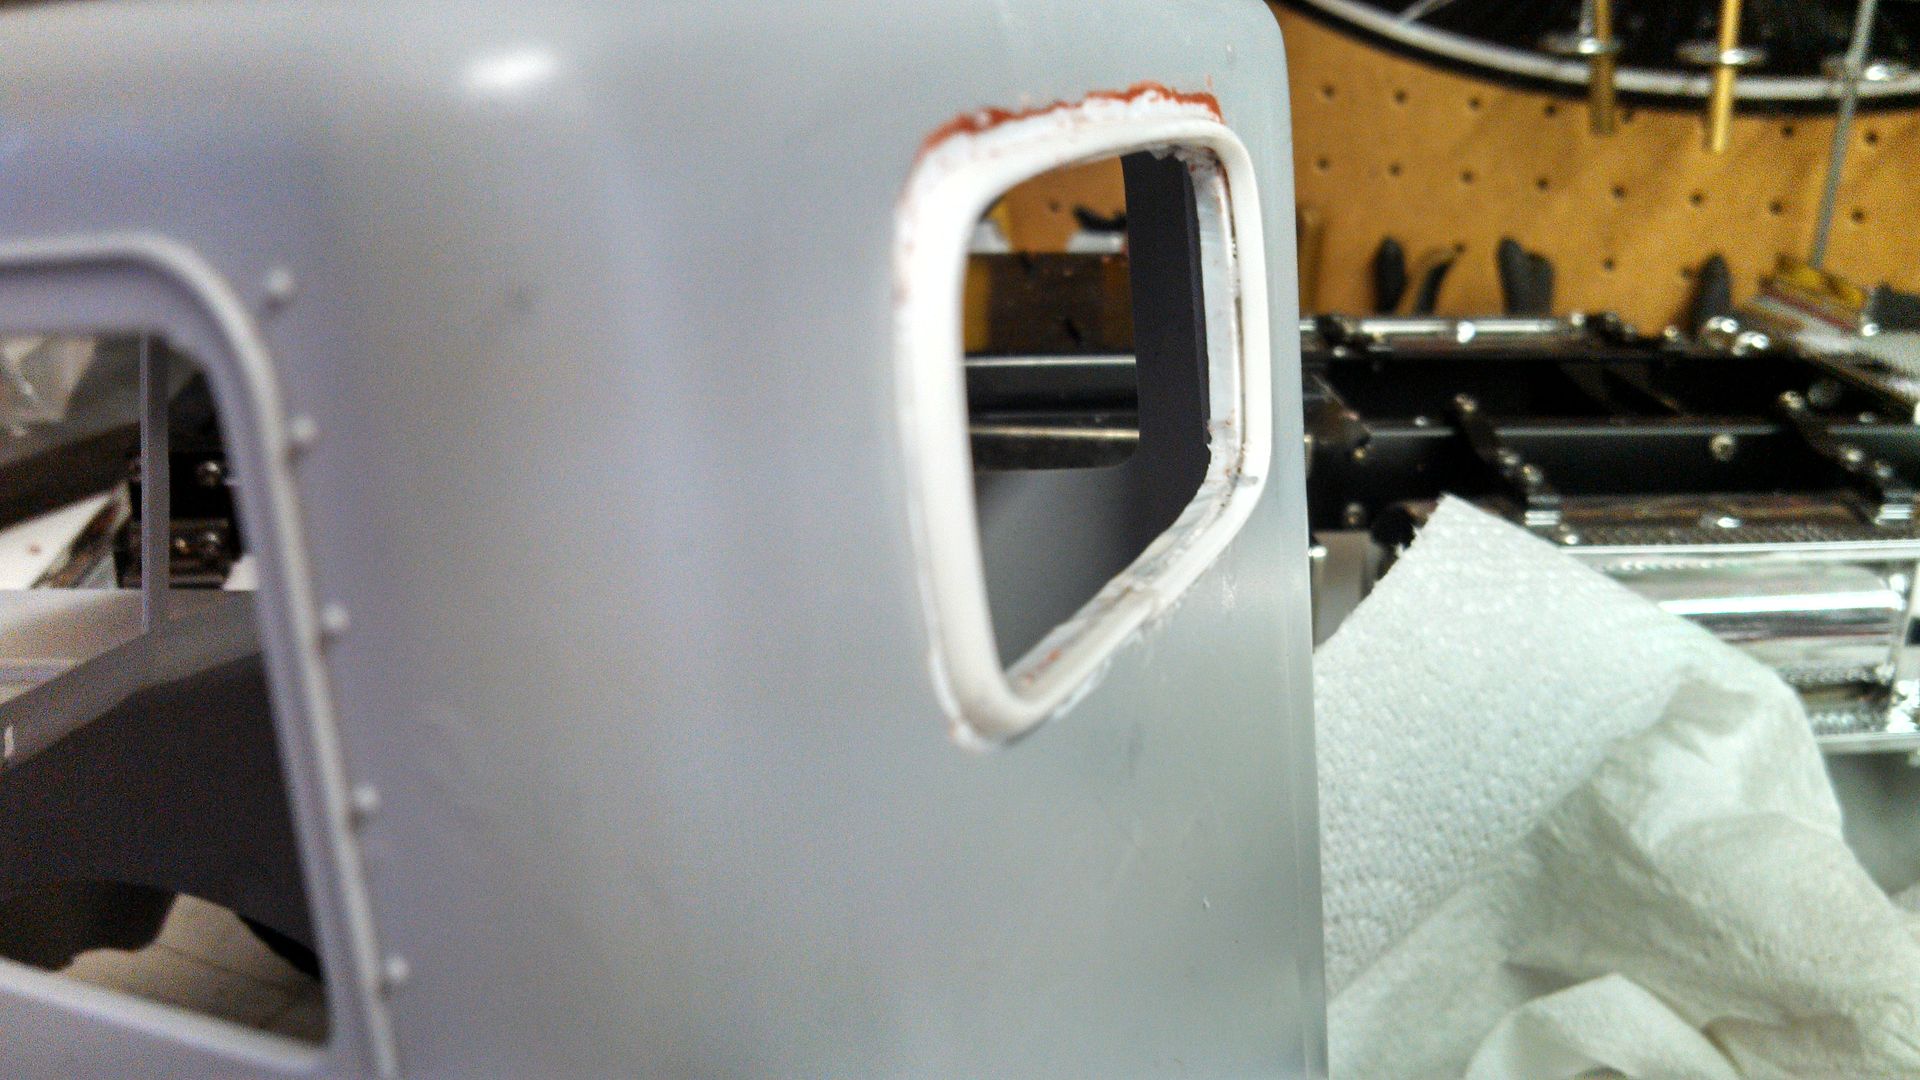 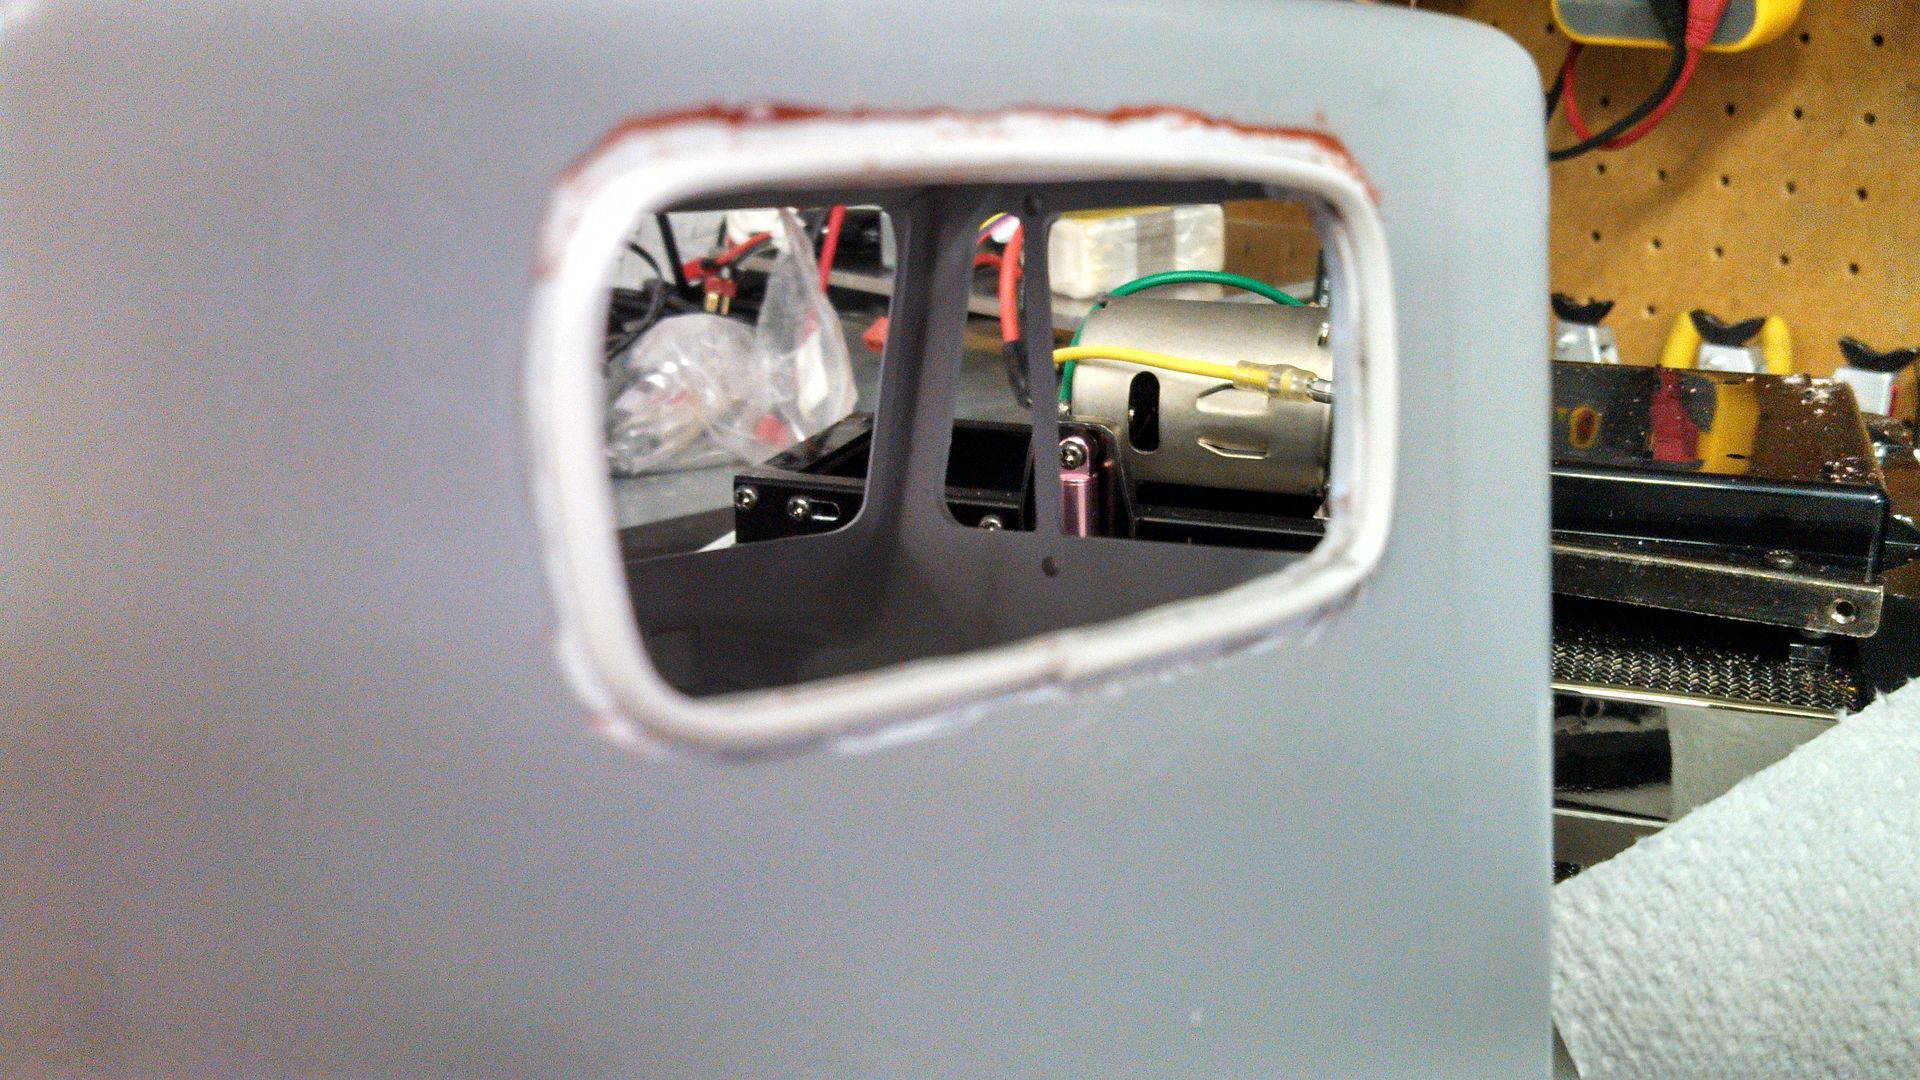 Hoping to lay down some color today...
__________________
To view links or images in signatures your post count must be 10 or greater. You currently have 0 posts. To view links or images in signatures your post count must be 10 or greater. You currently have 0 posts.
|
|
#11
10-21-2013, 07:02 AM
|
||||
|
||||
|
I opted for a flat grey base....
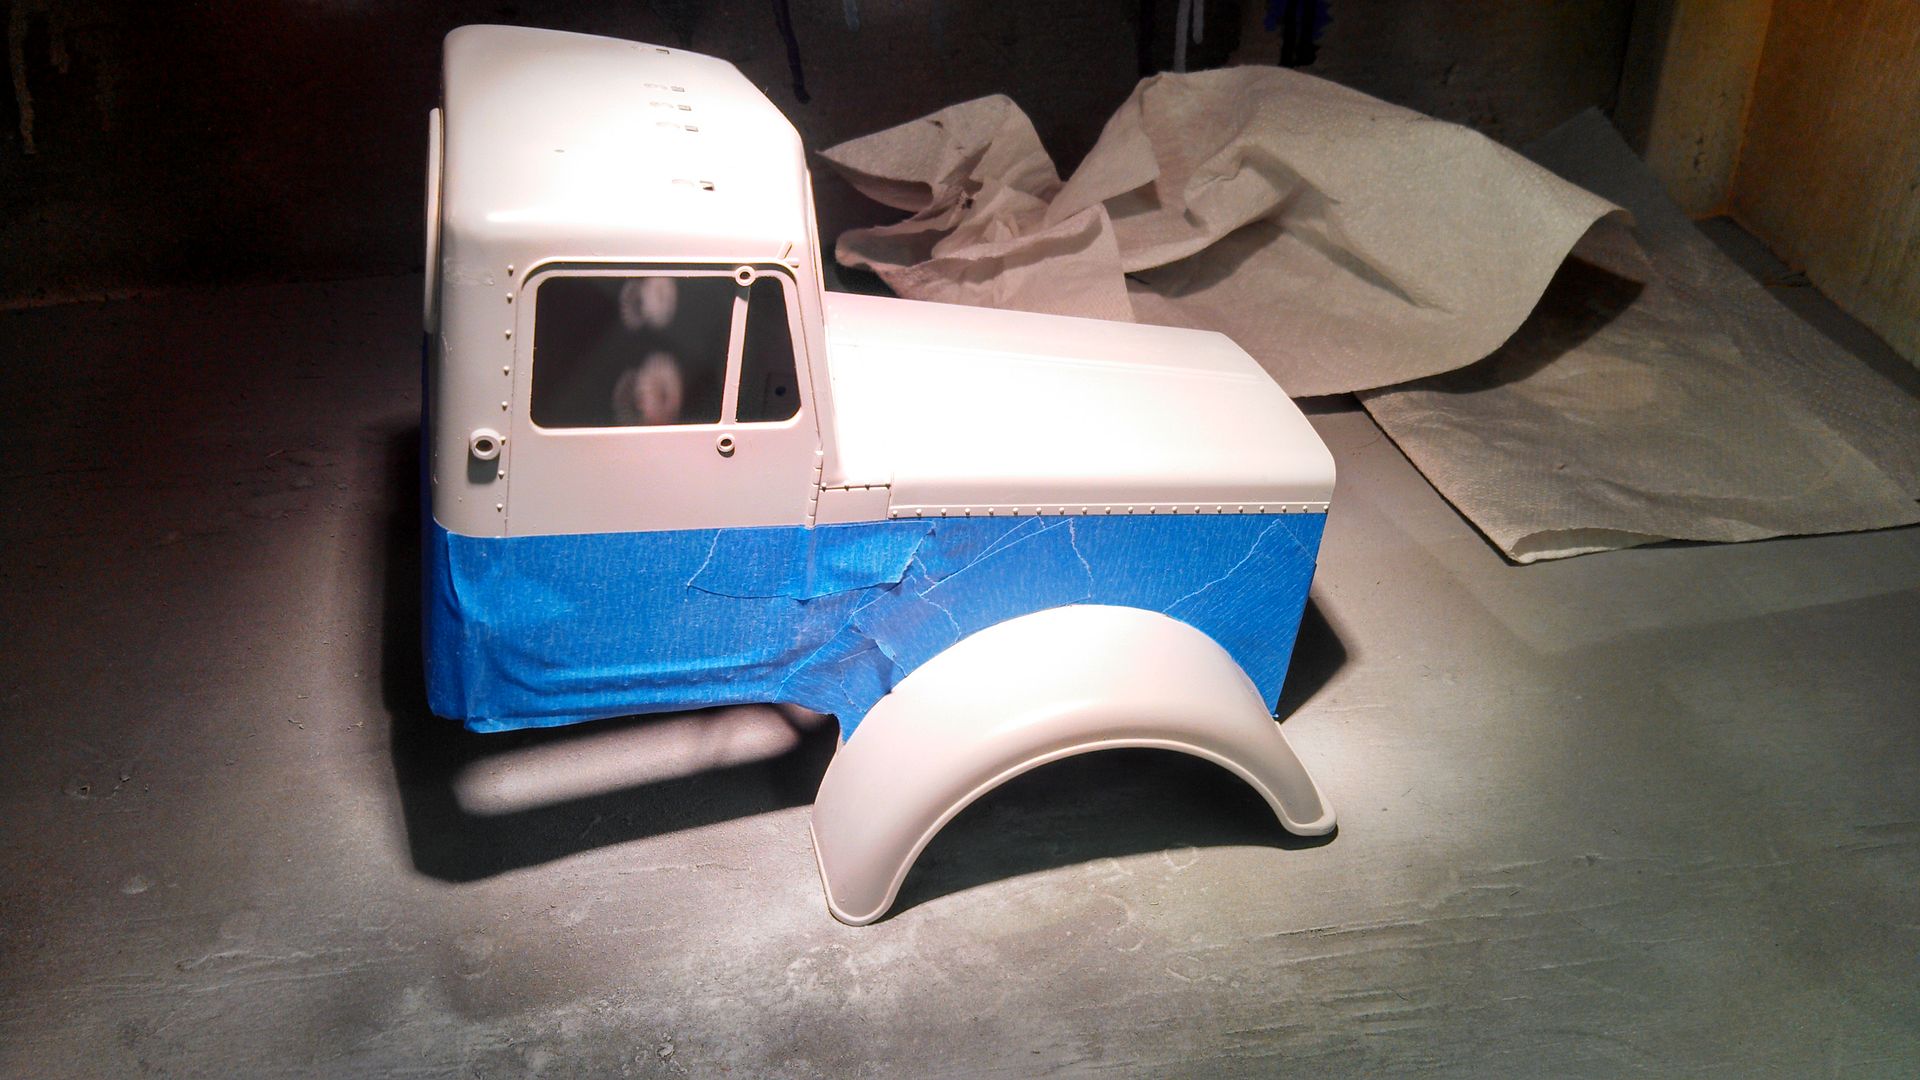 Then picked up some Ford Purple... 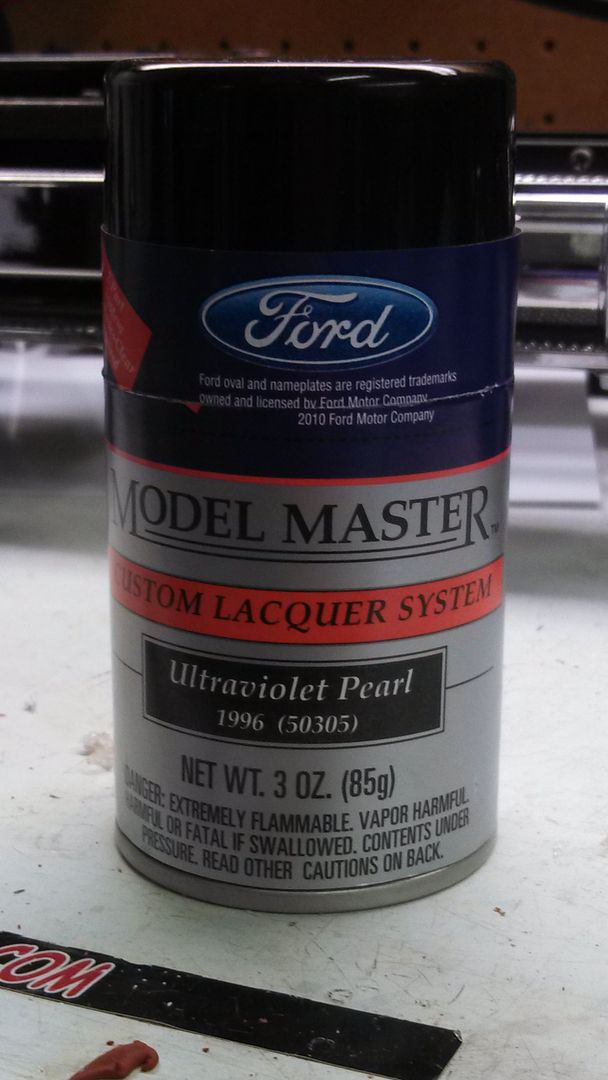 Gave the paint a warm bath 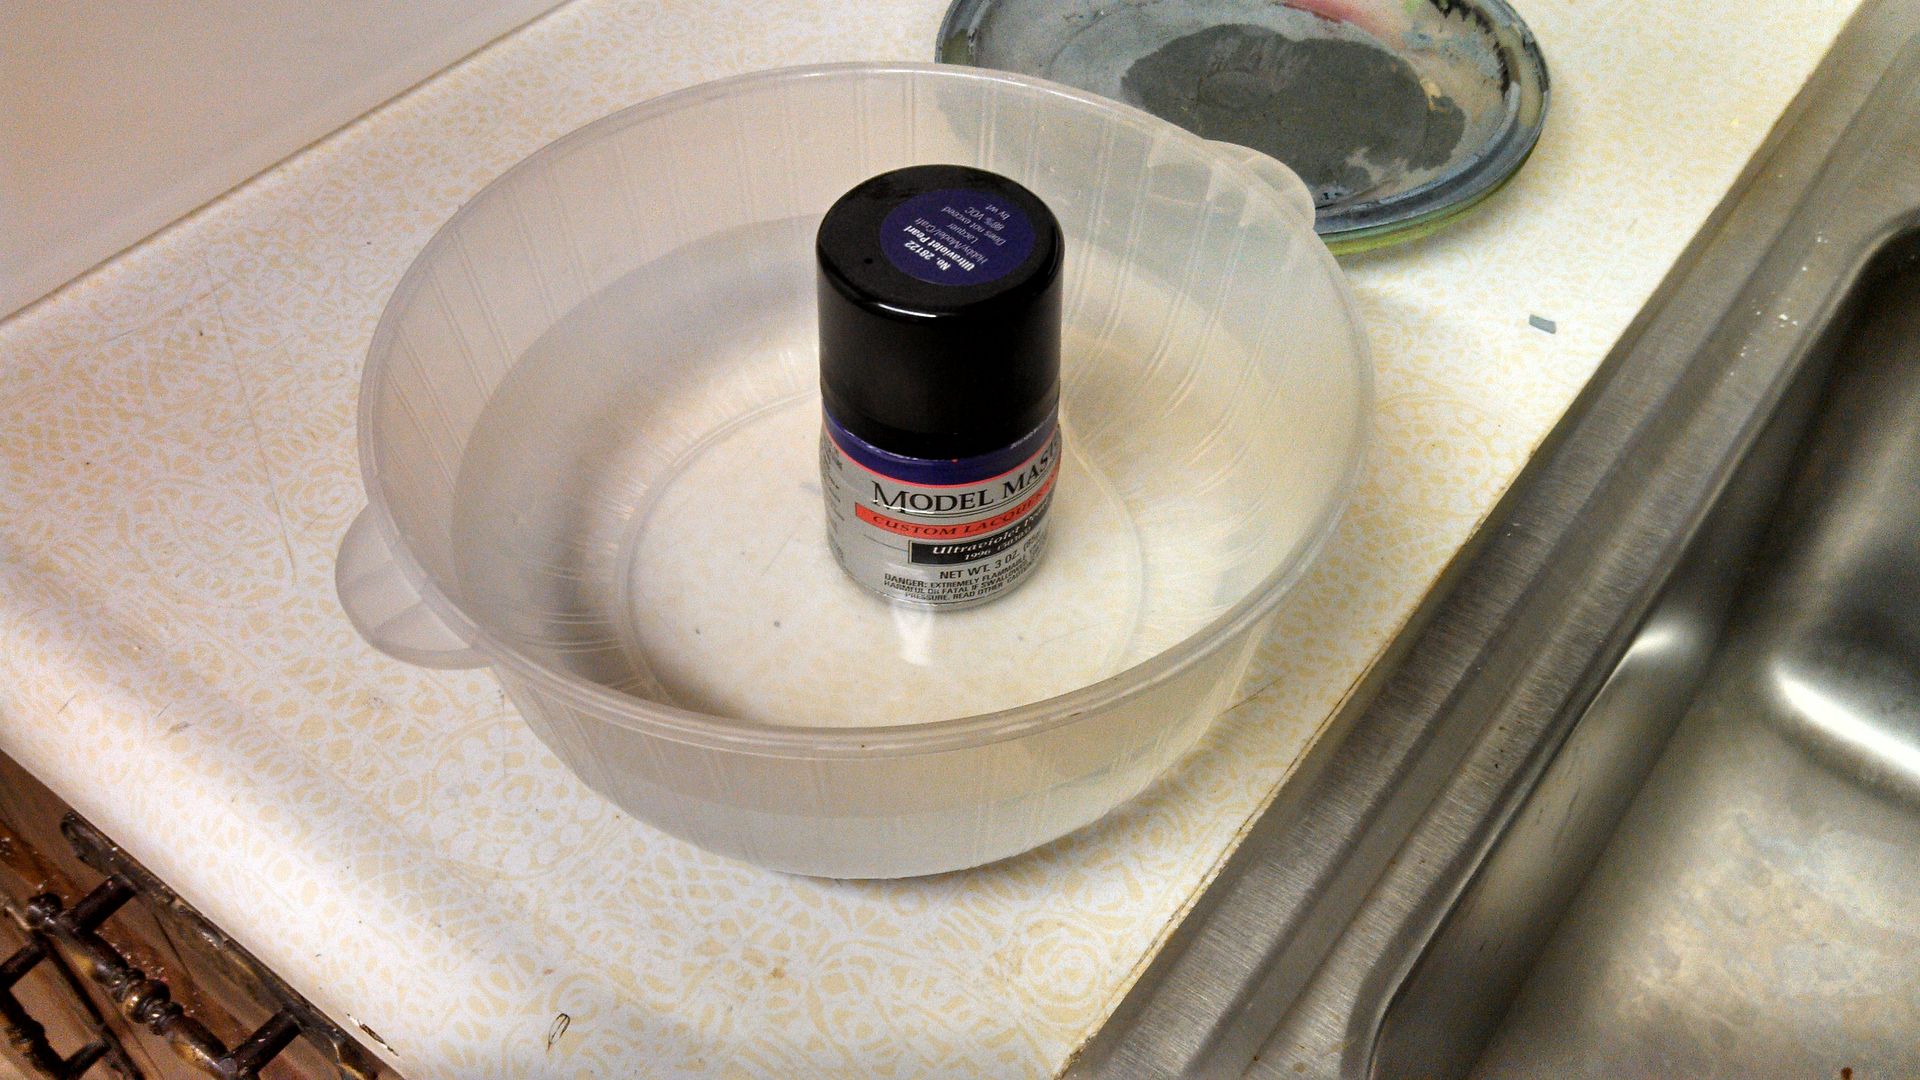 Then started laying down some light coats 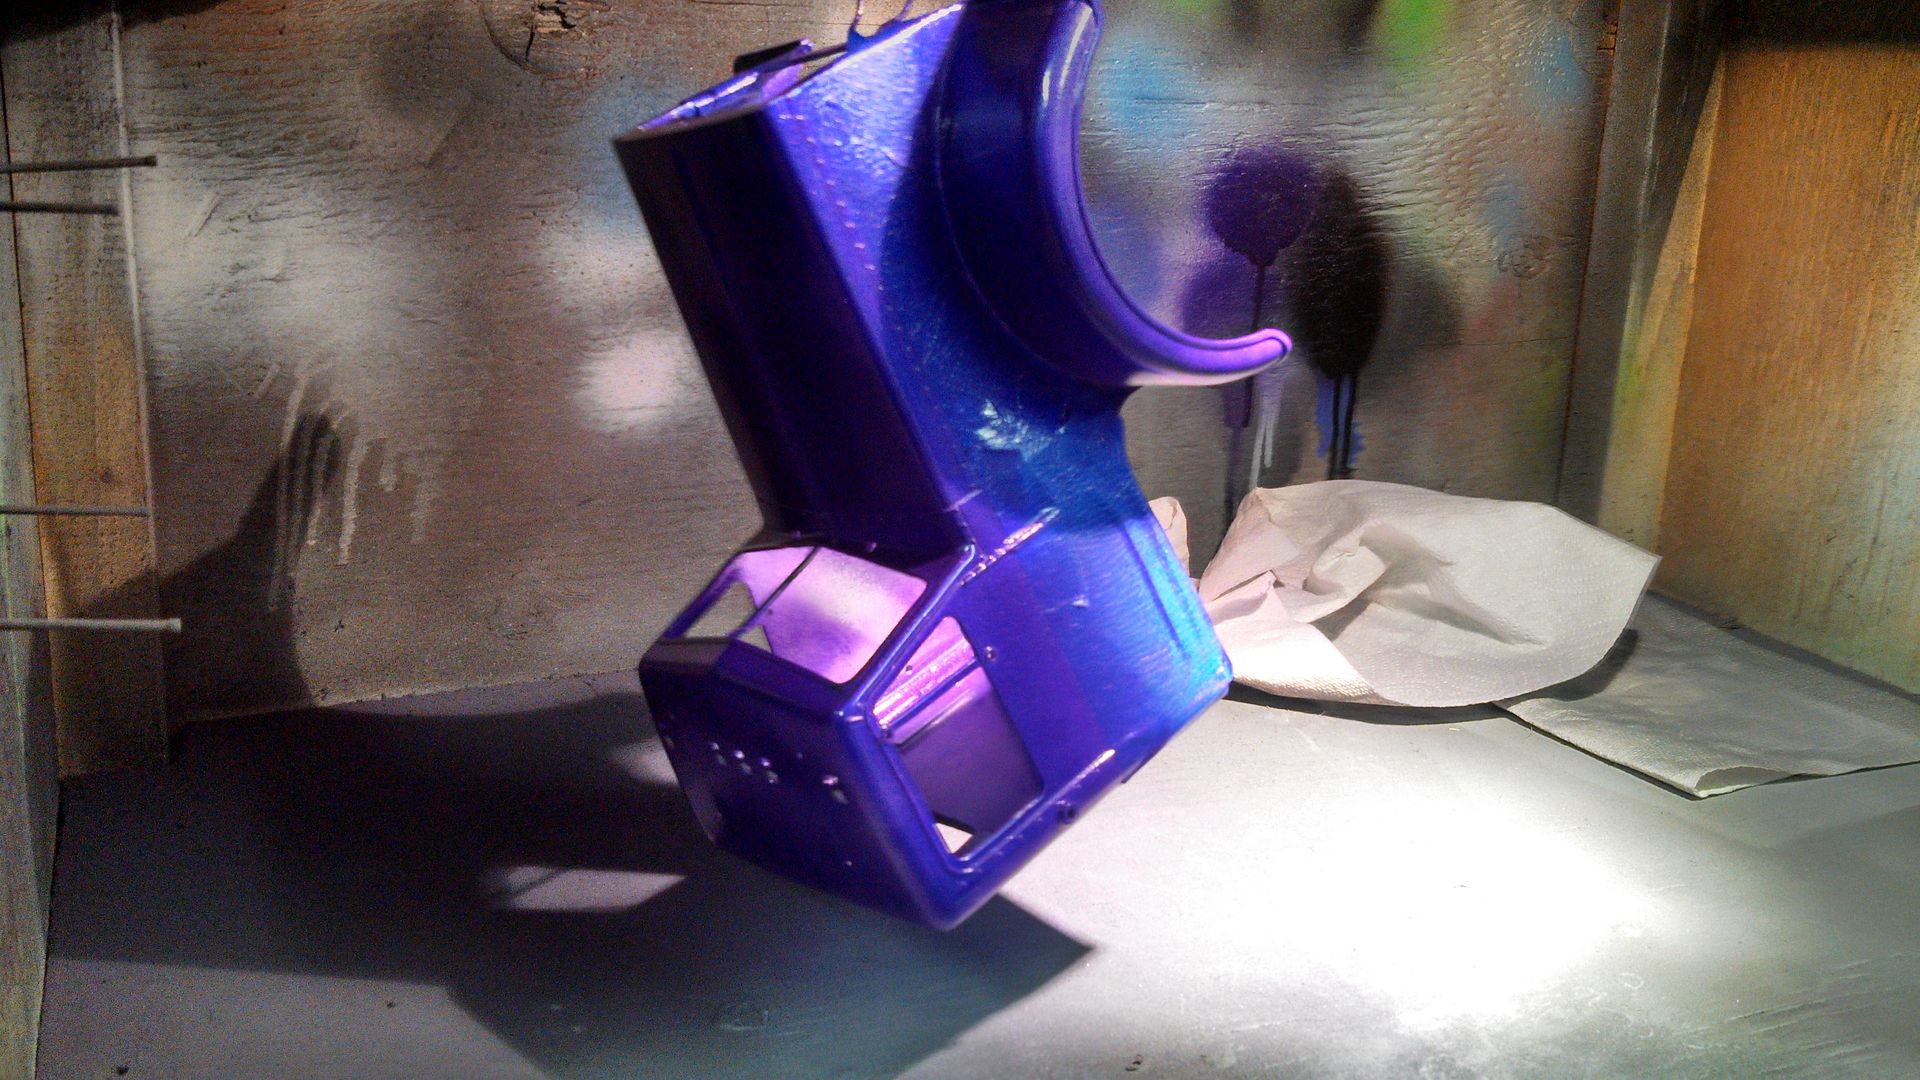 How does she look?? 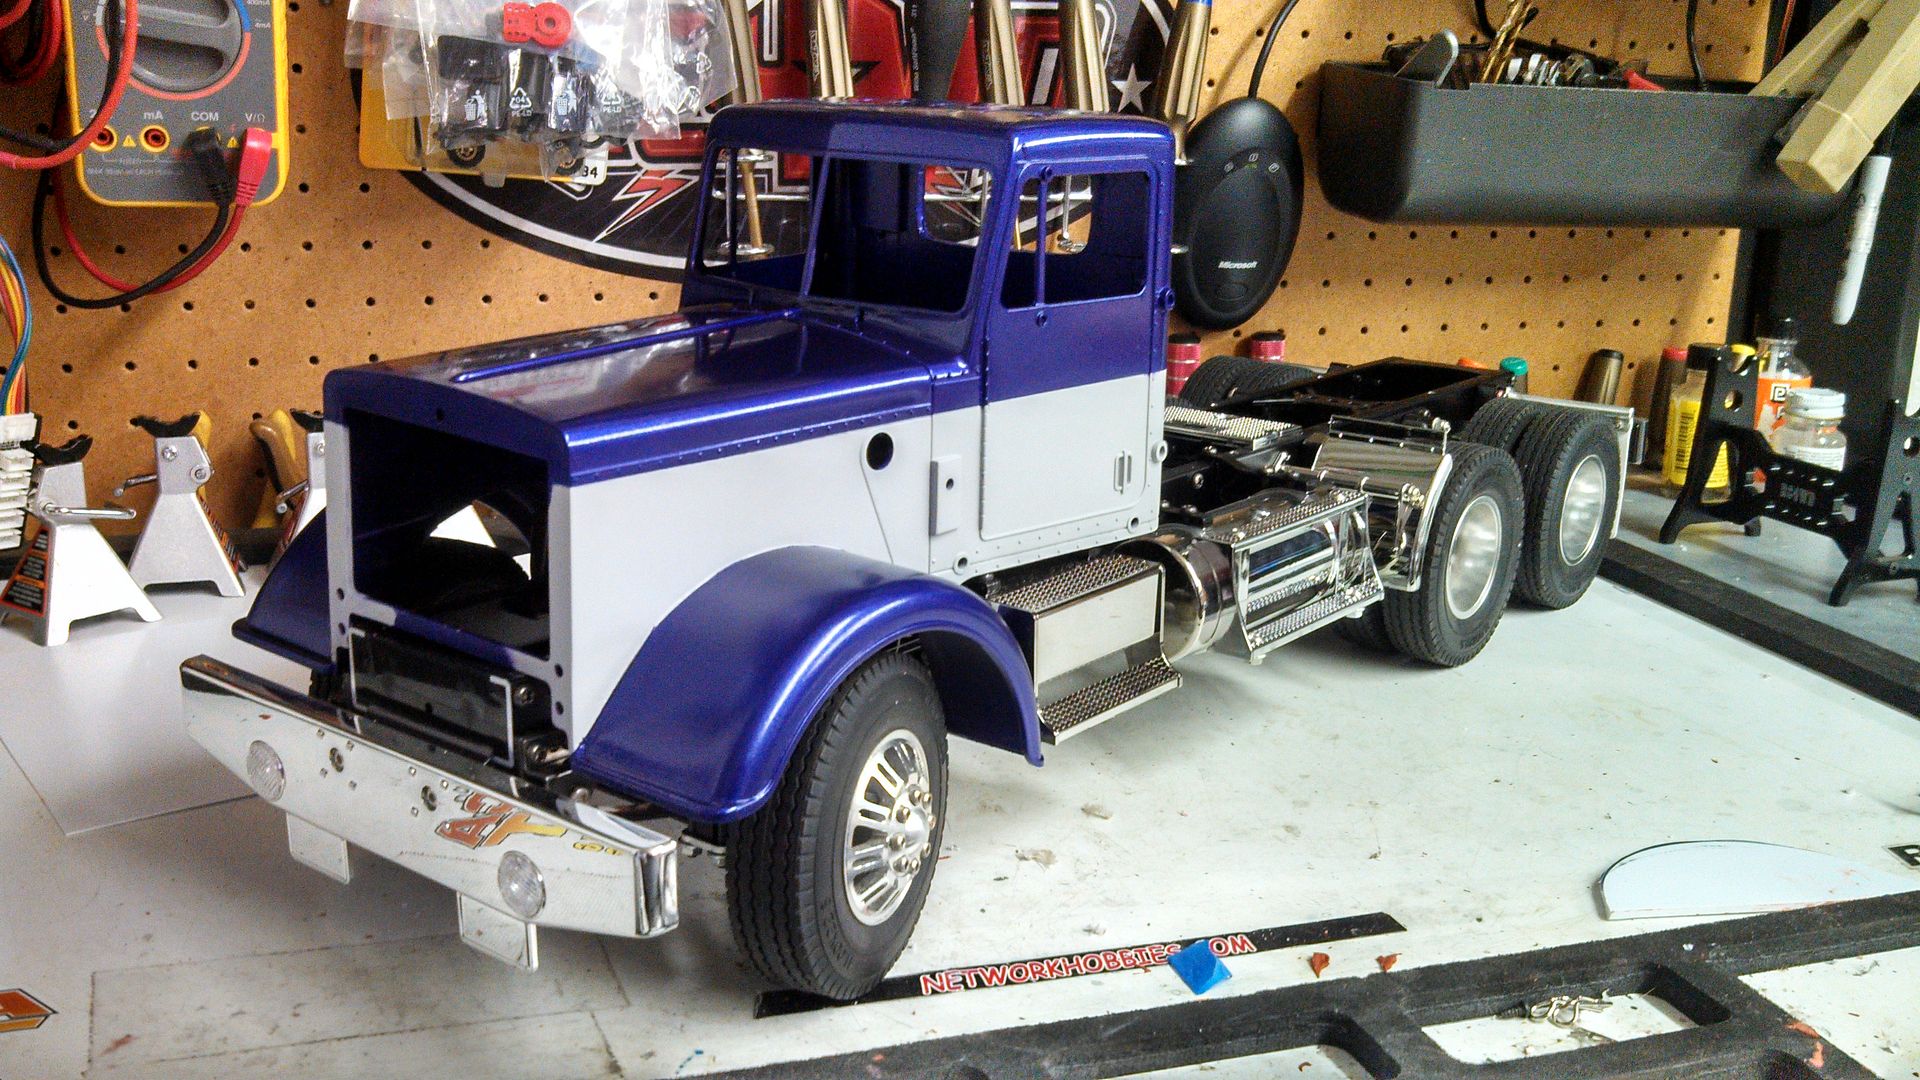 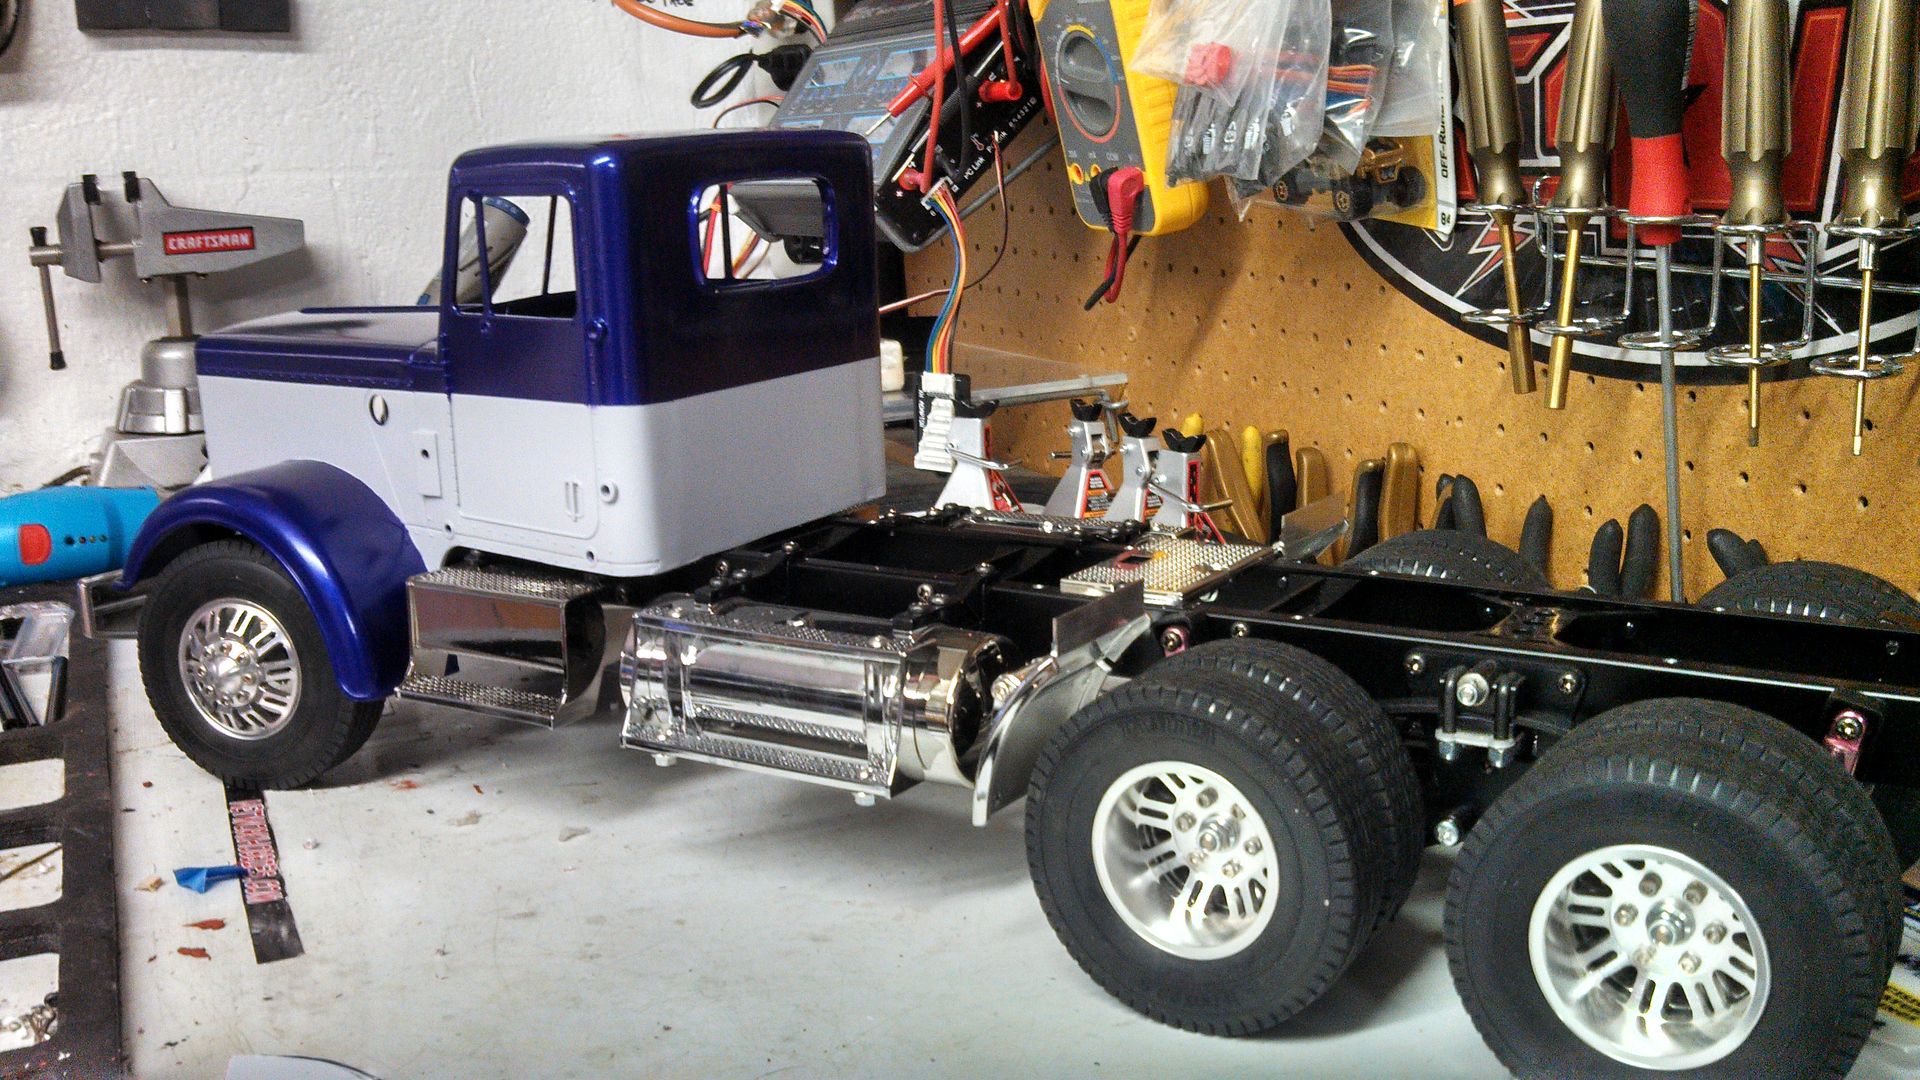 Not sure if I want to clear the whole thing in Matte or keep the different one's. What do you think?
__________________
To view links or images in signatures your post count must be 10 or greater. You currently have 0 posts. To view links or images in signatures your post count must be 10 or greater. You currently have 0 posts.
|
|
#12
10-21-2013, 07:04 AM
|
||||
|
||||
|
To make it a Kenworth...you need the grill..
Enter stage left, RC4WD Smokey Billet Semi Grill Hit the buffer on it to get the verticals to shine a little more..  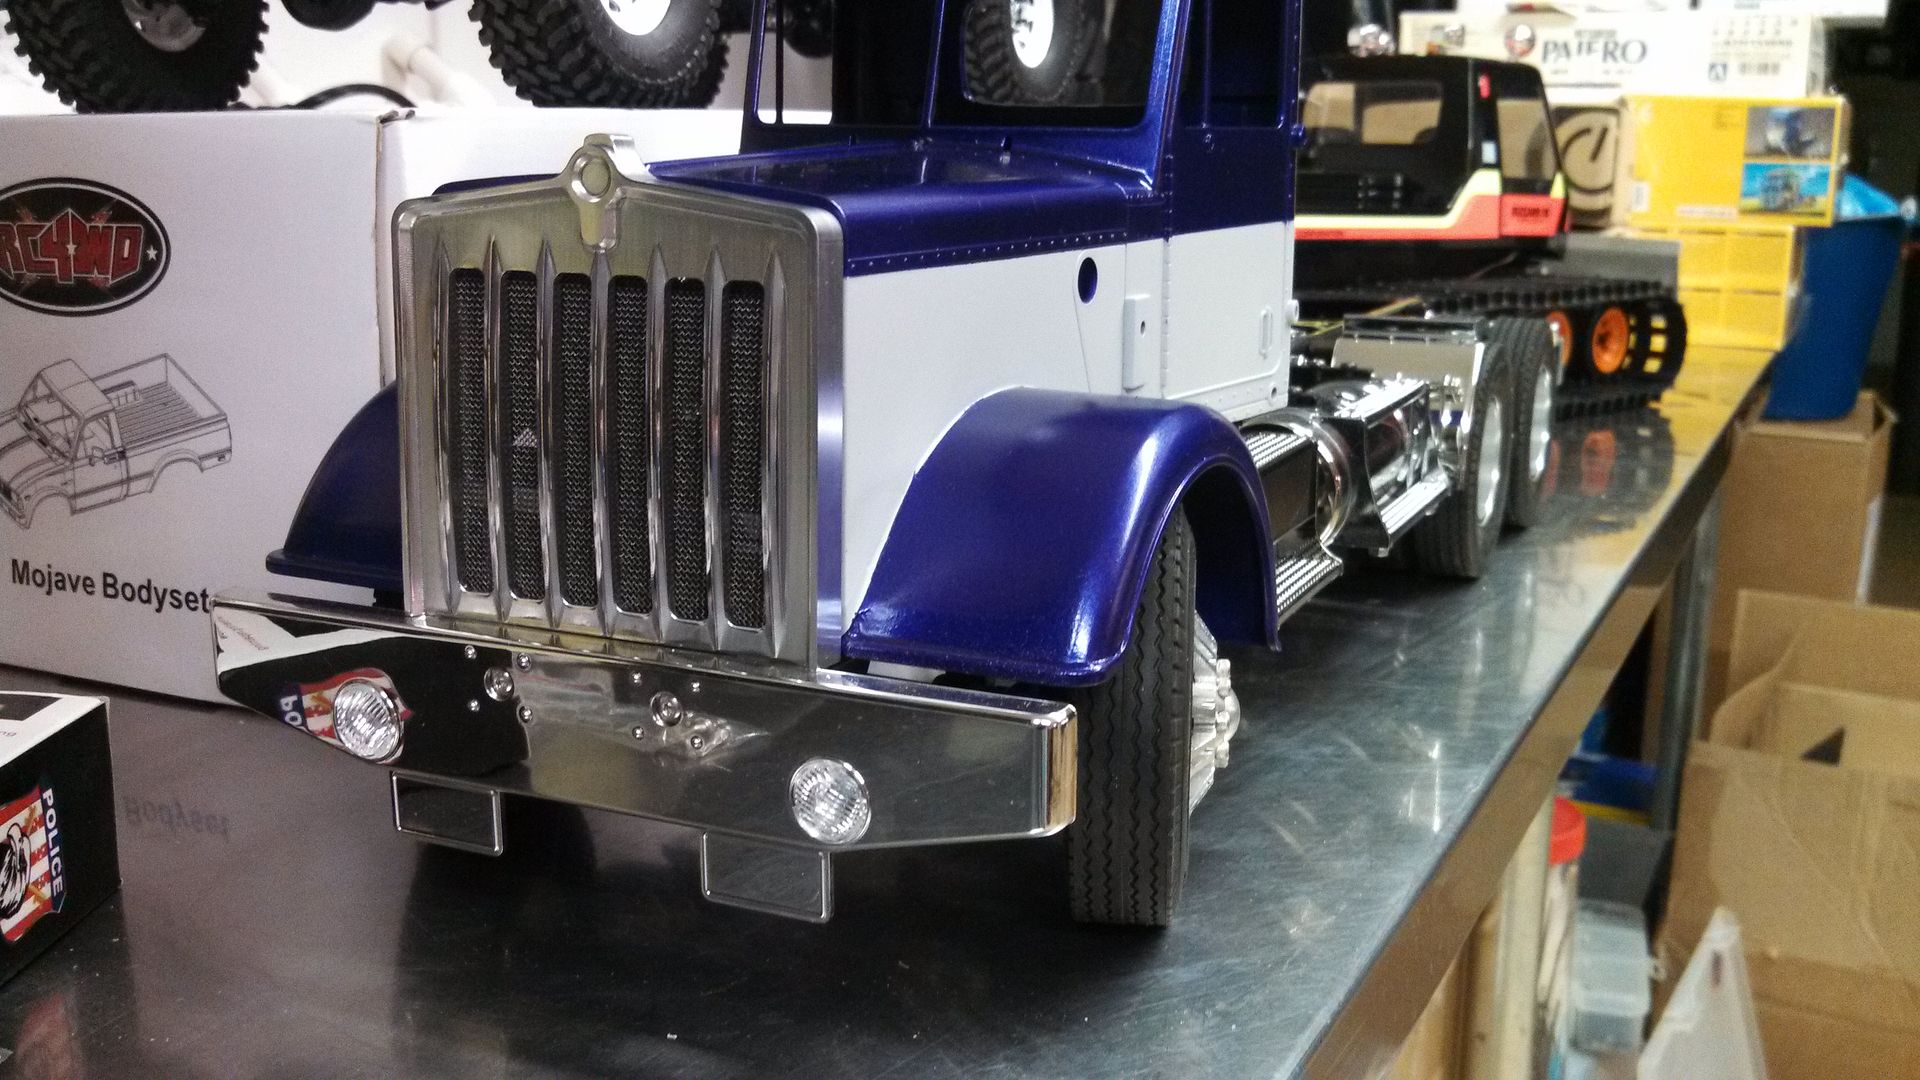
__________________
To view links or images in signatures your post count must be 10 or greater. You currently have 0 posts. To view links or images in signatures your post count must be 10 or greater. You currently have 0 posts.
|
|
#15
10-21-2013, 08:37 AM
|
||||
|
||||
|
Quote:
 I'll have to see what it is. I have used it in the past with no issues... Quote:
__________________
To view links or images in signatures your post count must be 10 or greater. You currently have 0 posts. To view links or images in signatures your post count must be 10 or greater. You currently have 0 posts.
|
|
#16
10-21-2013, 10:40 AM
|
||||
|
||||
|
Nice job friend
|
|
#17
10-21-2013, 12:18 PM
|
|||
|
|||
|
off to a nice start!
|
|
#18
10-21-2013, 03:06 PM
|
|||
|
|||
|
looking great!!
|
|
| Currently Active Users Viewing This Thread: 1 (0 members and 1 guests) | |
|
|


 Linear Mode

